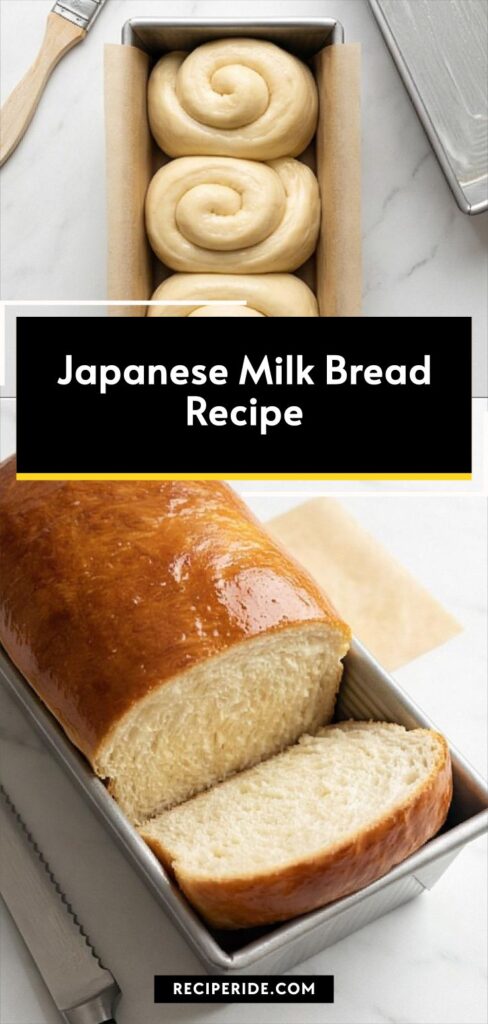
Japanese Milk Bread Recipe
Bake a soft, pillowy Japanese Milk Bread Recipe for tender slices and glossy crust.
Ingredients
- 3 tablespoons (25 g) bread flour, for tangzhong (taken from the total flour below)
- 1/2 cup (120 ml / 120 g) whole milk, for tangzhong
- 2 3/4 cups (330 g) bread flour, plus extra as needed for dusting
- 1/4 cup (50 g) granulated sugar
- 1 1/4 teaspoons (7 g) fine sea salt or kosher salt (not coarse)
- 2 1/4 teaspoons (7 g) instant yeast (rapid-rise or bread machine yeast)
- 1/3 cup (80 ml / 80 g) whole milk, lukewarm 95°F (35°C)
- 1 large egg (about 50 g), at room temperature
- 4 tablespoons (56 g) unsalted butter, very soft, at room temperature
- 1 tablespoon (14 g) unsalted butter, for greasing the pan
- 1 large egg, for egg wash, at room temperature
- 1 tablespoon (15 ml) whole milk, for egg wash
- 1 tablespoon (14 g) unsalted butter, melted, for brushing the baked loaf (optional)
Instructions
Step 1: Make and cool the tangzhong
Whisk the measured 3 tablespoons (25 g) of bread flour into 1/2 cup (120 ml) whole milk until perfectly lump-free, then cook over gentle heat while stirring constantly until the mixture thickens into a smooth, glossy paste that forms soft lines when stirred and reaches around 150°F (65°C). Transfer the hot paste into a small shallow white ceramic bowl, press plastic wrap directly onto the surface to prevent a skin, and let it cool to lukewarm/room temperature for about 15–20 minutes so it’s ready to enrich the dough without overheating the yeast.

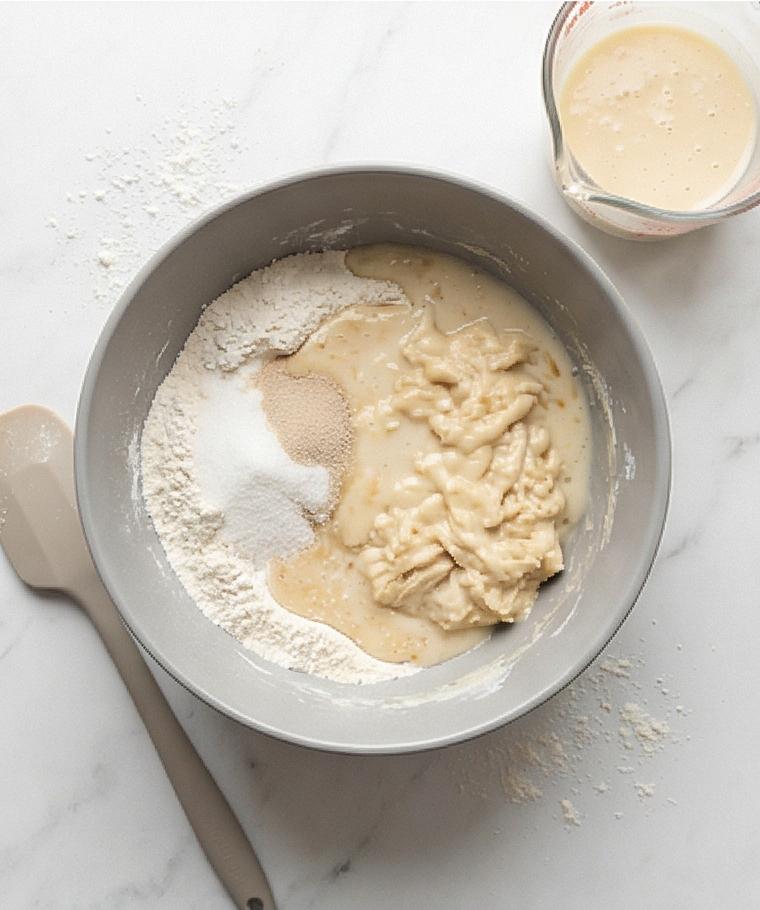
Step 2: Combine dry ingredients and make the wet mix
Into a modern matte grey ceramic mixing bowl add 2 3/4 cups bread flour, the sugar, salt and instant yeast, giving them a quick whisk to distribute the grains evenly. In a medium measuring jug whisk together the lukewarm 1/3 cup milk, one room-temperature egg, and the cooled tangzhong until smooth and homogenous. Pour the wet mixture into the grey bowl and mix on low until a shaggy, cohesive dough forms with no dry flour pockets—an irregular, slightly tacky mass that promises a soft crumb once worked.
Step 3: Rest briefly, then knead and incorporate butter
Let the shaggy dough rest for ten minutes to hydrate the flour, then resume kneading in the same matte grey bowl with the dough hook attached. Add the very soft 4 tablespoons of butter piece by piece while kneading on medium speed until each addition is fully absorbed. Continue until the dough is very smooth, elastic, slightly tacky but not sticky—soft, glossy surface, springs back when pressed. Test a small piece to find a thin, translucent windowpane; this glossy, extensible texture is the hallmark of a properly kneaded milk bread dough.
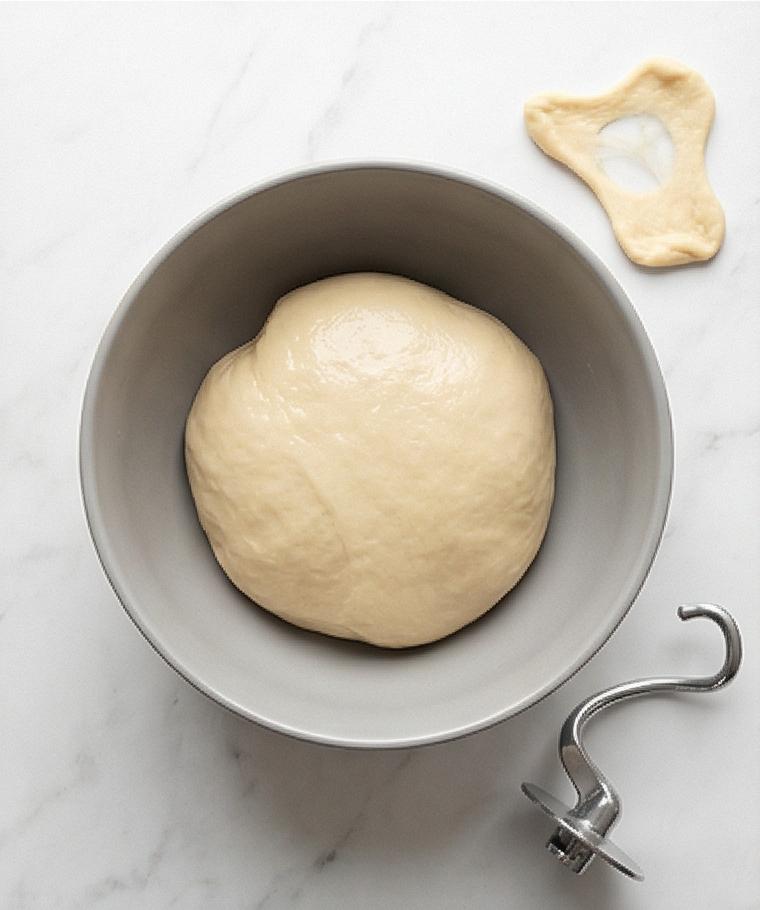
Step 4: First rise and prepare the pan
Shape the dough into a smooth ball and place it into a lightly buttered bowl (use a thin film of softened butter). Cover tightly with plastic wrap and let it rise in a warm, draft-free spot until doubled and airy—about 60–90 minutes—until the surface looks puffy and domed. While it rises, thoroughly grease a 9×5-inch rectangular loaf pan with the reserved tablespoon of butter and, if you prefer, line the bottom and long sides with a parchment sling for easy removal.
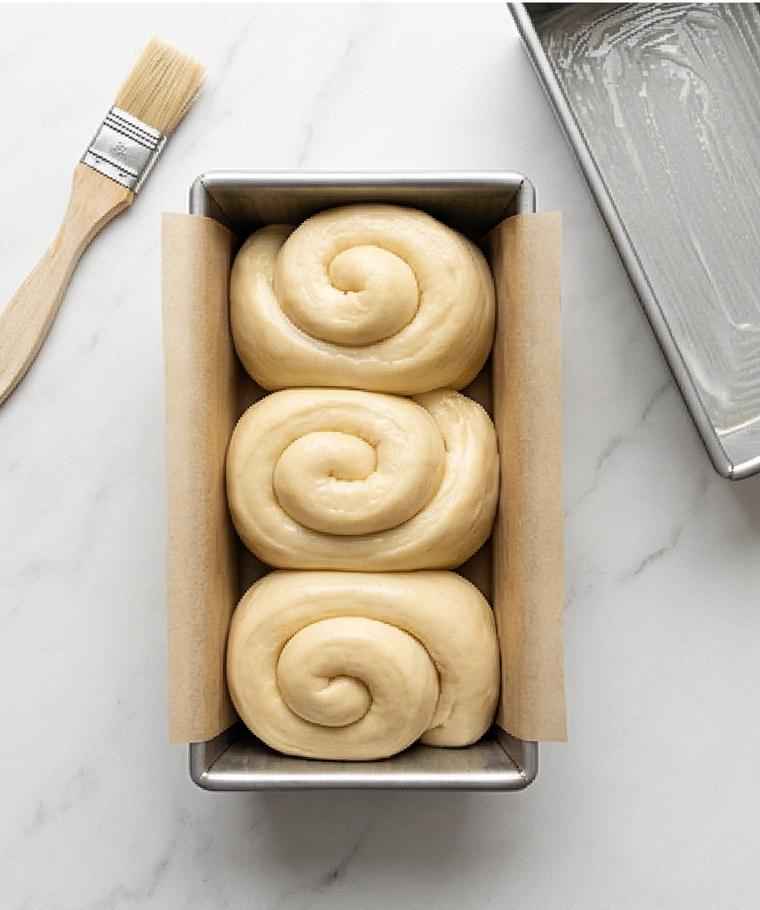
Step 5: Deflate, divide, rest, shape, and arrange for proofing
Turn the risen dough out gently onto a lightly floured work surface, press out gas without tearing, then weigh and divide into three equal pieces. Pre-shape each into a loose ball, cover and rest for 10 minutes so the gluten relaxes. Roll each rested piece into a 6–7" oval, fold like a letter, turn and roll tightly into neat logs, pinching seams closed. Place the logs seam-side down into the prepared rectangular pan, snug but with room to expand. Cover loosely and proof until the rolls puff, touch and rise about 1–1½" above the rim, jiggle lightly when shaken.
Step 6: Egg wash, bake, cool, and finish
During the last twenty minutes of proofing preheat the oven to 350°F (175°C). Blend one egg with one tablespoon milk to a smooth, uniform egg wash and gently brush the risen dough with a soft pastry brush, avoiding deflation. Bake the pan at 350°F for 25–30 minutes until the top is a deep, even golden brown and the interior reads about 190–195°F (88–90°C). Remove from the oven and immediately brush the hot loaf with 1 tablespoon melted butter for softness and sheen. Let the loaf cool in the pan for 10–15 minutes, then transfer to a wire rack to cool further before slicing.
Step 7: Slice, serve, and store
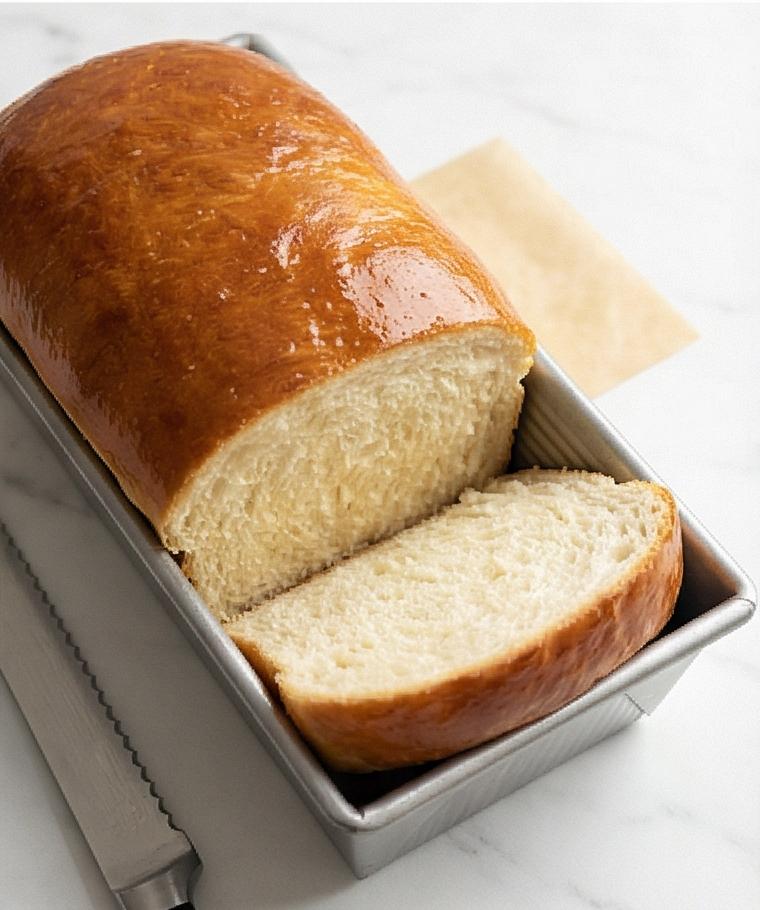
Once mostly cooled, slice the milk bread into thick or thin slices to taste: the crumb should be pillowy, tender, and slightly elastic; the crust soft and glossy. Serve plain, toasted, or with butter, jam, or honey; store completely cooled in an airtight bag at room temperature up to three days, or slice and freeze for longer storage.
Notes
- Chill the dough briefly if it becomes too sticky; a short rest makes shaping easier.
- Use an instant-read thermometer to confirm internal loaf temperature of 190–195°F for doneness.
- Slice after partial cooling to maintain the pillowy texture and avoid squashing the crumb.