Dalgona Coffee Recipe
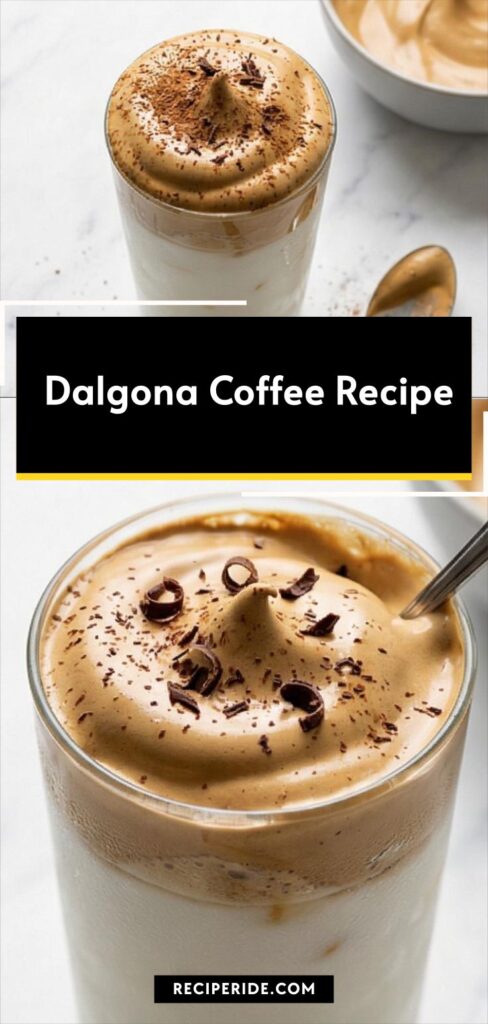
Make the Dalgona Coffee Recipe: whip instant coffee, sugar and hot water, spoon over cold milk for a frothy iced treat.
Ingredients
- 2 tablespoons (10 g) instant coffee granules
- 2 tablespoons (24 g) granulated sugar
- 2 tablespoons (30 ml) hot water, heated to 200°F (93°C)
- 1/2 cup (70 g) ice cubes (about 5–6 standard cubes)
- 1 cup (240 ml) cold whole milk, about 40°F (4°C), or preferred milk (2%, skim, or plant-based)
- 1 teaspoon (2 g) unsweetened cocoa powder, for optional dusting
- 1/4 teaspoon (0.5 g) ground cinnamon, for optional dusting
- 1 tablespoon (6 g) finely grated dark chocolate or chocolate shavings, optional garnish
Instructions
Step 1: Heat the water to steaming but not boiling
Bring the water to just below a full boil so it’s hot and lively—about the temperature where wisps of steam rise but it’s not rolling. Pour the hot water into a small heatproof glass measuring cup and set it beside your medium matte light-grey ceramic mixing bowl; this bowl will carry through the whole process so keep it front and center. The goal here is simple: get the water hot and ready while keeping your mise en place tidy and visually calm on the white Carrara surface.
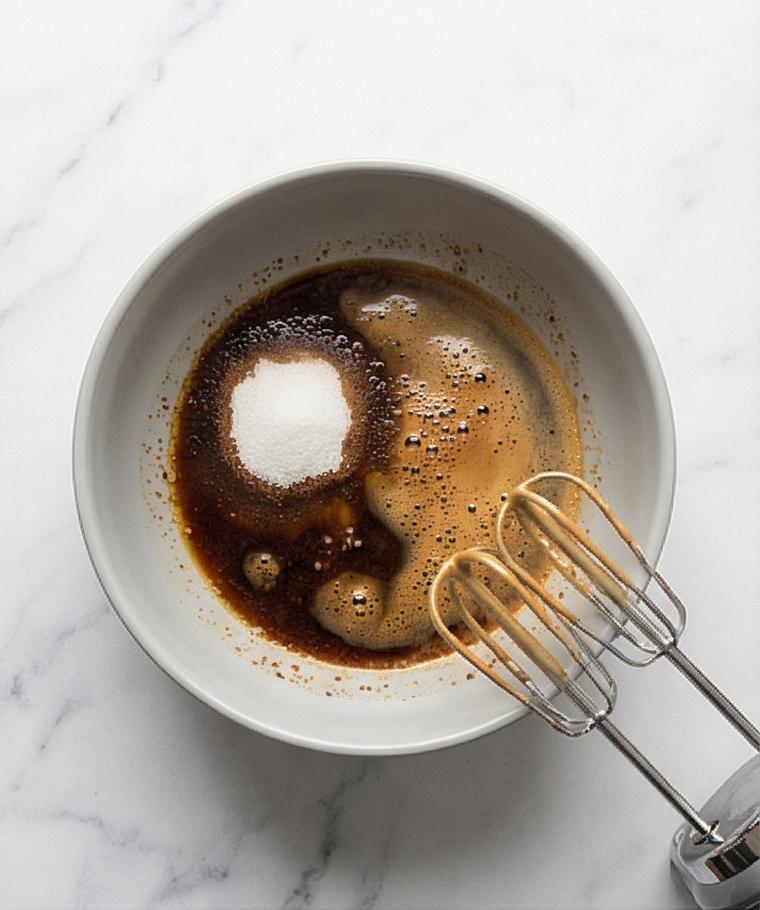
Step 2: Combine the coffee and sugar with hot water and begin whipping
Add the instant coffee and granulated sugar into the same matte grey bowl, then introduce the measured hot water. Start whipping using an electric hand mixer on medium-high, or a balloon whisk if you prefer more wrist work; move the beaters in gentle circles so the sugar dissolves and the mixture lightens. You’ll see the slurry transform from a thin, glossy dark syrup into a lighter, air-filled mixture—this early aeration is the first visible milestone.
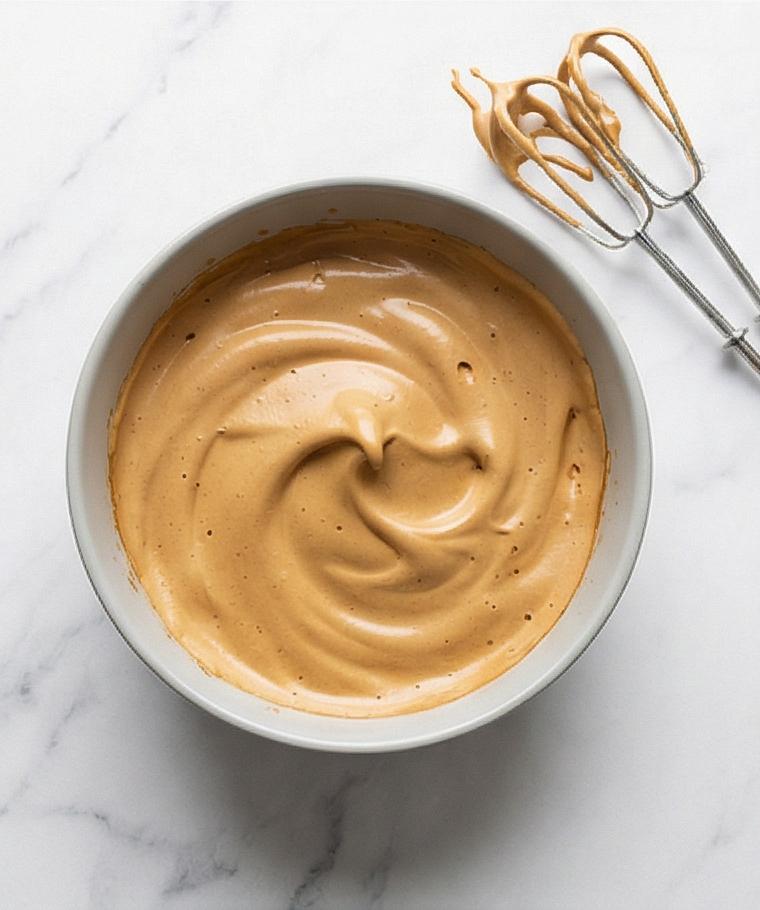
Step 3: Whip to a thick, glossy meringue-like foam
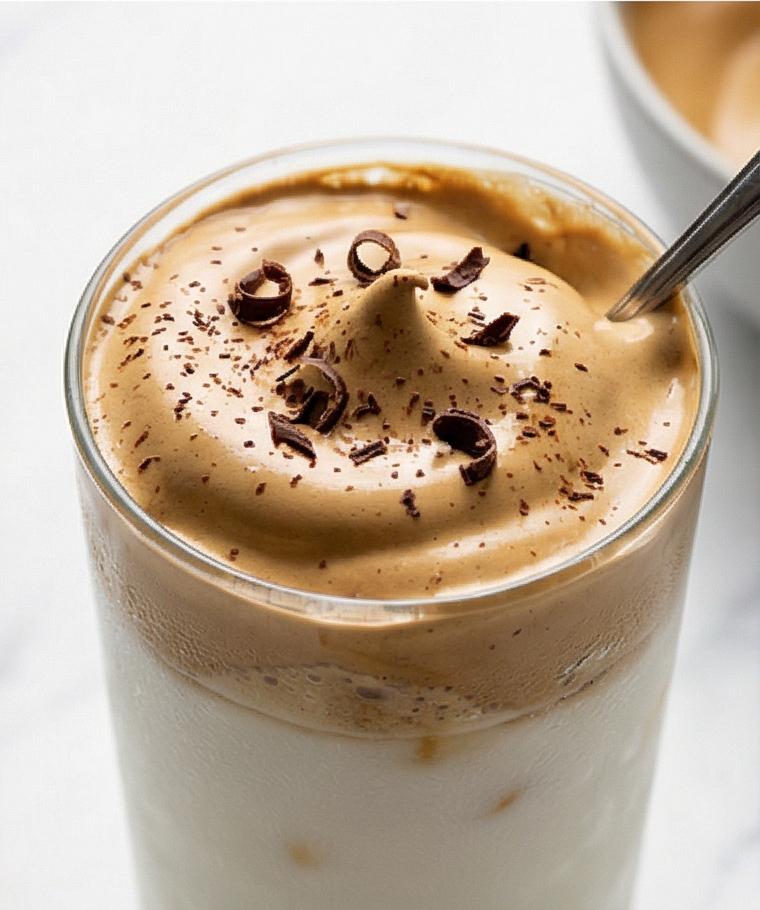
Continue whipping until the mixture becomes very thick and glossy, holding medium-stiff peaks—soft, caramel-brown peaks that sit up when the whisk is lifted. The texture should read like dense whipped cream: silky, pillowy but with structural integrity. If it still slides off the whisk, keep aerating; the transition from fluid to stable foam is the key visual transformation here.
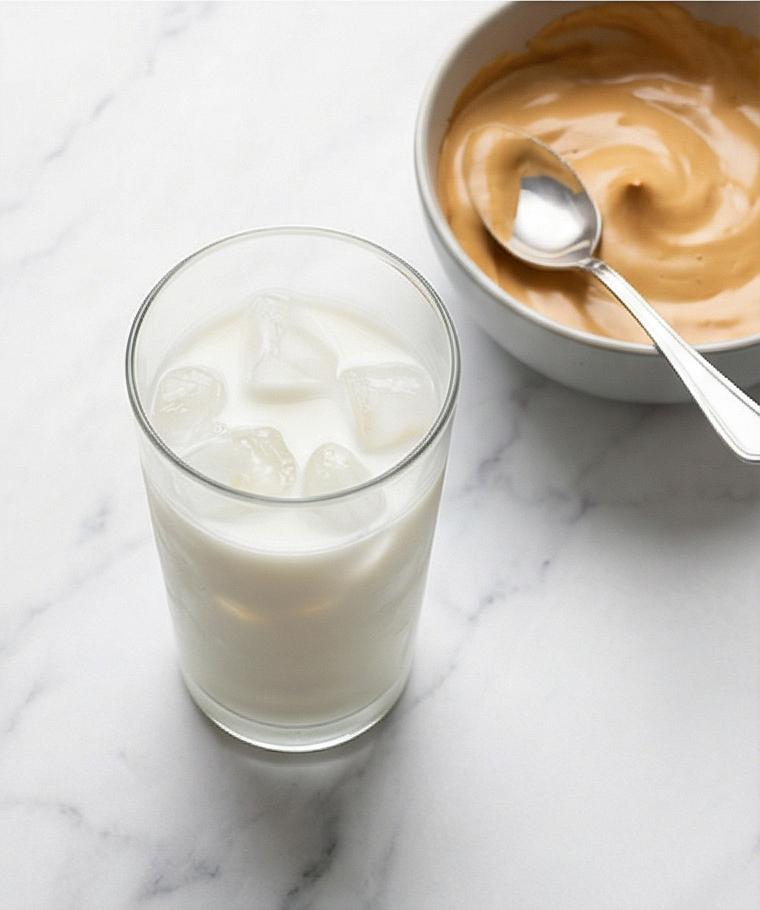
Step 4: Prepare the serving glass with ice and cold milk
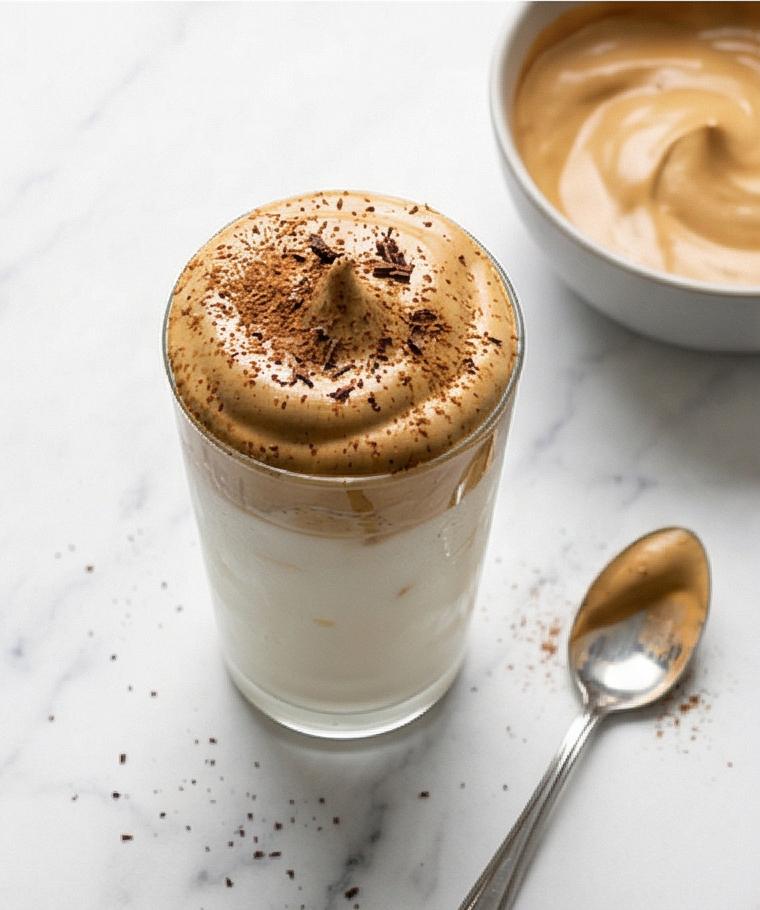
While the coffee is reaching peak foam, fill a clear 12–14 oz serving glass with ice cubes and pour in cold milk, leaving at least an inch of empty space at the top. Use a tall clear glass so the layered contrast between the opaque white milk and the caramel coffee foam will read clearly in the final shot. Place the glass back on the Carrara slab, upright and pristine—this is your staging for assembly.
Step 5: Taste and gently adjust the foam if needed
Spoon a tiny dab of the whipped coffee into a clean ceramic tasting spoon and sample it—if you prefer it sweeter, briefly whip in a teaspoon or two of sugar; if it’s too intense, fold in a teaspoon or two of cold milk to soften, then whip a few seconds to restore texture. Keep adjustments minimal; the visual cue to aim for is a satiny, even surface with soft peaks and no liquid streaks.
Step 6: Spoon the whipped coffee over the milk to assemble
Use a dessert spoon to dollop the thick whipped coffee over the cold milk-and-ice glass, dividing the foam evenly and smoothing or shaping soft peaks for a decorative crown. The foam should sit distinctly above the milk, creating a sculptural, cloud-like cap—clear separation, strong contrast, and airy texture are what you want to capture here.
Step 7: Dust and finish with delicate garnishes
Optionally dust the whipped top with a fine sift of unsweetened cocoa or a whisper of ground cinnamon, and sprinkle a few shavings of finely grated dark chocolate for sparkle and texture. The garnishes should be light and artful—tiny contrasting specks that accentuate the foam’s surface without obscuring its caramel tones.
Step 8: Serve immediately and enjoy the layered experience
Present the glass immediately while the milk stays cold and the foam remains airy. Encourage stirring before sipping so the dense foam dissolves into the milk, but photograph the undisturbed layered moment first: crystalline ice, opaque milk, and a lofty, textured coffee cap sitting above it.
Step 9: Optional hot variation—top hot milk with the same whipped coffee
For a hot version, gently warm milk in a separate heatproof jug until just steaming (about 140°F / 60°C) and pour into a heatproof mug. Spoon the whipped coffee on top as before; the foam will float as a warm, glossy dome. Photograph this as an alternate final, but keep the same bowl and tools nearby to show process continuity.
Step 10: Final plating—ready to photograph and savor
Set the finished drink on the white Carrara surface, glass pristine and vertical, foam crowned and lightly dusted. Capture the moment immediately: the textures—airy foam, tiny cocoa specks, fine chocolate curls, crystalline ice and cold milk—should all be visible and inviting.
Notes
- Use an electric hand mixer for fastest results; a balloon whisk works with more time.
- For creamier vegan results, use full-fat oat milk.
- Adjust sweetness by tasting a small dab of the foam before assembling.
- If foam loses volume, rewhip briefly to revive some texture.
- Photograph the layered drink immediately before stirring.