Air Fryer Garlic Bread Recipe
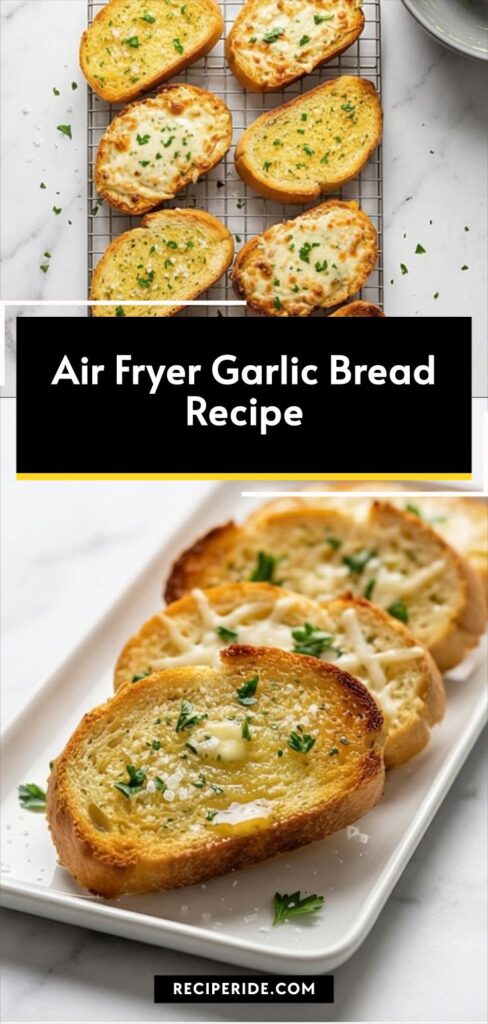
Make Air Fryer Garlic Bread Recipe now: crisp, buttery garlic bread in minutes with simple ingredients - Air Fryer Garlic Bread Recipe.
Ingredients
- 1/2 cup (1 stick / 113 g) unsalted butter, softened to room temperature
- 3 large garlic cloves (about 12 g), finely minced or pressed
- 2 tablespoons (6 g) finely chopped fresh flat-leaf parsley, plus more for garnish
- 3 tablespoons (15 g) finely grated Parmesan cheese
- 1/4 teaspoon fine sea salt
- 1/8 teaspoon freshly ground black pepper
- 1/8 teaspoon red pepper flakes (optional, for mild heat)
- 1 medium French baguette or Italian bread loaf (about 12 oz / 340 g), sliced into 3/4-inch (2 cm) thick pieces
- 1 tablespoon (15 ml) extra-virgin olive oil, for lightly greasing the air fryer basket
- 3/4 cup (75 g) shredded low-moisture mozzarella cheese (optional, for cheesy garlic bread)
- 1 tablespoon (3 g) finely chopped fresh flat-leaf parsley, for garnish
- 1/4 teaspoon flaky sea salt (optional, for finishing)
Instructions
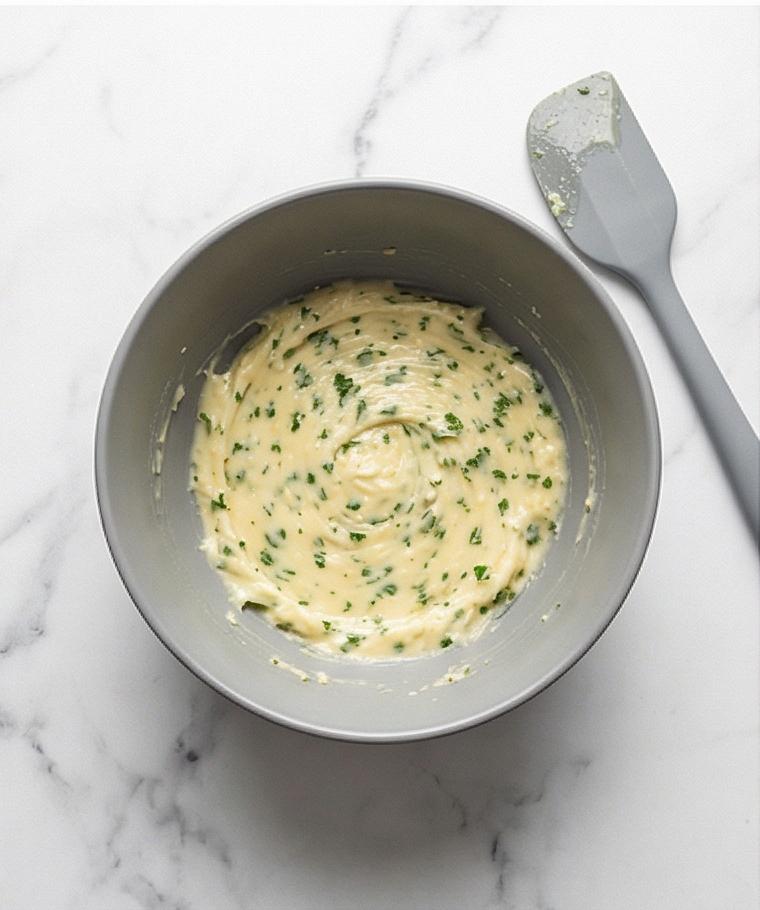
Step 1: Make the garlic-parsley butter
Soften the butter until it is spreadable but not melted, then finely mince or press the garlic and finely chop the parsley. In a medium matte grey ceramic bowl combine the softened butter with the minced garlic, grated Parmesan, chopped parsley, a pinch of fine sea salt, freshly ground black pepper, and the red pepper flakes if you like a little heat. Mash and fold with a small offset spatula until the mixture is utterly smooth, creamy, and homogeneous — no streaks of plain butter — the surface should look satiny with little green flecks and tiny cheese granules. Taste and adjust seasoning gently.
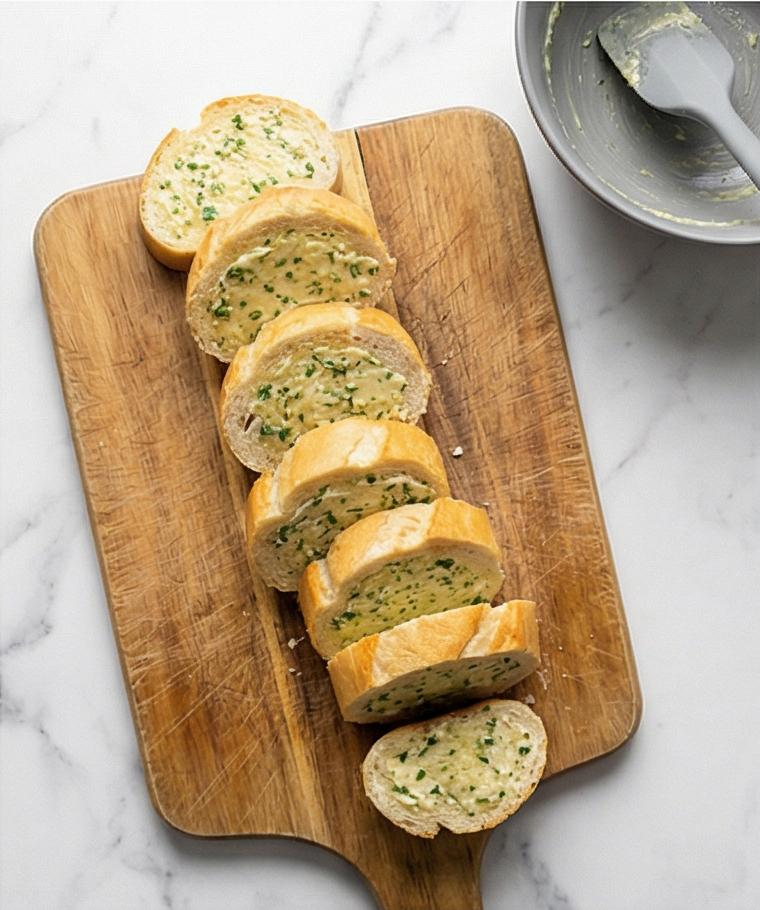
Step 2: Slice the loaf and spread the butter
Slice the baguette on a slight diagonal into roughly 3/4-inch (2 cm) pieces and arrange them in a single layer on a wooden cutting board. Using the same offset spatula, spread a generous, even layer of the garlic-parsley butter across the cut side of each slice, covering edge-to-edge so each piece has a glossy, buttery face; you should see the soft, whipped texture of the butter pressed into the porous crumb and tiny parsley flecks embedded in the surface. Keep the mixing bowl and spatula nearby — utensil persistence keeps the scene natural and readable.
Step 3: Optional cheese finish and assembly for cooking
If you want cheesy garlic bread, sprinkle a thin, even layer of shredded low-moisture mozzarella atop the buttered slices, pressing the shreds very lightly into the butter so they cling. Reserve a small handful of extra cheese in a little white ramekin to add later for extra browning. Lightly brush a perforated stainless tray with olive oil (or rub a little oil on its surface) and arrange the slices buttered-side-up in a single layer with a little space between each slice for air circulation; keep the mixing bowl and spatula visible at the edge for continuity. The assembled, cheese-topped slices should read as poised: butter glossy, cheese dry and structured, crumbs clean.

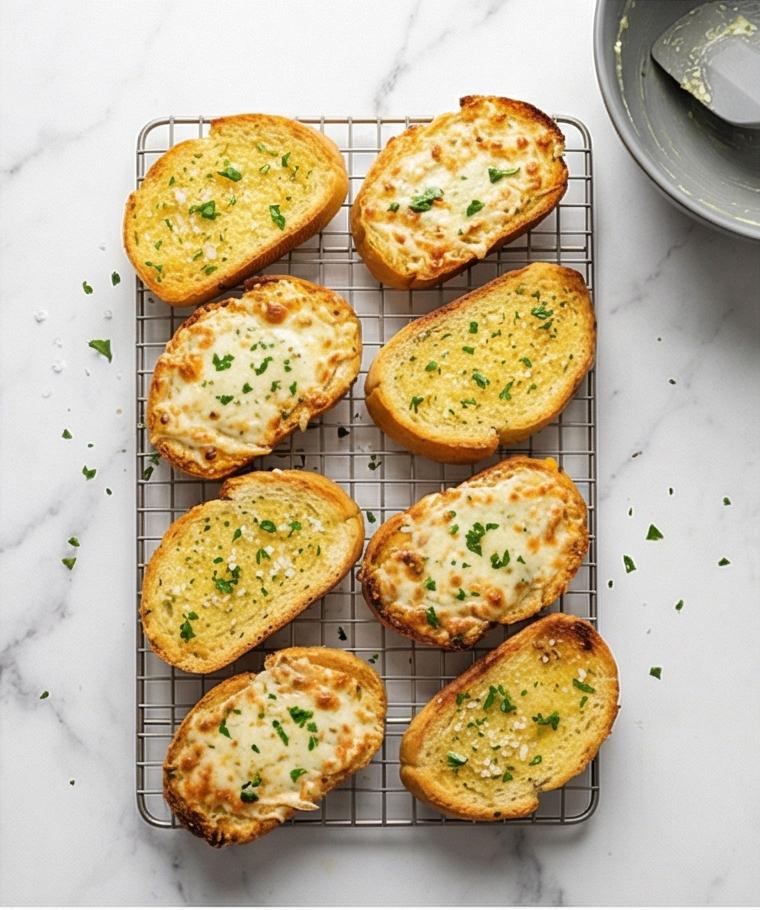
Step 4: Cooked transformation and resting
After a short hot-air cook the bread will transform: the butter will be fully melted into the crumb, the tops will show light golden spots, and the edges become crisp and slightly deeper in color. If cheesed, the mozzarella softens and then becomes bubbly with lightly bronzed edges. Transfer the hot slices with tongs to a wire cooling rack set on the marble so the bottoms stay crisp; sprinkle immediately with the reserved chopped parsley and a pinch of flaky sea salt to finish. The slices should glisten with melted butter and show contrast between crisp crust, soft interior, and molten cheese where present.
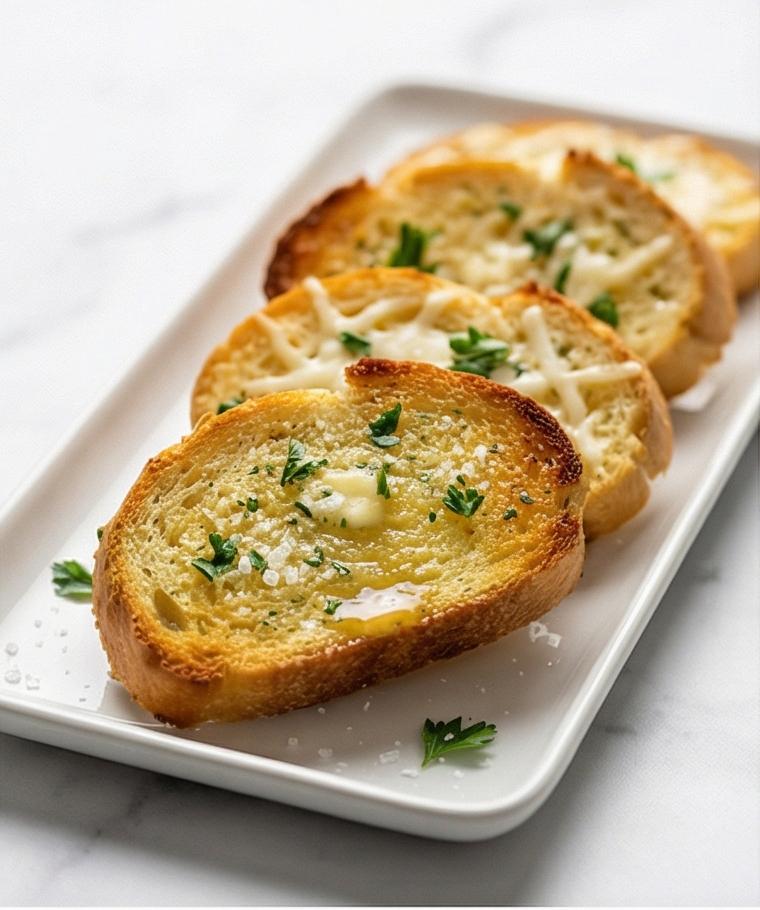
Step 5: Plate and serve warm
Arrange the slices on a long rectangular matte white ceramic platter for serving, slightly overlapping for a composed, appetizing stack. Garnish with the remaining chopped parsley and a few visible flakes of sea salt; if cheesy, show gentle strings of melted mozzarella and tiny browned bubbles at the edges. Serve immediately while warm — the texture story is clear: crisp, golden edges; glossy, fragrant butter pockets; delicate parmesan granularity; and bright herb flecks.
Notes
- Use room-temperature butter so it spreads smoothly without melting into the bread before cooking.
- If you prefer a milder garlic flavor, roast the cloves first and mash them into the butter.
- To keep slices crisp for serving, reheat briefly in the air fryer or oven rather than the microwave.