Dalgona Coffee Recipe is one of those tiny pleasures that feels like a barista trick you can pull off at home. I first learned it the week I wanted a dramatic morning without leaving the apartment, and now it greets slow weekends and frantic afternoons alike. This Dalgona Coffee Recipe turns three simple pantry staples into a show-stopping, frothy cup that makes even the most ordinary milk feel special. If you love texture, ritual, and a little hands-on magic, this recipe will become a fast favorite.
How This Recipe Became My Rainy-Day Favorite
The first time I made the Dalgona Coffee Recipe it was raining hard and the city smelled like wet concrete and lemon rind. I remember heating the water and watching steam curl up, the sugar and instant coffee melting into an almost syrupy dark ribbon before the whisk turned it into clouds. As it thickened I felt oddly proud, like I was sculpting something small and edible. The first spoonful was a contrast of airy coffee and cool milk that tasted like a dessert and a pick-me-up at once. It became my rainy-day ritual because it asked for just enough focus to calm me but not so much that I couldn’t sip and watch the storm.
Discussing the Primary Ingredients
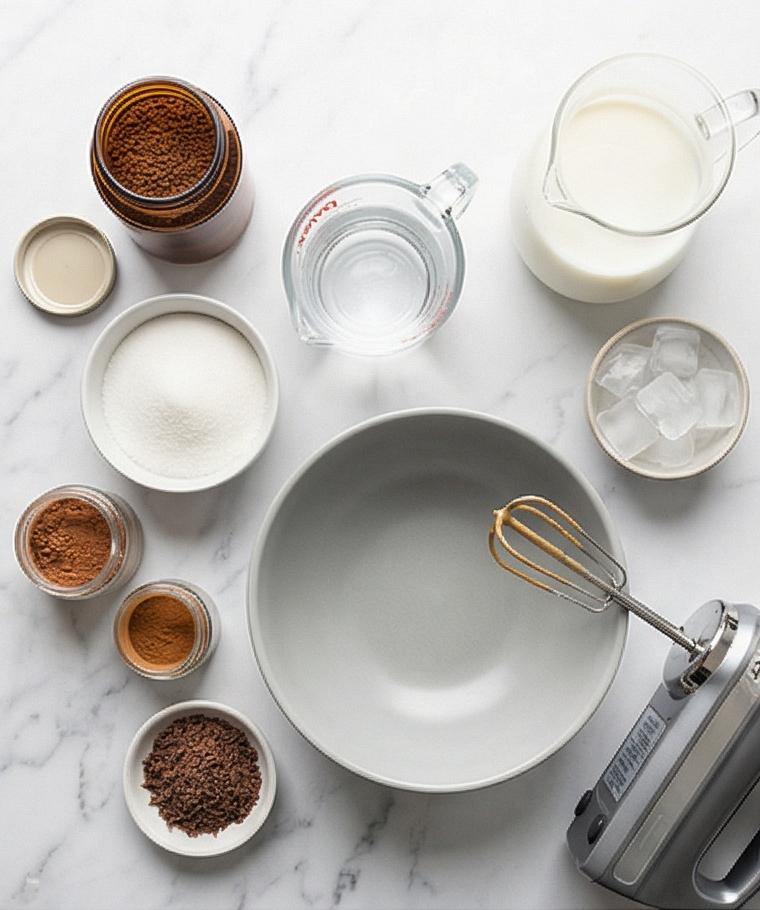
- Instant Coffee Granules: The star that makes the foam possible. Use instant coffee for rapid dissolution and consistent foam. If you want a milder flavor, try a lighter roast instant or a 50/50 mix with decaf.
- Granulated Sugar: Structural backbone for the foam and sweetness. Substitute coconut sugar for a caramel note or powdered sugar for an ultra-silk finish, but expect subtle texture shifts.
- Hot Water: Activates and dissolves the coffee and sugar; very hot but not boiling is best. Filtered water tastes cleaner.
- Cold Milk and Ice: The canvas for the foam; whole milk gives the richest mouthfeel. Use 2% for balance or oat milk for a creamier plant-based option.
- Optional Garnishes: Cocoa, cinnamon, or dark chocolate add aroma and contrast.
Essential Kitchen Tools and Why They Matter
A few simple tools make this whole process feel effortless and help guarantee a great result. You do not need anything fancy, but using tools that fit the task will save time and improve texture.
- Electric hand mixer or whisk: An electric mixer gets you to glossy foam in minutes; a balloon whisk works if you have the patience. Either one aerates the mixture properly.
- Medium mixing bowl: A bowl with some depth catches splashes and gives you room to whip. Metal or ceramic keeps cool air near the mixture.
- Measuring spoons and small heatproof cup: Accurate proportions matter for stability. Heatproof cup for the hot water avoids cracks.
- Tall clear serving glass: Shows off the layers. Use a wide-mouth mug for a hot version.
- Dessert spoon or offset spatula: For gentle, decorative dolloping of the foam.
Step-by-Step Preparation Guide
Step 1: Heat the water to steaming but not boiling
Bring the water to just below a full boil so it’s hot and lively—about the temperature where wisps of steam rise but it’s not rolling. Pour the hot water into a small heatproof glass measuring cup and set it beside your medium matte light-grey ceramic mixing bowl; this bowl will carry through the whole process so keep it front and center. The goal here is simple: get the water hot and ready while keeping your mise en place tidy and visually calm on the white Carrara surface.
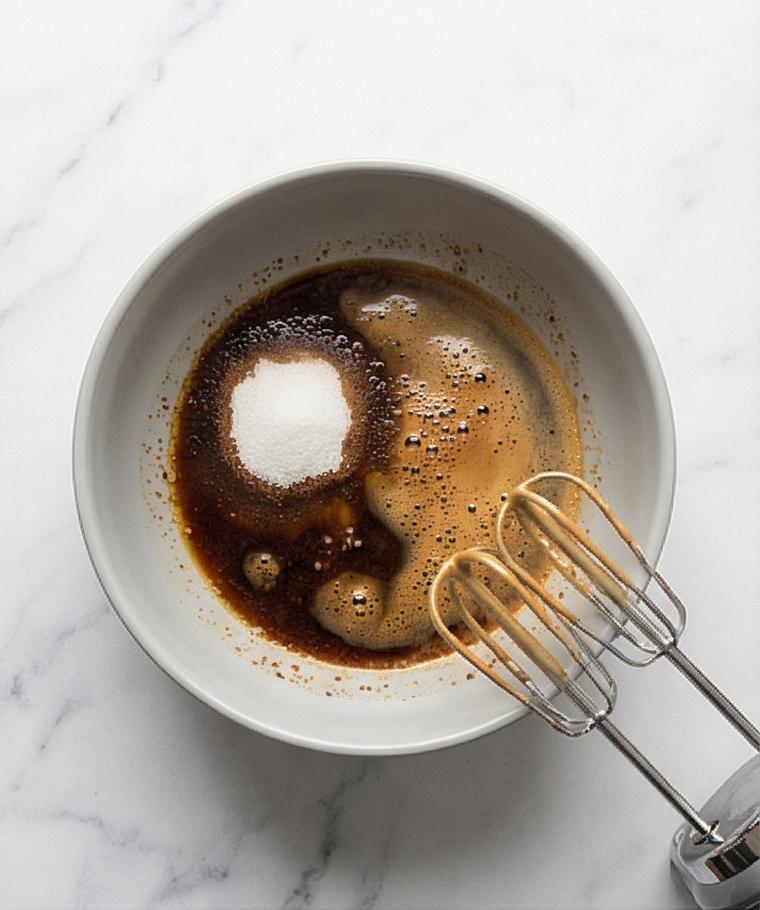
Step 2: Combine the coffee and sugar with hot water and begin whipping
Add the instant coffee and granulated sugar into the same matte grey bowl, then introduce the measured hot water. Start whipping using an electric hand mixer on medium-high, or a balloon whisk if you prefer more wrist work; move the beaters in gentle circles so the sugar dissolves and the mixture lightens. You’ll see the slurry transform from a thin, glossy dark syrup into a lighter, air-filled mixture—this early aeration is the first visible milestone.
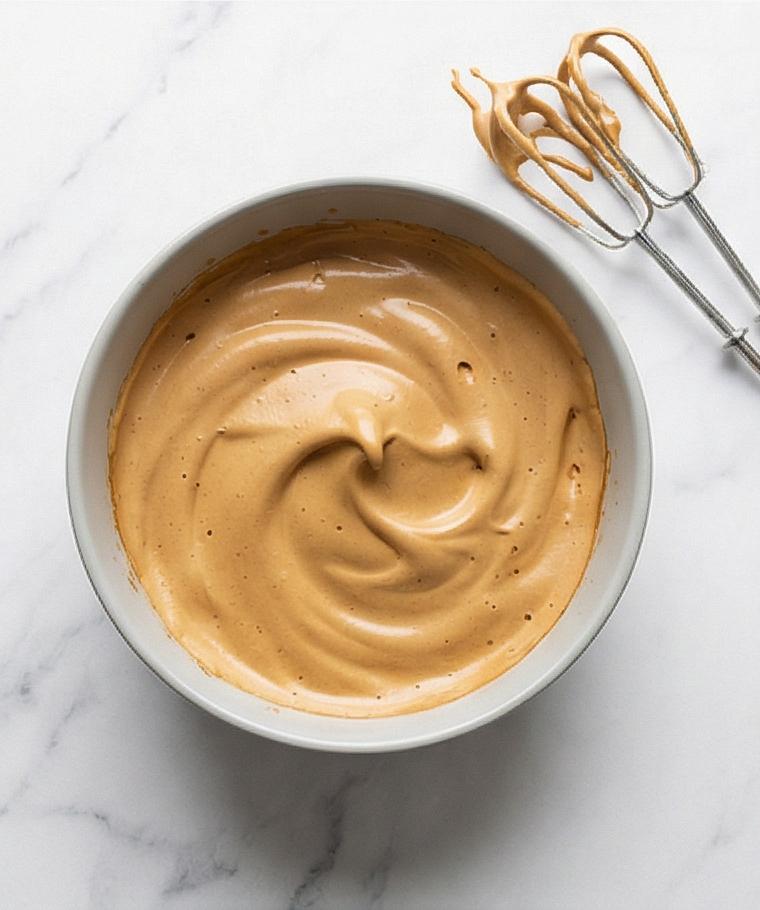
Step 3: Whip to a thick, glossy meringue-like foam
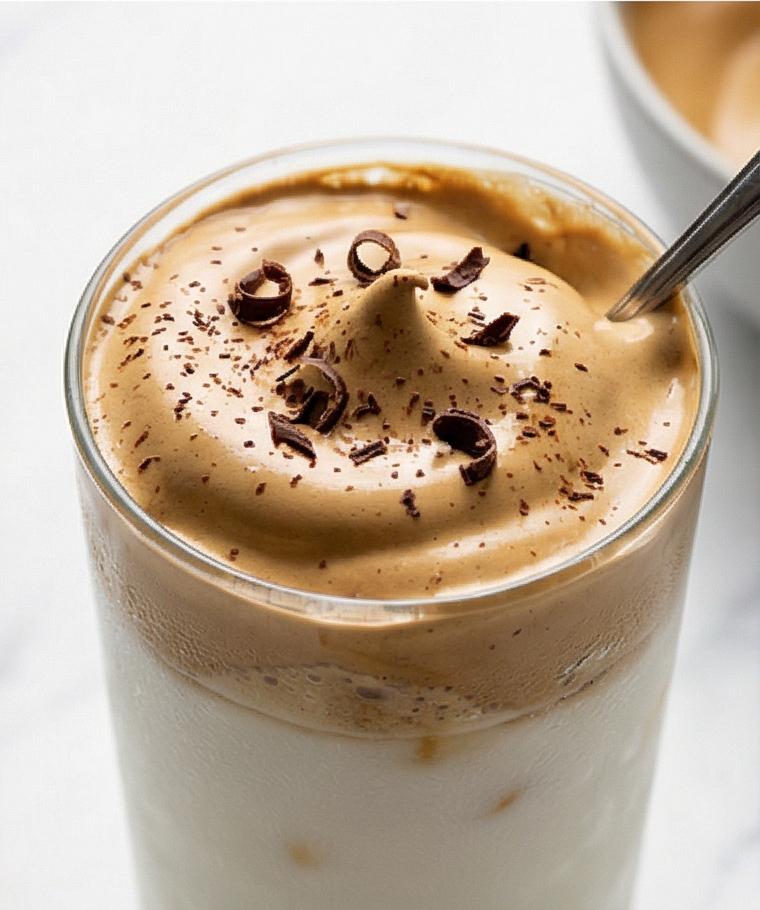
Continue whipping until the mixture becomes very thick and glossy, holding medium-stiff peaks—soft, caramel-brown peaks that sit up when the whisk is lifted. The texture should read like dense whipped cream: silky, pillowy but with structural integrity. If it still slides off the whisk, keep aerating; the transition from fluid to stable foam is the key visual transformation here.
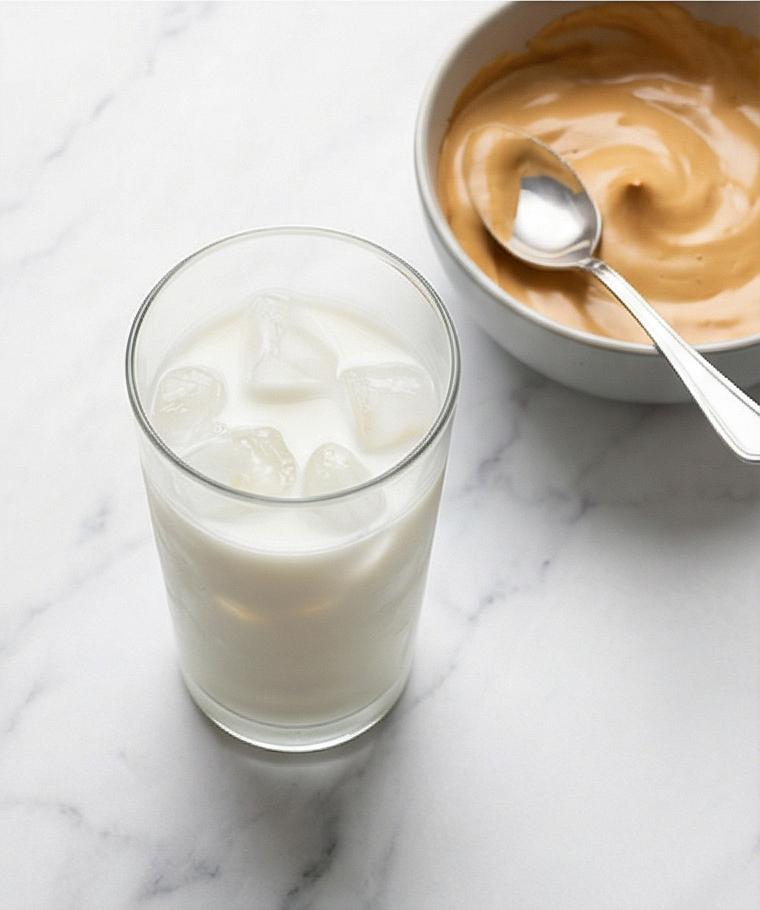
Step 4: Prepare the serving glass with ice and cold milk
While the coffee is reaching peak foam, fill a clear 12–14 oz serving glass with ice cubes and pour in cold milk, leaving at least an inch of empty space at the top. Use a tall clear glass so the layered contrast between the opaque white milk and the caramel coffee foam will read clearly in the final shot. Place the glass back on the Carrara slab, upright and pristine—this is your staging for assembly.
Step 5: Taste and gently adjust the foam if needed
Spoon a tiny dab of the whipped coffee into a clean ceramic tasting spoon and sample it—if you prefer it sweeter, briefly whip in a teaspoon or two of sugar; if it’s too intense, fold in a teaspoon or two of cold milk to soften, then whip a few seconds to restore texture. Keep adjustments minimal; the visual cue to aim for is a satiny, even surface with soft peaks and no liquid streaks.
Step 6: Spoon the whipped coffee over the milk to assemble
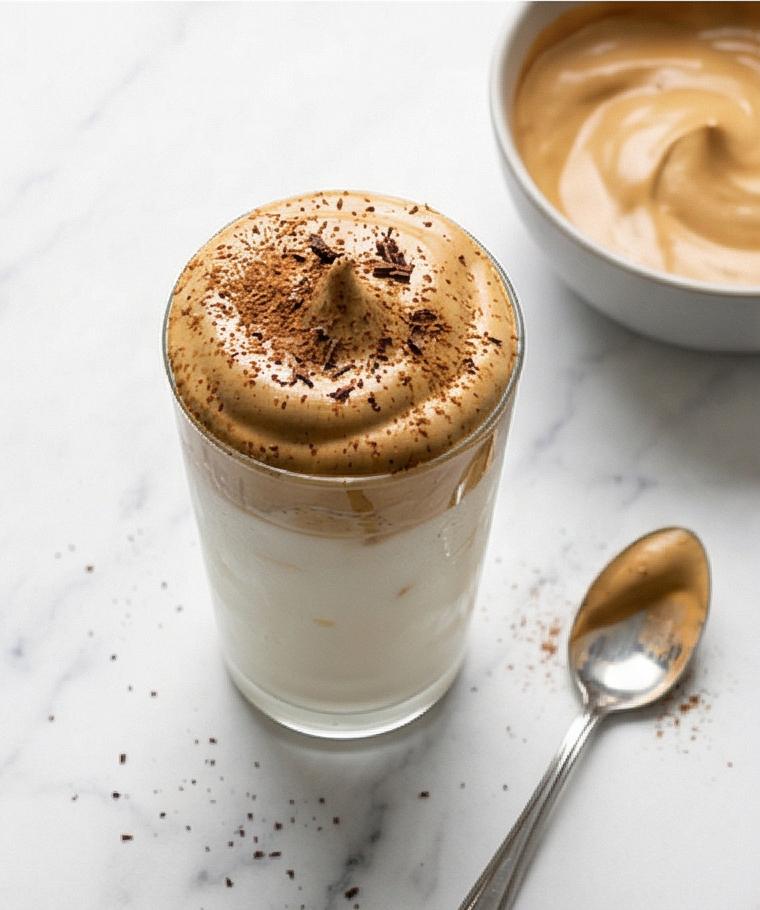
Use a dessert spoon to dollop the thick whipped coffee over the cold milk-and-ice glass, dividing the foam evenly and smoothing or shaping soft peaks for a decorative crown. The foam should sit distinctly above the milk, creating a sculptural, cloud-like cap—clear separation, strong contrast, and airy texture are what you want to capture here.
Step 7: Dust and finish with delicate garnishes
Optionally dust the whipped top with a fine sift of unsweetened cocoa or a whisper of ground cinnamon, and sprinkle a few shavings of finely grated dark chocolate for sparkle and texture. The garnishes should be light and artful—tiny contrasting specks that accentuate the foam’s surface without obscuring its caramel tones.
Step 8: Serve immediately and enjoy the layered experience
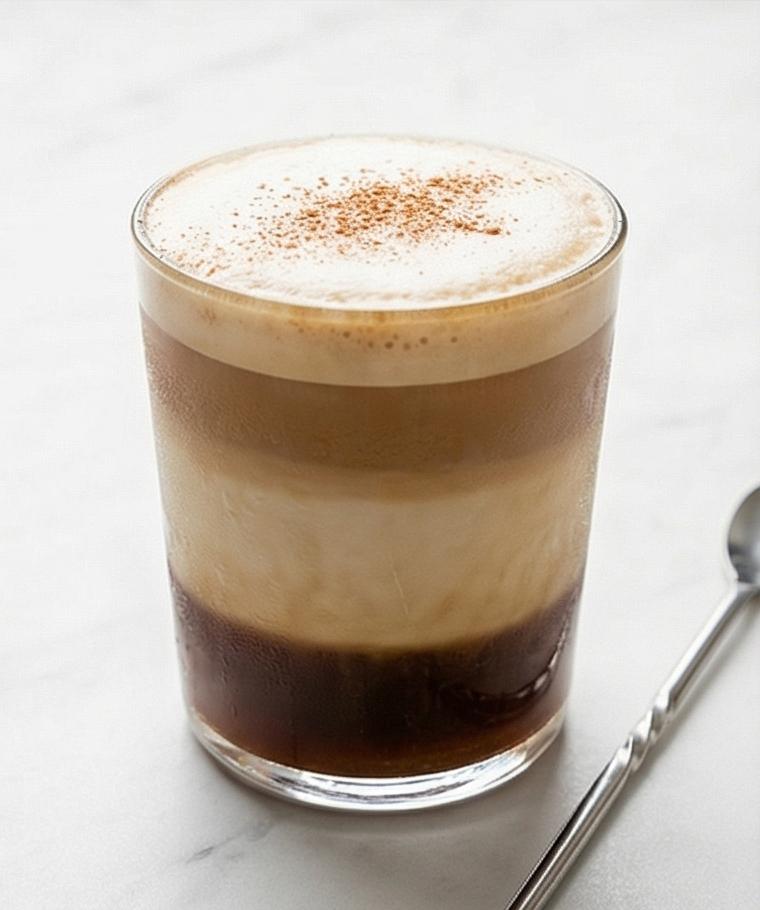
Present the glass immediately while the milk stays cold and the foam remains airy. Encourage stirring before sipping so the dense foam dissolves into the milk, but photograph the undisturbed layered moment first: crystalline ice, opaque milk, and a lofty, textured coffee cap sitting above it.
Step 9: Optional hot variation—top hot milk with the same whipped coffee
For a hot version, gently warm milk in a separate heatproof jug until just steaming (about 140°F / 60°C) and pour into a heatproof mug. Spoon the whipped coffee on top as before; the foam will float as a warm, glossy dome. Photograph this as an alternate final, but keep the same bowl and tools nearby to show process continuity.
Step 10: Final plating—ready to photograph and savor
Set the finished drink on the white Carrara surface, glass pristine and vertical, foam crowned and lightly dusted. Capture the moment immediately: the textures—airy foam, tiny cocoa specks, fine chocolate curls, crystalline ice and cold milk—should all be visible and inviting.
Making It Your Own
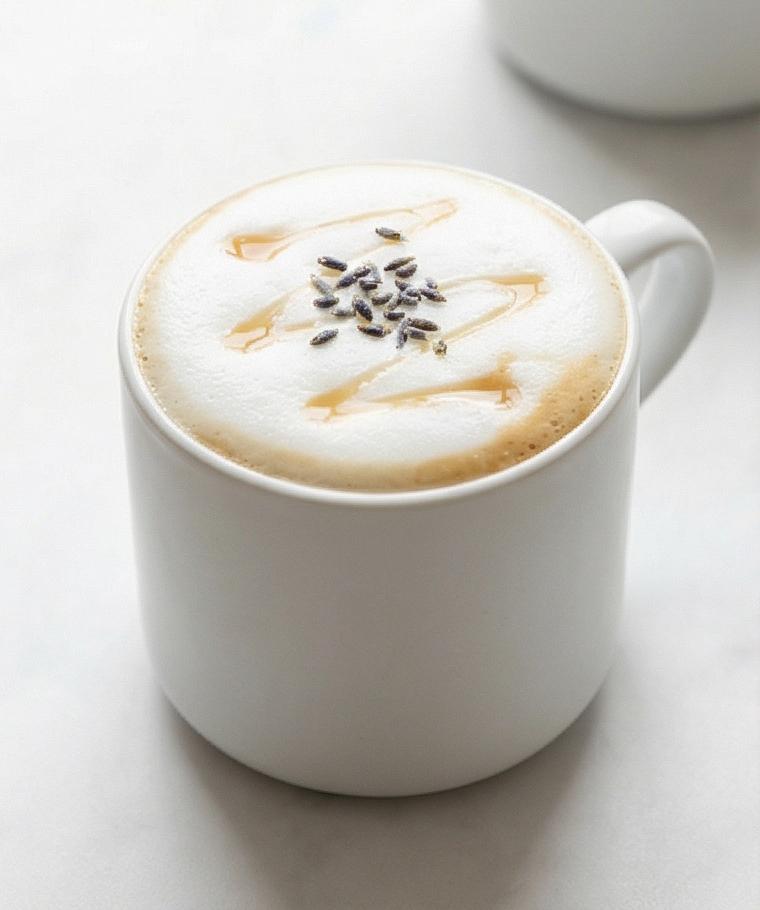
I like to tinker with small variations depending on the season and my mood. In autumn I add a pinch of pumpkin spice into the foam for warmth, and in summer I stir a drop of vanilla extract into the milk for perfume. For a stronger kick, swap one tablespoon of the instant coffee for espresso powder. If you want it vegan, full-fat oat or canned coconut milk gives a luxuriously creamy base. For a chocolate twist, mix a teaspoon of cocoa into the foam before whipping. Each change shifts the balance slightly, and every version has surprised me in pleasant ways.
How to Serve
When I serve this to friends I make sure each glass is identical: same ice, same milk fill level, same foam height. For a group, prepare several bowls of whipped coffee at once using multiple mixers or a stand mixer to save time. For a dinner party, offer a small station with cocoa, cinnamon and chocolate shavings so guests can personalize their garnish.
If you want a morning service, prepare the foam and keep it at room temperature for up to 30 minutes while you toast bread or plate pastries. For a cozy evening, serve the hot variation in ceramic mugs and place small biscotti on the side.
Storage and Reheating Tips
Leftover whipped coffee does not store well for texture, so aim to prepare the foam fresh when possible. If you must keep it, transfer the foam to an airtight container and refrigerate for up to 24 hours. Expect some loss of volume and sheen; a quick rewhip for 20 to 30 seconds helps revive some structure.
Milk and ice should always be fresh, so do not pre-fill glasses hours in advance. For the hot variation, reheat milk gently on the stove or in a microwave until steaming, then spoon on freshly whipped coffee for best results.
Common Slipups and How to Avoid Them
Underwhipping is perhaps the most common mistake. If the foam slides off your whisk it is not ready; keep aerating. Using room-temperature water will slow the process, so start with properly heated water.
Overcompensating with extras like too much sugar or milk in the foam can collapse its structure. Adjust gently and taste as you go; small tweaks preserve both texture and flavor.
A Warm Invitation
Give the Dalgona Coffee Recipe a try this weekend—make one for yourself and one for someone else. It is quick, theatrical and surprisingly comforting. Photograph the layers, then stir and savor the moment together.
Frequently Asked Questions
- Can I make Dalgona Coffee without instant coffee? No, instant coffee is necessary to achieve the stable foam. Ground coffee will not dissolve the same way.
- How long does the whipped coffee keep its texture? Best within 20 to 30 minutes; you can refrigerate for 24 hours but expect loss of volume and gloss.
- Is this recipe vegan friendly? Yes, swap the milk for oat, soy or almond milk and use sugar that is vegan certified if needed.
- Can I sweeten the drink differently? Yes, try honey in the milk or a sugar alternative, but avoid liquid sweeteners in the foam itself as they affect whipping.
- What is the best way to photograph the drink? Use a tall clear glass, natural side light, and capture the layered contrast before stirring.

Dalgona Coffee Recipe
Make the Dalgona Coffee Recipe: whip instant coffee, sugar and hot water, spoon over cold milk for a frothy iced treat.
Ingredients
Instructions
Step 1: Heat the water to steaming but not boiling
Bring the water to just below a full boil so it’s hot and lively—about the temperature where wisps of steam rise but it’s not rolling. Pour the hot water into a small heatproof glass measuring cup and set it beside your medium matte light-grey ceramic mixing bowl; this bowl will carry through the whole process so keep it front and center. The goal here is simple: get the water hot and ready while keeping your mise en place tidy and visually calm on the white Carrara surface.
Step 2: Combine the coffee and sugar with hot water and begin whipping
Add the instant coffee and granulated sugar into the same matte grey bowl, then introduce the measured hot water. Start whipping using an electric hand mixer on medium-high, or a balloon whisk if you prefer more wrist work; move the beaters in gentle circles so the sugar dissolves and the mixture lightens. You’ll see the slurry transform from a thin, glossy dark syrup into a lighter, air-filled mixture—this early aeration is the first visible milestone.
Step 3: Whip to a thick, glossy meringue-like foam
Continue whipping until the mixture becomes very thick and glossy, holding medium-stiff peaks—soft, caramel-brown peaks that sit up when the whisk is lifted. The texture should read like dense whipped cream: silky, pillowy but with structural integrity. If it still slides off the whisk, keep aerating; the transition from fluid to stable foam is the key visual transformation here.
Step 4: Prepare the serving glass with ice and cold milk
While the coffee is reaching peak foam, fill a clear 12–14 oz serving glass with ice cubes and pour in cold milk, leaving at least an inch of empty space at the top. Use a tall clear glass so the layered contrast between the opaque white milk and the caramel coffee foam will read clearly in the final shot. Place the glass back on the Carrara slab, upright and pristine—this is your staging for assembly.
Step 5: Taste and gently adjust the foam if needed
Spoon a tiny dab of the whipped coffee into a clean ceramic tasting spoon and sample it—if you prefer it sweeter, briefly whip in a teaspoon or two of sugar; if it’s too intense, fold in a teaspoon or two of cold milk to soften, then whip a few seconds to restore texture. Keep adjustments minimal; the visual cue to aim for is a satiny, even surface with soft peaks and no liquid streaks.
Step 6: Spoon the whipped coffee over the milk to assemble
Use a dessert spoon to dollop the thick whipped coffee over the cold milk-and-ice glass, dividing the foam evenly and smoothing or shaping soft peaks for a decorative crown. The foam should sit distinctly above the milk, creating a sculptural, cloud-like cap—clear separation, strong contrast, and airy texture are what you want to capture here.
Step 7: Dust and finish with delicate garnishes
Optionally dust the whipped top with a fine sift of unsweetened cocoa or a whisper of ground cinnamon, and sprinkle a few shavings of finely grated dark chocolate for sparkle and texture. The garnishes should be light and artful—tiny contrasting specks that accentuate the foam’s surface without obscuring its caramel tones.
Step 8: Serve immediately and enjoy the layered experience
Present the glass immediately while the milk stays cold and the foam remains airy. Encourage stirring before sipping so the dense foam dissolves into the milk, but photograph the undisturbed layered moment first: crystalline ice, opaque milk, and a lofty, textured coffee cap sitting above it.
Step 9: Optional hot variation—top hot milk with the same whipped coffee
For a hot version, gently warm milk in a separate heatproof jug until just steaming (about 140°F / 60°C) and pour into a heatproof mug. Spoon the whipped coffee on top as before; the foam will float as a warm, glossy dome. Photograph this as an alternate final, but keep the same bowl and tools nearby to show process continuity.
Step 10: Final plating—ready to photograph and savor
Set the finished drink on the white Carrara surface, glass pristine and vertical, foam crowned and lightly dusted. Capture the moment immediately: the textures—airy foam, tiny cocoa specks, fine chocolate curls, crystalline ice and cold milk—should all be visible and inviting.
Notes
- Use an electric hand mixer for fastest results; a balloon whisk works with more time.
- For creamier vegan results, use full-fat oat milk.
- Adjust sweetness by tasting a small dab of the foam before assembling.
- If foam loses volume, rewhip briefly to revive some texture.
- Photograph the layered drink immediately before stirring.


