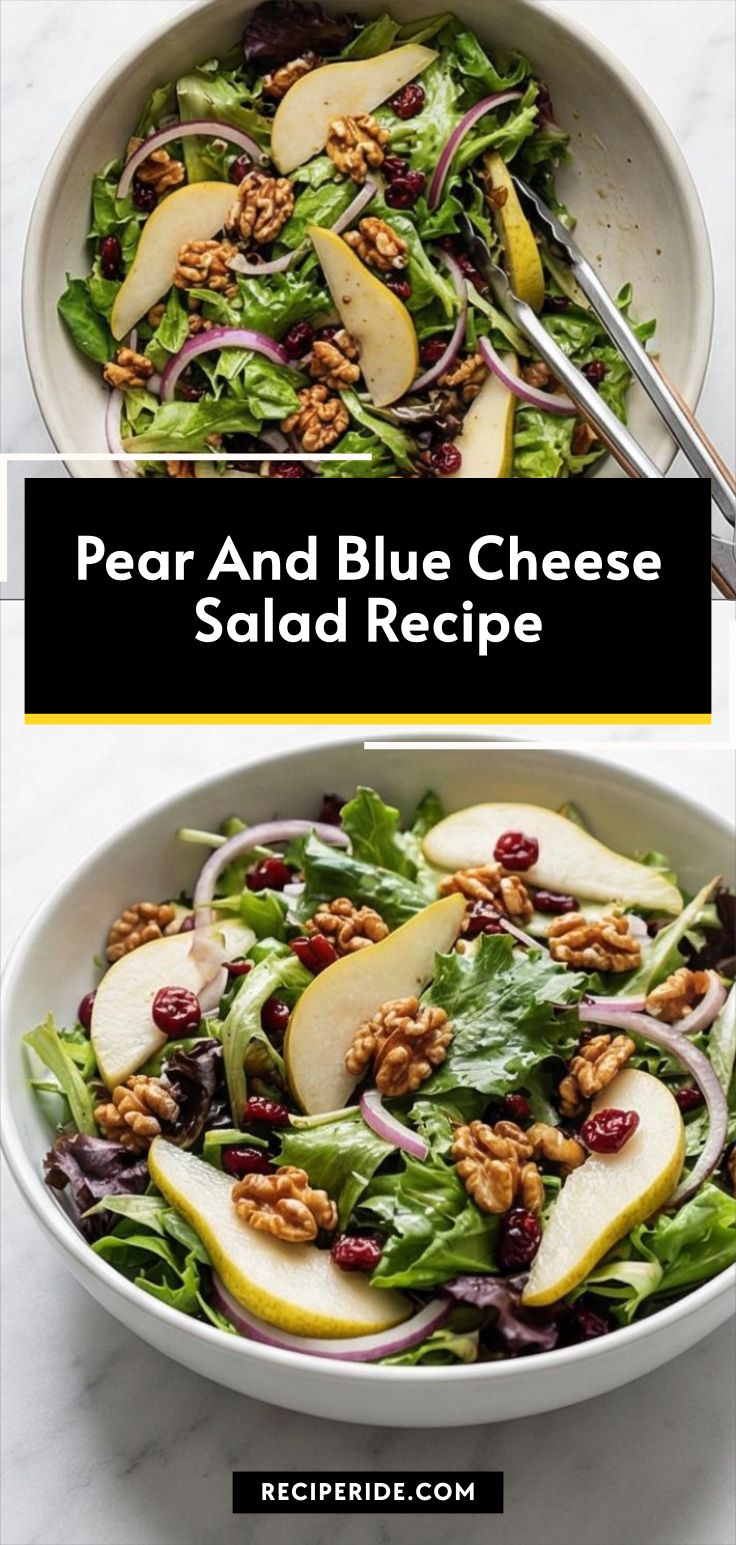
Pear And Blue Cheese Salad Recipe
I love a salad that feels like a small celebration on the plate, and this Pear And Blue Cheese Salad Recipe does just that. It’s one of those dishes I turn to when I want something quick, elegant, and reliably comforting. The crunch of toasted walnuts, the sweet-sour snap of lemon vinaigrette, and the creamy pockets of blue cheese always make guests sit up and take notice. Over the years this Pear And Blue Cheese Salad Recipe has become my go-to for casual dinner parties and quiet weeknight treats alike.
How This Salad Became My Cozy-Meal Go-To
The first time I made the Pear And Blue Cheese Salad Recipe I was bringing something to a friend who had just moved into a small apartment with a tiny kitchen and no oven mitts. I remember the pears glowing like small moons against the blue cheese, the walnuts still warm from the skillet, and the lemon scent brightening the air. We ate standing at the counter, laughing between bites, and I felt proud of how simple ingredients could feel luxe. That memory still shapes how I make this salad: careful toasting, gentle tossing, and a little patience so the textures stay distinct. Each bite tastes like that evening: warm, a little tangy, and entirely at home.
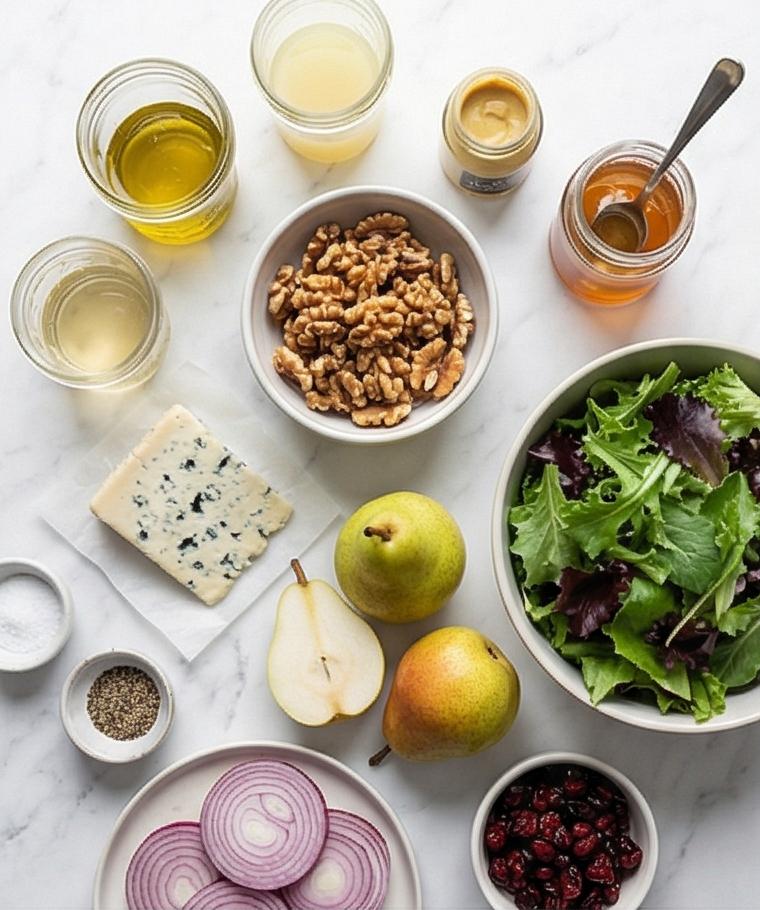
The Stars of This Salad
- Walnuts: Add crunch and a toasty, slightly bitter backbone; substitute pecans or sliced almonds if needed. Pick fresh, plump nuts and toast briefly to deepen flavor.
- Pears: Bring sweetness and juicy texture; Bosc or Anjou work well. Choose ripe but firm fruit to keep slices intact.
- Blue cheese: Provides creamy, salty pockets; try Gorgonzola or Roquefort for different intensity. Keep it chilled until plating.
- Mixed salad greens: A delicate base that shows off the toppings; use a baby greens mix or peppery arugula for a bolder bite.
- Dressing elements: Lemon, white wine vinegar, Dijon, honey, and olive oil form a bright vinaigrette; swap maple syrup for honey for a different note.
Essential Kitchen Tools
A few simple tools make this Pear And Blue Cheese Salad Recipe come together with ease. You do not need anything fancy, but each item helps protect texture and flavor.
- Small baking sheet and parchment: For toasting walnuts evenly; a rimmed sheet keeps nuts contained.
- Small jar or bowl and whisk: For emulsifying the lemon-mustard dressing; a jar makes storage easy.
- Sharp knife and cutting board: For thin, even pear slices; a steady hand preserves texture.
- Large salad bowl and tongs: For gentle tossing to avoid bruising greens; use salad servers if you prefer.
- Microplane or small grater: Optional for a fresh lemon zest finish.
Step-by-Step Preparation Guide
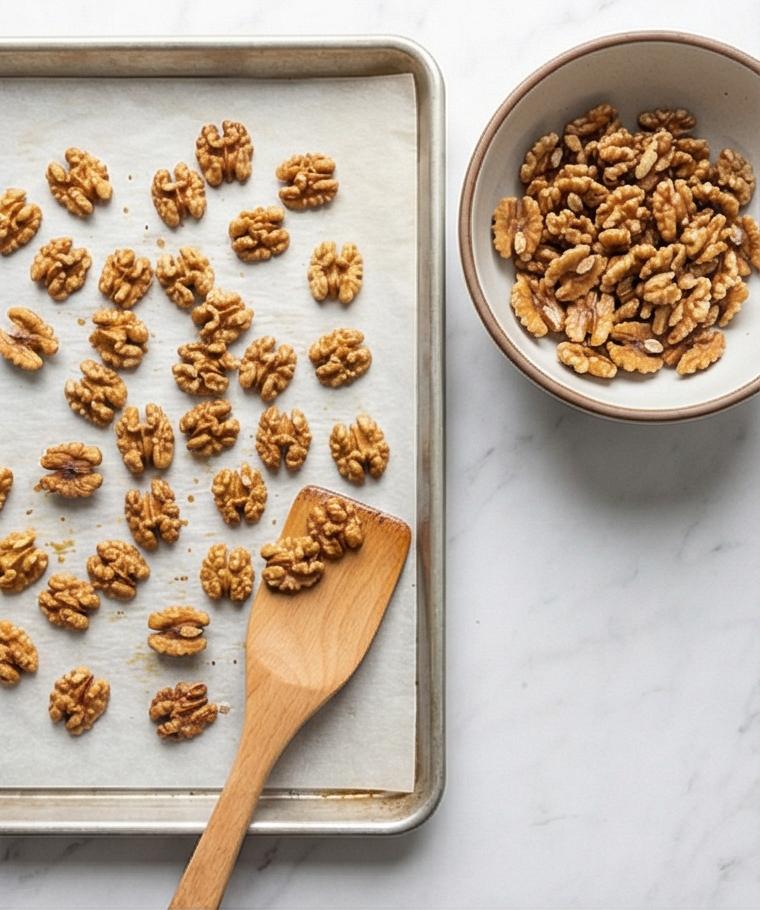
Step 1: Toast the walnuts and cool them
Spread the walnut halves or pieces in a single layer on a small parchment-lined baking sheet and toast until fragrant and lightly golden; remove immediately so they won’t overbake and let them cool completely on the paper. Cooling lets the nuts crisp and stop steaming so they remain crunchy when added to the salad. Keep the toasted walnuts together with a few reserved halves for plating — their textured, blistered skins and warm amber color are an important visual contrast for later steps.
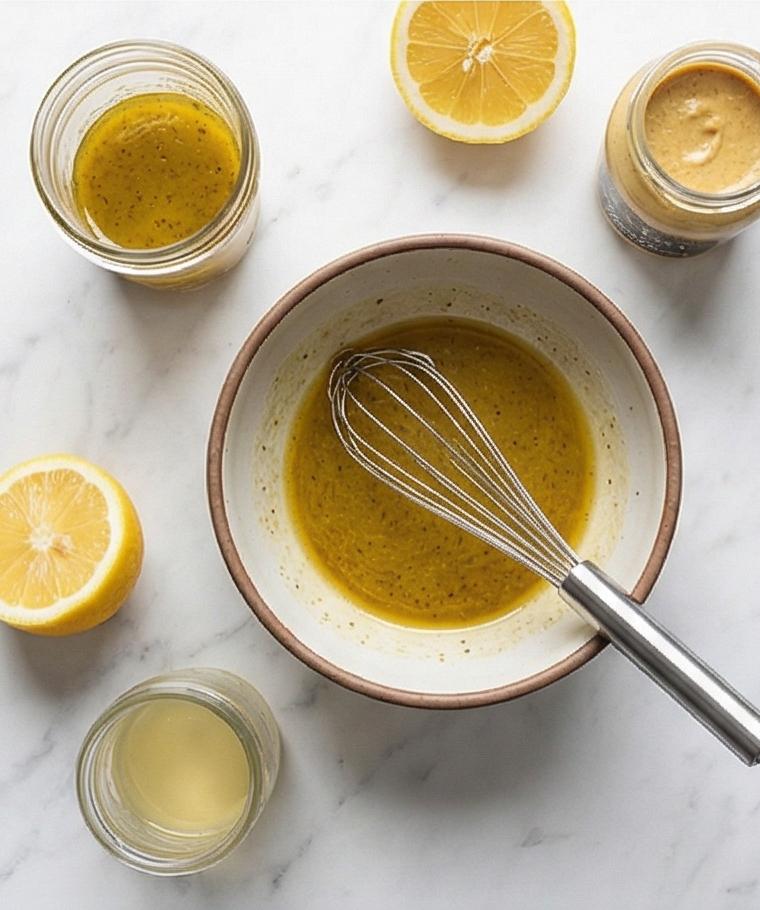
Step 2: Whisk the lemon‑mustard dressing until silky and emulsified
In a small glass jar or shallow ceramic bowl whisk together the lemon juice, white wine vinegar, Dijon, honey, salt, and pepper, then stream in the olive oil while whisking until the dressing becomes glossy, slightly thickened, and homogenous with no visible oil streaks. Taste and adjust salt and pepper; the dressing should cling lightly to a spoon and leave a faint sheen on the bowl — a bright, tangy vinaigrette that will highlight the pears and blue cheese. Keep the dressing jar nearby for the assembly.
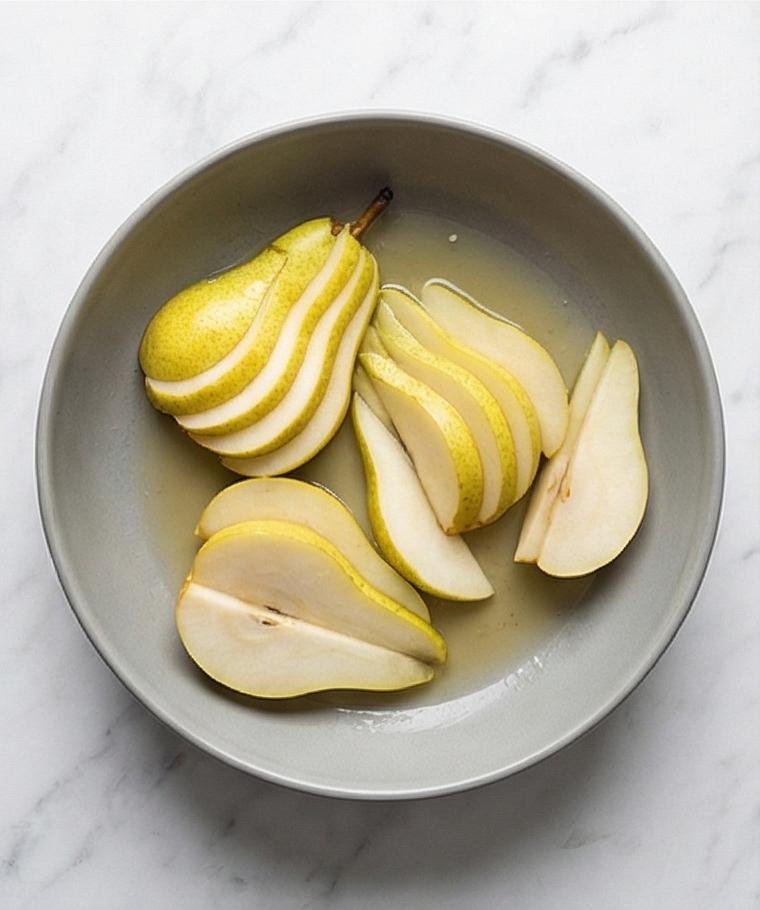
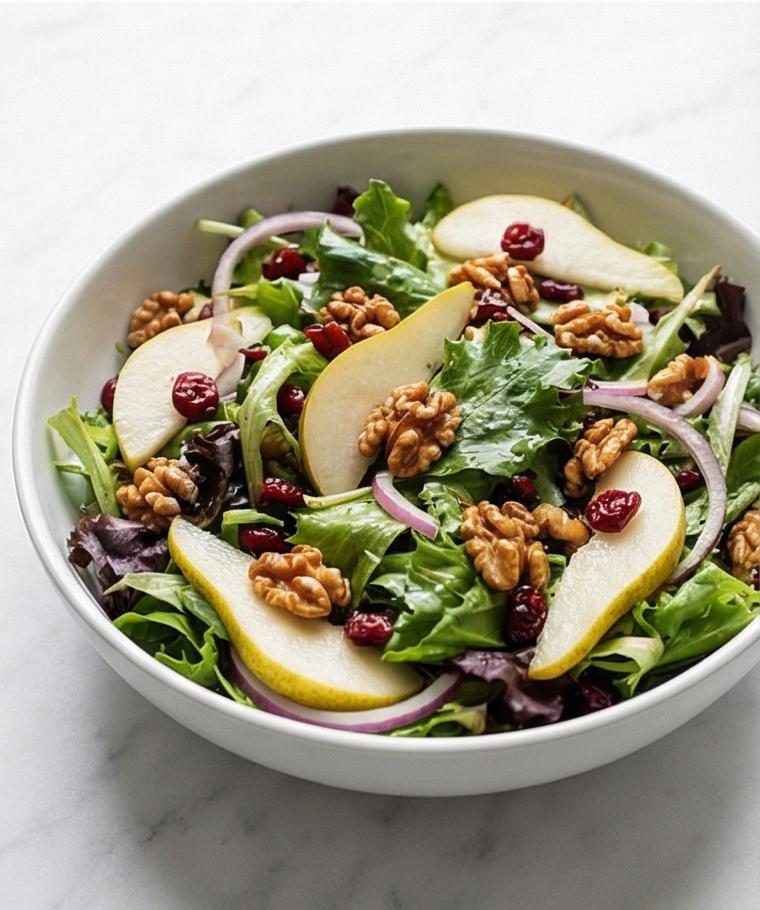
Step 3: Core and thinly slice the pears, toss with lemon to prevent browning
Core the ripe but firm pears and cut them into even 1/4 inch (6 mm) slices, leaving the skins on for color and texture. Place the slices in a medium matte ceramic bowl and gently toss with the reserved tablespoon of lemon juice so each slice glows with a faint citrus sheen and will resist oxidation. Arrange the slices so their pale cream flesh and blushing skins are visible as neat overlapping fans — this prepped pear bowl will be ready to join the greens. Also very thinly slice the red onion into translucent strands and set aside.
Step 4: Assemble the salad components in the mixing bowl and dress gently
Put the dried and well-dried mixed greens into a large salad bowl and fluff them so they are loose and airy. Add the thin red onion strands, the lemon‑tossed pear slices, the cooled toasted walnuts, and the chopped dried cranberries if using. Whisk the dressing quickly to re-emulsify and pour about two-thirds over the salad, then use tongs to gently toss for 20–30 seconds until the leaves are lightly coated — you want a delicate sheen, not a saturated, soggy look. Pause and taste; add more dressing sparingly if needed.
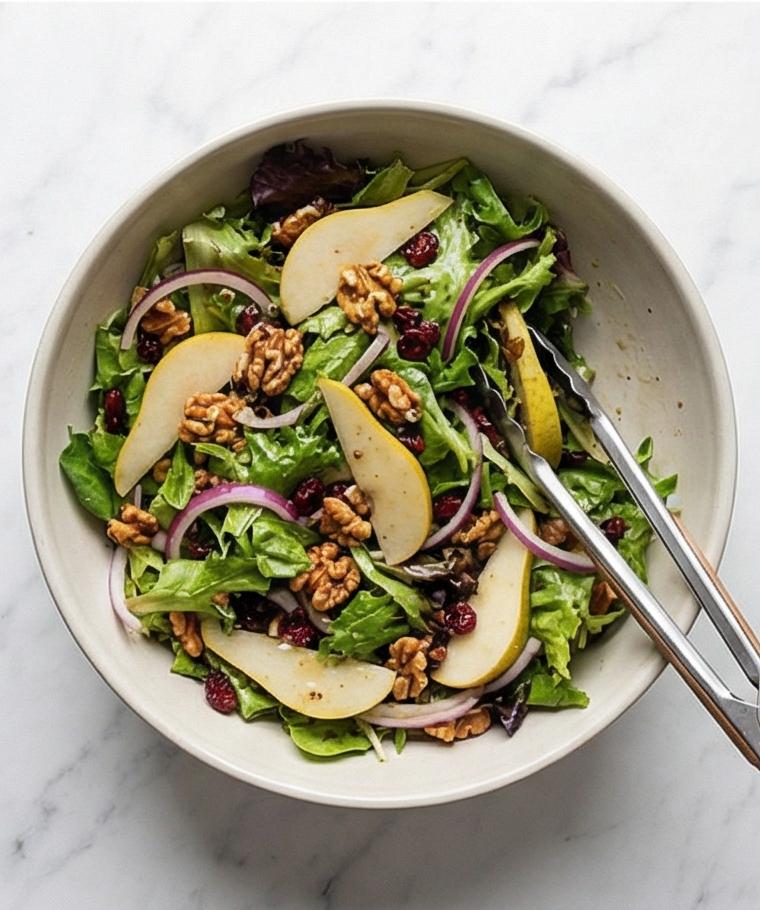
Step 5: Finish with crumbled blue cheese, garnish, and serve immediately
Sprinkle chilled crumbled blue cheese across the top in visible clusters so there are creamy pockets throughout; toss once or twice more just to distribute without breaking the curds down. Taste a leaf and a slice of pear and adjust seasoning with a pinch more salt, a few grinds of pepper, or an extra drop of lemon if it needs brightness. Just before serving scatter chopped parsley or chives and a few extra walnut pieces and blue‑cheese crumbles for a composed, textured finish. Serve within ten minutes of dressing for ideal texture and contrast.
Making It Your Own
I love tweaking this salad depending on the season. Swap dried cranberries for chopped, tinned pears in winter, or roast the walnuts with a pinch of smoked paprika for a savory twist. For a dairy-free version, omit the blue cheese and add roasted chickpeas and a drizzle of tahini-thinned lemon instead. If you prefer a sweeter dressing, trade the honey for pear syrup or maple and reduce the lemon by a splash.
Try regional swaps like using local goat cheese in place of blue cheese for a milder, tangier finish. For a heartier meal, add thin slices of grilled chicken or seared halloumi. These small experiments keep the Pear And Blue Cheese Salad Recipe feeling new and personal each time.
How to Serve
When I host, I think about texture, color, and timing. Serve this salad on a chilled platter if it is a starter so the greens stay crisp. For a family-style dinner, toss in a large bowl and offer extra dressing on the side so guests can adjust to taste. Garnish with reserved walnut halves and a few extra crumbles of blue cheese for visual drama.
To scale up, multiply ingredients by the number of guests and toast nuts in batches so they all brown evenly. If making for two, keep portions freer in the bowl and arrange pear slices as pretty fans on top. This salad is happiest served within ten minutes of dressing; plan plating just before you sit down.
Storage and Leftovers
This salad is best eaten fresh, but leftovers can work with care. Store the components separately when possible: dressing in a jar, toasted walnuts in an airtight container, and greens and pears loosely in the fridge for up to a day. Assemble last minute to preserve crunch.
If all components are mixed, keep leftovers refrigerated and eat within a day. Rehydrate a bit of crispness by adding a small handful of fresh greens when serving the next day, but avoid reheating as the delicate textures and blue cheese will change.
Common Mistakes and How to Avoid Them
Overdressing is the number one slip-up. Start with two-thirds of the dressing and add more only if needed; you want a light sheen, not a soaked salad.
Another common error is using overly ripe pears that go mushy when tossed. Pick pears that give slightly to pressure but hold their shape when sliced. Finally, toast your nuts carefully and cool them completely to maintain their crunch in the finished salad.
Final Thoughts
Give this Pear And Blue Cheese Salad Recipe a try the next time you want something quick, elegant, and full of contrast. It is forgiving, adaptable, and always a crowd-pleaser. I hope it becomes a little ritual for you as it did for me.
Frequently Asked Questions.
-
Q: Can I make the dressing ahead of time?
A: Yes, whisk the dressing and store it in a sealed jar in the fridge for up to 3 days. Shake or whisk again before using. -
Q: What pears are best for this salad?
A: Bosc or Anjou are great because they are sweet yet firm when ripe, holding their shape when sliced. -
Q: Can I substitute the blue cheese?
A: Absolutely. Try Gorgonzola for a milder blue or goat cheese for a creamier, less pungent option. -
Q: How do I keep the greens from getting soggy?
A: Dry the greens thoroughly after washing and add the dressing just before serving. Toss gently and serve promptly. -
Q: Is this salad suitable for vegans?
A: You can make a vegan version by omitting blue cheese and using toasted chickpeas or a dollop of nut-based cheese as a substitute.
Pear And Blue Cheese Salad Recipe
Make Pear And Blue Cheese Salad Recipe: crisp greens, toasted walnuts, pears, and a bright lemon-mustard vinaigrette.
Ingredients
Instructions
Step 1: Toast the walnuts and cool them
Spread the walnut halves or pieces in a single layer on a small parchment-lined baking sheet and toast until fragrant and lightly golden; remove immediately so they won't overbake and let them cool completely on the paper. Cooling lets the nuts crisp and stop steaming so they remain crunchy when added to the salad. Keep the toasted walnuts together with a few reserved halves for plating — their textured, blistered skins and warm amber color are an important visual contrast for later steps.
Step 2: Whisk the lemon‑mustard dressing until silky and emulsified
In a small glass jar or shallow ceramic bowl whisk together the lemon juice, white wine vinegar, Dijon, honey, salt, and pepper, then stream in the olive oil while whisking until the dressing becomes glossy, slightly thickened, and homogenous with no visible oil streaks. Taste and adjust salt and pepper; the dressing should cling lightly to a spoon and leave a faint sheen on the bowl — a bright, tangy vinaigrette that will highlight the pears and blue cheese. Keep the dressing jar nearby for the assembly.
Step 3: Core and thinly slice the pears, toss with lemon to prevent browning
Core the ripe but firm pears and cut them into even 1/4 inch (6 mm) slices, leaving the skins on for color and texture. Place the slices in a medium matte ceramic bowl and gently toss with the reserved tablespoon of lemon juice so each slice glows with a faint citrus sheen and will resist oxidation. Arrange the slices so their pale cream flesh and blushing skins are visible as neat overlapping fans — this prepped pear bowl will be ready to join the greens. Also very thinly slice the red onion into translucent strands and set aside.
Step 4: Assemble the salad components in the mixing bowl and dress gently
Put the dried and well-dried mixed greens into a large salad bowl and fluff them so they are loose and airy. Add the thin red onion strands, the lemon‑tossed pear slices, the cooled toasted walnuts, and the chopped dried cranberries if using. Whisk the dressing quickly to re-emulsify and pour about two-thirds over the salad, then use tongs to gently toss for 20–30 seconds until the leaves are lightly coated — you want a delicate sheen, not a saturated, soggy look. Pause and taste; add more dressing sparingly if needed.
Step 5: Finish with crumbled blue cheese, garnish, and serve immediately
Sprinkle chilled crumbled blue cheese across the top in visible clusters so there are creamy pockets throughout; toss once or twice more just to distribute without breaking the curds down. Taste a leaf and a slice of pear and adjust seasoning with a pinch more salt, a few grinds of pepper, or an extra drop of lemon if it needs brightness. Just before serving scatter chopped parsley or chives and a few extra walnut pieces and blue‑cheese crumbles for a composed, textured finish. Serve within ten minutes of dressing for ideal texture and contrast.
Notes
- Toast nuts briefly and cool completely before adding to salad
- Keep blue cheese chilled until just before plating to preserve texture
- Toss greens gently and add dressing sparingly to avoid sogginess
- Prepare dressing ahead and re-emulsify by whisking before use
- Choose ripe but firm pears to maintain clean slices

