Biscoff Cookie Butter Bars Recipe has become my go-to when I want something that feels indulgent but not fussy. I first made the Biscoff Cookie Butter Bars Recipe on a rainy weekend and the whole house smelled like warm spice and brown sugar within minutes. There is something comforting about that caramelized Speculoos note and the dense, fudgy texture that keeps you reaching for just one more square. I love how approachable the technique is; you don’t need airy beating or complicated tempering, just good ingredients and a steady hand.
How This Recipe Became My Cozy Afternoon Treat
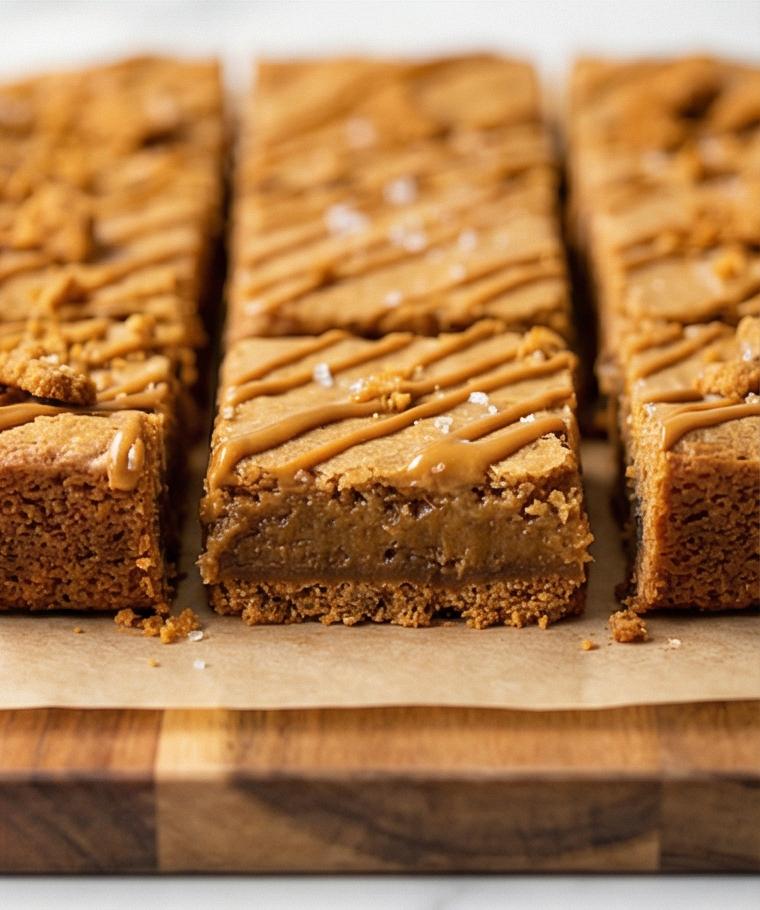
I remember the afternoon I first tested this Biscoff Cookie Butter Bars Recipe: rain tapping on the windows, a playlist of soft jazz, and a box of Biscoff cookies that threatened to take over my pantry. The aroma as the crust hit the oven was like a warm invitation, and when the cookie-butter filling set, I couldn’t help but press my nose to the pan and exhale a little sigh of contentment. The first bite was a tiny revelation: buttery crumbs, a dense, fudgy center that yielded slowly, and a whisper of salt that made the caramel spice sing. I wrapped a square in parchment and carried it to the couch, feeling both proud and oddly protective. Baking this slab became a small, repeatable ritual for slow Sundays and last-minute guests; it’s comfort and showmanship in one.
What Goes Into These Bars
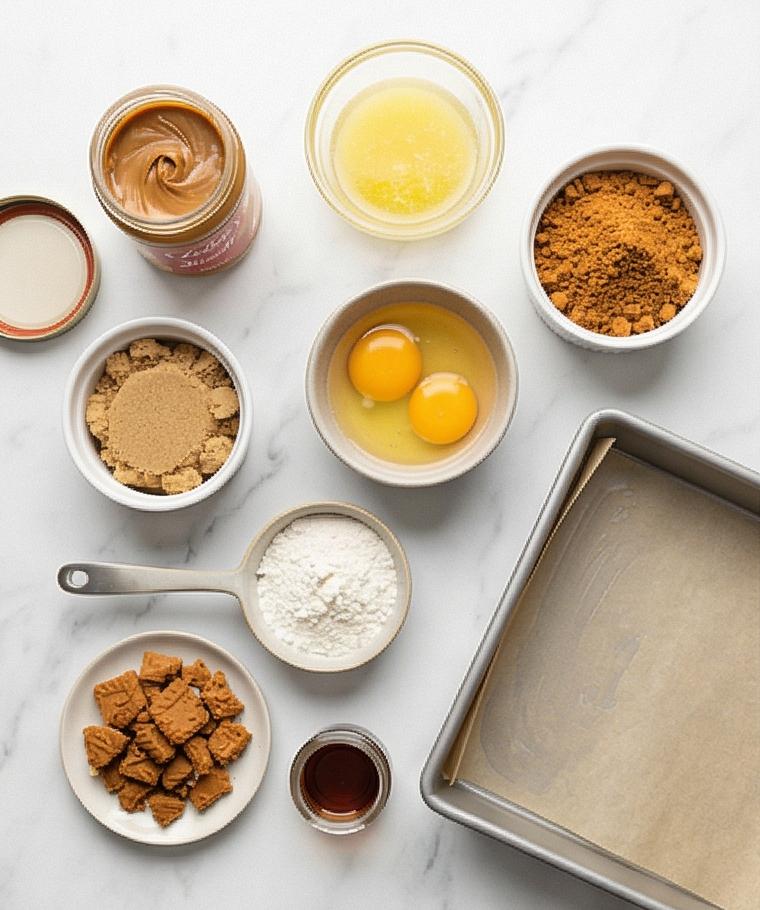
- Biscoff cookie crumbs: The crunchy, caramelized base and flavor backbone. Substitute with graham crackers or ginger snaps in a pinch; pick fresh, crisp cookies for best texture.
- Unsalted butter: Adds richness and binds the crust and filling; use European-style butter for more depth or salted and reduce added salt slightly.
- Light brown sugar: Gives moisture and that toffee-like note; dark brown sugar will deepen the molasses flavor.
- Creamy Biscoff cookie butter: The star spread for the filling and drizzle; try peanut butter for a different profile.
- Eggs and vanilla: Provide structure and flavor lift; room temperature eggs mix in more smoothly.
- Flour, baking powder, salt: Keep the bars tender yet set; spoon and level your flour for accuracy.
- Chopped Biscoff cookies: Add texture and signature crunch; swap in chopped speculoos or ginger snaps.
Essential Kitchen Tools
Start with a short set of reliable tools and you can make these bars anytime. A sturdy 8 x 8-inch metal pan bakes more evenly than glass; lining it with parchment makes removal effortless. An offset spatula or the back of a spoon helps spread dense batter without tearing the crust. A small microplane or fine grater is useful if you want extra garnish finesse.
- 8 x 8-inch metal baking pan: For even heat and neat edges; aluminum heats fast.
- Parchment paper: Makes lifting and slicing clean and easy.
- Measuring cups and spoons: Accurate measuring keeps texture consistent.
- Mixing bowls: One for wet, one for dry; don’t overmix.
- Offset spatula or spoon: Smooths batter into corners.
- Sharp knife: Warm slightly before slicing for cleaner cuts.
Step-by-Step Preparation Guide
Step 1: Preheat and prepare the pan
Preheat the oven to 350°F (175°C). Lightly grease an 8 x 8-inch metal baking pan and line the bottom and two sides with a sheet of parchment paper, leaving an overhang to lift the slab later; lightly grease the parchment as well. This step is all about creating a clean, square vessel that will hold the bars’ structure and make removal simple.
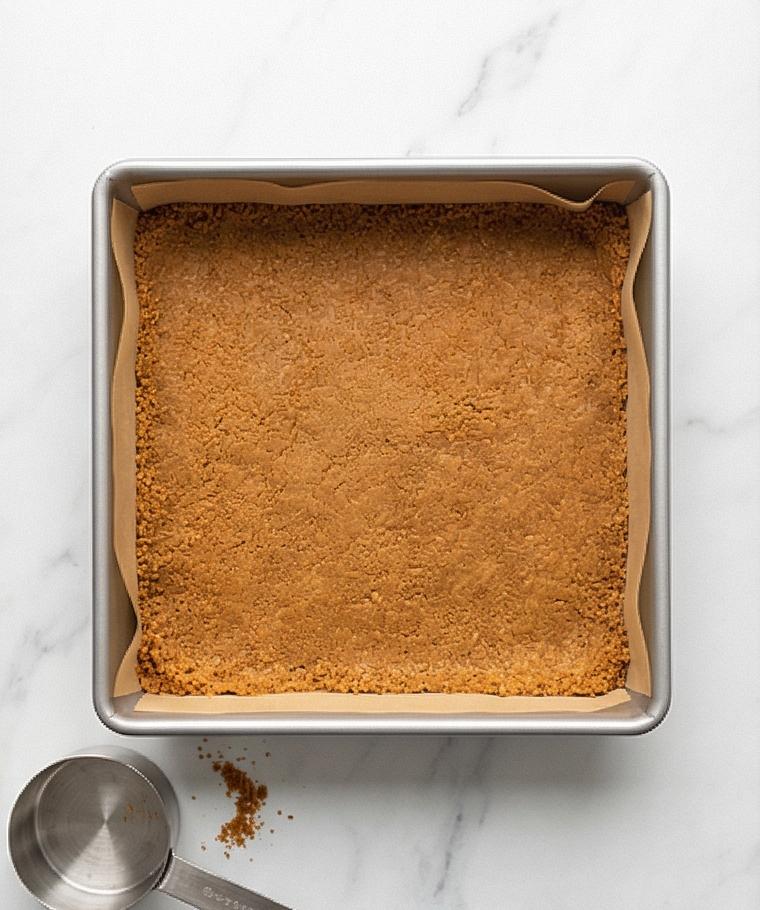
Step 2: Make and press the cookie crust
In a bowl combine finely crushed Biscoff crumbs with melted, slightly cooled butter and stir until the mixture looks like damp sand. Transfer the crumb mixture to the prepared pan and press it into an even, compact layer, using the bottom of a measuring cup or glass to firmly pack the crumbs especially into the corners so the crust will hold together after baking.
Step 3: Par-bake the crust and rest
Bake the pressed crust on the center rack for about 8 minutes until it looks slightly darker and feels set but not hard. Remove the pan and set it on a wire rack while you prepare the filling; leaving the oven on.
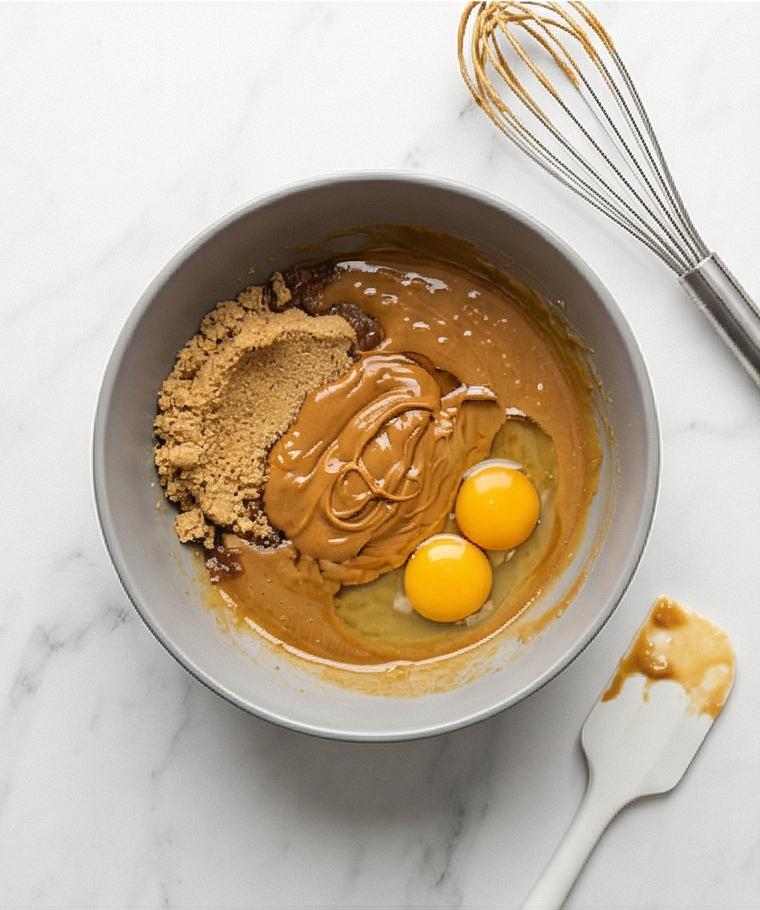
Step 4: Whisk the wet filling components
In a single medium mixing bowl whisk melted, slightly cooled butter with packed light brown sugar until thick, smooth and glossy, resembling wet sand. Add room-temperature creamy Biscoff cookie butter and pure vanilla extract, whisking until fully combined and glossy. Add one room-temperature egg and one yolk and whisk just until incorporated so the mixture remains dense and fudgy rather than airy.
Step 5: Add dry ingredients and fold in cookies
Whisk together flour, baking powder and salt in a separate bowl, then add the dry mix to the wet mixture in two additions, gently folding after each until no dry streaks remain. Fold in the coarsely chopped Biscoff cookies until evenly distributed—the batter should be thick, slightly tacky, and spreadable.
Step 6: Assemble and bake the bars
Spoon or pour the thick batter over the warm, par-baked crust and use an offset spatula or the back of a spoon to spread it evenly to the corners so the top bakes level. Return the pan to the oven and bake for 20–24 minutes until the edges are set and lightly golden and the top is matte with tiny cracks; a toothpick near the edge should come out with a few moist crumbs.
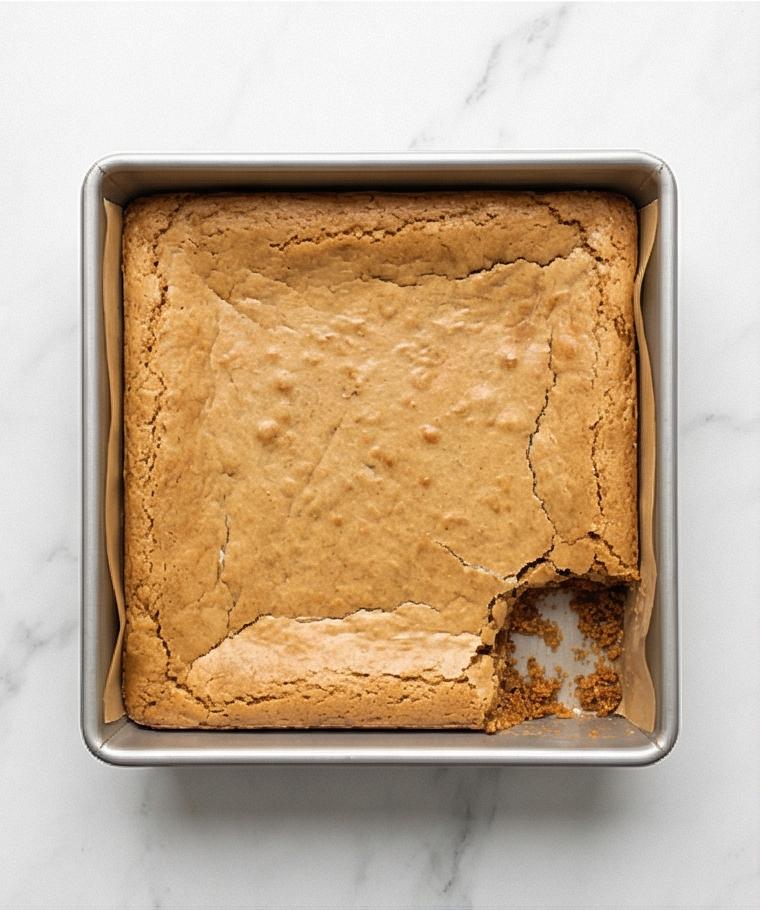
Step 7: Cool the slab completely in the pan
Transfer the hot pan to a wire rack and let the bars cool completely in the pan for at least 1 to 1½ hours at room temperature. This resting time is crucial for achieving clean slices and that dense, fudgy cookie-butter texture.
Step 8: Warm the cookie butter and decorate
Gently warm a small amount of creamy Biscoff cookie butter until pourable (short bursts in the microwave or a warm water bath), then drizzle thin zigzags or a crosshatch across the cooled slab. Immediately scatter roughly crushed cookies and a tiny pinch of flaky sea salt if desired so they adhere to the drizzle as it sets.
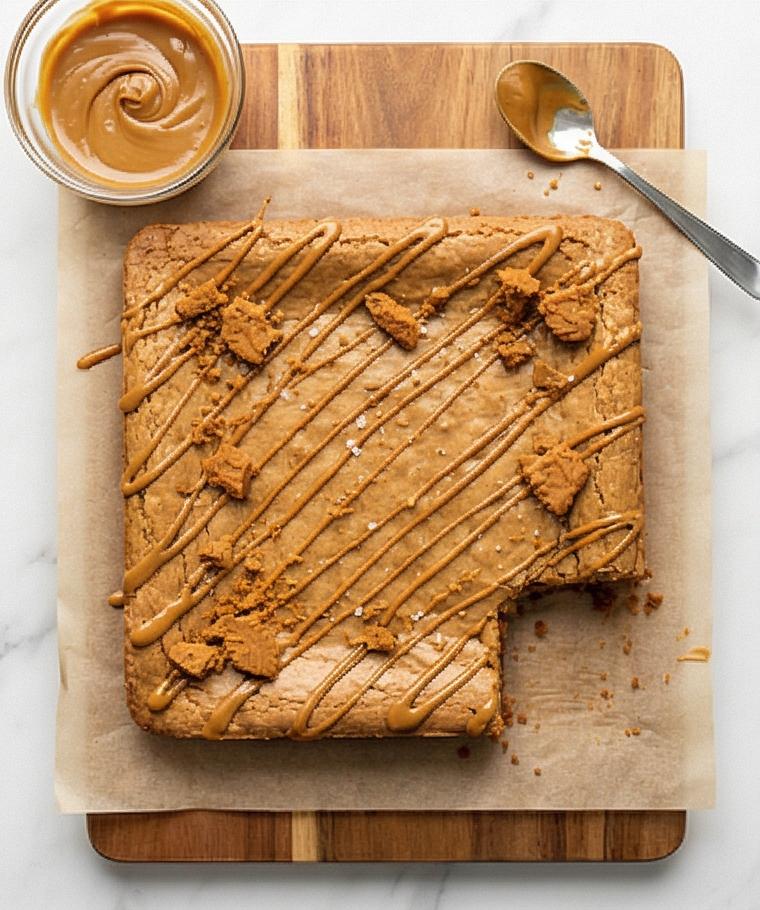
Step 9: Chill, slice, and store
For the neatest squares chill the decorated slab in the refrigerator for 30–60 minutes until slightly firm and the drizzle is set. Use the parchment overhang to lift the whole square slab from the pan onto a cutting board and slice into a 4 × 4 grid (16 bars) with a sharp knife, wiping between cuts for tidy edges. Serve at room temperature for the best texture; store cooled bars airtight at room temperature for up to 3 days or refrigerated up to 5 days.
Making It Your Own
I like to treat the Biscoff Cookie Butter Bars Recipe as a canvas. If you want a nuttier spin, swirl in a few tablespoons of almond or peanut butter with the Biscoff for a marbled effect. For a gluten-free option, replace the all-purpose flour with a 1:1 gluten-free baking blend and press almond flour into the crust for a denser base.
Seasonal tweaks are fun: fold in toasted chopped pecans and a pinch of warm spice for fall, or scatter freeze-dried raspberries over the warm drizzle in spring for a bright contrast. If you want a more decadent, fudgy bar, add a tablespoon or two of cocoa powder to the filling and reduce flour slightly. Small swaps let you tailor texture and flavor without changing the reliable method.
How to Serve
For a casual coffee meet-up, cut the slab into 16 bars and arrange on a simple platter with a few whole Biscoff cookies for garnish. If you are hosting a dessert-first tasting, slice into smaller 2 x 2-inch bites and serve with tiny spoons of whipped cream or a scoop of vanilla ice cream.
To scale up, bake two pans side by side; they can share oven time if you rotate them halfway through. For gifting, wrap individual bars in parchment and tie with twine; they travel well and keep their texture.
Storage and Reheating Tips
Store the cooled bars in an airtight container. At room temperature they stay tender and fudgy for about 3 days; refrigeration extends this to 5 days but will firm the texture. If chilled, let them come back to room temperature for 20 to 30 minutes before serving so the filling regains its soft, chewy feel.
To reheat a single bar, microwave for 8 to 12 seconds on a plate so the interior softens without getting greasy. For a warm, gooey treat, serve slightly warmed with a small scoop of ice cream or a drizzle of warmed cookie butter.
Common Mistakes and How to Avoid Them
Underbaking is easy to do because the center should be fudgy not raw. Aim for a matte top with tiny cracks and a toothpick that comes out with a few moist crumbs near the edge. Overmixing the batter introduces air and makes the bars cakier; fold gently.
Press the crust firmly into the corners and par-bake as directed to avoid a crumbly base. Warm the drizzle just enough to pour; overheating makes it thin and runny, which can sink into the slab.
Final Thoughts
If you love caramelized cookie flavors and a dense, chewy bite, try the Biscoff Cookie Butter Bars Recipe this weekend. It rewards a little patience with a deeply satisfying treat that feels both nostalgic and special. Once you make a tray, I bet it will become one of your reliable favorites too.
Frequently Asked Questions.
- Can I use a different cookie for the crust and filling? Yes. Graham crackers, ginger snaps, or speculoos-style cookies work well; adjust spices and sweetness if they are strongly flavored.
- Do I have to refrigerate the bars? No, they can be stored at room temperature for up to 3 days. Refrigerate for up to 5 days if you prefer a firmer texture.
- Can I freeze these bars? Yes. Wrap individual squares tightly and freeze for up to 2 months; thaw in the refrigerator or at room temperature.
- How can I make the bars more fudgy? Slightly underbake toward the lower end of the time range and allow the full cooling time; avoid overmixing the batter.
- Is there a vegan version? Swap butter for vegan butter, use a flax egg or commercial egg replacer, and choose a vegan cookie butter alternative; texture will vary.

Biscoff Cookie Butter Bars Recipe
Make Biscoff Cookie Butter Bars Recipe: dense, fudgy cookie-butter bars with a crunchy crust. Bake and enjoy warm or room temperature.
Ingredients
Instructions
Step 1: Preheat and prepare the pan
Preheat the oven to 350°F (175°C). Lightly grease an 8 x 8-inch metal baking pan and line the bottom and two sides with a sheet of parchment paper, leaving an overhang to lift the slab later; lightly grease the parchment as well. This step is all about creating a clean, square vessel that will hold the bars' structure and make removal simple.
Step 2: Make and press the cookie crust
In a bowl combine finely crushed Biscoff crumbs with melted, slightly cooled butter and stir until the mixture looks like damp sand. Transfer the crumb mixture to the prepared pan and press it into an even, compact layer, using the bottom of a measuring cup or glass to firmly pack the crumbs especially into the corners so the crust will hold together after baking.
Step 3: Par-bake the crust and rest
Bake the pressed crust on the center rack for about 8 minutes until it looks slightly darker and feels set but not hard. Remove the pan and set it on a wire rack while you prepare the filling; leaving the oven on.
Step 4: Whisk the wet filling components
In a single medium mixing bowl whisk melted, slightly cooled butter with packed light brown sugar until thick, smooth and glossy, resembling wet sand. Add room-temperature creamy Biscoff cookie butter and pure vanilla extract, whisking until fully combined and glossy. Add one room-temperature egg and one yolk and whisk just until incorporated so the mixture remains dense and fudgy rather than airy.
Step 5: Add dry ingredients and fold in cookies
Whisk together flour, baking powder and salt in a separate bowl, then add the dry mix to the wet mixture in two additions, gently folding after each until no dry streaks remain. Fold in the coarsely chopped Biscoff cookies until evenly distributed—the batter should be thick, slightly tacky, and spreadable.
Step 6: Assemble and bake the bars
Spoon or pour the thick batter over the warm, par-baked crust and use an offset spatula or the back of a spoon to spread it evenly to the corners so the top bakes level. Return the pan to the oven and bake for 20–24 minutes until the edges are set and lightly golden and the top is matte with tiny cracks; a toothpick near the edge should come out with a few moist crumbs.
Step 7: Cool the slab completely in the pan
Transfer the hot pan to a wire rack and let the bars cool completely in the pan for at least 1 to 1½ hours at room temperature. This resting time is crucial for achieving clean slices and that dense, fudgy cookie-butter texture.
Step 8: Warm the cookie butter and decorate
Gently warm a small amount of creamy Biscoff cookie butter until pourable (short bursts in the microwave or a warm water bath), then drizzle thin zigzags or a crosshatch across the cooled slab. Immediately scatter roughly crushed cookies and a tiny pinch of flaky sea salt if desired so they adhere to the drizzle as it sets.
Step 9: Chill, slice, and store
For the neatest squares chill the decorated slab in the refrigerator for 30–60 minutes until slightly firm and the drizzle is set. Use the parchment overhang to lift the whole square slab from the pan onto a cutting board and slice into a 4 × 4 grid (16 bars) with a sharp knife, wiping between cuts for tidy edges. Serve at room temperature for the best texture; store cooled bars airtight at room temperature for up to 3 days or refrigerated up to 5 days.
Notes
- Press the crust firmly into the pan for clean squares.
- Use room-temperature eggs for a smoother, denser filling.
- Warm the drizzle briefly; it should be pourable but not hot.
- Chill the slab before slicing for the neatest edges.
- Store airtight at room temperature up to 3 days or refrigerated up to 5 days.
