I still remember the first time I made Mimosa Sangria for a sun-soaked brunch with friends – it felt like capturing a little bottle of summer. I reached for Florida’s Natural orange juice because its bright sweetness cut through the bubbles in the best way, and the pitcher became the centerpiece of the table. If you love fruity, fizzy drinks that look as joyful as they taste, this Mimosa Sangria will be your go-to. It is simple, forgiving, and endlessly adaptable, which means you’ll want to make it again and again.
How This Recipe Became My Brunch Staple
The first time I mixed up this Mimosa Sangria I was nervous about balancing the sweet orange with champagne, but the fresh fruit – strawberries, navel orange, and pineapple – made everything easy. I remember pressing the orange slices and watching the juice bead on the pineapple cubes, the kitchen filling with a sunny citrus scent that felt like the pavement had warmed underfoot. When I served it, friends kept smiling and coming back for more; the bubbles lifted tiny flecks of fruit and made each glass feel celebratory. That memory of laughter, bright fruit, and clinking glasses is why I reach for this recipe whenever I want an effortless, festive drink.
What Makes the Ingredients Sing
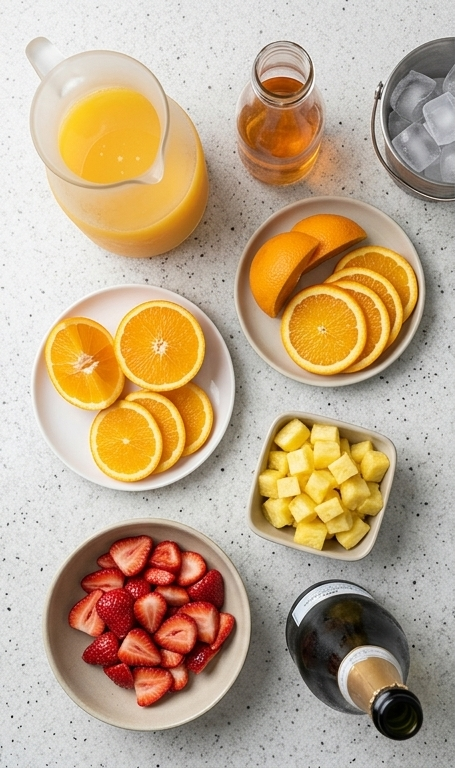
- Florida’s Natural Orange Juice: The backbone of the drink, offering fresh citrus sweetness and pulp for texture; substitute fresh-squeezed orange juice if you prefer a less processed flavor. Choose not-from-concentrate juice for brightness.
- Orange Liqueur (Cointreau or Grand Marnier): Adds depth and a slightly boozy orange note; swap for Triple Sec in a pinch or omit for a virgin version.
- Navel Orange: Provides aromatic oils and pretty slices; pick firm, heavy oranges with bright skin.
- Fresh Strawberries: Bring color and fragrant acidity; ripe but firm berries work best.
- Fresh Pineapple: Adds tropical sweetness and texture; ripe, fragrant pineapple yields the best results.
- Champagne or Dry Sparkling Wine: For effervescence and dryness; a Prosecco or Cava is a budget-friendly swap.
Essential Kitchen Tools and Friendly Advice
This Mimosa Sangria is forgiving, but a few tools make the process smoother and more enjoyable. Use a large clear pitcher so you can see the fruit suspended in the liquid – it makes a pretty presentation. A long wooden spoon or muddler helps release oils and juices from the fruit without smashing everything to mush. A sharp paring knife is essential for thin, even slices of orange and strawberries. If you want to chill quickly, an ice bucket or a shallow ice bath works well.
- Large clear glass pitcher: Makes mixing and serving easier and looks pretty on the table.
- Long wooden spoon or muddler: Ideal for gentle pressing to macerate fruit.
- Paring knife and cutting board: For precise thin slices and neat presentation.
- Ice bucket or shallow bowl for chilling: Optional but handy for quick cooling.
Step-by-Step Preparation Guide
Step 1: Combine and Muddle the Fruit
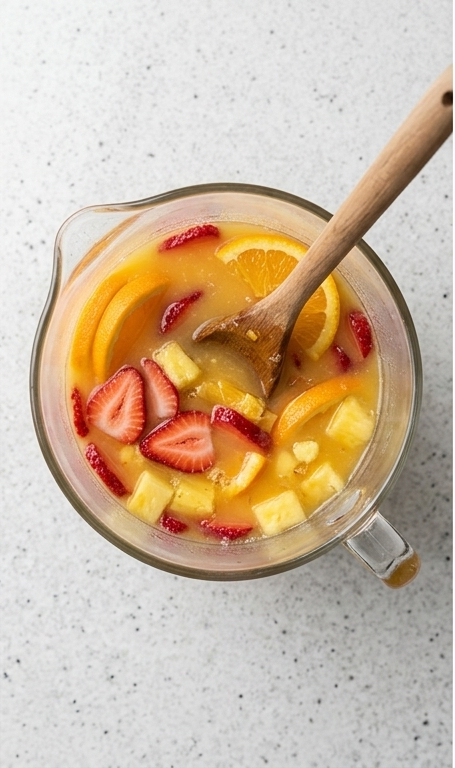
In a large clear glass pitcher pour the fresh orange juice and a splash of orange liqueur, then add the quartered and thinly sliced navel orange, hulled thin strawberry slices, and small cubes of fresh pineapple. Use a long wooden spoon to stir the mixture thoroughly, pressing and twisting gently so the fruit releases bright juices and fragrant oils – the orange segments will look slightly translucent where they’re bruised, the strawberry slices will glisten with syrupy red streaks, and small pineapple cubes will bead with sweet juice. Keep everything contained in the pitcher; the liquid should sit cleanly inside the vessel with a few floating fruit pieces and tiny pulp strands.
Step 2: Chill and Macerate
Transfer the filled pitcher to the refrigerator so the juice and liqueur can marry with the fruit; chilling for at least a short ten-minute rest (or up to a couple of hours) lets the fruit soften and the flavors meld. After cooling, tiny bubbles from trapped air may cling to strawberry seeds and orange rind edges, and the liquid will take on a slightly clouded, pulpy texture as fruit juices disperse – a gentle sheen of condensation on the pitcher signals it’s properly chilled and ready.
Step 3: Build and Top with Bubbles
When ready to serve, portion the orange-fruit mixture into clean clear serving glasses so each is about one-third full; the fruit should sit suspended, color-saturated, and slightly macerated in vivid orange juice. Slowly and carefully pour chilled champagne or dry sparkling wine down the side of each glass so effervescence lifts tiny fruit bits and creates a streaming layer of fine bubbles that rise around orange slices and strawberry edges. If using ice, add it sparingly so the drink remains luminous and not diluted.
Step 4: Garnish and Serve Immediately
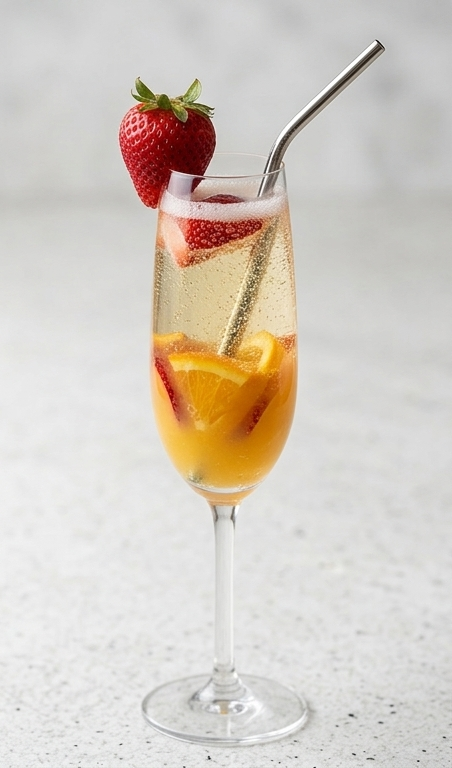
Finish each glass with a single large strawberry perched on the rim and an optional stainless-steel straw, the metal reflecting the pale gold liquid. The final glasses present a golden-yellow, effervescent sangria studded with suspended fruit: glossy orange wedges, floating ruby strawberry slices, and sunlit pineapple cubes. Serve at once while the bubbles are active and the fruit still looks freshly buoyant.
Making It Your Own
I like to tweak proportions depending on the occasion. For a lighter, more brunch-friendly version I reduce the liqueur and use a slightly sweeter Prosecco; for a party I keep the liqueur and use a full-bodied champagne for a more assertive palate. When berries are in season I add a handful of raspberries for extra color and a hint of tartness.
For a non-alcoholic take swap the champagne for sparkling water or a lemon-lime soda and omit the liqueur – it still feels celebratory. Try adding mint or basil for a herbal twist that plays nicely with the orange and pineapple. I often experiment regionally by throwing in local stone fruit in late summer, which makes the Mimosa Sangria feel like it came from that place and time.
How to Serve
If I am hosting, I set the pitcher on a tray with extra glasses, a small bowl of ice, and a platter of sliced fruit so guests can customize their drinks. For a small gathering of six, pour about 1/3 cup of the fruit mixture per glass then top with champagne; to scale up for a party of 12, double the ingredients and keep bottles of chilled sparkling wine nearby so you can top each round quickly.
Garnish matters: skewered strawberry halves or an orange wheel on the rim makes each glass look finished. Use clear glasses to show off the suspended fruit and bubbles, and consider chilled coupe glasses for a vintage vibe. Keep spare cloth napkins handy for sticky fingers and drips.
Storage and Reheating Tips
This Mimosa Sangria is best fresh, so plan to serve within a few hours of assembling for the most vibrant bubbles and fruit texture. If you must store it, keep the orange-fruit base refrigerated in a sealed pitcher for up to 24 hours; add the sparkling wine only when you’re ready to serve to preserve effervescence.
Leftover mixed sangria with bubbles will lose fizz quickly, so transfer any unused drink to a sealed bottle and enjoy cold the same day. If you prefer a make-ahead, mix the fruit and juice the day before and macerate in the refrigerator, then add champagne just before guests arrive.
Common Missteps and How to Avoid Them
Over-muddling the fruit can lead to a cloudy, overly sweet drink and a mushy texture – press gently to extract aroma and juice without pulverizing the fruit. Keep the stirring and pressing light.
Another mistake is adding champagne too soon; it will lose its sparkle if it sits. Always assemble the juice and fruit first, chill, and then top with bubbles right before serving for the best effervescence.
Final Pour: Try It Today
If you want an easy showstopper for brunch or a sunny gathering, try this Mimosa Sangria. It balances bright citrus, ripe berries, and sparkling wine in a way that feels both relaxed and celebratory. Make a pitcher, invite friends, and enjoy the small ritual of pouring the bubbles over a bed of colorful fruit.
Frequently Asked Questions.
- What is the best orange juice to use for Mimosa Sangria? : Use not-from-concentrate orange juice like Florida’s Natural or freshly squeezed orange juice for the brightest, truest flavor.
- Can I make Mimosa Sangria ahead of time? : Yes, you can prepare the fruit and juice base up to 24 hours in advance but add the champagne just before serving to keep it fizzy.
- What can I use instead of orange liqueur? : Swap Triple Sec or omit for a non-alcoholic version; a splash of orange extract can add aroma if you skip the liqueur.
- How many servings does this Mimosa Sangria recipe make? : This recipe makes about 6 servings, depending on glass size and how much champagne you pour.
- Can I substitute other fruits in this Mimosa Sangria? : Absolutely, try peaches, raspberries, or melon in season for different flavor profiles.
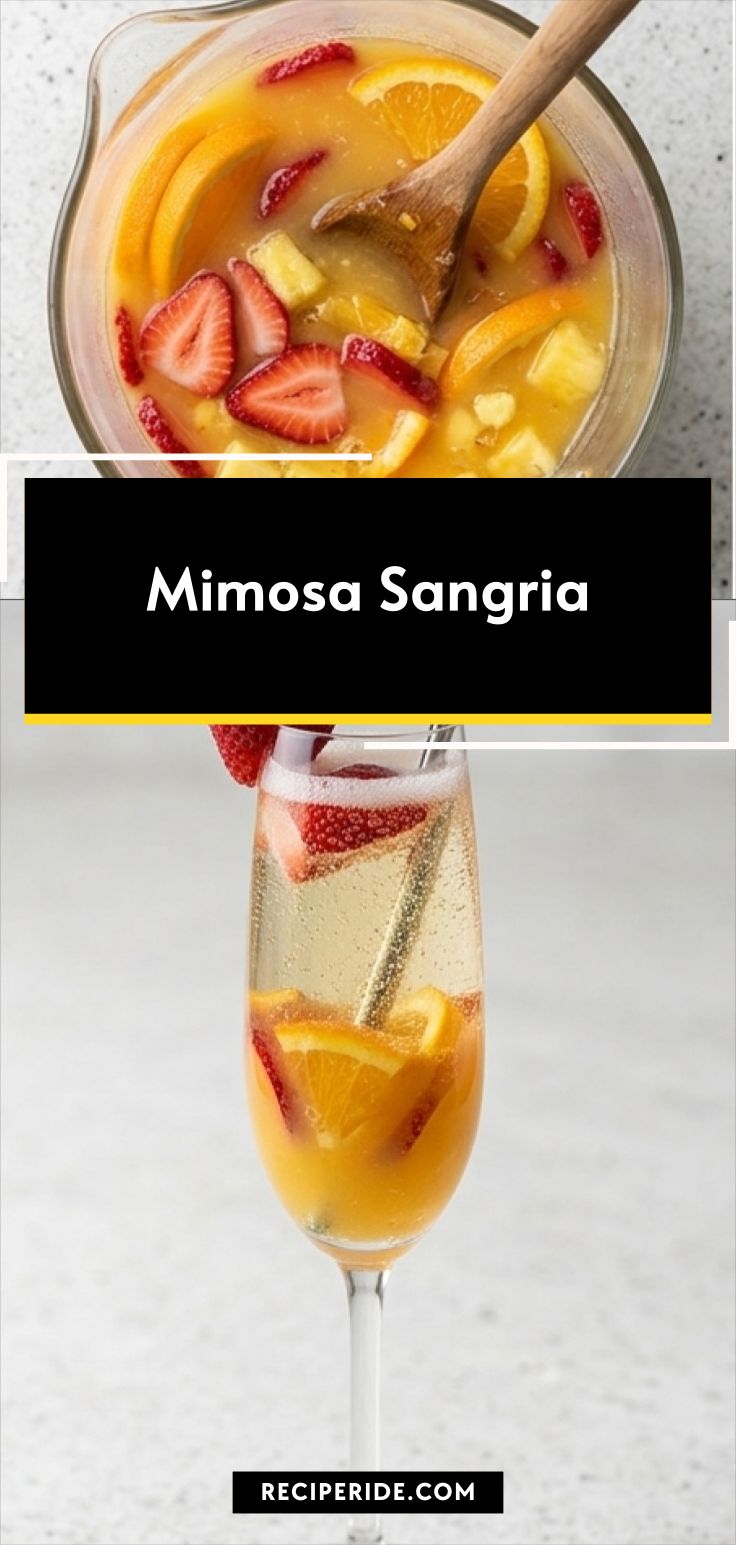
Mimosa Sangria
Make Mimosa Sangria: a bubbly orange, strawberry, and pineapple sangria perfect for brunch.
Ingredients
Instructions
Step 1: Combine and Muddle the Fruit
In a large clear glass pitcher pour the fresh orange juice and a splash of orange liqueur, then add the quartered and thinly sliced navel orange, hulled thin strawberry slices, and small cubes of fresh pineapple. Use a long wooden spoon to stir the mixture thoroughly, pressing and twisting gently so the fruit releases bright juices and fragrant oils — the orange segments will look slightly translucent where they’re bruised, the strawberry slices will glisten with syrupy red streaks, and small pineapple cubes will bead with sweet juice. Keep everything contained in the pitcher; the liquid should sit cleanly inside the vessel with a few floating fruit pieces and tiny pulp strands.
Step 2: Chill and Macerate
Transfer the filled pitcher to the refrigerator so the juice and liqueur can marry with the fruit; chilling for at least a short ten-minute rest (or up to a couple of hours) lets the fruit soften and the flavors meld. After cooling, tiny bubbles from trapped air may cling to strawberry seeds and orange rind edges, and the liquid will take on a slightly clouded, pulpy texture as fruit juices disperse — a gentle sheen of condensation on the pitcher signals it’s properly chilled and ready.
Step 3: Build and Top with Bubbles
When ready to serve, portion the orange-fruit mixture into clean clear serving glasses so each is about one-third full; the fruit should sit suspended, color-saturated, and slightly macerated in vivid orange juice. Slowly and carefully pour chilled champagne or dry sparkling wine down the side of each glass so effervescence lifts tiny fruit bits and creates a streaming layer of fine bubbles that rise around orange slices and strawberry edges. If using ice, add it sparingly so the drink remains luminous and not diluted.
Step 4: Garnish and Serve Immediately
Finish each glass with a single large strawberry perched on the rim and an optional stainless-steel straw, the metal reflecting the pale gold liquid. The final glasses present a golden-yellow, effervescent sangria studded with suspended fruit: glossy orange wedges, floating ruby strawberry slices, and sunlit pineapple cubes. Serve at once while the bubbles are active and the fruit still looks freshly buoyant.
Notes
- Add the sparkling wine only just before serving to preserve bubbles.
- Use ripe but firm fruit so slices hold shape when macerated.
- Chill the pitcher for at least 10 minutes for best flavor melding.
- For a non-alcoholic version, replace champagne with sparkling water or soda.
- Adjust liqueur amount to taste or omit for a lighter drink.