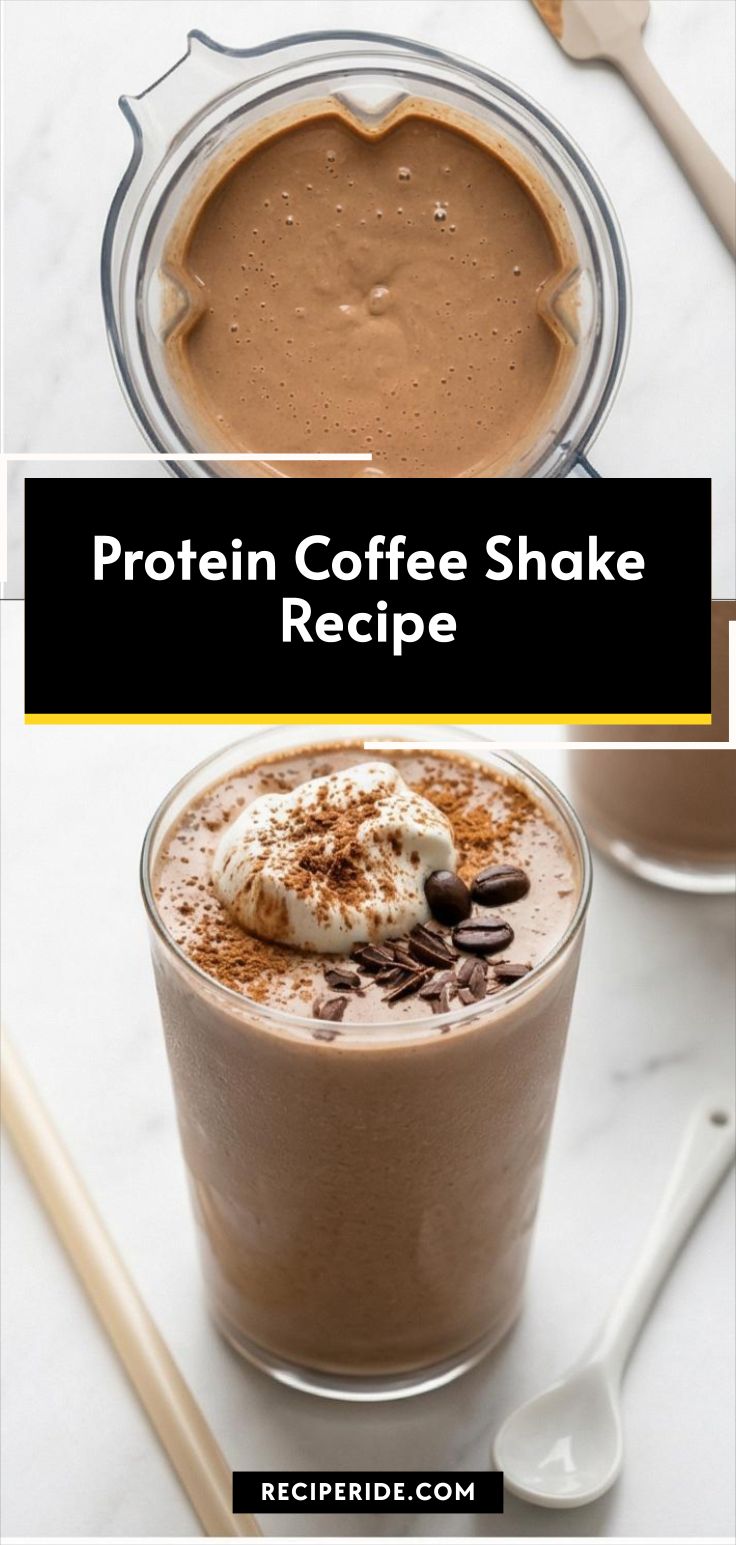
Protein Coffee Shake Recipe: if you love coffee and a quick hit of protein, this shake is a morning game changer. I started making my Protein Coffee Shake Recipe on rushed weekday mornings and it quickly became the easiest way to get both caffeine and fuel before a workout. The blender does most of the work, and the result feels like a dessert that also counts as breakfast. If you want something that tastes indulgent but still supports a busy schedule, this recipe is exactly worth trying.
How This Protein Coffee Shake Recipe Became My Rainy-Day Favorite
I remember the first time I made this Protein Coffee Shake Recipe on a slow, rainy Saturday. The kitchen smelled like strong brewed coffee and warm banana as I sliced the fruit, and the ritual of freezing the slices felt oddly comforting. I was a little skeptical that a drink could hit both the craving for chocolatey coffee and the need for something substantial, but the peanut butter and protein powder stitched everything together. I sipped it by the window, feeling cozy and energized at once, and from that afternoon on it became my go-to treat when the weather made me want both comfort and a small boost.
Meet the Main Ingredients
- Strong brewed coffee: The backbone for real coffee flavor and caffeine, choose a bold roast. Substitute with cold brew for a smoother, less acidic drink.
- Unsweetened almond milk: Adds creaminess without heaviness; use dairy milk for richer texture or oat milk for a naturally sweet note.
- Frozen banana: Thickens and sweetens naturally; ripe bananas work best. For a lower-sugar option, use frozen avocado slices.
- Protein powder: Chocolate or vanilla lifts the shake into meal territory; swap for plant-based powder if you prefer.
- Natural peanut or almond butter: Adds healthy fats and body; sunflower seed butter works for nut-free needs.
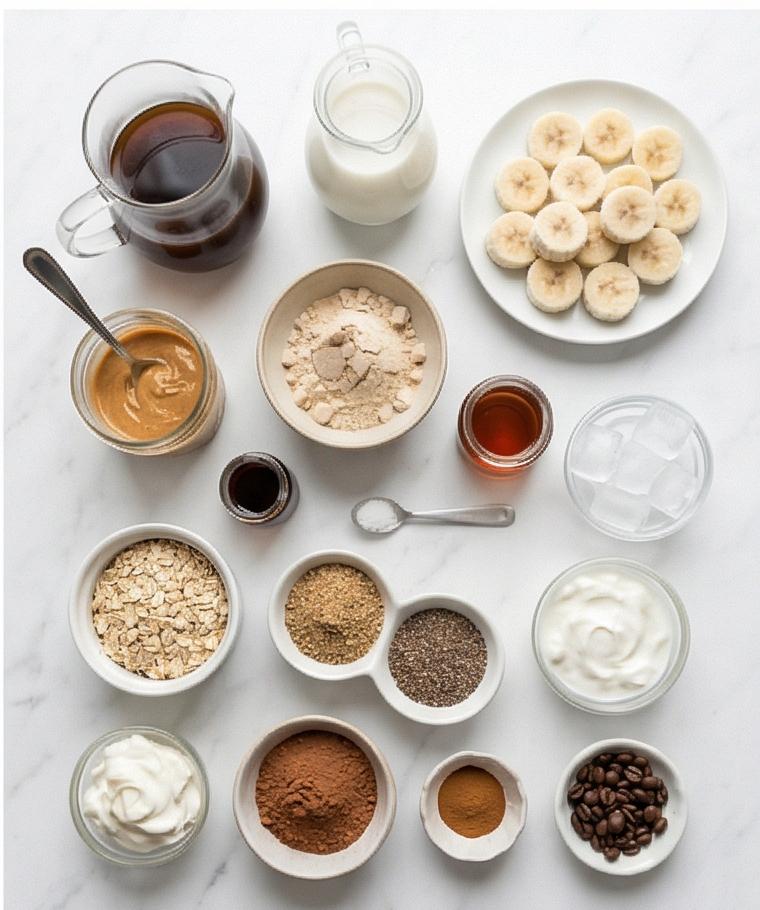
Essential Kitchen Tools
Start with a quick note: the right tools make a thick, smooth Protein Coffee Shake Recipe effortless. A powerful blender is the most important item, since it pulverizes ice and frozen banana without warming the shake. A fine mesh measuring set helps portion the protein and liquid accurately, and a spatula is handy for scraping nut butter into the blades.
- High-speed blender: Essential for silky texture; if you have a less powerful blender, chop the frozen banana smaller and use smaller ice amounts.
- Measuring cups and spoons: Keep flavor and nutrition consistent; a kitchen scale is ideal if you like precision.
- Freezer tray or plate: For freezing banana slices in a single layer so they don’t clump.
- Tall chilled glass and wide straw: For serving and enjoying the thick shake.
Step-by-Step Preparation Guide.
Step 1: Brew and chill the coffee; freeze the banana
Brew a very strong cup of coffee and let it cool completely at room temperature, then transfer it to the refrigerator until well chilled, the shake relies on cold coffee so the ice and frozen banana don’t melt and thin the texture. While the coffee cools, peel and slice the ripe banana into 1/2-inch rounds, arrange the slices in a single layer on a small tray or plate, and freeze until rock-firm. This pairing of chilled coffee and fully frozen banana is the foundation for the thick, creamy mouthfeel of the finished shake.
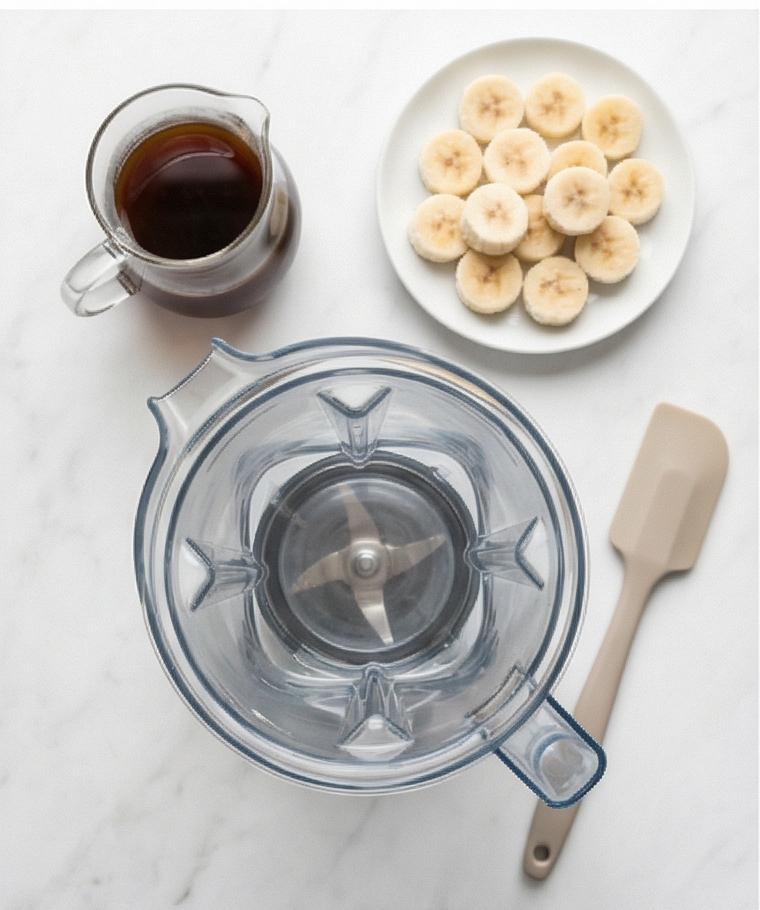
Step 2: Layer the liquids and frozen fruit in the blender
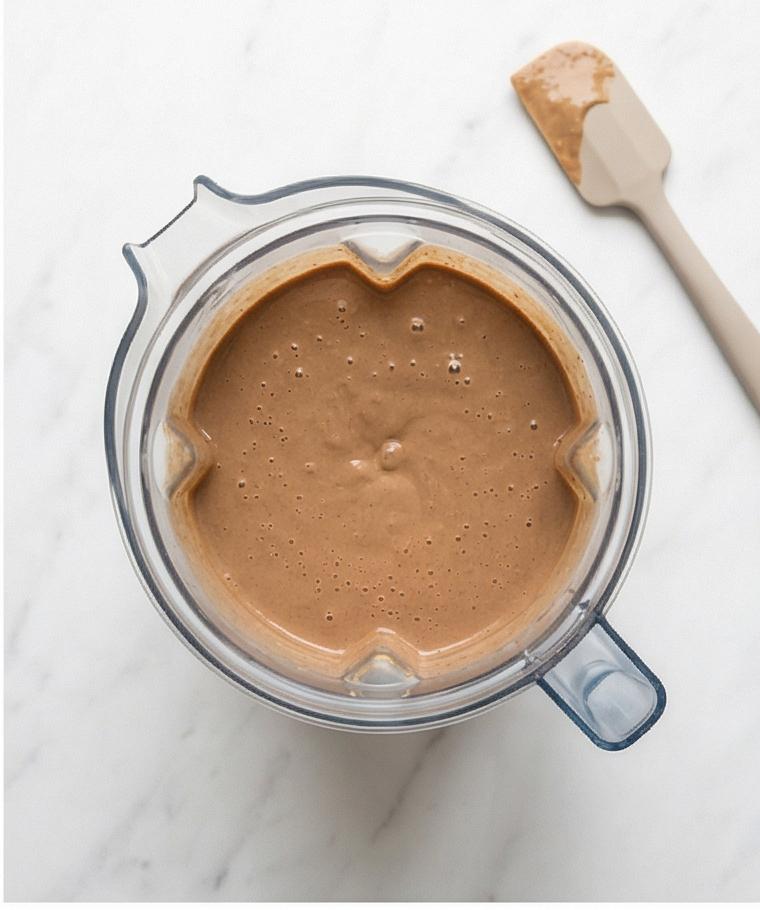
Set a clean, dry clear blender jar on the marble surface. Pour the chilled brewed coffee into the jar, then add the cold almond milk so the liquids form a dark coffee-and-pale-milk base. Add the frozen banana rounds, spreading them evenly over the liquids so they blend smoothly without clumping. Sprinkle one scoop of protein powder over the top so it sits dry and separate before blending, reducing the chance of lumps.
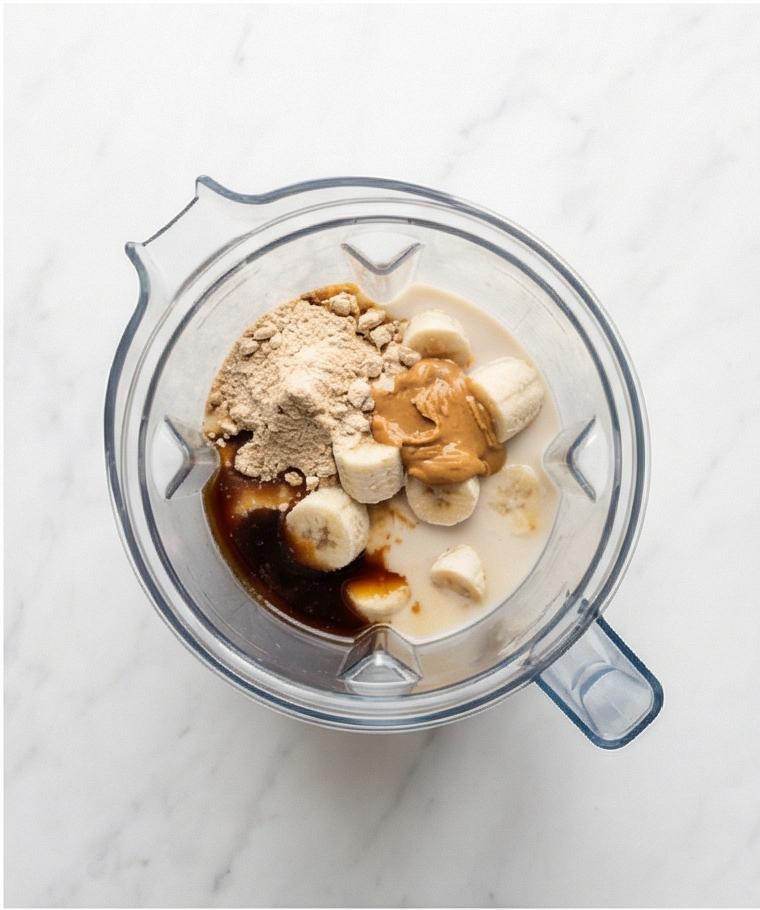
Step 3: Add the flavor boosters and optional body builders
Spoon in the natural peanut (or almond) butter, add a teaspoon or two of maple syrup if you want sweetness, then measure and add the vanilla extract and a small pinch of fine sea salt to quietly lift the flavors. If you want extra thickness or nutrition, add the rolled oats, ground flaxseed or chia seeds, and the cold Greek yogurt now, these ingredients change the density and creaminess dramatically, so they belong before the ice. Everything should sit layered in the jar: powders, nut butter dollop, and small dry add-ins.
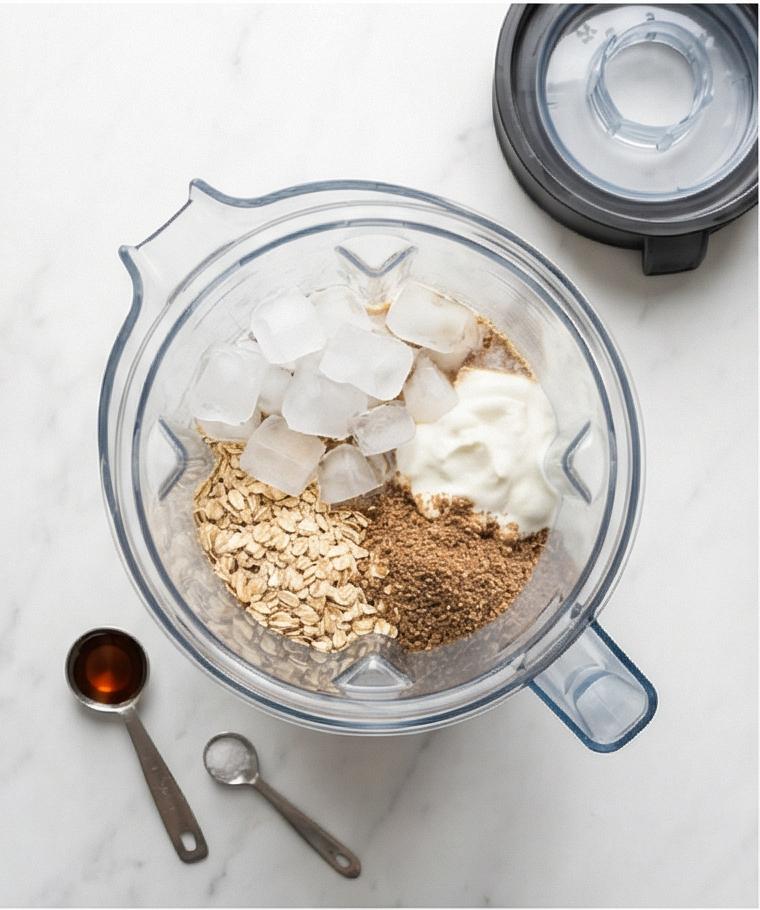
Step 4: Ice and secure the lid, then blend to silky smoothness
Top the jar with the measured ice cubes (start with 1/2 cup for a creamy but slightly frosty texture), secure the lid, and pulse on low to break up the ice and frozen banana, then increase to high speed until the mixture is uniformly smooth and thick with no visible chunks. If the blender struggles, stop, scrape down the sides with a spatula, then finish blending so the texture is homogenous and glossy, think velvety, opaque mocha. Taste and adjust: a splash more almond milk loosens it, another teaspoon of maple syrup sweetens it, and extra ice chills and thickens.
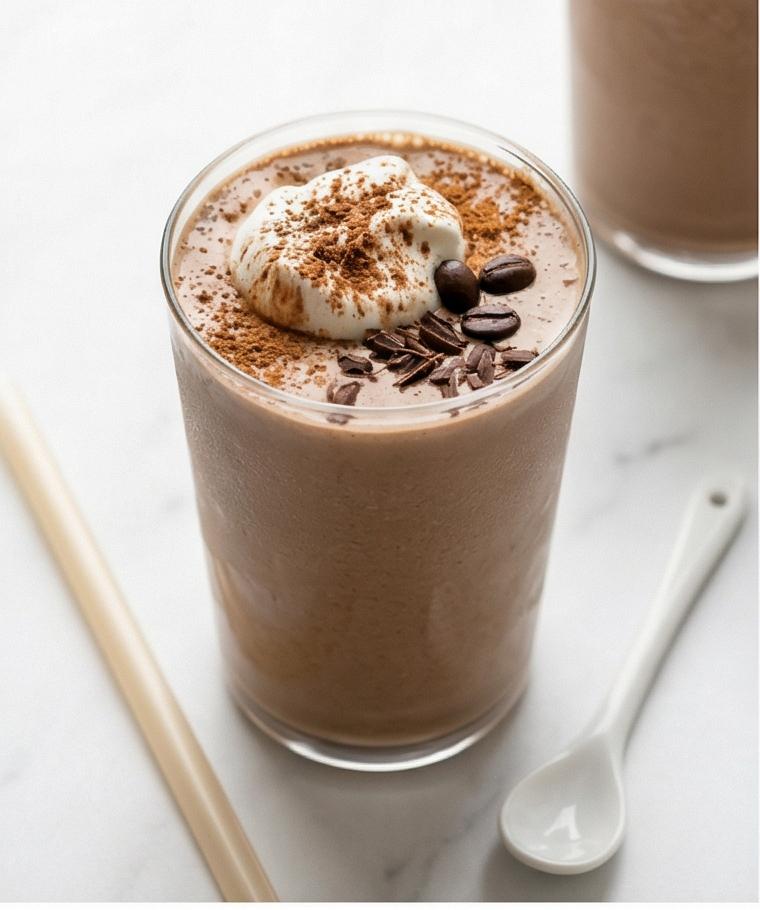
Step 5: Pour, garnish, and serve immediately
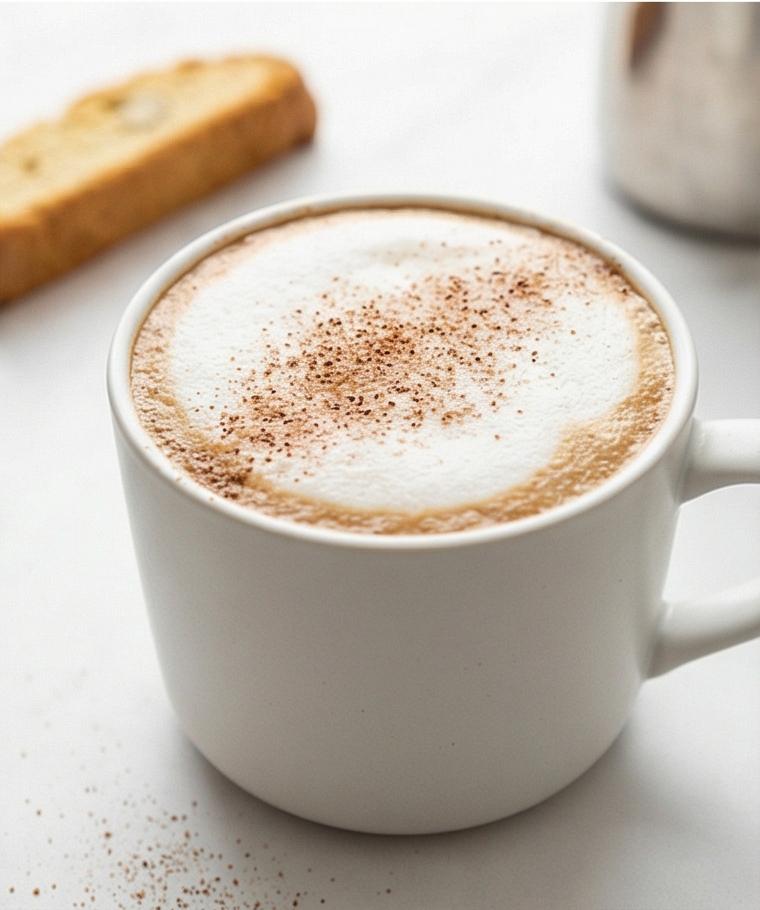
Pour the finished protein coffee shake into a chilled tall glass, leaving a little room for garnishes. Top with cold whipped cream if using, dust lightly with unsweetened cocoa powder and a whisper of ground cinnamon, and finish with 3-4 coffee beans or a few chocolate shavings for a neat, simple crown. Serve right away with a wide straw or spoon so the thick texture is easy to enjoy, the ideal experience is well-chilled and luxuriously creamy.
Making It Your Own
I like experimenting with small swaps to tune the Protein Coffee Shake Recipe to my mood. For a plant-forward twist I swap whey for pea protein and use oat milk, which makes the finish slightly sweeter. When I want a richer shake I add an extra half tablespoon of peanut butter and a splash of whole milk.
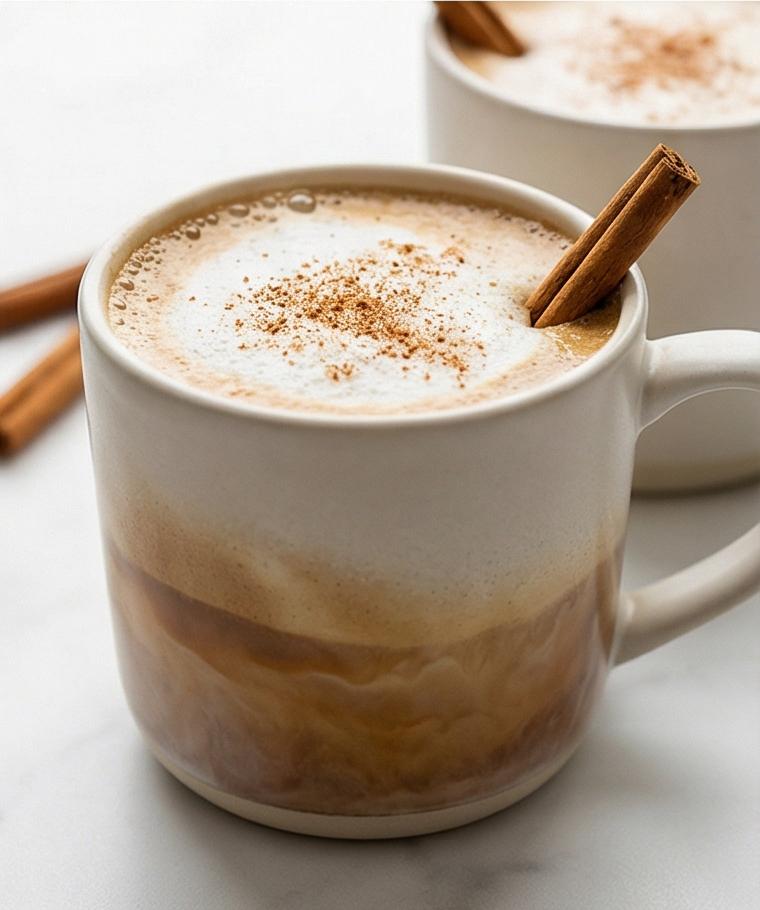
Seasonal experiments are fun too. In cooler months I stir in a pinch more cinnamon and a touch of instant espresso powder for depth. In summer I sometimes blend in a few frozen berries for a mocha-fruit surprise that brightens the drink.
How to Serve
Imagine you are hosting a casual brunch: make each Protein Coffee Shake Recipe just before guests arrive so the texture stays thick and icy. For a party, blend individual shakes and keep them in chilled glasses, or multiply ingredients and use a commercial blender to batch 4 to 6 servings quickly.
Garnish choices set the tone. For an elegant serving, top with lightly whipped cream and cocoa dusting. For a gym-ready presentation, skip the garnishes and serve in insulated bottles so the shake stays cold on the way to your workout.
Storage and Reheating Tips
This shake is best enjoyed immediately for texture and flavor. If you must store it, pour into an airtight jar and refrigerate for up to 24 hours, though expect a slight separation that you can reblend quickly to restore creaminess.
Do not microwave to reheat, because heat breaks the texture and makes the banana grainy. If you want a warm version, blend the shake without ice and heat gently on the stove while stirring, but know the result will be more of a coffee smoothie than the original chilled Protein Coffee Shake Recipe.
Common Slip-Ups and How to Avoid Them
Too thin a shake is the usual culprit, often from warm coffee or not-frozen banana. Always chill your coffee and freeze the banana slices fully. Add ice gradually so you control thickness.
Lumpy protein powder happens when you dump powder into warm liquid. Layer the powder over the frozen banana or blend briefly on low first, then increase speed. If your blender stalls, pulse and scrape down the sides.
Ready to Blend
Give this Protein Coffee Shake Recipe a try the next time you need a fast, delicious pick-me-up. It balances real coffee flavor with satisfying protein and healthy fats, and a few tiny tweaks make it yours. Enjoy the process, and have fun mixing in your favorite additions.
Frequently Asked Questions.
- Q: Can I use cold brew instead of brewed coffee? A: Yes, cold brew works great and yields a smoother, less acidic flavor.
- Q: Can I make this dairy free? A: Absolutely, use unsweetened almond milk or oat milk and swap in plant-based protein powder.
- Q: How do I make the shake thicker? A: Use fully frozen banana, add less almond milk, and include rolled oats or Greek yogurt.
- Q: Can I prepare the shake ahead of time? A: You can refrigerate it up to 24 hours but expect some separation; reblend before serving.
- Q: Is this suitable post-workout? A: Yes, with protein powder and peanut butter it makes a good post-workout recovery drink.
Protein Coffee Shake Recipe
Blend a creamy Protein Coffee Shake Recipe for a quick, caffeinated high-protein breakfast or snack.
Ingredients
Instructions
Step 1: Brew and chill the coffee; freeze the banana
Brew a very strong cup of coffee and let it cool completely at room temperature, then transfer it to the refrigerator until well chilled — the shake relies on cold coffee so the ice and frozen banana don’t melt and thin the texture. While the coffee cools, peel and slice the ripe banana into 1/2‑inch rounds, arrange the slices in a single layer on a small tray or plate, and freeze until rock‑firm. This pairing of chilled coffee and fully frozen banana is the foundation for the thick, creamy mouthfeel of the finished shake.
Step 2: Layer the liquids and frozen fruit in the blender
Set a clean, dry clear blender jar on the marble surface. Pour the chilled brewed coffee into the jar, then add the cold almond milk so the liquids form a dark coffee‑and‑pale‑milk base. Add the frozen banana rounds, spreading them evenly over the liquids so they blend smoothly without clumping. Sprinkle one scoop of protein powder over the top so it sits dry and separate before blending, reducing the chance of lumps.
Step 3: Add the flavor boosters and optional body builders
Spoon in the natural peanut (or almond) butter, add a teaspoon or two of maple syrup if you want sweetness, then measure and add the vanilla extract and a small pinch of fine sea salt to quietly lift the flavors. If you want extra thickness or nutrition, add the rolled oats, ground flaxseed or chia seeds, and the cold Greek yogurt now — these ingredients change the density and creaminess dramatically, so they belong before the ice. Everything should sit layered in the jar: powders, nut butter dollop, and small dry add‑ins.
Step 4: Ice and secure the lid, then blend to silky smoothness
Top the jar with the measured ice cubes (start with 1/2 cup for a creamy but slightly frosty texture), secure the lid, and pulse on low to break up the ice and frozen banana, then increase to high speed until the mixture is uniformly smooth and thick with no visible chunks. If the blender struggles, stop, scrape down the sides with a spatula, then finish blending so the texture is homogenous and glossy — think velvety, opaque mocha. Taste and adjust: a splash more almond milk loosens it, another teaspoon of maple syrup sweetens it, and extra ice chills and thickens.
Step 5: Pour, garnish, and serve immediately
Pour the finished protein coffee shake into a chilled tall glass, leaving a little room for garnishes. Top with cold whipped cream if using, dust lightly with unsweetened cocoa powder and a whisper of ground cinnamon, and finish with 3–4 coffee beans or a few chocolate shavings for a neat, simple crown. Serve right away with a wide straw or spoon so the thick texture is easy to enjoy — the ideal experience is well‑chilled and luxuriously creamy.
Notes
- Use very cold brewed coffee and fully frozen banana slices to keep the shake thick.
- If your blender struggles, pulse and scrape the sides, then finish on high.
- Swap protein types and milk to suit dietary needs or flavor preferences.
- For a lower sugar version, omit maple syrup and use a less ripe banana.
- To batch make, blend and keep chilled in individual jars, then reblend briefly before serving.
