Mimosa Cake is one of those recipes I come back to when I want something that feels celebratory but not fussy. I first learned this version after a brunch where the host served a slice that tasted like sunshine and bubbles. Over the years I have tweaked little things, but the core remains the same: tender sponge soaked with champagne notes and a bright orange Swiss-style buttercream. I love making Mimosa Cake for birthdays and small gatherings because it looks elegant while staying comfortably approachable.
There is something about the balance of citrus, light crumb, and silky frosting that makes this Mimosa Cake worth the extra care. It feels like a treat and like a memory at the same time, which is why I reach for it when I want baking to feel meaningful.
How Mimosa Cake Became My Weekend Celebration
The first time I baked this Mimosa Cake I remember the kitchen smelling like a florist shop crossed with a bakery. It was raining and I was testing recipes between errands, clutching an umbrella and a notepad. When I cut into the first warm layer and caught the orange zest on my sleeve, I felt oddly triumphant. I decorated the cake with a scatter of berries and the whole table fell quiet for that first bite. My friends closed their eyes and then laughed, saying it tasted like a grown up pop of joy. That memory stuck, and now whenever I make this cake I replay the little victories of that afternoon: the easy laughter, the bright citrus, and the way the frosting smoothed out as though it had always belonged to the cake.
The Ingredients That Make This Mimosa Cake Sing
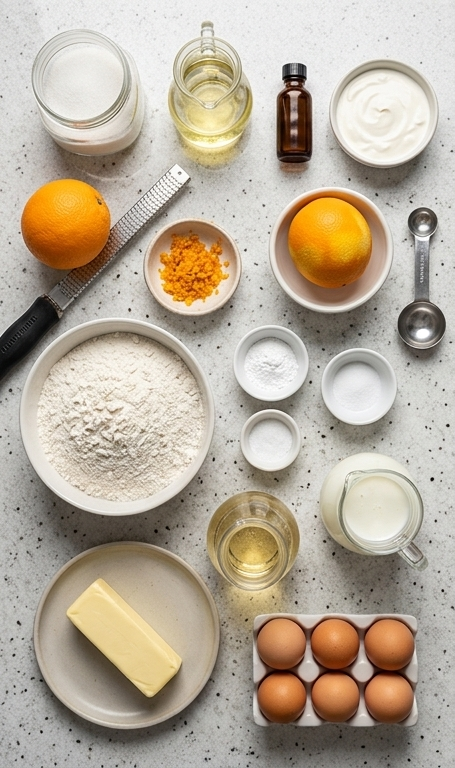
- Granulated Sugar: Sweetens both cake and meringue, and helps create the glossy Swiss foundation. Substitute with superfine sugar for smoother dissolution.
- Vegetable Oil: Keeps the crumb tender and moist; a neutral canola oil works well as a swap.
- Eggs and Egg Whites: Eggs enrich the cake, while separate whites form the meringue for the buttercream. Use room-temperature eggs for best volume.
- Orange Zest: Provides the citrus lift that defines the Mimosa Cake; substitute with lemon or a mix for variation.
- Champagne: Adds delicate fizz and aroma; dry sparkling wine or prosecco are fine alternatives.
- Unsalted Butter: The backbone of the Swiss-style buttercream; choose high quality butter for better flavor.
Essential Kitchen Tools
A few reliable tools make a delicate cake like this much easier. You do not need every gadget, but the right basics will save time and stress. A stand mixer is a game changer for the meringue and buttercream, though a hand mixer also works if you are patient. Good quality bowls, an accurate oven thermometer, and a few flexible spatulas are worth the investment. Also, an offset spatula helps make the crumb coat smooth.
- Stand mixer: Best for stable meringue and even butter incorporation; hand mixer is an alternative.
- 9-inch round pans: Use three for a three-layer cake; doubling the recipe yields four layers.
- Silpat or parchment: Prevents sticking and helps even browning.
- Instant-read thermometer: Handy for checking meringue temperature and oven accuracy.
- Offset spatula and bench scraper: For smooth frosting and tidy sides.
Step-by-Step Preparation Guide
Step 1: Combine wet bases and aerate
Preheat the oven to 350°F, then begin by whisking the granulated sugar, vegetable oil, eggs, and pure vanilla extract together in a large mixing bowl. Beat on medium speed until the mixture lightens in color and the oil and eggs feel fully incorporated—about a couple of minutes—stopping to scrape the bowl so everything becomes uniform and slightly aerated. This is where the cake gains its initial silk and lift, so aim for a glossy, cohesive liquid batter that still pours easily.
Step 2: Enrich with dairy and citrus
Fold the sour cream and freshly zested orange into the wet mixture, beating briefly just to combine. The sour cream will add tang and weight while the orange zest releases bright aromatic oils; you should see tiny orange flecks suspended in a smooth, pale-yellow batter. Scrape the sides and bottom of the bowl to keep the texture even and homogenous.
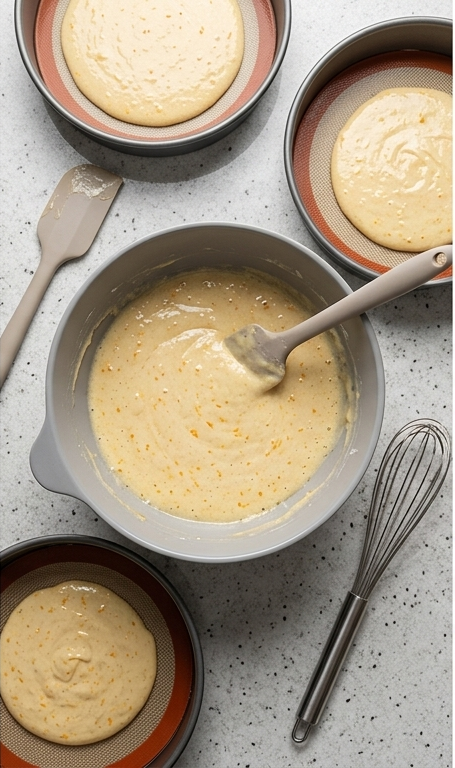
Step 3: Incorporate dry ingredients and leaveners, then hydrate
In a separate bowl whisk together the all-purpose flour, baking powder, and salt until evenly distributed. With the mixer on low, alternate adding the dry mixture with the buttermilk and champagne, starting and ending with the dry. Mix only until the flour has just incorporated—stop when you can no longer see streaks of flour and the batter falls from the spatula in a thick, slightly ribboning stream. Use a spatula to fold from the bottom up so the batter remains airy. Divide the batter into the prepared 9-inch round pans lined with Silpat mats and bake 18–22 minutes until a toothpick comes out clean; cool briefly, then remove from pans and cool completely. Repeat as needed to produce the three layers for assembly.
Step 4: Build the Swiss-style meringue foundation
Combine the granulated sugar and room-temperature egg whites in a heatproof stainless-steel mixing bowl and set that bowl over (but not touching) a pan of gently simmering water. Stir constantly as the mixture warms until the sugar fully dissolves and the mixture reaches the proper gentle temperature and feels smooth between fingers. This creates the safe, silky base for the frosting and transforms raw egg whites into a glossy, stable syrup.
Step 5: Whip to glossy peaks
Transfer the warmed sugar–egg-white mixture to a stand mixer fitted with the whisk attachment. Whisk starting on low, gradually increasing to medium and beat for roughly 10–15 minutes until the mixture becomes bright white, glossy, and holds thick, soft peaks. The bowl should feel cool to the touch at the end of this stage—this is the moment the meringue has developed structure and sheen.
Step 6: Enrich with butter while stabilizing texture
Switch the mixer to the paddle attachment and, with the mixer on medium-low, add room-temperature butter a couple of tablespoons at a time, allowing each addition to incorporate fully before adding more. The frosting may momentarily appear curdled; continue to beat patiently. As the butter is incorporated the mixture will smooth and transform from satin meringue into a silky buttercream with body.
Step 7: Flavor and finish the frosting
Stir in vanilla bean paste (or pure vanilla) and additional orange zest, then beat on medium for several minutes until the buttercream is glossy, silky, and spreadable. Check the texture: it should be light, emulsion-stable, and able to hold soft ridges from a spatula while still smoothing easily.
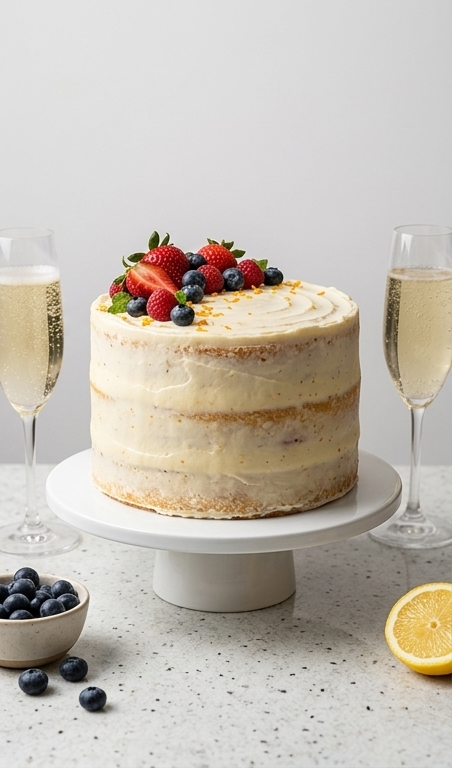
Step 8: Assemble and finish the Mimosa Cake
Level the cooled cake layers if needed, then spread an even layer of the orange-scented Swiss-style buttercream between each layer. Apply a thin crumb coat and chill briefly if desired, then finish with a rustic outer layer that lets small flashes of the golden sponge peek through. Top with a bright cluster of strawberries, blueberries, and raspberries, scatter a little grated orange zest, and tuck in a few small green leaves for fresh contrast. Present the assembled three-layer cake on a round white cake stand centered on the same surface; place two fluted glasses of a sparkling beverage nearby with a small bowl of extra berries and a slice of lemon as garnish.
Step 9: Chill briefly and serve
Let the finished cake rest just long enough for the buttercream to set slightly, then bring to room temperature for serving so the texture is soft and tender. Slice with a warm knife and enjoy the delicate champagne aroma and citrus lift balanced by the silken buttercream and tender crumb.
Making It Your Own
I often swap the champagne for prosecco when I want a slightly fruitier top note. For a nonalcoholic twist I substitute sparkling white grape juice and a teaspoon of vanilla for extra depth. Each change alters the mood of the Mimosa Cake in a small, satisfying way.
If you need it dairy free try coconut cream in the cake and a stabilized vegan butter for the frosting. The structure will be slightly softer but still very pleasing.
For a seasonal spin add a splash of Grand Marnier and fold in a few chopped macerated raspberries between layers for a bright summer finish.
How to Serve the Mimosa Cake
When I host, I slice the cake into modest wedges and arrange them on a white platter so the orange zest and berries pop. Serve with tall flutes of sparkling wine or a nonalcoholic spritzer to mirror the champagne note in the cake. If you expect a crowd, double the recipe and stack four thin layers so each slice feels like a celebration.
For a brunch, pair the Mimosa Cake with fresh fruit, shortbread cookies, and a cheese plate to balance textures. For an intimate dessert, plate individual slices with a drizzle of warmed berry coulis and a few mint leaves for contrast.
Storage and Reheating Tips
Store the assembled Mimosa Cake in the refrigerator, covered lightly to prevent condensation. The buttercream benefits from a cool environment, and the cake keeps well for up to three days when chilled.
To serve, let the cake come to room temperature for about 20 to 30 minutes so the buttercream softens and the flavors open. Avoid reheating in the oven; instead warm slices briefly in a low toaster oven if you prefer a slightly tender crumb.
Common Slipups and How to Dodge Them
One common slipup is overbeating the batter once the flour is added. Stop mixing as soon as the flour disappears to keep the crumb tender. Another is adding the butter too cold to the meringue; room-temperature butter will produce a smooth, emulsion-stable buttercream.
Also watch the meringue while it warms over the pan. Stir constantly and check that the sugar dissolves, or you may end up with a grainy texture in the finished frosting.
Final Slice
Give this Mimosa Cake a try the next time you want a dessert that feels both festive and comforting. It rewards a little patience and always makes a table feel special.
Frequently Asked Questions.
- Q: Can I use nonalcoholic sparkling wine instead of champagne? A: Yes, nonalcoholic sparkling wine or sparkling white grape juice works well and keeps the flavor profile bright.
- Q: How far ahead can I make the cake? A: You can bake layers a day ahead and store them wrapped in the refrigerator; assemble the next day for best texture.
- Q: Is it safe to use raw egg whites for Swiss meringue? A: The whites are gently warmed until the sugar dissolves which raises the temperature, and then whipped; this is the standard method for Swiss meringue and is considered safe when done correctly.
- Q: Can I freeze the cake? A: You can freeze individual unfrosted layers wrapped well for up to one month; thaw overnight in the refrigerator before assembling.
- Q: How do I fix curdled buttercream? A: Keep beating at medium speed and be patient; if it stays separated, chill briefly and then beat again to help the emulsion come together.
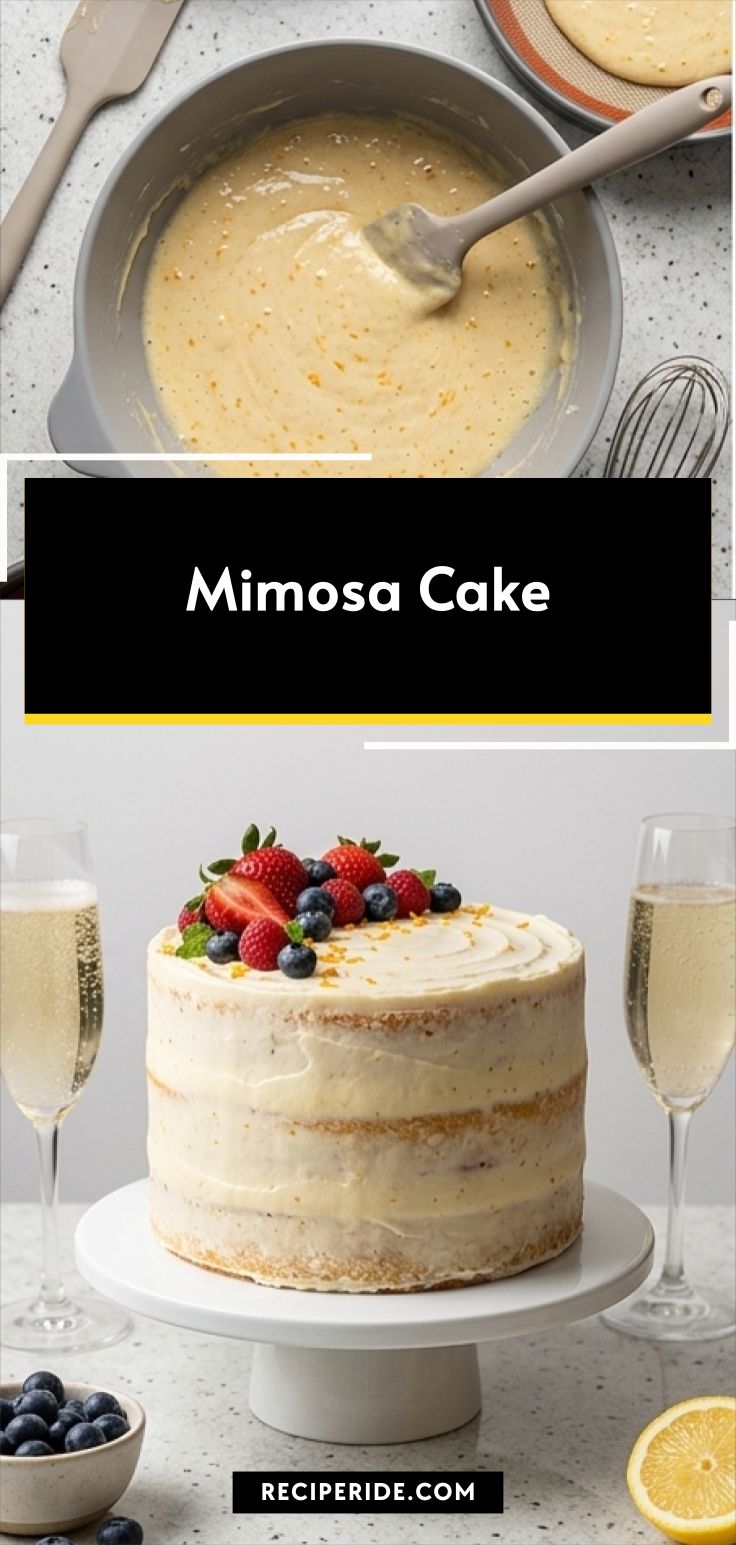
Mimosa Cake
Bake a bright Mimosa Cake with champagne-scented layers and orange Swiss buttercream for an elegant celebration.
Ingredients
Instructions
Step 1: Combine wet bases and aerate
Preheat the oven to 350°F, then begin by whisking the granulated sugar, vegetable oil, eggs, and pure vanilla extract together in a large mixing bowl. Beat on medium speed until the mixture lightens in color and the oil and eggs feel fully incorporated—about a couple of minutes—stopping to scrape the bowl so everything becomes uniform and slightly aerated. This is where the cake gains its initial silk and lift, so aim for a glossy, cohesive liquid batter that still pours easily.
Step 2: Enrich with dairy and citrus
Fold the sour cream and freshly zested orange into the wet mixture, beating briefly just to combine. The sour cream will add tang and weight while the orange zest releases bright aromatic oils; you should see tiny orange flecks suspended in a smooth, pale-yellow batter. Scrape the sides and bottom of the bowl to keep the texture even and homogenous.
Step 3: Incorporate dry ingredients and leaveners, then hydrate
In a separate bowl whisk together the all-purpose flour, baking powder, and salt until evenly distributed. With the mixer on low, alternate adding the dry mixture with the buttermilk and champagne, starting and ending with the dry. Mix only until the flour has just incorporated—stop when you can no longer see streaks of flour and the batter falls from the spatula in a thick, slightly ribboning stream. Use a spatula to fold from the bottom up so the batter remains airy. Divide the batter into the prepared 9-inch round pans lined with Silpat mats and bake 18–22 minutes until a toothpick comes out clean; cool briefly, then remove from pans and cool completely. Repeat as needed to produce the three layers for assembly.
Step 4: Build the Swiss-style meringue foundation
Combine the granulated sugar and room-temperature egg whites in a heatproof stainless-steel mixing bowl and set that bowl over (but not touching) a pan of gently simmering water. Stir constantly as the mixture warms until the sugar fully dissolves and the mixture reaches the proper gentle temperature and feels smooth between fingers. This creates the safe, silky base for the frosting and transforms raw egg whites into a glossy, stable syrup.
Step 5: Whip to glossy peaks
Transfer the warmed sugar–egg-white mixture to a stand mixer fitted with the whisk attachment. Whisk starting on low, gradually increasing to medium and beat for roughly 10–15 minutes until the mixture becomes bright white, glossy, and holds thick, soft peaks. The bowl should feel cool to the touch at the end of this stage—this is the moment the meringue has developed structure and sheen.
Step 6: Enrich with butter while stabilizing texture
Switch the mixer to the paddle attachment and, with the mixer on medium-low, add room-temperature butter a couple of tablespoons at a time, allowing each addition to incorporate fully before adding more. The frosting may momentarily appear curdled; continue to beat patiently. As the butter is incorporated the mixture will smooth and transform from satin meringue into a silky buttercream with body.
Step 7: Flavor and finish the frosting
Stir in vanilla bean paste (or pure vanilla) and additional orange zest, then beat on medium for several minutes until the buttercream is glossy, silky, and spreadable. Check the texture: it should be light, emulsion-stable, and able to hold soft ridges from a spatula while still smoothing easily.
Step 8: Assemble and finish the Mimosa Cake
Level the cooled cake layers if needed, then spread an even layer of the orange-scented Swiss-style buttercream between each layer. Apply a thin crumb coat and chill briefly if desired, then finish with a rustic outer layer that lets small flashes of the golden sponge peek through. Top with a bright cluster of strawberries, blueberries, and raspberries, scatter a little grated orange zest, and tuck in a few small green leaves for fresh contrast. Present the assembled three-layer cake on a round white cake stand centered on the same surface; place two fluted glasses of a sparkling beverage nearby with a small bowl of extra berries and a slice of lemon as garnish.
Step 9: Chill briefly and serve
Let the finished cake rest just long enough for the buttercream to set slightly, then bring to room temperature for serving so the texture is soft and tender. Slice with a warm knife and enjoy the delicate champagne aroma and citrus lift balanced by the silken buttercream and tender crumb.
Notes
- Bring eggs and butter to room temperature before starting for better mixing.
- Use an instant-read thermometer to check meringue temperature for safety and texture.
- If buttercream looks curdled, keep beating or chill briefly and rebeat to bring the emulsion back together.