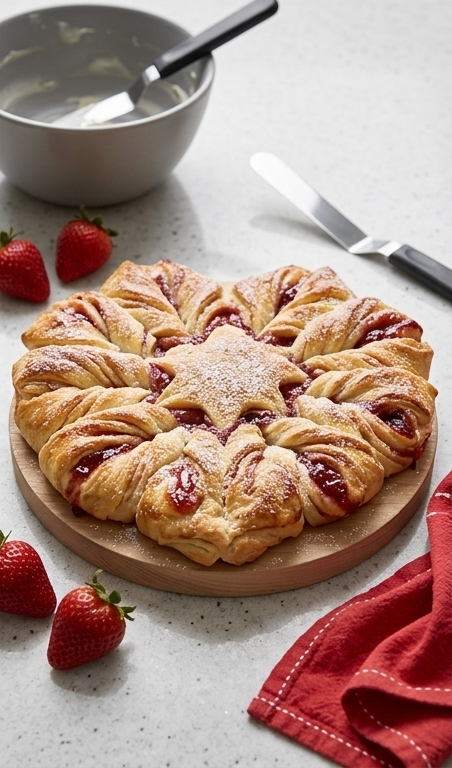
I still get that warm, sunlit feeling when I make Skillet Strawberry Crumble. It has become my go-to for any time strawberries are abundant, and the scent of spiced fruit and buttery crumble takes me right back to lazy weekend breakfasts and impromptu dinner parties. This Skillet Strawberry Crumble is one of those recipes that looks impressive but stays wonderfully simple. If you love bright strawberry flavor with a tender cake-like base and crunchy topping, you will enjoy how easy it is to pull together.
My love for Skillet Strawberry Crumble is rooted in small rituals: hulling berries with a quick laugh at their stubborn green tops, sneaking spoonfuls of the macerating juices, and listening for the oven timer as the kitchen fills with warm cinnamon notes. One wet spring afternoon, I brought this skillet to a friend who had just moved across town. We ate it out of the pan in the living room with mismatched forks and cold tea, and the house felt settled for the first time. The fruit bubbled and smelled like summer rain; the topping browned into crunchy islands that broke apart under the glaze. It is a recipe that compresses comfort, celebration, and the ease of cooking for people you care about.
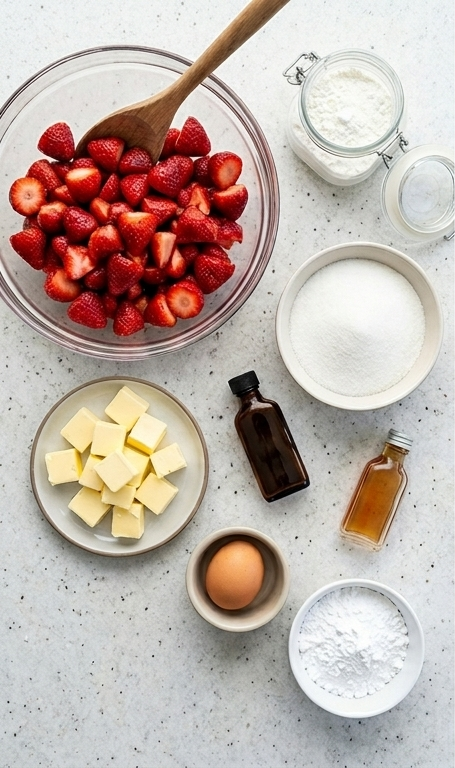
The Cast of Ingredients
- Strawberries: The bright heart of the dish; use firm, ripe berries for the best texture and sweetness. If strawberries are out of season, substitute a mix of raspberries and chopped peaches. Choose berries that are fragrant and deep red.
- Cornstarch: Thickens the juices so the filling is syrupy, not runny. Arrowroot works as a substitute for a clearer finish.
- All-purpose flour: Builds the base and crumble; for a nuttier bite, swap up to 1/3 cup with whole wheat or spelt.
- Cold butter: Creates tender, flaky crumbs. Use a high-quality unsalted butter and keep it well chilled.
- Sugar and confectioners’ sugar: Sugar sweetens and macerates the fruit; confectioners’ sugar becomes the glossy glaze. Adjust to taste.
Essential Tools
Start with a short intro: a few reliable tools make this skillet dessert effortless. Each piece shapes the texture, timing, or final look, so choose thoughtfully and keep alternatives in mind.
- 12-inch skillet: Ideal for even baking and dramatic presentation; use an oven-safe cast iron or heavy stainless steel skillet. If you do not have a 12-inch, a deep 9-inch pie dish can work.
- Mixing bowls: One for macerating fruit and one for the dough. Glass or stainless bowls are easiest to handle.
- Pastry cutter or fork: For cutting butter into flour; you can also use your fingers or a food processor briefly.
- Whisk and wooden spoon: For dry ingredients and stirring the dough.
- Measuring cups and spoons: Accurate measures help the crumble come out reliably; use a kitchen scale if you have one.
Step-by-Step Preparation Guide
Step 1: Prepare the strawberries
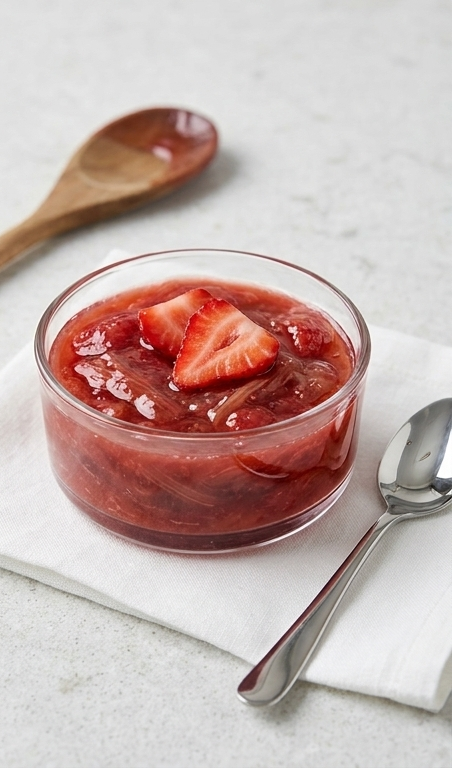
Toss the roughly chopped, hulled strawberries with the cornstarch and half a cup of granulated sugar in a large mixing bowl until the fruit is evenly coated and glossy; let them sit while you assemble the rest so they macerate and release some juice, building a syrupy, ruby-red filling that will thicken as it bakes.
Step 2: Ready the skillet and oven
Heat the oven to 375°F and grease a 12-inch skillet with nonstick spray so it’s ready to receive the dough; set the skillet on the Luna Pearl surface while you finish the dough so everything is at hand and the workflow stays tidy.
Step 3: Combine the dry cake ingredients
Whisk together the flour, the full cup of granulated sugar, cinnamon, baking powder, and kosher salt in a large bowl until evenly distributed and aromatic, creating a lightly speckled, dry base that will cradle the butter pieces.
Step 4: Cut the butter into the dry mix
Add the cold diced butter to the flour mixture and work it in with your fingers or a fork until the butter pieces are pea-sized or smaller, leaving a mix that reads as coarse crumbs with tiny glossy butter pockets—a tactile, grainy texture primed for binding.
Step 5: Add the wet ingredients and form the dough
Stir in the egg, vanilla, and almond extract until the dough just comes together into a slightly shaggy, pliable mixture; reserve about half the dough. Press half of the mixture firmly and evenly into the bottom of the prepared skillet to form a compact base that will bake into a tender, lightly sweet cake layer.
Step 6: Assemble the skillet
Spread the macerated strawberry mixture evenly over the pressed base so juicy, ruby pools peek through the fruit, then crumble the remaining dough over the top in even, irregular clusters so the surface reads as a coarse, golden streusel ready to bake.
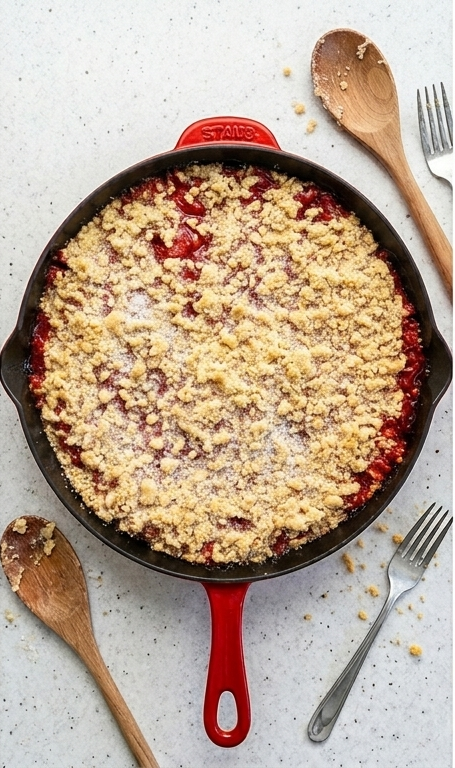
Step 7: Bake until golden and bubbling
Bake the assembled skillet for 30 to 35 minutes until the crumble topping is golden at the edges and the strawberry juices are bubbling and glossy through the gaps—look for a warm, bronzed surface with juicy red contrast at the seams.
Step 8: Whisk the glaze
Whisk together the confectioners’ sugar, a tablespoon of milk, and a drop of fresh lemon juice until smooth and glossy, adjusting with more milk by the teaspoon for a thinner pourable glaze that will sit in thin ribbons on the warm topping.
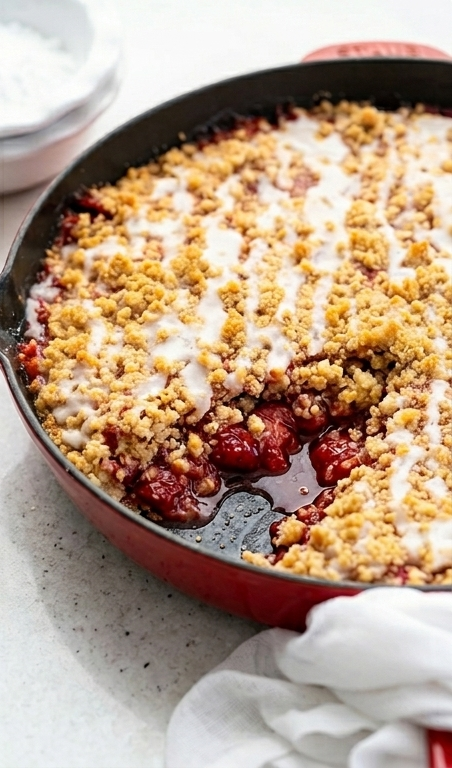
Step 9: Glaze and serve
Drizzle the glaze in delicate, glossy lines over the hot or cooled crumble, letting it pool slightly on the peaks of the streusel; serve straight from the skillet so the golden, coarse crumbs and bright strawberry pockets contrast against the warm red enamel.
Seasonal Twists and Variations
I like to experiment with textures and flavors, treating the Skillet Strawberry Crumble as a friendly template. For a gluten-free version, swap the all-purpose flour for a 1-to-1 gluten-free blend and add a tablespoon of almond flour for structure. If you want a nutty crunch, fold in 1/2 cup of chopped almonds or pecans into the topping. For a dairy-free option, use chilled coconut oil cut into the flour instead of butter and a plant milk in the glaze. To make it boozy for adults, stir a tablespoon of Grand Marnier or aged rum into the macerating strawberries. Each change shifts the character but keeps the joyful contrast of sweet fruit and crisp topping.
How to Serve
When hosting, I serve Skillet Strawberry Crumble straight from the pan so guests can scoop generous portions of warm fruit and crumb. For a brunch, pair slices with vanilla yogurt or a scoop of ricotta to add creaminess. For dessert, top each serving with vanilla ice cream or lightly whipped cream and a sprig of mint for freshness. If you need to stretch it for a larger crowd, bake two smaller skillets or spread the mix into a large baking dish; watch the baking time and remove when the juices bubble and the top is deeply golden. Present with small plates and dessert forks so everyone can dig in and share.
Storage and Reheating Tips
Store leftover Skillet Strawberry Crumble tightly covered at room temperature for up to one day. After that, refrigerate in an airtight container for up to four days; the topping will soften but the flavors will develop.
To reheat, warm individual portions in a 325°F oven for 8 to 12 minutes until bubbling, or microwave for 20 to 35 seconds for a quick fix. If you like the topping crisper after refrigeration, reheat in the oven and briefly broil for 30 to 60 seconds while watching closely.
Common Mistakes and How to Avoid Them
A common misstep is over-macerating the berries with too much sugar up front, which can make the filling too sweet and thin. Use the called-for sugar and check the strawberry sweetness before adding more.
Another slip is letting the butter get too soft while cutting it into the flour; keep it cold so you get those lovely pea-sized pockets that bake into flaky crumbs. If the topping seems too wet after baking, give it a few extra minutes in the oven to brown and set.
Final Thoughts
If you try this Skillet Strawberry Crumble, invite someone over and let the pan do the charming. It is forgiving, festive, and fast enough for weeknight warmth but pretty enough for company. You will likely find yourself making it again and again when strawberries come into season.
Frequently Asked Questions.
- Can I use frozen strawberries for Skillet Strawberry Crumble? Yes, you can use frozen strawberries but do not thaw them fully; toss frozen berries with the cornstarch and a touch less sugar so the filling does not become too watery.
- How can I make Skillet Strawberry Crumble less sweet? Reduce the granulated sugar in the fruit by 1/4 cup and taste the macerated berries before baking; you can also skip the glaze or dust a very light amount of confectioners’ sugar.
- Is there a dairy-free version of this recipe? Yes. Substitute chilled coconut oil or a vegan butter for cold butter and use plant-based milk in the glaze for a dairy-free option.
- Can I prepare Skillet Strawberry Crumble ahead of time? Assemble it and keep it covered in the fridge for up to 12 hours, then bake straight from cold, adding a few minutes to the bake time if needed.
- What can I serve with Skillet Strawberry Crumble? Vanilla ice cream, whipped cream, mascarpone, or a dollop of Greek yogurt all pair beautifully and add a creamy contrast to the warm fruit and crunchy topping.
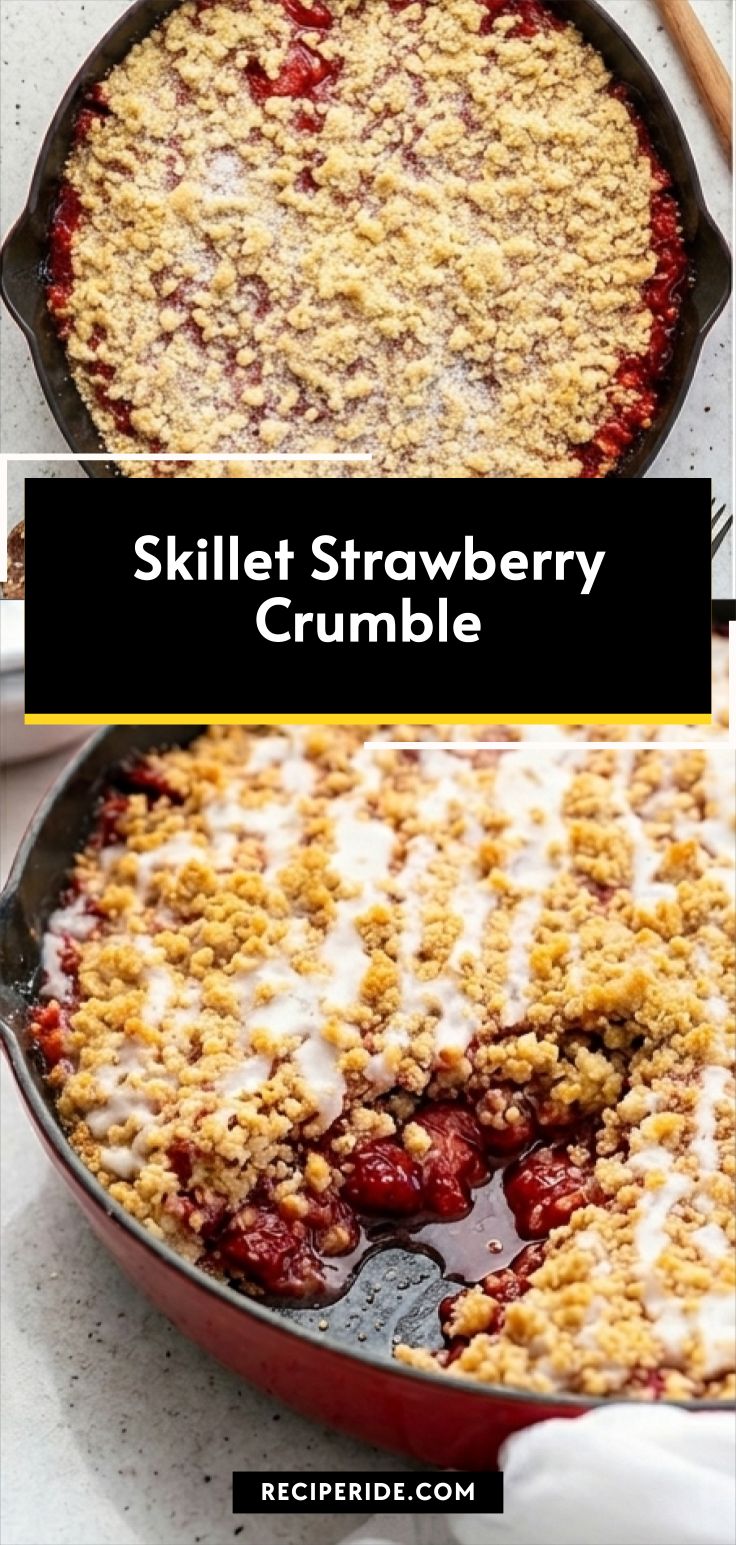
Skillet Strawberry Crumble
Make Skillet Strawberry Crumble: a warm, buttery strawberry skillet dessert ready in under an hour.
Ingredients
Instructions
Step 1: Prepare the strawberries
Toss the roughly chopped, hulled strawberries with the cornstarch and half a cup of granulated sugar in a large mixing bowl until the fruit is evenly coated and glossy; let them sit while you assemble the rest so they macerate and release some juice, building a syrupy, ruby-red filling that will thicken as it bakes.
Step 2: Ready the skillet and oven
Heat the oven to 375°F and grease a 12-inch skillet with nonstick spray so it’s ready to receive the dough; set the skillet on the Luna Pearl surface while you finish the dough so everything is at hand and the workflow stays tidy.
Step 3: Combine the dry cake ingredients
Whisk together the flour, the full cup of granulated sugar, cinnamon, baking powder, and kosher salt in a large bowl until evenly distributed and aromatic, creating a lightly speckled, dry base that will cradle the butter pieces.
Step 4: Cut the butter into the dry mix
Add the cold diced butter to the flour mixture and work it in with your fingers or a fork until the butter pieces are pea-sized or smaller, leaving a mix that reads as coarse crumbs with tiny glossy butter pockets—a tactile, grainy texture primed for binding.
Step 5: Add the wet ingredients and form the dough
Stir in the egg, vanilla, and almond extract until the dough just comes together into a slightly shaggy, pliable mixture; reserve about half the dough. Press half of the mixture firmly and evenly into the bottom of the prepared skillet to form a compact base that will bake into a tender, lightly sweet cake layer.
Step 6: Assemble the skillet
Spread the macerated strawberry mixture evenly over the pressed base so juicy, ruby pools peek through the fruit, then crumble the remaining dough over the top in even, irregular clusters so the surface reads as a coarse, golden streusel ready to bake.
Step 7: Bake until golden and bubbling
Bake the assembled skillet for 30 to 35 minutes until the crumble topping is golden at the edges and the strawberry juices are bubbling and glossy through the gaps—look for a warm, bronzed surface with juicy red contrast at the seams.
Step 8: Whisk the glaze
Whisk together the confectioners’ sugar, a tablespoon of milk, and a drop of fresh lemon juice until smooth and glossy, adjusting with more milk by the teaspoon for a thinner pourable glaze that will sit in thin ribbons on the warm topping.
Step 9: Glaze and serve
Drizzle the glaze in delicate, glossy lines over the hot or cooled crumble, letting it pool slightly on the peaks of the streusel; serve straight from the skillet so the golden, coarse crumbs and bright strawberry pockets contrast against the warm red enamel.
Notes
- Keep the butter very cold so the topping bakes up flaky and crisp.
- Taste the strawberries before adding extra sugar; sweetness varies by season.
- To crisp the topping after refrigeration, reheat in the oven and broil briefly while watching closely.
