Strawberry Rhubarb Bread has been my go-to for late-spring baking the past few years. I still remember the first loaf I made when the farmer’s market first piled rhubarb into wooden crates; the perfume of strawberries and the tart snap of rhubarb filled my kitchen and I was hooked. This recipe blends bright fruit with a tender, slightly tangy crumb and a buttery crumble on top. It’s an unfussy loaf that somehow feels celebratory, perfect for mornings, afternoon tea, or a casual dessert when you want something homemade and warming.
Why This Loaf Feels Like Home
One rainy afternoon I mixed up a batch of Strawberry Rhubarb Bread while a storm pelted the windows. The rhythm of stirring and the soft thud of fruit hitting the batter slowed me down. When it finally came out of the oven, steam rose in thin ribbons as I cut the first slice; the crumble crackled under my fork and a surge of warm, sweet-tart aroma filled the room. I remember the taste more than the exact recipe in that moment: the strawberries’ sweet perfume, rhubarb’s tart bite, and the faint cinnamon that held it together. Sharing that loaf with a friend felt natural, like offering a small, edible memory. Since then I reach for this recipe when I want comfort with a little edge of brightness.
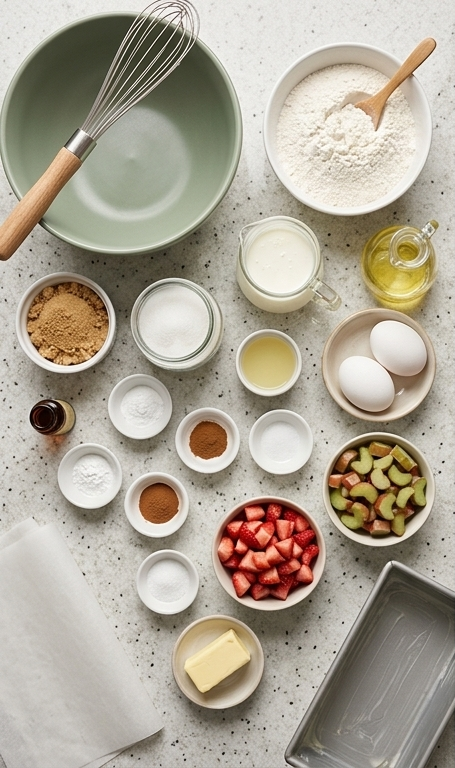
The Heroes in the Bowl
- Strawberries: Fresh diced strawberries add sweetness, moisture, and color. If they are out of season, frozen and thawed strawberries work but drain excess liquid first to keep the batter from becoming gummy.
- Rhubarb: Gives bright tartness and structure; slice thinly so it disperses evenly. If you need a substitute, try diced tart apples or frozen cherries for a different character.
- All-purpose flour: The backbone of the loaf; sift or whisk to remove lumps. For a lighter crumb, replace up to 25 percent with cake flour.
- Buttermilk: Adds acidity and tenderness; yogurt thinned with milk is a good stand-in.
- Butter or oil: Oil keeps the loaf extra moist, while melted butter adds richer flavor. Choose unsalted butter to control salt.
Essential Kitchen Tools
Every bake matters more with the right handful of tools. A sturdy loaf pan ensures even shape and browning; a parchment sling is an easy step that saves the crumble. A good whisk and a silicone spatula make mixing gentle and mess-free, while a pastry cutter or your fingertips produce the ideal crumble texture. If you have a kitchen thermometer, it removes the guesswork from doneness.
- 9×5-inch loaf pan: For even baking; if you only have a smaller pan, reduce bake time slightly.
- Parchment paper: Makes unmolding effortless and protects the crumble.
- Whisk and spatula: Whisk for wet blend, spatula for folding fruit.
- Pastry cutter or fingers: For achieving pebble-like crumble.
- Wire rack and thermometer: Cool the loaf properly and check internal temp if desired.
Step-by-Step Preparation Guide.
Step 1: Preheat & prep the loaf pan
Preheat the oven to 350°F and prepare a 9×5-inch loaf pan by spraying it with cooking spray or greasing and flouring it; for an easy, foolproof removal, make a parchment sling that drapes over the long sides and spray that as well. This small extra step keeps the crumble intact when you lift the loaf out later, and it’s a gentle, practical start to the bake.
Step 2: Whisk the wet ingredients
In a large mixing bowl combine the granulated and brown sugars with the buttermilk, lemon juice, oil (or melted unsalted butter), eggs, and vanilla; whisk until the sugars have mostly dissolved and the mixture looks homogenous and glossy. The batter will be slightly fluid and pale, with a faint sheen from the oil and eggs—this is the tender base for the loaf.
Step 3: Whisk the dry ingredients
In a separate bowl whisk together the all-purpose flour with the baking powder, baking soda, ground cinnamon, and kosher salt until evenly distributed. The dry mixture should be light and airy, with no visible streaks of leavening agents, so it blends smoothly into the wet mix without overworking.
Step 4: Combine wet and dry
Add the dry ingredients to the wet mixture and stir gently just until the flour streaks disappear; you want a slightly thick, ribboning batter without overmixing. Stop as soon as the batter comes together—this preserves tenderness and avoids a tougher crumb.
Step 5: Fold in the fruit
Fold in the diced strawberries and thinly sliced rhubarb with a wide spatula, folding just until the fruit is evenly dispersed in the batter. Look for bright pink and green flecks suspended through the pale batter—this is the delightful visual promise of the finished loaf.
Step 6: Transfer and level
Pour the batter into the prepared parchment-lined loaf pan and gently smooth the top with an offset spatula so it’s even but not compressed; you should still see fruit pieces peeking at the surface. This is the final, unbaked silhouette of your loaf—soft, pillowy batter contained in a neat rectangular form.
Step 7: Make the crumble topping
In a medium bowl add the flour, granulated and light brown sugars, the well-softened butter, and a pinch of salt; use a pastry cutter or your fingertips to cut and fluff the butter into the dry ingredients until small pebbles and loose crumbles form. The texture should be pebble-like and friable—loose bits that will bake into a crisp, rustic topping rather than a paste.
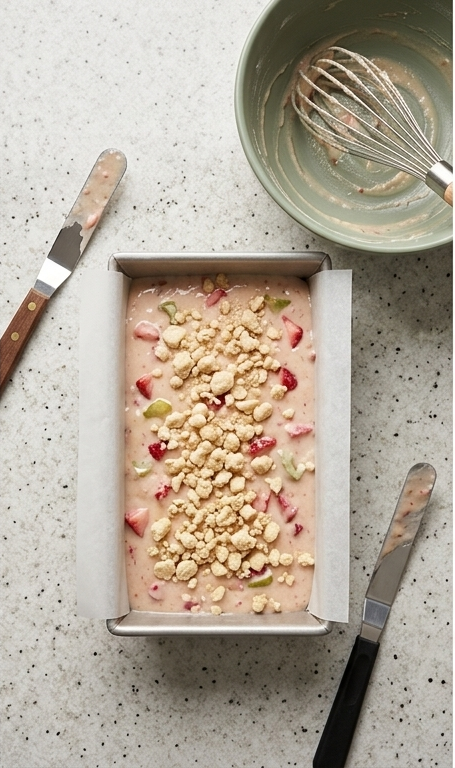
Step 8: Top, ready to bake
Evenly sprinkle the crumble over the smoothed batter so the small pebbles sit atop the loaf in a single, distributed layer. This pre-bake appearance—pale pink-speckled batter under a scatter of raw, buttery crumbles—is the exact moment the loaf is poised to go into the oven and transform.
Step 9: Bake until golden and set
Bake the topped loaf at 350°F for about 55 minutes, until the crumble is lightly golden, the top springs back to a gentle touch, and a toothpick inserted in the center comes out clean (or the internal temperature reads about 200°F). The finished crust should be warm golden-brown with crisp crumble islands and a tender, fruit-speckled interior.
Step 10: Cool and unmold
Allow the loaf to cool in the pan on a wire rack for about 30 minutes so the crumb sets, then carefully lift it out on the parchment sling and transfer to the rack to cool completely before glazing. Cooling fully keeps the glaze from sliding and helps the loaf slice cleanly.
Step 11: Whisk the glaze
In a medium bowl whisk together confectioners’ sugar and vanilla while slowly drizzling in the cream until you reach a smooth, pourable glaze that still holds a faint ribbon when it falls from the whisk. Adjust sugar or dairy for a thicker or thinner drape—this glaze will settle into the crumble crevices and add a glossy, sweet finish.
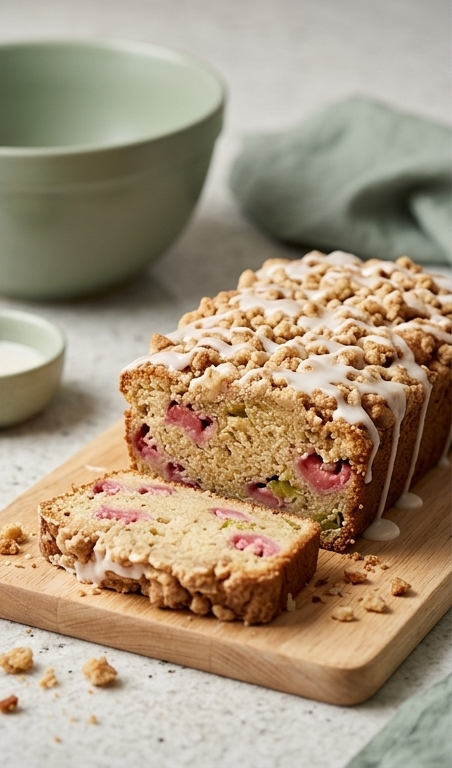
Step 12: Glaze, slice, and store
Evenly drizzle the glaze across the cooled loaf so it pools slightly between crumble peaks, then slice and serve—each cut should reveal a tender, moist crumb mottled with pink strawberry and green rhubarb. Store airtight at room temperature up to 48 hours (or refrigerate up to one week or freeze up to three months); expect a slight loss of crumble crispness over time but the loaf will remain flavorful.
Making It Your Own
Try a few small experiments to make Strawberry Rhubarb Bread your signature loaf. For a dairy-free version, swap the buttermilk for thinned coconut yogurt and use plant-based butter in the crumble; the crumb will be slightly different but still satisfying. For a gluten-reduced loaf, replace half the all-purpose flour with a cup-for-cup gluten-free blend and add an extra minute to the bake.
If you want a nutty lift, fold in 1/3 cup chopped toasted almonds or pecans to the crumble. For a more citrus-forward flavor, add a teaspoon of lemon zest to the batter and a tablespoon of lemon juice to the glaze. Each tweak keeps the core of Strawberry Rhubarb Bread intact while letting you tailor sweetness, texture, or dietary needs.
How to Serve
If I’m hosting, I slice the loaf into thick slabs and arrange them on a wooden board with small bowls of fresh berries and whipped cream. The loaf is also excellent slightly warmed; pop slices in a toaster oven for 3-4 minutes to revive the crumble a bit. For a brunch for six, bake two loaves and cut each into 8 slices so everyone can sample.
For a smaller gathering, halve the recipe or serve smaller slices alongside yogurt and a strong coffee. If serving as dessert, pair it with a scoop of vanilla ice cream and a drizzle of reduced strawberry syrup for extra flair. Presentation is simple: a dusting of extra confectioners’ sugar and a few whole berries on the plate always looks inviting.
Storage and Reheating
Store Strawberry Rhubarb Bread airtight at room temperature for up to 48 hours; the crumble will lose a bit of crunch but the loaf stays moist. If you plan to keep it longer, refrigerate up to one week or freeze individual wrapped slices for up to three months. Thaw frozen slices at room temperature or in the fridge overnight.
To refresh slices, warm them in a toaster oven or regular oven at 300°F for 5 to 8 minutes until the loaf feels gently warm. You can also microwave a slice for about 12 to 20 seconds, but this softens the crumble. A quick re-toast brings back a little texture and tastes freshly baked.
Baking Bloopers and Fixes
If your loaf feels dense, you may have overmixed after adding the flour; next time stir just until the streaks disappear. Also check your baking powder and baking soda for freshness, since old leaveners leave bakes flatter than expected.
If the center sinks, it may not have been fully set when removed; test with a toothpick and add 5 to 10 minutes as needed. If the crumble looks soggy after baking, let the loaf cool fully on a rack so steam can escape before glazing.
Final Slice
Give Strawberry Rhubarb Bread a try this season. It balances sweet and tart in a way that feels both nostalgic and fresh, and once you make it you’ll find little reasons to bake it again and again. Share slices with friends or keep one for slow breakfasts; either way, you’ll end up with a loaf that comforts and surprises.
Frequently Asked Questions.
- Can I use frozen fruit for Strawberry Rhubarb Bread? Yes, but thaw and drain frozen strawberries or chop and toss them in a little flour to reduce excess moisture before folding them into the batter.
- How do I know when the loaf is done? The loaf is done when the top is golden and a toothpick in the center comes out clean; an internal temperature around 200°F is a reliable indicator.
- Can I make the crumble ahead of time? You can prepare the crumble up to a day ahead and keep it chilled; bring it to room temperature before sprinkling so it bakes evenly.
- Is there a gluten-free swap that works? Yes, replace half the all-purpose flour with a cup-for-cup gluten-free blend and avoid overmixing; texture will be slightly different but still delicious.
- What can I do with extra rhubarb? Freeze thin slices on a tray and transfer to a bag for future loaves, or stew it with a little sugar to serve over yogurt or pancakes.
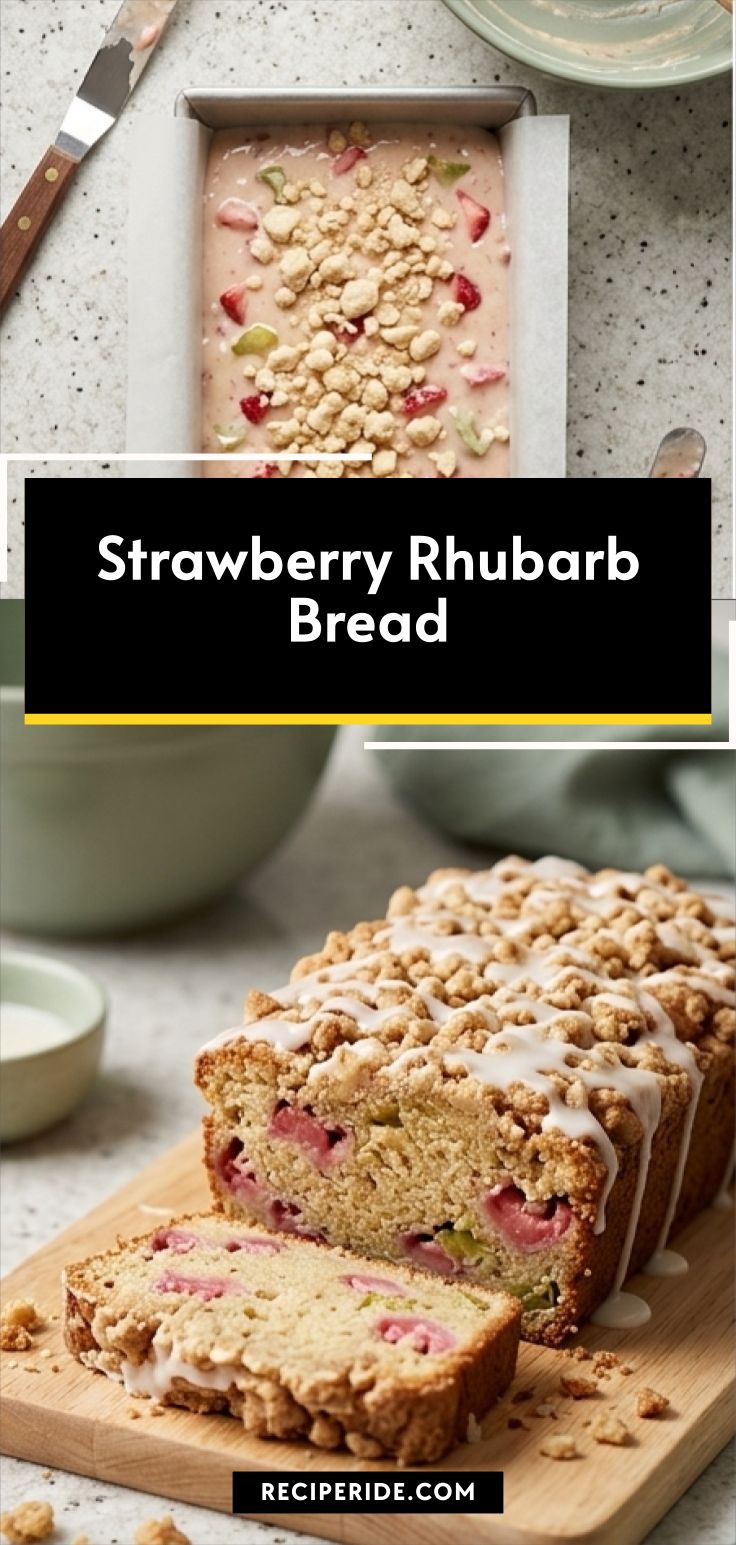
Strawberry Rhubarb Bread
Bake Strawberry Rhubarb Bread: tender, fruity loaf with a buttery crumble and sweet glaze.
Ingredients
Instructions
Step 1: Preheat & prep the loaf pan
Preheat the oven to 350°F and prepare a 9x5-inch loaf pan by spraying it with cooking spray or greasing and flouring it; for an easy, foolproof removal, make a parchment sling that drapes over the long sides and spray that as well. This small extra step keeps the crumble intact when you lift the loaf out later, and it’s a gentle, practical start to the bake.
Step 2: Whisk the wet ingredients
In a large mixing bowl combine the granulated and brown sugars with the buttermilk, lemon juice, oil (or melted unsalted butter), eggs, and vanilla; whisk until the sugars have mostly dissolved and the mixture looks homogenous and glossy. The batter will be slightly fluid and pale, with a faint sheen from the oil and eggs—this is the tender base for the loaf.
Step 3: Whisk the dry ingredients
In a separate bowl whisk together the all-purpose flour with the baking powder, baking soda, ground cinnamon, and kosher salt until evenly distributed. The dry mixture should be light and airy, with no visible streaks of leavening agents, so it blends smoothly into the wet mix without overworking.
Step 4: Combine wet and dry
Add the dry ingredients to the wet mixture and stir gently just until the flour streaks disappear; you want a slightly thick, ribboning batter without overmixing. Stop as soon as the batter comes together—this preserves tenderness and avoids a tougher crumb.
Step 5: Fold in the fruit
Fold in the diced strawberries and thinly sliced rhubarb with a wide spatula, folding just until the fruit is evenly dispersed in the batter. Look for bright pink and green flecks suspended through the pale batter—this is the delightful visual promise of the finished loaf.
Step 6: Transfer and level
Pour the batter into the prepared parchment-lined loaf pan and gently smooth the top with an offset spatula so it’s even but not compressed; you should still see fruit pieces peeking at the surface. This is the final, unbaked silhouette of your loaf—soft, pillowy batter contained in a neat rectangular form.
Step 7: Make the crumble topping
In a medium bowl add the flour, granulated and light brown sugars, the well-softened butter, and a pinch of salt; use a pastry cutter or your fingertips to cut and fluff the butter into the dry ingredients until small pebbles and loose crumbles form. The texture should be pebble-like and friable—loose bits that will bake into a crisp, rustic topping rather than a paste.
Step 8: Top, ready to bake
Evenly sprinkle the crumble over the smoothed batter so the small pebbles sit atop the loaf in a single, distributed layer. This pre-bake appearance—pale pink-speckled batter under a scatter of raw, buttery crumbles—is the exact moment the loaf is poised to go into the oven and transform.
Step 9: Bake until golden and set
Bake the topped loaf at 350°F for about 55 minutes, until the crumble is lightly golden, the top springs back to a gentle touch, and a toothpick inserted in the center comes out clean (or the internal temperature reads about 200°F). The finished crust should be warm golden-brown with crisp crumble islands and a tender, fruit-speckled interior.
Step 10: Cool and unmold
Allow the loaf to cool in the pan on a wire rack for about 30 minutes so the crumb sets, then carefully lift it out on the parchment sling and transfer to the rack to cool completely before glazing. Cooling fully keeps the glaze from sliding and helps the loaf slice cleanly.
Step 11: Whisk the glaze
In a medium bowl whisk together confectioners’ sugar and vanilla while slowly drizzling in the cream until you reach a smooth, pourable glaze that still holds a faint ribbon when it falls from the whisk. Adjust sugar or dairy for a thicker or thinner drape—this glaze will settle into the crumble crevices and add a glossy, sweet finish.
Step 12: Glaze, slice, and store
Evenly drizzle the glaze across the cooled loaf so it pools slightly between crumble peaks, then slice and serve—each cut should reveal a tender, moist crumb mottled with pink strawberry and green rhubarb. Store airtight at room temperature up to 48 hours (or refrigerate up to one week or freeze up to three months); expect a slight loss of crumble crispness over time but the loaf will remain flavorful.
Notes
- Use frozen strawberries if fresh are out of season; drain excess liquid first.
- Thin plain yogurt with milk to substitute for buttermilk.
- Make a parchment sling to lift the loaf without damaging the crumble.
- Store airtight at room temperature up to 48 hours or freeze slices up to three months.
- Check leaveners for freshness if loaf seems flat.


