I still remember the first time I made the Japanese Soufflé Pancakes Recipe: the batter looked impossibly light and the pancakes rose into airy, trembly towers that felt almost stolen from a cafe. I’ve made them on lazy weekend mornings and during tiny celebrations because they turn the ordinary into something worth pausing for. These pancakes taught me how patience and gentle folding change textures, and now they’re one of my go-to brunch treats. If you love a pillowy, custardy bite, this Japanese Soufflé Pancakes Recipe will feel like a small, delicious triumph every time.
How This Recipe Became My Rainy-Day Favorite
I was stuck indoors on a rain-heavy afternoon when I first tried the Japanese Soufflé Pancakes Recipe, experimenting with egg whites and a whisper of sugar while the house smelled faintly of wet pavement and coffee. The process felt a little meditative: whisking until glossy, folding with the lightest touch, and waiting as steam coaxed pale domes to rise. When I finally lifted the lid, steam curled like a soft sigh and the pancakes wobbled like tiny clouds. I remember pressing a fork into one and feeling the delicate custard give way, warm and barely set. Serving them with a simple spoonful of whipped cream and a scattering of berries made the room feel sunnier, even though it was still gray outside. That memory stuck, and now whenever I want comfort that feels elegant, these pancakes are my quiet celebration.
Main Ingredients and Why They Matter
- Eggs: The backbone of the texture. Use fresh, separated eggs at room temperature for stronger volume in the whites and silkier yolk batter; pasteurized eggs can be used for safety though whipping may be slightly slower.
- Whole Milk: Adds richness and looseness to the yolk mixture; substitute with oat or almond milk for a lighter, dairy-free-ish option though texture will change.
- Cake Flour: Keeps the crumb tender; use low-protein all-purpose flour if needed, but sift to avoid lumps.
- Granulated Sugar: Sweetens both yolk batter and meringue; superfine sugar dissolves fastest in the whites.
- Neutral Oil and Butter: For release and flavor; grapeseed or canola work well.
Essential Kitchen Tools and Why You’ll Use Them
These pancakes rely more on technique than fancy gear, but a few tools make everything easier. A sturdy nonstick skillet and a tight-fitting lid give even steam and gentle heat control; if you don’t have a tight lid, a large baking tray inverted over the pan can help trap steam. Ring molds keep the pancakes tall and neat; if you lack molds, use metal cookie cutters or improvise with small heatproof ramekins. A reliable whisk or an electric hand mixer speeds whipping the whites to glossy peaks, and a flexible spatula preserves air when folding. Finally, an offset spatula or small palette knife helps release cakes from molds without deflating them.
- Large nonstick skillet with lid: For gentle steam cooking; alternatives include a wide pan plus an inverted baking sheet.
- Ring molds (3-inch): Keep pancakes tall; try small ramekins if needed.
- Whisk or electric mixer: Essential for glossy meringue; a balloon whisk works in a pinch.
- Flexible spatula: For delicate folding; use a silicone or rubber spatula.
- Offset spatula or small palette knife: For clean releases and gentle flipping.
Step-by-Step Preparation Guide
Step 1: Prepare equipment and grease the molds
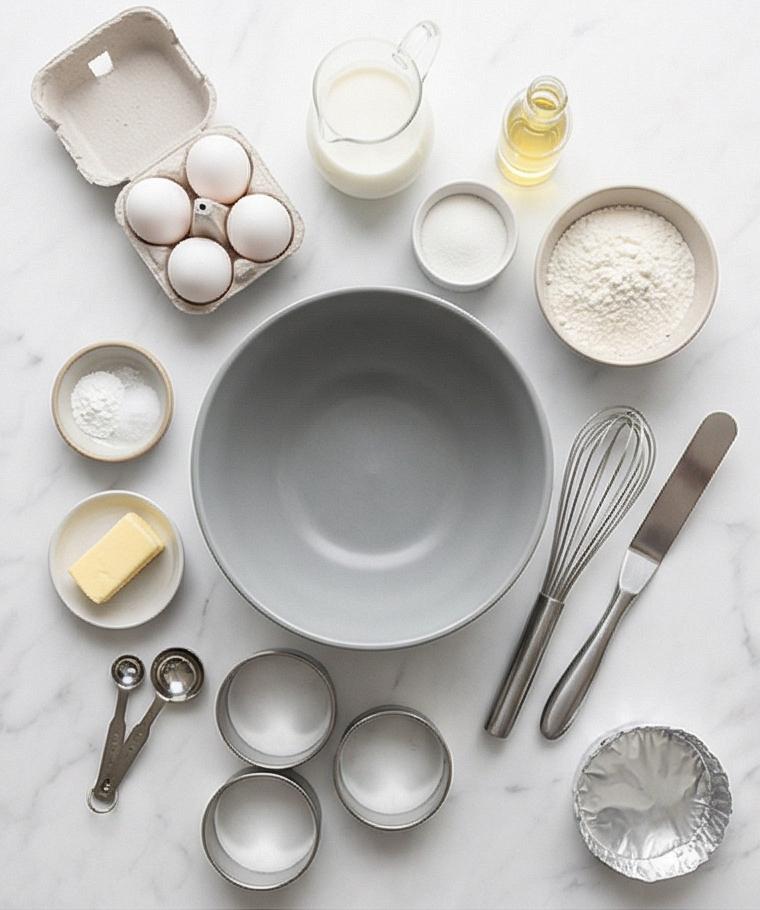
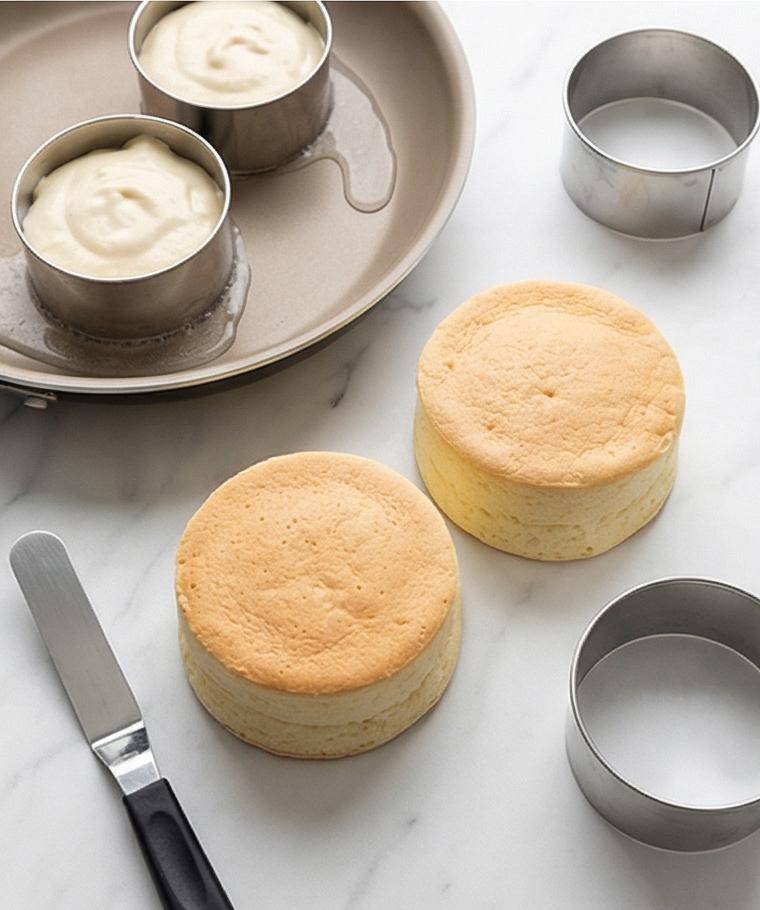
Lay out the essential tools on the marble: a large nonstick skillet with a tight lid (kept off-camera), three 3-inch round ring molds, a folded strip of heavy aluminum foil option, a small bottle of neutral oil, a small dish of softened unsalted butter, a folded paper towel, a measuring spoon, and a metal whisk. Lightly brush a thin, even film of neutral oil inside each mold with the paper towel so the tall pancakes will release cleanly later; if a mold tends to stick, dust the interior sparingly with sifted cake flour and tap out any excess. Keep everything tidy and ready on the Carrara surface — equipment primed, no hands, no stove in view.
Step 2: Make the yolk batter and incorporate dry ingredients
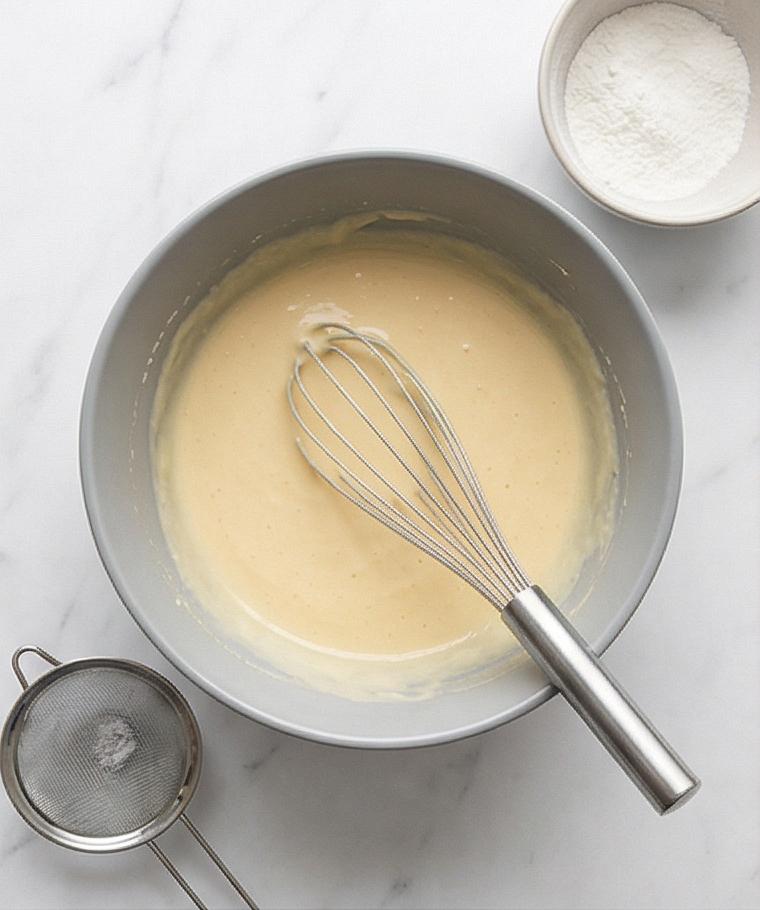
Crack and separate the eggs into two clean bowls; reserve the yolks in a matte dove-grey ceramic mixing bowl. Add the granulated sugar and whisk the yolks until pale and slightly thickened, then whisk in whole milk and pure vanilla until silky and smooth. In a small ceramic ramekin sift together cake flour, baking powder, and fine sea salt, then sift the dry mix directly into the yolk mixture and whisk gently just until homogeneous — a soft, custardy, pale-yellow batter with a satiny texture and no dry streaks. The dove-grey bowl and a stainless whisk rest together, showing the smooth batter ready for the next step.
Step 3: Whip the egg whites to glossy medium-stiff peaks
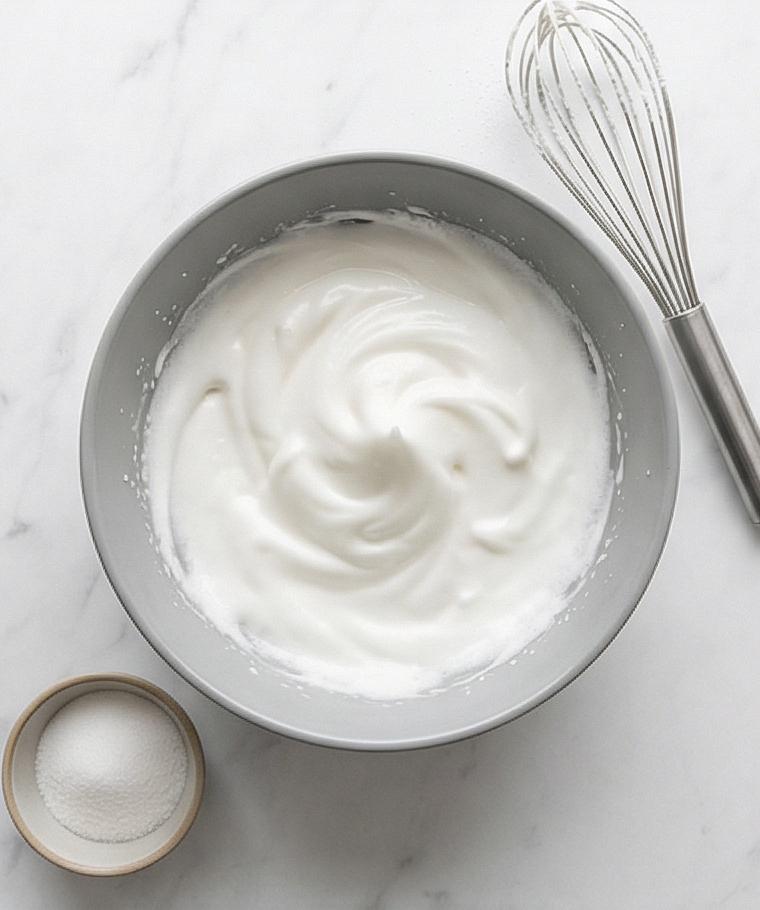
Transfer the egg-white bowl (the same matte dove-grey ceramic bowl used earlier for continuity) or a matching bowl, and begin whipping with a metal whisk or electric whisk attachment. Watch the progression from foamy opaque bubbles to glossy white meringue as sugar is added gradually; the final meringue should be thick, glossy, and hold medium-stiff peaks that gently curl at the tip. Present the bowl of glossy meringue with the whisk propped on the rim and a small ramekin of remaining sugar nearby, emphasizing airy texture and fine, satiny peaks.
Step 4: Fold and finish the soufflé pancake batter
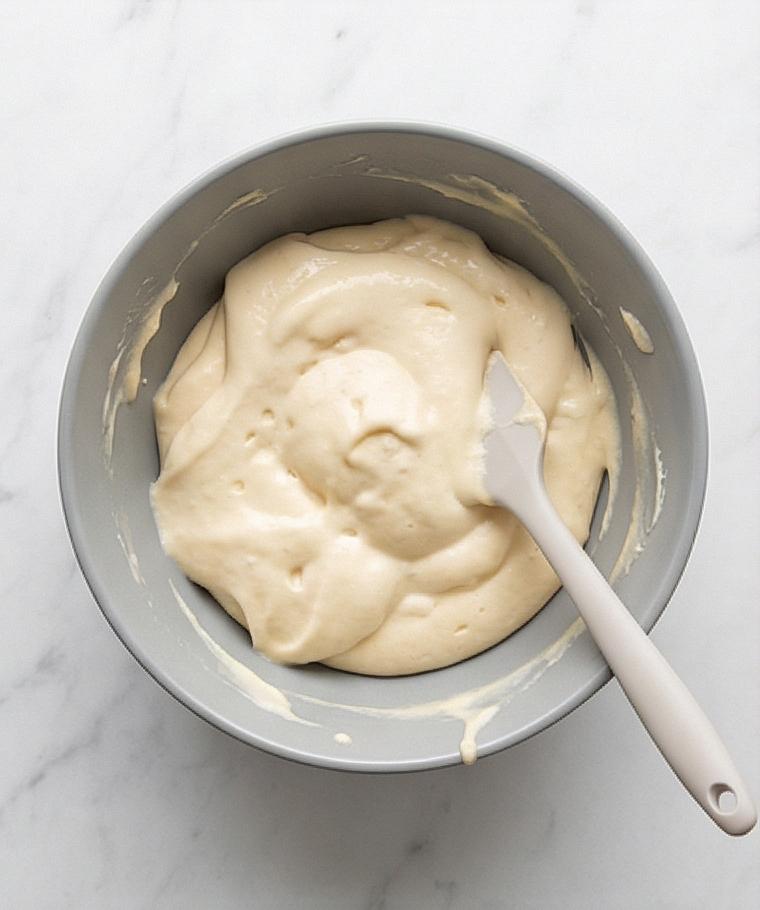
Gently fold roughly one-third of the meringue into the yolk batter using a flexible spatula, then fold in the remaining meringue in two additions with a lifting, turning motion to preserve air. The result is a thick, billowy, cloud-like batter that holds soft mounds and shows visible, lofty air pockets — glossy yet resilient. Keep the matte dove-grey bowl, a pale spatula with batter streaks, and a small stainless measuring spoon as persistent utensils to signal continuity and texture: soft, pillowy, lightly aerated batter ready to be portioned.
Step 5: Portion, steam-cook, flip, and release the pancakes
Scoop the tall batter into the greased ring molds placed on a thinly oiled skillet surface (displayed on the marble without any visible stove), filling each mold halfway to two-thirds so the batter mounds naturally. Show the filled molds on the marble with a shallow puddle of water in the skillet rim (for steam) and a tight-fitting lid set aside (off-camera or resting upside down on the surface) to imply steaming; after gentle covered cooking and a careful flip in-mold, the pancakes emerge tall, jiggly, lightly golden, and still springy. Present the released pancakes sitting upright on the marble with the metal molds and a small offset spatula nearby, highlighting the airy interior and pale golden exterior ready for plating.
Step 6: Assemble, finish, and serve the plated pancakes
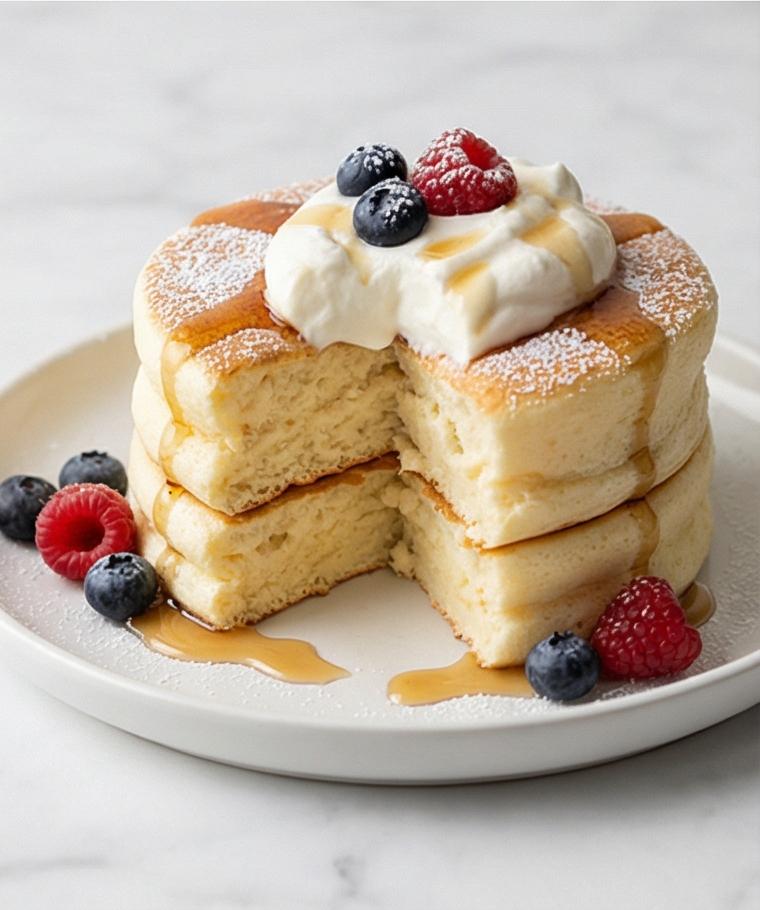
Stack one or two of the warm, towering soufflé pancakes on a simple shallow white ceramic plate; top with a generous quenelle of softly whipped cream (smooth, holding soft peaks), arrange a few fresh berries at the side, drizzle warm maple syrup sparingly so it beads and clings to the sides, and finish with a delicate dusting of powdered sugar. The final composition emphasizes the height, jiggly custardy interior visible at the cut edge, pillowy texture, and restrained color contrast against the quiet Carrara marble — all presented for immediate serving, warm and ephemeral.
Making It Your Own
I love tweaking the Japanese Soufflé Pancakes Recipe depending on mood and season. For a citrus morning, fold a teaspoon of finely grated lemon zest into the yolk batter and top with macerated berries. For chocolate lovers, gently fold in a tablespoon of cocoa and swap the berries for a smear of chocolate sauce. If you need gluten-free options, try a measured gluten-free flour blend designed for cakes; texture will be slightly different but still delightful.
For a lighter, dairy-free spin, use an oat-based milk in the yolks and serve with coconut whipped cream. When I experimented with matcha, a teaspoon sifted into the dry ingredients gave a soft green hue and a pleasant grassy note that paired beautifully with a drizzle of sweetened condensed milk.
How to Serve
Picture a small brunch for friends: stack one or two towering Japanese Soufflé Pancakes Recipe pancakes per plate, add a generous spoonful of softly whipped cream, and scatter seasonal berries for color. For a large group, cook in batches and keep pancakes warm on a cooling rack in a low oven (about 90 to 100 C) for short periods, then assemble right before serving.
Serve with small bowls of warm maple syrup, lightly sweetened whipped cream, and a dusting of powdered sugar so guests can customize. For a more elegant presentation, garnish with micro herbs or edible flowers and use shallow white plates to highlight the pale, jiggly interior and gentle golden edges.
Storage and Reheating Tips
Leftover pancakes are best eaten the same day, but you can store them in the refrigerator for 1 to 2 days in an airtight container. Place a sheet of parchment between layers to prevent sticking. Reheat gently so you don’t collapse the airy interior.
To reheat, warm in a low oven (100 to 120 C) for 5 to 8 minutes, or briefly steam them covered in a skillet over very low heat for a couple of minutes; avoid high direct heat. If you froze extra pancakes, thaw overnight in the refrigerator and reheat using the same gentle methods.
Common Mistakes and How to Avoid Them
Underwhipping or overwhipping the egg whites will cost you volume. Aim for glossy, medium-stiff peaks that hold their shape but still fold smoothly. If your whites are greasy or have any yolk, start over with clean bowls and dry whisks.
Overmixing the batter after adding the meringue will knock out air. Use a gentle folding motion and stop when you see soft, billowy peaks. Also, don’t rush the steam cooking with too high heat; low, steady steam is what builds the height without burning the base.
Final Thoughts
Give the Japanese Soufflé Pancakes Recipe a try on a slow morning and treat the process as part of the pleasure. With a bit of practice you’ll find the rhythm of whipping, folding, and steaming, and the payoff is impossibly light, tender pancakes that feel celebratory.
Frequently Asked Questions.
- Can I make these pancakes without cake flour? Yes, use low-protein all-purpose flour sifted well; cake flour is preferred for tenderness but all-purpose will work in a pinch.
- How long do the pancakes stay fluffy after cooking? They’re best fresh and warm; expect the height and jiggle to soften within a couple of hours, so serve promptly.
- Can I use a hand mixer instead of whisking by hand? Absolutely, a hand mixer speeds whipping to glossy peaks and is my go-to for consistent results.
- Are there egg-free versions? True egg-free versions are difficult since eggs are central to the structure, but some experimenters use aquafaba as a vegan meringue alternative with varying success.
- How do I prevent the pancakes from browning too much? Cook over low heat and use steam; if they brown quickly, lower the temperature and add a little more water to the pan.
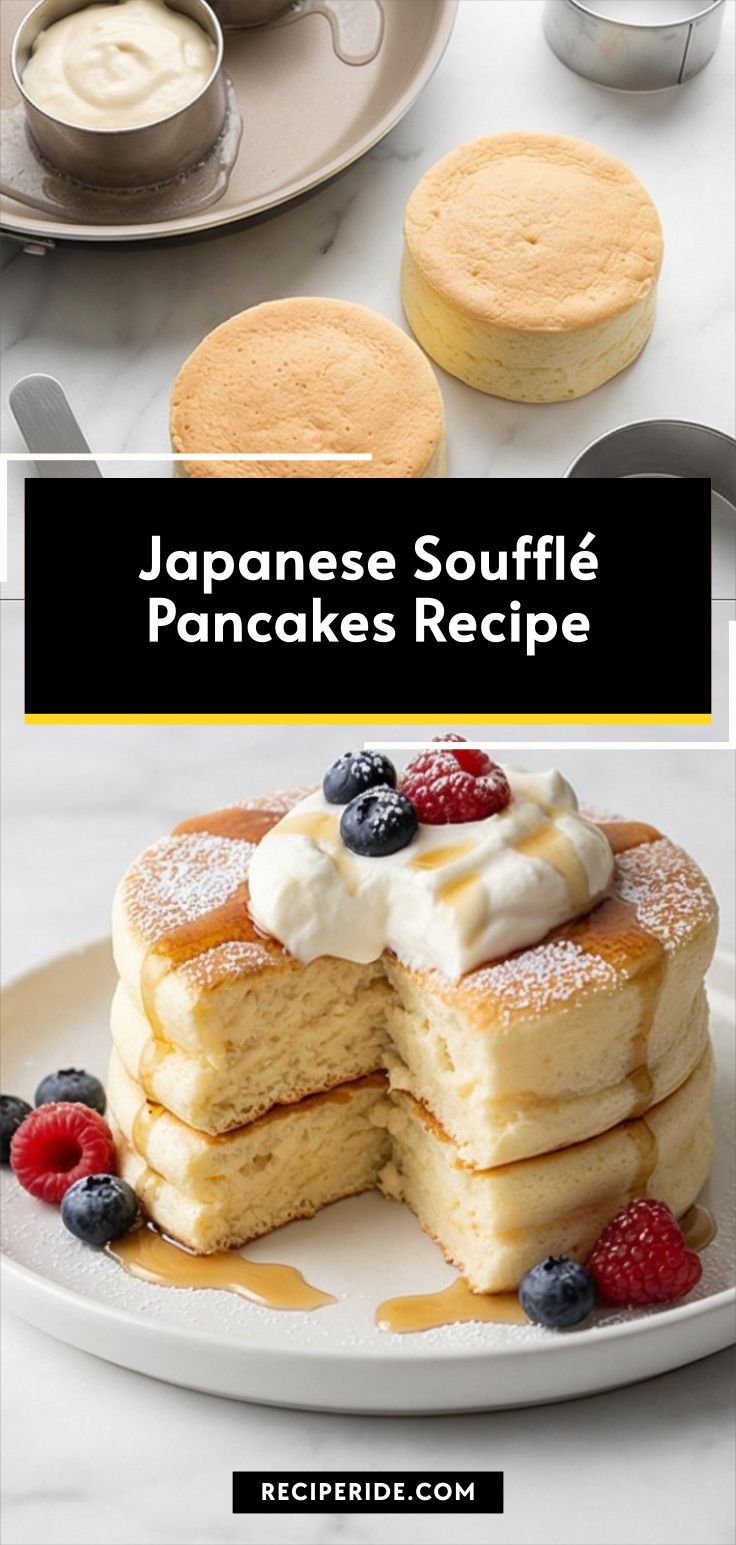
Japanese Soufflé Pancakes Recipe
Make light, airy Japanese Soufflé Pancakes Recipe—whip, fold, and steam for towering, jiggly pancakes perfect for brunch.
Ingredients
Instructions
Step 1: Prepare equipment and grease the molds
Lay out the essential tools on the marble: a large nonstick skillet with a tight lid (kept off-camera), three 3-inch round ring molds, a folded strip of heavy aluminum foil option, a small bottle of neutral oil, a small dish of softened unsalted butter, a folded paper towel, a measuring spoon, and a metal whisk. Lightly brush a thin, even film of neutral oil inside each mold with the paper towel so the tall pancakes will release cleanly later; if a mold tends to stick, dust the interior sparingly with sifted cake flour and tap out any excess. Keep everything tidy and ready on the Carrara surface — equipment primed, no hands, no stove in view.
Step 2: Make the yolk batter and incorporate dry ingredients
Crack and separate the eggs into two clean bowls; reserve the yolks in a matte dove-grey ceramic mixing bowl. Add the granulated sugar and whisk the yolks until pale and slightly thickened, then whisk in whole milk and pure vanilla until silky and smooth. In a small ceramic ramekin sift together cake flour, baking powder, and fine sea salt, then sift the dry mix directly into the yolk mixture and whisk gently just until homogeneous — a soft, custardy, pale-yellow batter with a satiny texture and no dry streaks. The dove-grey bowl and a stainless whisk rest together, showing the smooth batter ready for the next step.
Step 3: Whip the egg whites to glossy medium-stiff peaks
Transfer the egg-white bowl (the same matte dove-grey ceramic bowl used earlier for continuity) or a matching bowl, and begin whipping with a metal whisk or electric whisk attachment. Watch the progression from foamy opaque bubbles to glossy white meringue as sugar is added gradually; the final meringue should be thick, glossy, and hold medium-stiff peaks that gently curl at the tip. Present the bowl of glossy meringue with the whisk propped on the rim and a small ramekin of remaining sugar nearby, emphasizing airy texture and fine, satiny peaks.
Step 4: Fold and finish the soufflé pancake batter
Gently fold roughly one-third of the meringue into the yolk batter using a flexible spatula, then fold in the remaining meringue in two additions with a lifting, turning motion to preserve air. The result is a thick, billowy, cloud-like batter that holds soft mounds and shows visible, lofty air pockets — glossy yet resilient. Keep the matte dove-grey bowl, a pale spatula with batter streaks, and a small stainless measuring spoon as persistent utensils to signal continuity and texture: soft, pillowy, lightly aerated batter ready to be portioned.
Step 5: Portion, steam-cook, flip, and release the pancakes
Scoop the tall batter into the greased ring molds placed on a thinly oiled skillet surface (displayed on the marble without any visible stove), filling each mold halfway to two-thirds so the batter mounds naturally. Show the filled molds on the marble with a shallow puddle of water in the skillet rim (for steam) and a tight-fitting lid set aside (off-camera or resting upside down on the surface) to imply steaming; after gentle covered cooking and a careful flip in-mold, the pancakes emerge tall, jiggly, lightly golden, and still springy. Present the released pancakes sitting upright on the marble with the metal molds and a small offset spatula nearby, highlighting the airy interior and pale golden exterior ready for plating.
Step 6: Assemble, finish, and serve the plated pancakes
Stack one or two of the warm, towering soufflé pancakes on a simple shallow white ceramic plate; top with a generous quenelle of softly whipped cream (smooth, holding soft peaks), arrange a few fresh berries at the side, drizzle warm maple syrup sparingly so it beads and clings to the sides, and finish with a delicate dusting of powdered sugar. The final composition emphasizes the height, jiggly custardy interior visible at the cut edge, pillowy texture, and restrained color contrast against the quiet Carrara marble — all presented for immediate serving, warm and ephemeral.
Notes
- Use room-temperature eggs to achieve better meringue volume.
- Sift the cake flour to avoid lumps and to keep the batter light.
- Fold the meringue gently and stop when soft peaks remain to preserve air.
- Keep the pan temperature low and add water for steady steam to prevent browning.
- Serve immediately for the best texture; refrigerate leftovers and reheat gently in a low oven.