Açaí Bowl Recipe: a bowl that feels like summer in a spoon, and it is one of my favorite quick breakfasts. I first learned to build this Açaí Bowl Recipe on a cramped apartment balcony with a cheap blender and a serious sweet tooth. It is forgiving, bright, and endlessly adaptable, so you can make it as simple or as fancy as you like. Come with me through textures and colors and I will show you how to turn frozen packets and a banana into a shrine of cool, creamy bliss.
How This Recipe Became My Rainy-Day Favorite
I remember the first time I made this Açaí Bowl Recipe on an overcast morning when the city smelled like wet pavement. The packet of açaí felt exotic and a little intimidating, but the color—so deep and electric—lifted my mood as soon as I opened the freezer. As the blender hummed, the kitchen filled with a sweet, berry perfume and the sound of ice ticking like tiny drums. Serving the bowl on a chilled plate made it feel like a treat, even though it was basically breakfast. I ate slowly, enjoying the crunch of toasted almonds against the silky base, and felt unexpectedly comforted. Since then, this bowl has been my pick-me-up after late nights, a cooling reward after long runs, and a cheerful weekend ritual.
Key Ingredients and Why They Matter
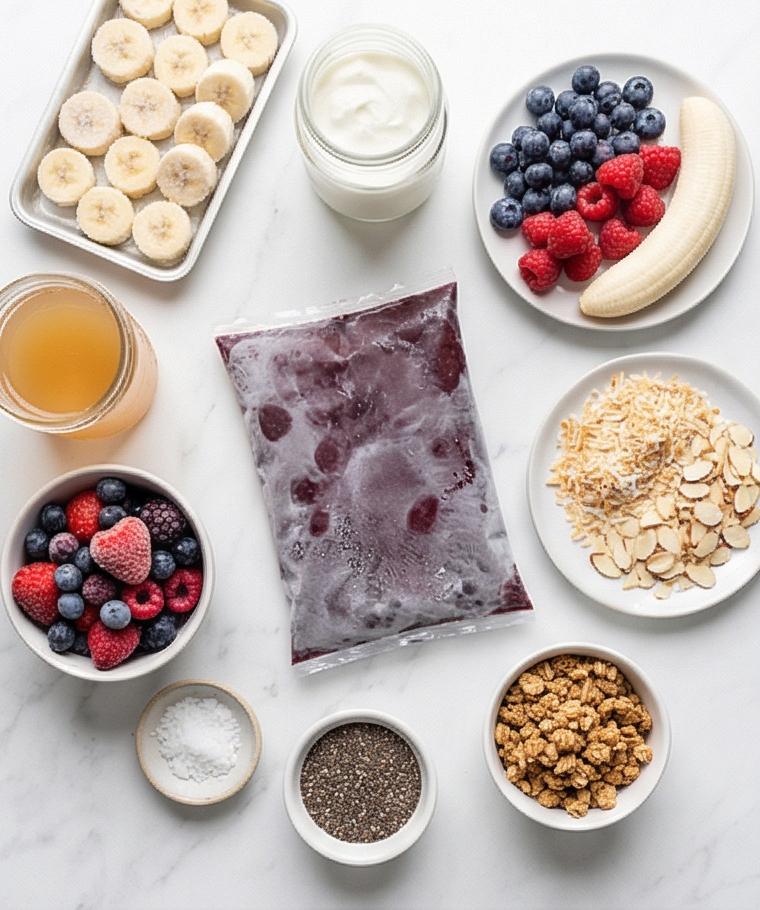
- Frozen Açaí Purée: The star, providing that signature deep color and antioxidant-rich base. Substitute with frozen mixed berries for a similar texture if you cannot find açaí.
- Banana: Adds body and natural sweetness while keeping the texture creamy. Use frozen mango for a tropical twist.
- Frozen Mixed Berries: Boosts flavor, color, and cold structure. Swap for all-blueberry or mixed stone fruit in season.
- Greek Yogurt: Gives creaminess and tang, and helps the blend hold peaks. Use a dairy-free coconut yogurt for a vegan option.
- Liquid (apple juice or almond milk): Keeps blades moving without thinning the bowl. Start small and add only as needed.
Essential Kitchen Tools and Friendly Alternatives
A few simple tools make this Açaí Bowl Recipe effortless. A reliable blender is the real game changer; high speed or high torque will get you the creamiest, soft-serve texture. If you do not have a high-speed blender, use a standard blender and work in shorter bursts, or pulse with extra frozen fruit to help the blades catch. A chilled bowl keeps the finished texture from melting too fast; a metal bowl in the freezer works great as a budget option. A small spatula and a tamper (if your blender has one) make blending and shaping the bowl easier. Finally, a fine grater or zester is handy if you like adding citrus brightness.
- High-speed blender: Gives the smoothest, most stable texture; alternatives: work in batches or use a food processor.
- Small tray and freezer space: For freezing banana slices flat; alternatives: use parchment on a plate.
- Chilled serving bowl: Helps maintain structure; alternatives: metal bowl from the freezer.
- Spatula and tamper: For scraping and compacting; alternatives: use a sturdy spoon.
Step-by-Step Preparation Guide.
Step 1: Freeze the banana and keep fruit fully frozen
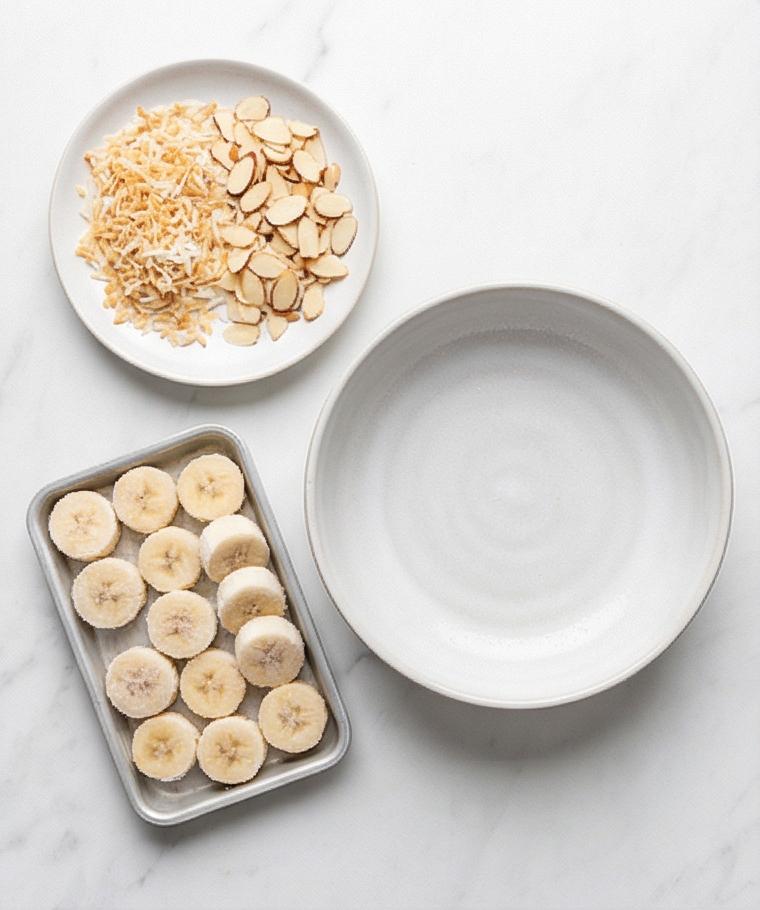
Plan ahead by peeling and thinly slicing the large ripe banana and spreading the slices in a single layer on a small tray; freeze at 0°F (-18°C) until rock solid. At the same time keep the açaí purée packet and mixed berries frozen at the same temperature. This step is all about temperature and structure — the banana must be a solid frozen disc so it contributes body, not water, to the final blend.
Step 2: Toast coconut and almonds (optional) and cool
If you’re using shredded coconut and sliced almonds, toast them quickly in a dry skillet over medium-low heat until lightly golden and fragrant, 3–5 minutes, stirring constantly; transfer immediately to a cool plate to stop cooking and preserve crispness. Let them cool completely at room temperature so they stay crunchy. This step transforms raw flakes and slivers into thin, golden, crisp shards with warm nutty aromas.
Step 3: Chill the serving bowl for best texture
Place the serving bowl in the refrigerator (about 39°F / 4°C) for at least 15 minutes, or the freezer for 10 minutes; a cold bowl helps the açaí base keep its soft-serve, spoonable density when transferred. This quiet, preparatory pause ensures the final presentation holds a high mound and resists rapid melting.
Step 4: Build the liquid base in the blender
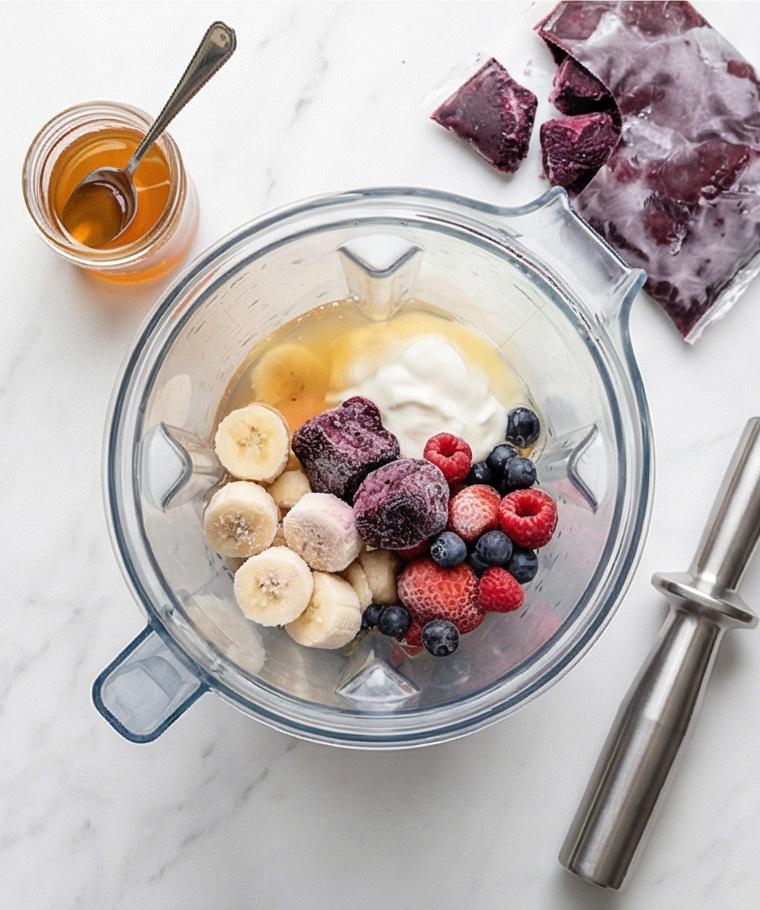
In a high-speed blender add 1/4 cup cold apple juice or unsweetened almond milk, 1/4 cup cold Greek yogurt, 1–2 teaspoons honey or maple syrup (start small), a teaspoon of lime juice if using, and a small pinch of fine sea salt. This gentle liquid layer is deliberately small — it’s only there to help the blades catch the frozen fruit and create a creamy, thick emulsion rather than a soupy puree.
Step 5: Add frozen açaí packet and frozen fruit on top
Run the sealed frozen açaí packet briefly under cool running water just long enough to break it into a few chunks. Cut it open and add the frozen açaí purée to the blender, then layer in the frozen banana slices and the 1/2 cup frozen mixed berries on top of the liquid base. The visual result should be a stacked, stratified blender jar: pale liquid at the bottom, deep purple açaí and frosty fruit slabs above — ready to be transformed.
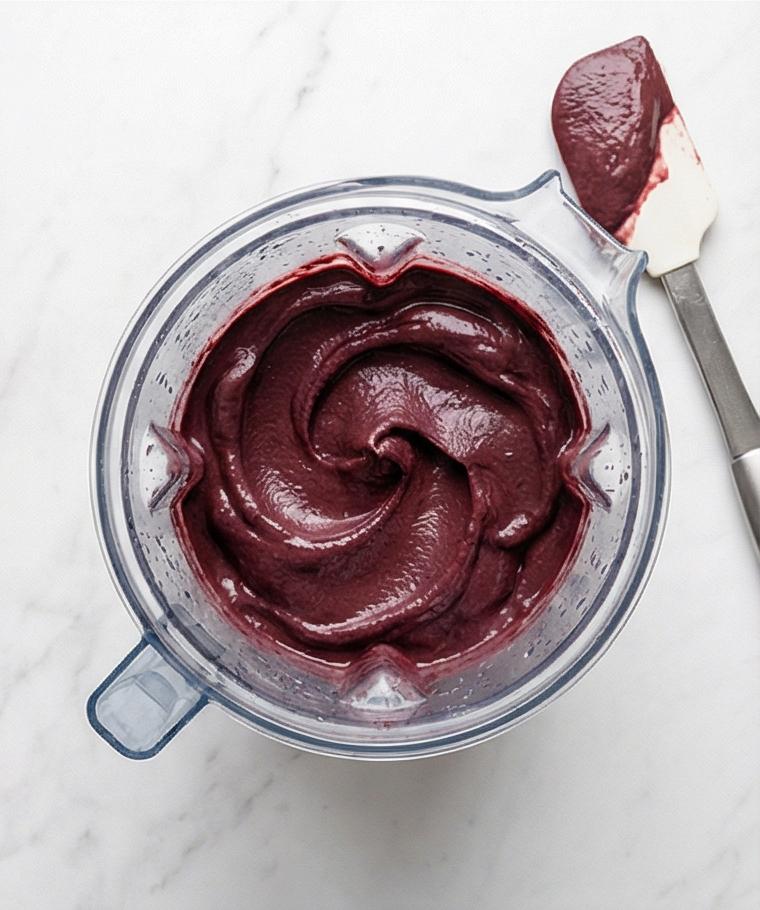
Step 6: Blend to a thick, spoonable soft-serve texture
Start blending on low and ramp to high, using a tamper if available, pausing to scrape the sides and adding cold liquid 1 tablespoon at a time only if the blades struggle. Blend in short bursts until the mixture is glossy, dense, and smooth — a soft-serve–like texture that holds a peak on a spoon. Stop as soon as it’s homogeneous and very cold; this step is about preserving structure and gloss, not achieving maximum fluidity.
Step 7: Protect texture and correct if necessary
If the mixture loosens or becomes soupy, rescue it with a few ice cubes or a handful of extra frozen berries and pulse briefly to re-thicken. The finished base should be very cold, glossy, and stiff enough to mound — imagine an upright swirl of frozen yogurt that retains clean edges.
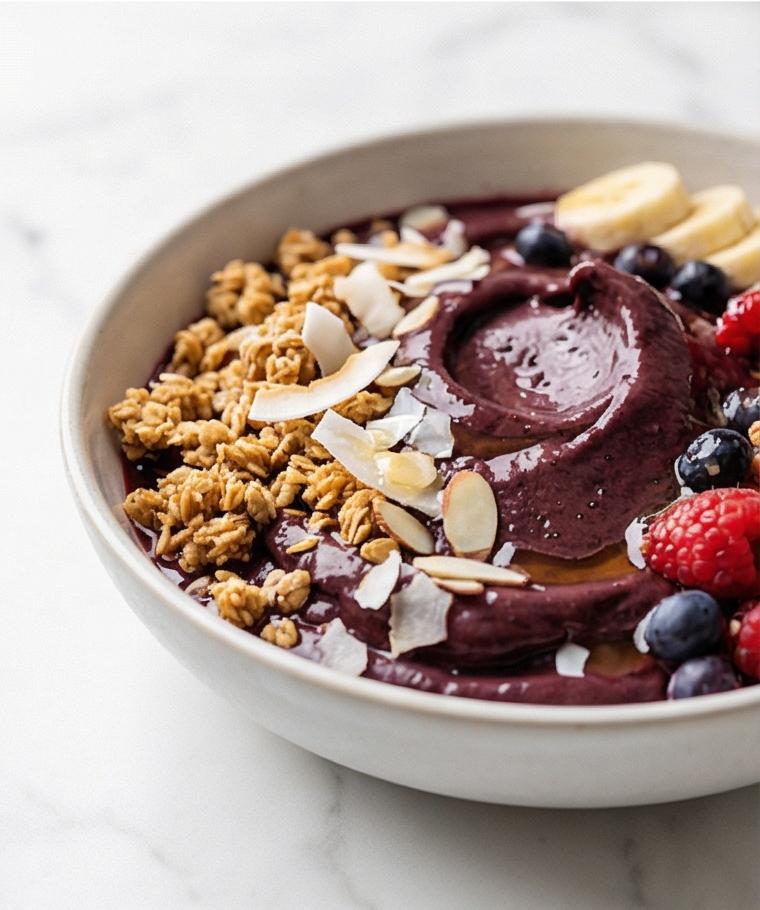
Step 8: Transfer to the chilled serving bowl and shape
Remove the chilled bowl and use a spatula to scoop the thick açaí into the center, piling slightly higher in the middle. Smooth the surface with the back of a spoon or spatula to create a flat, even plane for toppings while keeping a generous, compact mound beneath.
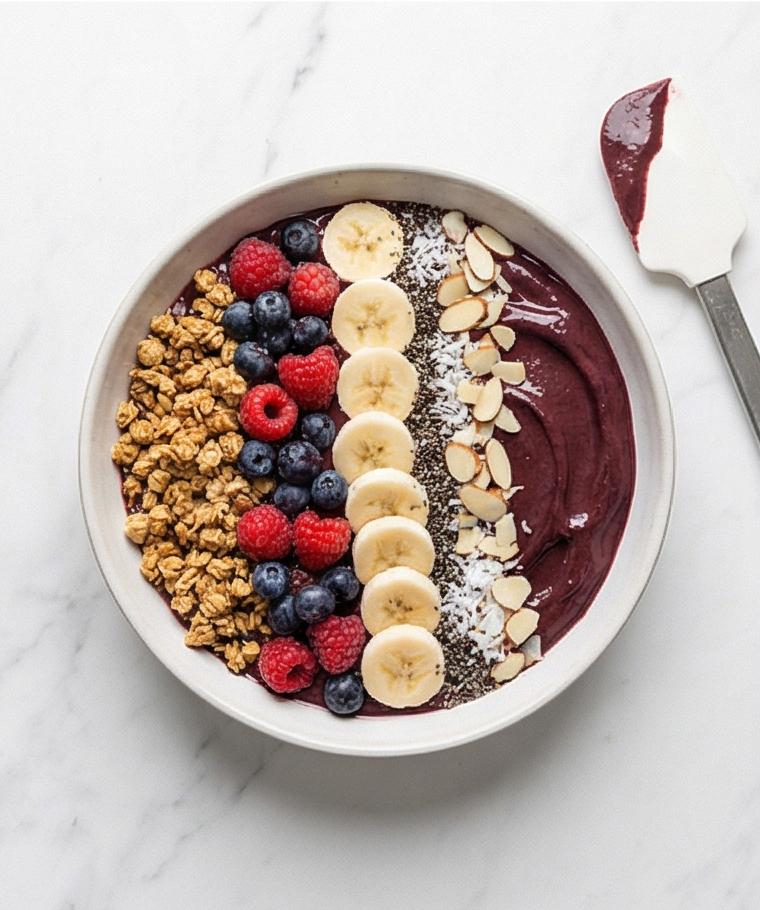
Step 9: Artfully arrange the toppings
Layer the toppings with intent: place a 1/4 cup stripe of crunchy granola across one side, spoon a neat cluster of fresh mixed berries beside it, fan the half banana slices if using, then scatter 1 tablespoon chia seeds and 1 tablespoon sliced almonds evenly. Finish by sprinkling 2 tablespoons shredded coconut so every bite offers contrast — crisp, crunchy, and juicy against the creamy base.
Step 10: Drizzle and serve immediately
If desired, finish with 1–2 teaspoons honey or maple syrup drizzled over the toppings for a glossy finish. Serve at once while the açaí is very cold and thick (ideally within 5–10 minutes of blending). Enjoy with a spoon, scooping through the creamy base and crunchy toppings in each bite.
Making It Your Own
Try a tropical version by swapping half the banana for frozen mango and adding shredded coconut on top. For a protein boost, stir in a scoop of unflavored or vanilla protein powder with the liquid base and use Greek yogurt as the dairy component. If you prefer less sugar, use unsweetened almond milk and omit the drizzle, then add a squeeze of lime for brightness. In winter, warm spices like a whisper of cinnamon or grated ginger can make this bowl feel cozy. Small experiments teach you what textures and toppers you love most, and each variation is worth tasting on its own.
How to Serve
When I serve this Açaí Bowl Recipe for friends, presentation matters as much as flavor. Chill bowls ahead and arrange toppings in stripes or concentric circles so every spoonful is pretty. For a brunch, make individual bowls and set toppings in small dishes for guests to customize. For a larger gathering, consider a build-your-own açaí station with extra fruits, seeds, and crunchy bits so people can pick their favorites. If you need to double the recipe, blend in two batches and keep the first batch in a chilled bowl in the freezer for a few minutes while you finish the second, then serve immediately.
Storage and Reheating Tips
This bowl is best enjoyed fresh and cold. If you have leftovers, store the blended base in an airtight container in the freezer; it will keep for 1 to 2 weeks but will firm up. When you want to serve again, let the container sit at room temperature for 5 minutes, then pulse in a blender with a splash of cold liquid to soften to spoonable texture.
For prepped components, keep granola and toasted nuts in a sealed jar at room temperature for up to one week to preserve crunch. Fresh sliced banana for topping should be kept separate and used within a few hours to avoid browning.
Common Mistakes and How to Avoid Them
Overthinning the base is the number one slip. Add liquid sparingly and stop as soon as blades move smoothly. If you do thin it too much, rescue with more frozen fruit or a few ice cubes.
Failing to freeze the banana solid will make the bowl watery. Plan ahead and give the banana at least four hours to become rock hard. Keeping the serving bowl chilled also saves you from rapid meltdown.
Final Thoughts
Give this Açaí Bowl Recipe a try the next time you want something bright, satisfying, and quick. It is forgiving, colorful, and endlessly adaptable, and it has a way of making ordinary mornings feel a little celebratory.
Frequently Asked Questions.
- What is the best way to store leftover açaí base?
Store it in an airtight container in the freezer for up to two weeks; pulse with a splash of cold liquid to restore texture when ready to eat.
- Can I make this Açaí Bowl Recipe without dairy?
Yes, use unsweetened almond milk or coconut yogurt and it will still be creamy and delicious.
- How do I keep toppings crunchy?
Store granola and toasted nuts separately at room temperature and add them right before serving.
- Can I use fresh fruit instead of frozen?
Fresh fruit will work for toppings, but the base needs frozen banana and fruit to achieve the right texture.
- Is açaí powder a good substitute for frozen açaí purée?
Açaí powder can be used, but you will need to freeze additional fruit and adjust liquids to get the same thick, soft-serve texture.
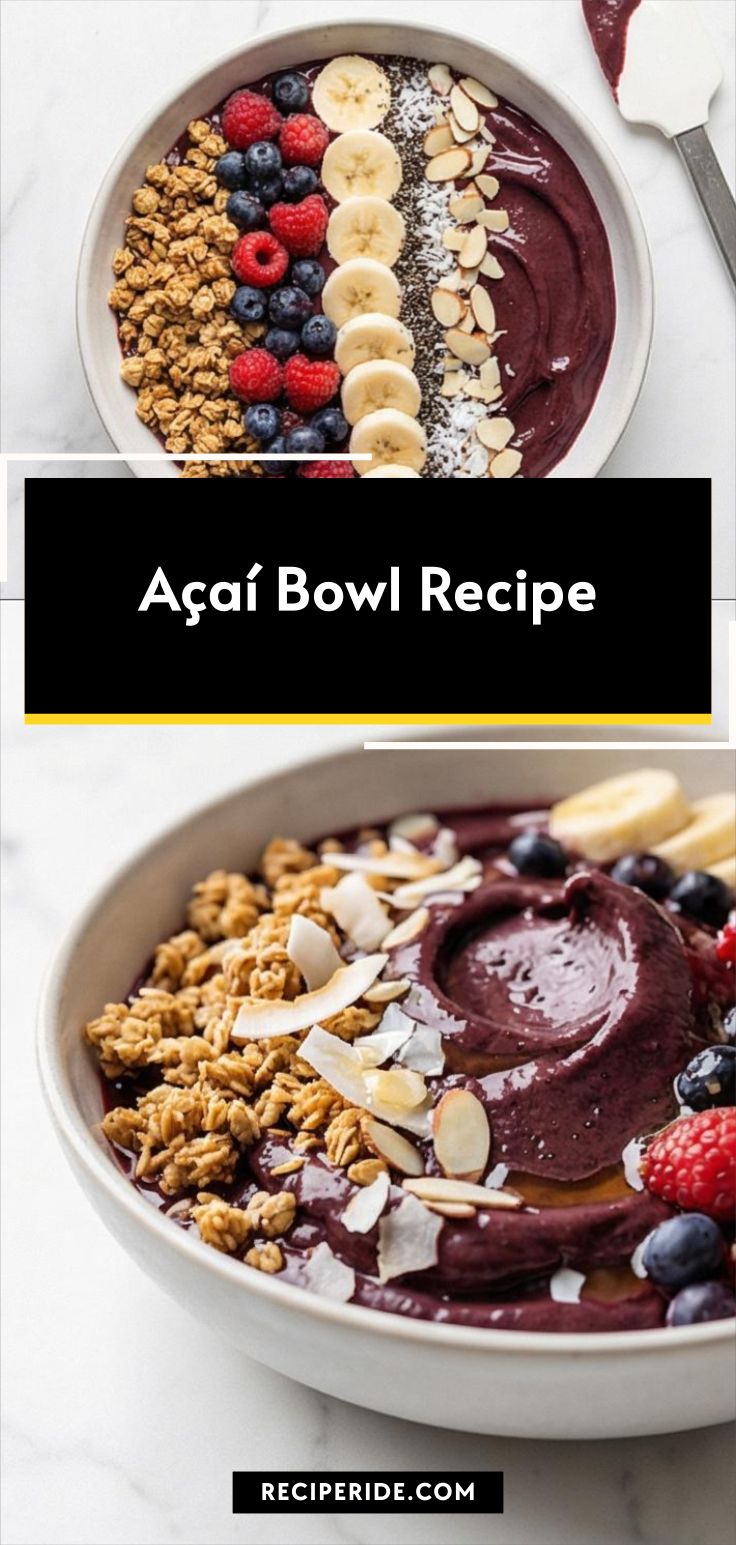
Açaí Bowl Recipe
Make this Açaí Bowl Recipe now: creamy açaí, frozen banana, and crunchy toppings for a quick, vibrant breakfast.
Ingredients
Instructions
Step 1: Freeze the banana and keep fruit fully frozen
Plan ahead by peeling and thinly slicing the large ripe banana and spreading the slices in a single layer on a small tray; freeze at 0°F (-18°C) until rock solid. At the same time keep the açaí purée packet and mixed berries frozen at the same temperature. This step is all about temperature and structure — the banana must be a solid frozen disc so it contributes body, not water, to the final blend.
Step 2: Toast coconut and almonds (optional) and cool
If you're using shredded coconut and sliced almonds, toast them quickly in a dry skillet over medium-low heat until lightly golden and fragrant, 3–5 minutes, stirring constantly; transfer immediately to a cool plate to stop cooking and preserve crispness. Let them cool completely at room temperature so they stay crunchy. This step transforms raw flakes and slivers into thin, golden, crisp shards with warm nutty aromas.
Step 3: Chill the serving bowl for best texture
Place the serving bowl in the refrigerator (about 39°F / 4°C) for at least 15 minutes, or the freezer for 10 minutes; a cold bowl helps the açaí base keep its soft-serve, spoonable density when transferred. This quiet, preparatory pause ensures the final presentation holds a high mound and resists rapid melting.
Step 4: Build the liquid base in the blender
In a high-speed blender add 1/4 cup cold apple juice or unsweetened almond milk, 1/4 cup cold Greek yogurt, 1–2 teaspoons honey or maple syrup (start small), a teaspoon of lime juice if using, and a small pinch of fine sea salt. This gentle liquid layer is deliberately small — it’s only there to help the blades catch the frozen fruit and create a creamy, thick emulsion rather than a soupy puree.
Step 5: Add frozen açaí packet and frozen fruit on top
Run the sealed frozen açaí packet briefly under cool running water just long enough to break it into a few chunks. Cut it open and add the frozen açaí purée to the blender, then layer in the frozen banana slices and the 1/2 cup frozen mixed berries on top of the liquid base. The visual result should be a stacked, stratified blender jar: pale liquid at the bottom, deep purple açaí and frosty fruit slabs above — ready to be transformed.
Step 6: Blend to a thick, spoonable soft-serve texture
Start blending on low and ramp to high, using a tamper if available, pausing to scrape the sides and adding cold liquid 1 tablespoon at a time only if the blades struggle. Blend in short bursts until the mixture is glossy, dense, and smooth — a soft-serve–like texture that holds a peak on a spoon. Stop as soon as it’s homogeneous and very cold; this step is about preserving structure and gloss, not achieving maximum fluidity.
Step 7: Protect texture and correct if necessary
If the mixture loosens or becomes soupy, rescue it with a few ice cubes or a handful of extra frozen berries and pulse briefly to re-thicken. The finished base should be very cold, glossy, and stiff enough to mound — imagine an upright swirl of frozen yogurt that retains clean edges.
Step 8: Transfer to the chilled serving bowl and shape
Remove the chilled bowl and use a spatula to scoop the thick açaí into the center, piling slightly higher in the middle. Smooth the surface with the back of a spoon or spatula to create a flat, even plane for toppings while keeping a generous, compact mound beneath.
Step 9: Artfully arrange the toppings
Layer the toppings with intent: place a 1/4 cup stripe of crunchy granola across one side, spoon a neat cluster of fresh mixed berries beside it, fan the half banana slices if using, then scatter 1 tablespoon chia seeds and 1 tablespoon sliced almonds evenly. Finish by sprinkling 2 tablespoons shredded coconut so every bite offers contrast — crisp, crunchy, and juicy against the creamy base.
Step 10: Drizzle and serve immediately
If desired, finish with 1–2 teaspoons honey or maple syrup drizzled over the toppings for a glossy finish. Serve at once while the açaí is very cold and thick (ideally within 5–10 minutes of blending). Enjoy with a spoon, scooping through the creamy base and crunchy toppings in each bite.
Notes
- Freeze banana slices flat so they blend into a creamy texture and not ice shards.
- Add liquid 1 tablespoon at a time to avoid a soupy bowl.
- Toast coconut and almonds briefly and cool to preserve crunch.
- Keep granola and toppings separate until serving for maximum texture.
- Rescue a soupy blend with a few ice cubes or extra frozen fruit and pulse briefly.