Breakfast Pizza Recipe has always been my favorite weekend project. I love waking up a little early, turning on the oven, and filling the kitchen with the smell of bacon and warm dough. This Breakfast Pizza Recipe brings brunch flavors together in one honest, satisfying bite: crisp crust, gooey cheese, savory sausage, and custardy eggs. It feels like a small celebration on a weekday morning or a relaxed treat for guests who show up hungry.
The magic of this Breakfast Pizza Recipe is that it manages to be both comforting and a little fancy: garlic cream sauce instead of plain tomato, soft scrambled eggs tucked into the toppings, and a crust with a tender chew and a lovely blistered rim. If you like hands-on cooking that rewards a bit of patience, this one is worth making.
How This Pizza Became My Slow-Sunday Ritual
I first made this pizza on a rainy weekend when I wanted something warm and generous that would stretch across the whole morning. The first time I pulled it from the oven, the kitchen smelled like a diner at sunrise: rendered bacon, browned sausage, and a garlicky cream that made the whole room sing. The dough was sticky at first and felt like a small puzzle to coax into a disk, but once the crust browned and the cheese bubbled, everyone gathered around the counter, forks in hand. I remember the hush as the first slice was cut, then an immediate chorus of delighted noises. Making the Breakfast Pizza Recipe turned into a ritual where the process is as enjoyable as the eating: kneading while a pot of coffee percolates, sautéing the peppers with soft jazz on low, and brushing the crust with olive oil before the big bake. Those little sensory moments are what made it more than a recipe; it became a way to slow down and share.
The Ingredients That Make It Sing
This pizza comes together from pantry staples and a few special items that lift it into something memorable. I focus on ingredients that provide structure, fat for flavor, and textures that contrast: a tender yet chewy crust, sizzling bacon and sausage for crunch and bite, and a silky garlic cream that keeps the pie lush. Choose fresh eggs and high-quality cheese for the best results; leaner sausage can be used, but a little fat improves flavor. If you need a swap, try turkey bacon or a plant-based sausage and a mild non-dairy milk for the sauce.
- All-purpose flour: The structural backbone for the dough; unbleached is best. You can try bread flour for extra chew, but add a touch more water.
- Active dry yeast: Gives lift and flavor; instant yeast works too but cut proofing time slightly.
- Olive oil: Adds richness and helps the crust brown; neutral oil is an option.
- Bacon: Provides salty crunch; turkey bacon is a lean substitute.
- Breakfast sausage: Adds savory pockets and caramelized bits; use vegetarian crumbles for a meatless version.
- Eggs: Make the pie feel like breakfast; try pasteurized egg products if concerned.
- Mozzarella, cheddar, Parmesan: A mix for melt, tang, and finishing flavor; swap to milder or sharper cheeses as you like.
- Milk/cream and butter: For soft scrambled eggs and the garlic cream; use whole milk or plant-based alternatives.

Essential Kitchen Tools and Why They Matter
A few reliable tools make this Breakfast Pizza Recipe much easier and more enjoyable. You do not need a pro setup, but the right items help with texture and timing. Investing in one or two items will pay off across many recipes.
- Mixing bowl: Large and sturdy so the dough can be mixed and rest comfortably; a plastic or stainless steel bowl works fine.
- Baking stone or steel: Creates the crisp, well-browned bottom; if you do not have one, use a preheated heavy baking sheet.
- Rolling/working surface: Marble or wooden board for shaping the dough; dust with flour or cornmeal to prevent sticking.
- Nonstick skillet: For browning bacon, sausage, and saut�eing aromatics; cast iron is a great alternative.
- Small whisk and saucepan: To make the garlic cream sauce smoothly without lumps.
- Pastry brush and parchment paper: For brushing the crust and transferring the pizza cleanly to the stone.
Step-by-Step Preparation Guide
Step 1: Bloom the yeast and combine with oil
Warm water, sugar, and active dry yeast are gently combined in a small clear glass measuring cup until the surface forms a delicate, foamy cap that smells faintly yeasty; a teaspoon of olive oil is whisked in so the liquid sits silky and glossy. The description emphasizes the airy foam, tiny bubble textures, and the glossy sheen where oil ribbons across the surface — a quiet, fragrant starting point for the dough.
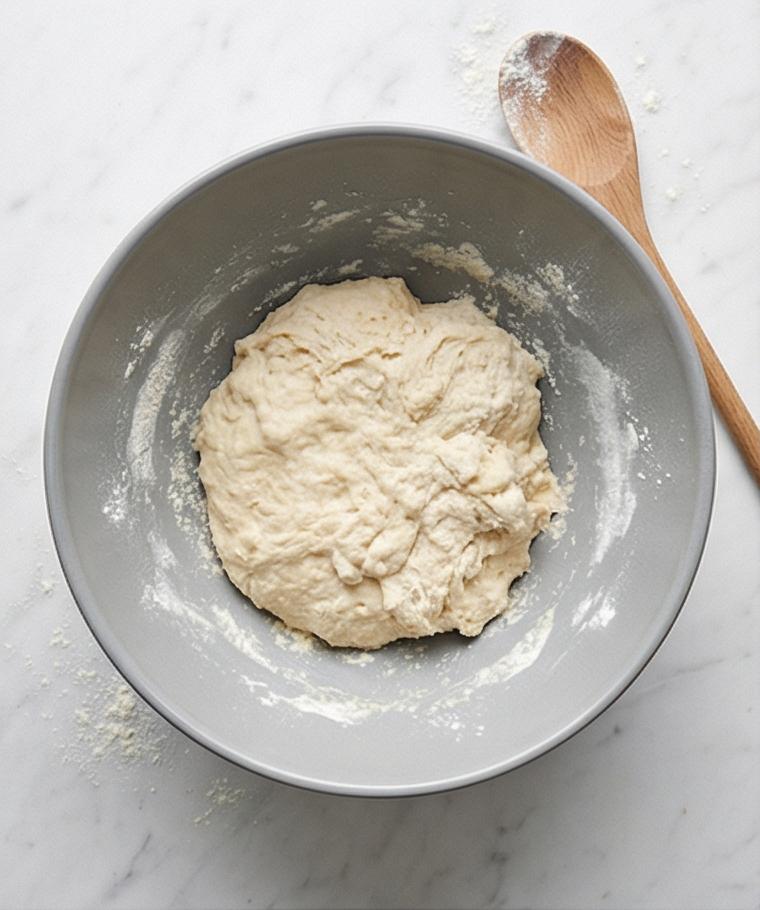
Step 2: Mix the flour and form a shaggy dough
In a large matte-grey ceramic mixing bowl, the all-purpose flour and salt are whisked, then the foamy yeast mixture is poured in and stirred with a wooden spoon until a rough, shaggy dough forms with no dry streaks. The dough looks coarse and patchy at this point — sticky pockets of hydration, scattered flour dust, and a wooden spoon coated in tacky gluten.
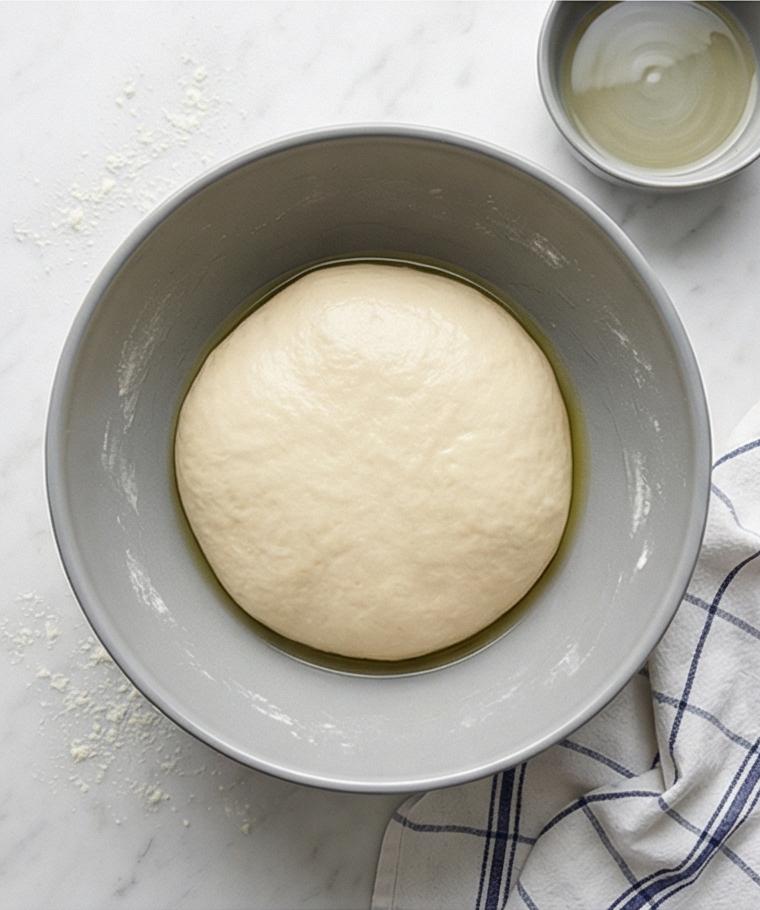
Step 3: Knead until smooth and let rise until doubled
The shaggy mass is turned onto a lightly floured Carrara marble surface and kneaded until smooth, elastic, and only slightly tacky, developing a satiny gluten window and faint stretch marks from the fingers; the dough is then given a light coating of olive oil, placed back in the same matte-grey ceramic bowl, covered, and left in a warm spot until it puffs and roughly doubles, forming a smooth, domed surface. The focus here is on the dough�s glossy skin, soft spring, and the gentle air pockets beneath the surface.
Step 4: Brown the bacon and crumble the sausage, then rest
Crisp, browned bacon pieces and small, craggy crumbles of breakfast sausage are transferred to a paper-towel�lined plate to drain and cool; the bacon is mahogany with rendered gloss, the sausage shows browned fissures and a slightly caramelized exterior. A small glass jar holds the reserved tablespoon of rendered fat. Everything is arranged neatly on the marble so the cooked meats can rest and be inspected for texture and color without any stove visible.
Step 5: Saut�e9 the aromatics, make soft scrambled eggs, and whisk a garlic cream sauce
In the reserved pan juices the finely diced yellow onion and red bell pepper have been softened to translucent, lightly golden bits and are set alongside the meats; separately, very soft, glossy scrambled eggs are folded until just underdone and spooned onto a plate so they remain pillowy and custardy. The garlic cream sauce is shown cooled in a small white ceramic pouring jug � a pale, silky b�chamel-like texture that clings to a spoon and shows flecks of minced garlic and freshly ground pepper. These components are arranged together on the marble, ready for assembly.

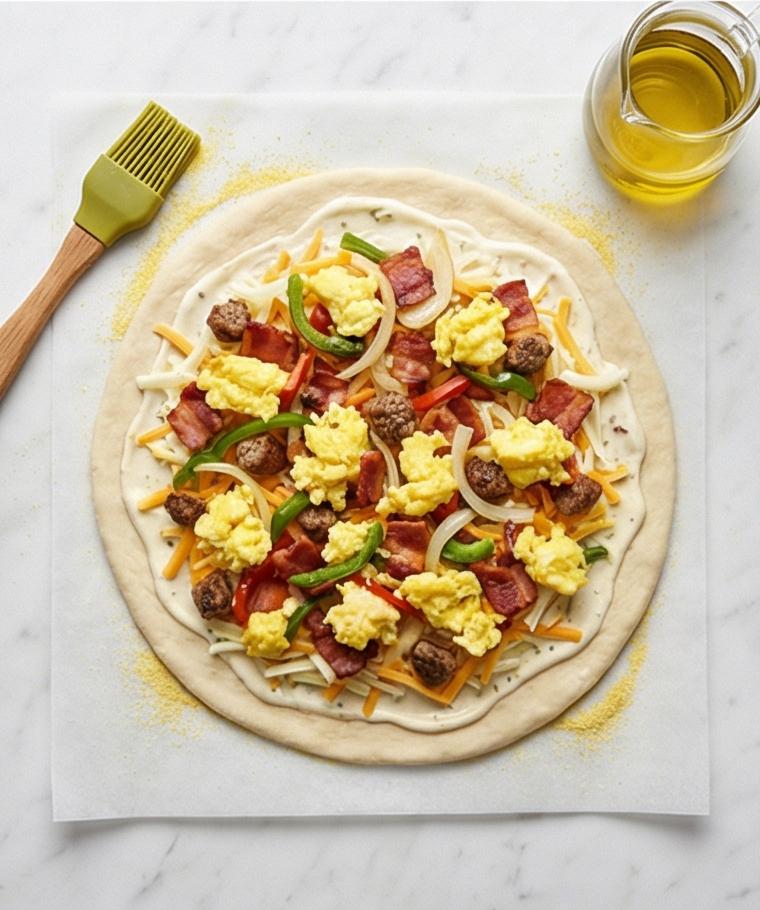
Step 6: Preheat the stone, shape the dough, and assemble the pizza
After the dough is punched down and rested, it is pressed and stretched on the marble into a 12-inch disc with a slightly higher rim, placed on a parchment square dusted with fine cornmeal, then spread with the cooled garlic cream sauce leaving a neat 1/2-inch border. Half of the shredded mozzarella and cheddar are sprinkled, followed by an even scatter of bacon, sausage, saut�e9ed onion and bell pepper, and pieces of the soft scrambled eggs; the remaining cheeses and grated Parmesan finish the top, and a small pastry brush and a tiny glass jug of olive oil sit beside the crust for the final brush. The assembled, uncooked pizza is calm, layered, and ready for the hot stone.
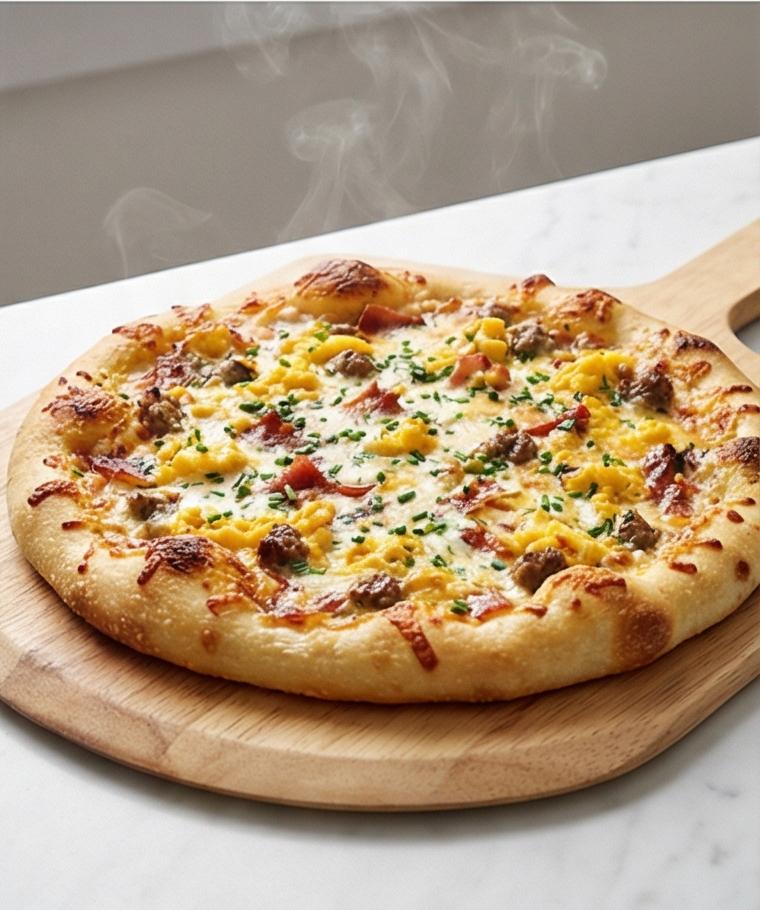
Step 7: Bake until golden, rest, garnish, and slice to serve
The baked pizza is described after baking: a deep golden-brown rim with tiny blisters, a well-browned bottom, bubbling, slightly bronzed cheese, visible ribbons of garlicky cream, crisp bacon fragments, browned sausage pockets, and soft egg curds that have set without drying; it rests briefly on a wooden board, is sprinkled with finely chopped chives and a pinch of crushed red pepper flakes, then sliced into 6�8 wedges and served with optional hot sauce on the side. The finished result is juicy, textural, and composed for hot serving.
Making It Your Own
I like to experiment with toppings depending on the season. In spring, I swap the red pepper for thinly sliced asparagus and scatter fresh pea shoots after baking. In cooler months, a handful of sautéed mushrooms and a drizzle of truffle oil make a luxe version. For a vegetarian take, I replace bacon and sausage with smoked tempeh and roasted cherry tomatoes; the garlic cream keeps the pie feeling rich even without meat. If you want more heat, stir chopped pickled jalape�f1os into the sauce or top with hot sauce when serving. Small changes make the Breakfast Pizza Recipe feel new each time.
How to Serve
When I serve this at a brunch gathering, I bake the pizza on a hot stone so the bottom is well browned and the slices hold up. Let it rest for a few minutes so the cheese sets slightly, then slice into 6 to 8 wedges depending on appetite. For a crowd, make two pizzas and keep one warm on a sheet in a low oven set to about 200°F (95°C). Pair with a simple arugula salad dressed with lemon and olive oil to cut the richness, and offer hot sauce and crushed red pepper flakes on the side so guests can customize.
If hosting a more formal brunch, serve each wedge with a small herb garnish and a microgreens toss on the side. For kids or picky eaters, make a half-and-half pizza with mozzarella only on one side and the full toppings on the other.
Storage and Reheating Tips
Leftover slices refrigerate well for 2 to 3 days in an airtight container. Reheat in a hot skillet over medium-low heat with a lid for a few minutes to revive both the crust and the topping without making the eggs rubbery. This keeps the bottom crisp and melts the cheese again.
For longer storage, freeze individual slices wrapped tightly in plastic and foil for up to 1 month. Thaw in the refrigerator before reheating, then finish in a 375°F (190°C) oven for 8 to 10 minutes until warmed through and the crust is crisp.
Common Mistakes and How to Avoid Them
Expecting the dough to behave like a no-rise shortcut can leave you with a dense crust. Give the dough time to relax and rise; it rewards patience with better flavor and texture. If your kitchen is cool, proof the dough in a warm spot like an oven with the light on.
Overcooking the eggs is another frequent slip. Aim for very soft scrambled eggs and add them to the pizza just before baking or spoon them on after the bake to keep them tender. Also, do not overload the pie with wet toppings or the crust can become soggy.
Final Thoughts
Give the Breakfast Pizza Recipe a try this weekend. It is a joyful mix of textures and flavors, and the process is as satisfying as the result. Invite a friend, make coffee, and enjoy the simple ritual of turning humble ingredients into something everyone will love.
Frequently Asked Questions.
- Can I make the dough ahead of time and refrigerate it? Yes, you can refrigerate the dough for up to 24 hours after the first mix; bring it to room temperature before shaping and allow a bit more time to relax.
- Can I use store-bought pizza dough? Yes, store-bought dough works well and can save time; choose a high-quality option and let it sit at room temperature for 30 minutes before stretching.
- What can I use instead of the garlic cream sauce? Try a light ricotta spread or even a thin layer of olive oil and garlic for a simpler option, though the cream sauce adds richness.
- How do I keep the crust from getting soggy? Preheat a baking stone or steel, limit wet toppings, and brush the crust with a little olive oil to create a barrier.
- Is there a vegetarian version that still tastes rich? Yes, swap meats for smoked tempeh or roasted mushrooms and keep the garlic cream sauce; add a salty finish like capers or olives for depth.

Breakfast Pizza Recipe
Make the Breakfast Pizza Recipe for a savory weekend brunch with bacon, sausage, and creamy garlic sauce.
Ingredients
Instructions
Step 1: Bloom the yeast and combine with oil
Warm water, sugar, and active dry yeast are gently combined in a small clear glass measuring cup until the surface forms a delicate, foamy cap that smells faintly yeasty; a teaspoon of olive oil is whisked in so the liquid sits silky and glossy. The description emphasizes the airy foam, tiny bubble textures, and the glossy sheen where oil ribbons across the surface — a quiet, fragrant starting point for the dough.
Step 2: Mix the flour and form a shaggy dough
In a large matte-grey ceramic mixing bowl, the all-purpose flour and salt are whisked, then the foamy yeast mixture is poured in and stirred with a wooden spoon until a rough, shaggy dough forms with no dry streaks. The dough looks coarse and patchy at this point — sticky pockets of hydration, scattered flour dust, and a wooden spoon coated in tacky gluten.
Step 3: Knead until smooth and let rise until doubled
The shaggy mass is turned onto a lightly floured Carrara marble surface and kneaded until smooth, elastic, and only slightly tacky, developing a satiny gluten window and faint stretch marks from the fingers; the dough is then given a light coating of olive oil, placed back in the same matte-grey ceramic bowl, covered, and left in a warm spot until it puffs and roughly doubles, forming a smooth, domed surface. The focus here is on the dough’s glossy skin, soft spring, and the gentle air pockets beneath the surface.
Step 4: Brown the bacon and crumble the sausage, then rest
Crisp, browned bacon pieces and small, craggy crumbles of breakfast sausage are transferred to a paper-towel–lined plate to drain and cool; the bacon is mahogany with rendered gloss, the sausage shows browned fissures and a slightly caramelized exterior. A small glass jar holds the reserved tablespoon of rendered fat. Everything is arranged neatly on the marble so the cooked meats can rest and be inspected for texture and color without any stove visible.
Step 5: Sauté the aromatics, make soft scrambled eggs, and whisk a garlic cream sauce
In the reserved pan juices the finely diced yellow onion and red bell pepper have been softened to translucent, lightly golden bits and are set alongside the meats; separately, very soft, glossy scrambled eggs are folded until just underdone and spooned onto a plate so they remain pillowy and custardy. The garlic cream sauce is shown cooled in a small white ceramic pouring jug — a pale, silky béchamel-like texture that clings to a spoon and shows flecks of minced garlic and freshly ground pepper. These components are arranged together on the marble, ready for assembly.
Step 6: Preheat the stone, shape the dough, and assemble the pizza
After the dough is punched down and rested, it is pressed and stretched on the marble into a 12-inch disc with a slightly higher rim, placed on a parchment square dusted with fine cornmeal, then spread with the cooled garlic cream sauce leaving a neat 1/2-inch border. Half of the shredded mozzarella and cheddar are sprinkled, followed by an even scatter of bacon, sausage, sautéed onion and bell pepper, and pieces of the soft scrambled eggs; the remaining cheeses and grated Parmesan finish the top, and a small pastry brush and a tiny glass jug of olive oil sit beside the crust for the final brush. The assembled, uncooked pizza is calm, layered, and ready for the hot stone.
Step 7: Bake until golden, rest, garnish, and slice to serve
The baked pizza is described after baking: a deep golden-brown rim with tiny blisters, a well-browned bottom, bubbling, slightly bronzed cheese, visible ribbons of garlicky cream, crisp bacon fragments, browned sausage pockets, and soft egg curds that have set without drying; it rests briefly on a wooden board, is sprinkled with finely chopped chives and a pinch of crushed red pepper flakes, then sliced into 6–8 wedges and served with optional hot sauce on the side. The finished result is juicy, textural, and composed for hot serving.
Notes
- Let the dough rise in a warm, draft-free spot for best results.
- Use a preheated baking stone or steel for a crisper bottom.
- Keep scrambled eggs slightly underdone before adding to the pizza to avoid dry curds.
