I have a soft spot for warm bread pulled straight from the oven, and the Garlic Knots Recipe is the kind of thing that will make your kitchen smell like a cozy Italian bakery. I started making this Garlic Knots Recipe on slow Sunday afternoons when the house needed a little cheering up, and it quickly became a go-to for guests and weeknight dinners alike. The dough is forgiving, the garlic butter is irresistible, and the finished knots vanish faster than you planned. Once you try this Garlic Knots Recipe, you may find yourself making extra just to have leftovers for sneaky midweek snacks.
How This Recipe Became My Rainy-Day Favorite
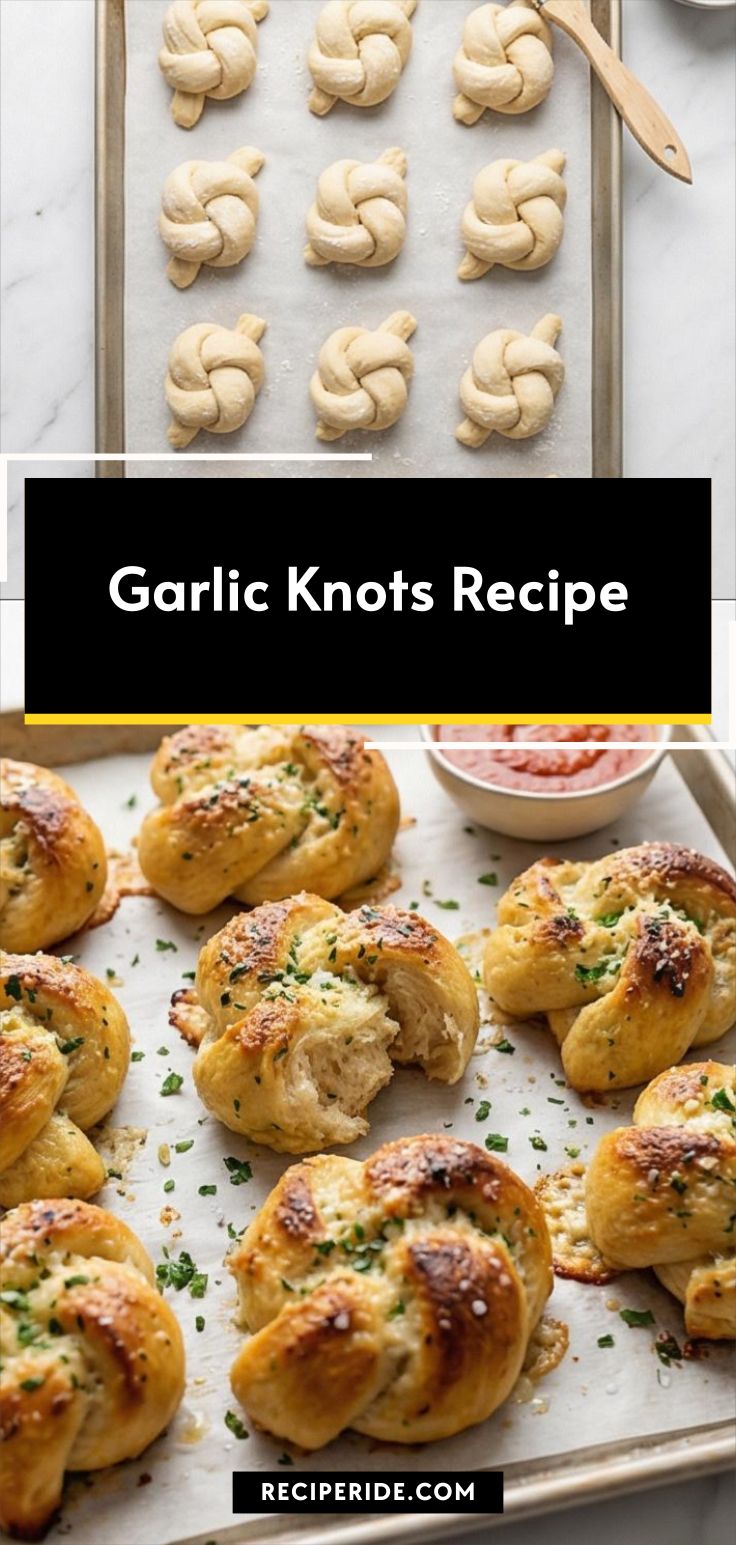
I remember the first time I braided the dough and tied it into those rustic little knots: it was raining, the windows fogged, and the scent of garlic and butter felt like a warm blanket. Kneading the dough calmed me, and the steady rhythm of rolling and tying each knot turned anxious energy into something comforting. When the timer buzzed, I pulled a tray of golden, glossy knots from the oven and the apartment filled with the crackle of hot butter and the whisper of fresh parsley. We sat around the tiny table with bowls of warm marinara and laughter, and the knots disappeared in minutes. That moment stuck with me; making Garlic Knots Recipe now feels like making a small celebration out of an ordinary day, and the memory of that rainy afternoon still makes each batch taste like comfort.
The Ingredients That Do the Heavy Lifting
- Warm Water: Activates the yeast and sets the dough temperature. Use water between 105 and 115°F; if you don’t have a thermometer, it should feel like warm bath water.
- Granulated Sugar: Feeds the yeast for a good bloom; honey is an okay substitute in a pinch.
- Yeast: The rising power. Instant or active dry both work; if using active dry, proof as directed.
- Flour: Bread flour gives chewier knots, all-purpose is fine for tender results.
- Sea Salt: Balances flavor—use fine sea salt for even distribution.
- Olive Oil and Butter: Fat for tenderness and flavor; you can use all butter for richness or all oil for a lighter profile.
- Garlic: Fresh is essential here for the brightest, most aromatic top notes.
- Parsley and Parmesan: Fresh parsley adds herbaceous lift; Parmesan gives savory, salty finish.

Essential Kitchen Tools and Why They Matter
A few simple tools make the whole process easier and more enjoyable. You do not need fancy equipment, but the right handful of items keeps the dough-handling tidy and consistent.
- Mixing Bowl: A medium-to-large bowl gives the dough room to rise; glass or stainless steel are both fine.
- Wooden Spoon: Great for that initial shaggy dough stage and prevents overworking when you are combining ingredients.
- Bench Scraper: Helps divide and shape dough neatly and keeps your hands less floured.
- Baking Sheet and Parchment: Ensures even browning and easy cleanup; an oiled sheet also works.
- Kitchen Thermometer: Handy for checking water temperature and internal doneness if you like precision.
Offer alternatives like using a stand mixer with a dough hook for less kneading, or a heavy skillet to bake smaller batches if you do not have a full-size oven tray.
Step-by-Step Preparation Guide
Step 1: Activate the yeast
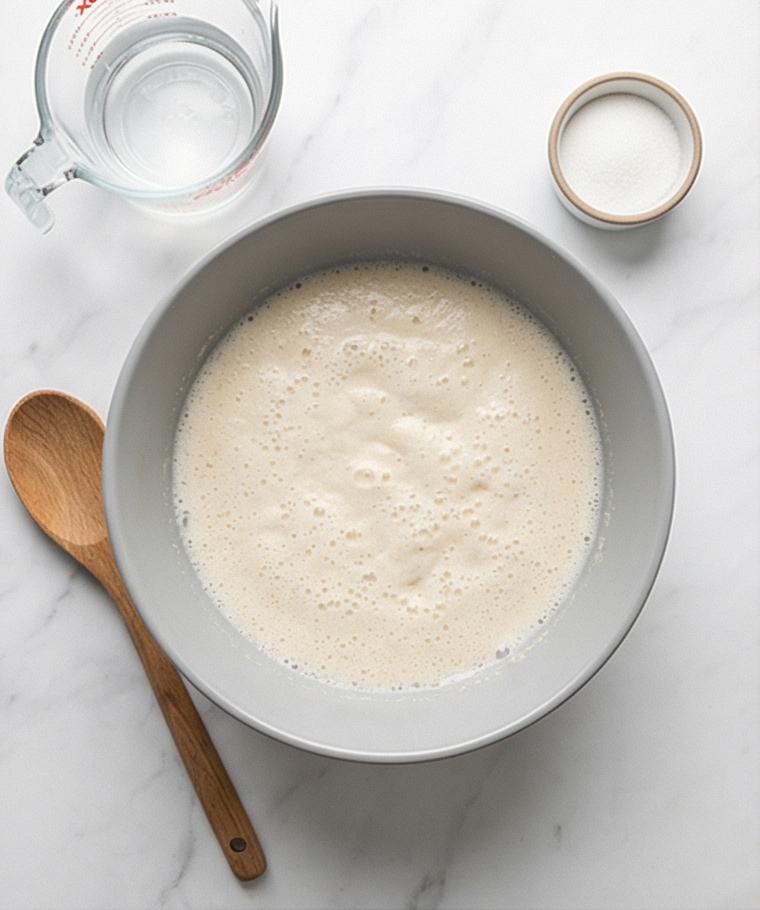
Combine the warm water and granulated sugar in a medium mixing bowl, sprinkle the yeast over the surface, stir gently until dissolved and let it sit until it becomes noticeably foamy and creamy. You want a glossy, bubbly surface — a clear visual sign the yeast is alive. If the mixture sits flat and dull, discard and start again; healthy foam will billow up with delicate, pearl-like bubbles and a faint yeasty aroma.
Step 2: Build the dough into a shaggy mass
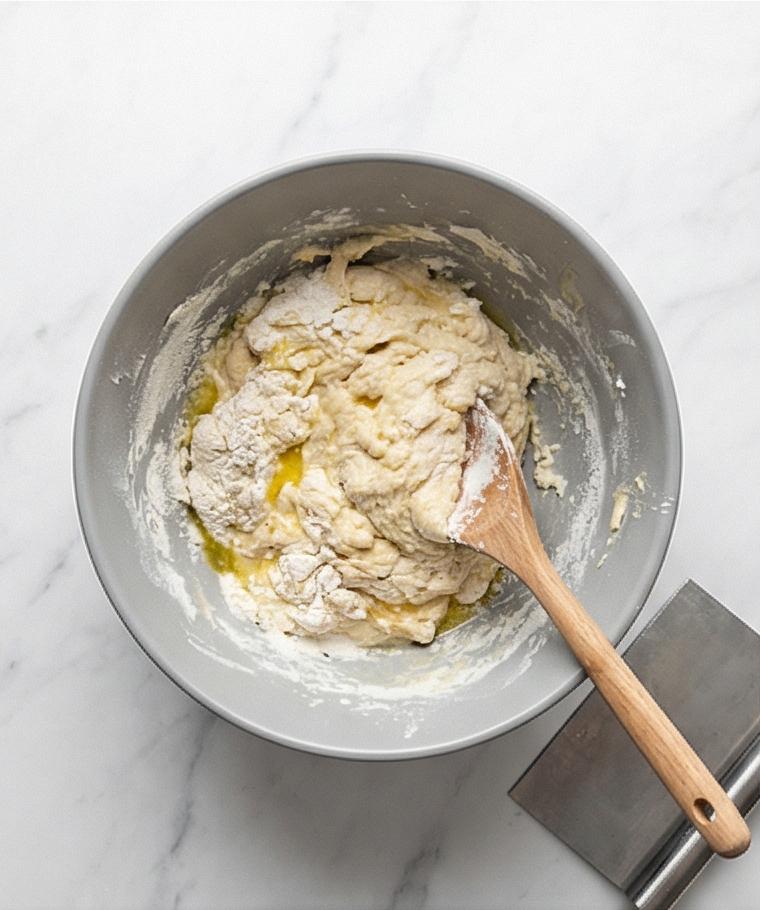
Add the flour, fine sea salt, olive oil and melted butter to the foamy yeast bowl and stir with a wooden spoon until a shaggy, mostly cohesive dough forms. The result should be a rough, flour-dusted mass with streaks of oil and butter visible on the surface and a few dry pockets — not smooth yet, but clearly coming together into a single, tacky mass that will respond to kneading.
Step 3: Knead, oil and let it rise
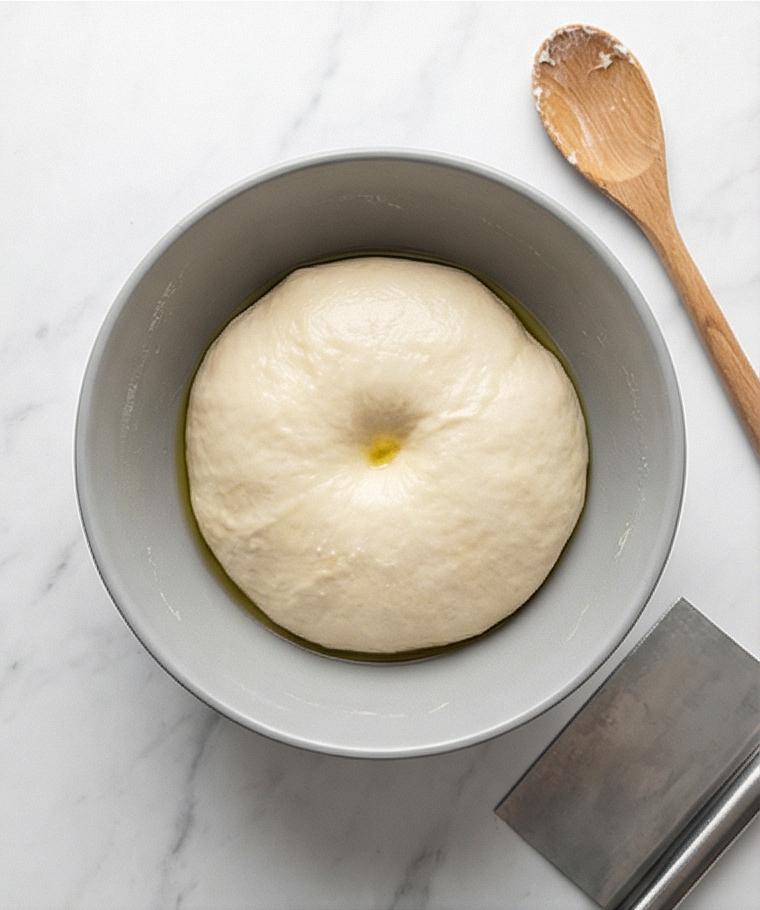
Knead the dough until it becomes smooth, elastic and slightly tacky; test it by gently stretching a small piece — it should thin without tearing. Shape the dough into a tight ball, place it into the same lightly oiled mixing bowl, turn to coat, then cover and let it rise at room temperature until doubled and softly springy to the fingertip. The risen dough should look pillowy with a taut, slightly glossy skin and a faint dusting of flour where you handled it.
Step 4: Infuse the garlic butter and shape the knots
While the dough is rising, warm the room-temperature butter with olive oil over very low heat until melted, then remove from heat and stir in the minced garlic, salt and optional red pepper flakes; let it steep off-heat until fragrant and pourable. Turn the risen dough out, roll or stretch into an even rectangle, cut into uniform strips, roll each into ropes and tie into loose knots, tucking or leaving ends rustic. Place each knot on a parchment-lined rectangular baking sheet spaced evenly, cover lightly and let them puff for a short second rise.

Step 5: Brush, bake and finish with herb–Parmesan butter
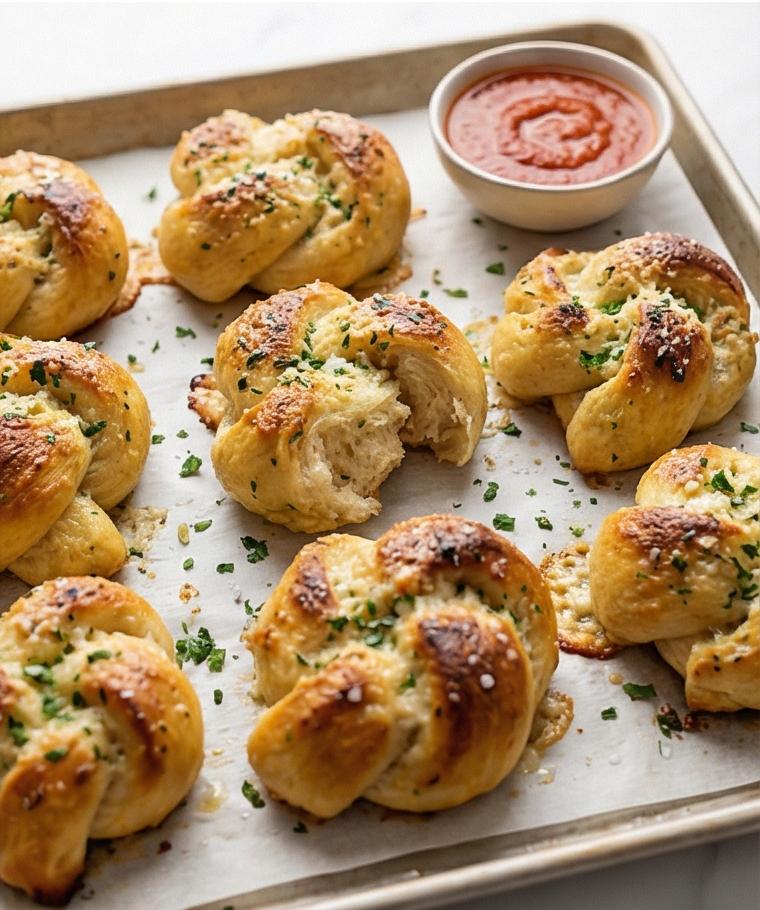
Stir the garlic butter, brush about half lightly over the tops, then bake the knots on the center rack until deep golden brown and evenly colored. Immediately after removing them, stir the chopped parsley and grated Parmesan into the remaining warm butter (rewarm gently if needed), and generously brush this herb–Parmesan mixture over the hot knots so it sizzles on contact. Finish with a light scatter of flaky sea salt, extra grated Parmesan and a little fresh chopped parsley.
Step 6: Serve warm with marinara for dipping
Let the knots rest briefly on the baking sheet so they stay tender inside with a lightly crisp, buttery exterior, then serve warm within the next 30–45 minutes with a small warm bowl of marinara for dipping if desired. The final presentation should highlight the glossy, herb-speckled surfaces, melted Parmesan pockets and tender inner crumb.
Making It Your Own
I like to experiment with small twists when I have time. For a herb-forward version, I fold finely chopped rosemary and thyme into the garlic butter. If someone at the table needs a dairy-free option, swapping the butter for more olive oil and skipping the Parmesan still gives great flavor. For a spicy variation, I add a pinch more red pepper flakes and a splash of smoked paprika to the butter.
For seasonal flair, try folding in a tablespoon of finely grated lemon zest during spring for brightness, or mix in roasted garlic in the fall for a sweeter, deeper profile. Each change feels like a fresh experiment, and they all highlight how adaptable the Garlic Knots Recipe can be.
How to Serve
When I host, I arrange the knots on a warm platter with a few dipping bowls placed around the table. For a casual spread, pair the knots with warm marinara, mixed olives and a simple green salad. For a more composed meal, serve alongside a big bowl of spaghetti, grilled vegetables and a light citrus salad to cut through the richness.
Adjust quantities by baking multiple sheets in staggered batches; the knots keep best when served within 30 to 45 minutes of baking for peak texture. If you need to serve a crowd, keep extras in a low oven (about 200°F) on a tray covered loosely with foil so they stay warm without drying out.
Storage and Reheating Tips
Store cooled knots in an airtight container at room temperature for up to 24 hours, or freeze cooled knots in a single layer on a tray, then transfer to a zip-top bag for up to one month. If refrigerating, expect a slight loss in tenderness but the flavor will remain lovely.
To reheat, thaw frozen knots at room temperature, then warm in a 350°F oven for 8 to 10 minutes until heated through. A quick brush of warmed garlic butter after reheating brings back shine and flavor. Avoid microwaving for best texture; it makes them gummy.
Oops-Proofing: Common Mistakes and How to Avoid Them
Underproofing yields dense knots. Give the dough time to double and look pillowy; if it springs back quickly, it needs more rise time. Overproofing can make them collapse in the oven, so keep an eye on visual cues rather than strict clocks.
Too-hot water will kill yeast and cold water will slow proofing. Aim for that 105 to 115°F window. Finally, do not skimp on fresh garlic and parsley; dried substitutes dull the brightness that makes these knots sing.
Final Thought
I hope you give this Garlic Knots Recipe a try this week. It is forgiving, flavorful and makes any meal feel like a small celebration. Pull a tray out of the oven, brush on that herb-Parmesan butter and watch how fast they disappear.
Frequently Asked Questions
- How long will the dough take to rise? The dough usually takes about 60 to 90 minutes to double at room temperature, depending on how warm your kitchen is.
- Can I use all-purpose flour instead of bread flour? Yes, all-purpose flour works fine; bread flour gives a slightly chewier texture but both are delicious.
- Can I make the dough ahead? You can refrigerate the shaped knots, covered, overnight and bake the next day; give them time to come to room temperature before baking.
- Is there a vegan version? Use olive oil in place of butter and skip the Parmesan or use a vegan hard cheese alternative for a dairy-free option.
- How do I keep garlic from burning? Steep the minced garlic in warm butter off-heat rather than sizzling it over high heat; that extracts flavor without browning and burning.
Garlic Knots Recipe
Make Garlic Knots Recipe at home: pillowy, garlicky knots brushed with herb-Parmesan butter and served warm with marinara.
Ingredients
Instructions
Step 1: Activate the yeast
Combine the warm water and granulated sugar in a medium mixing bowl, sprinkle the yeast over the surface, stir gently until dissolved and let it sit until it becomes noticeably foamy and creamy. You want a glossy, bubbly surface — a clear visual sign the yeast is alive. If the mixture sits flat and dull, discard and start again; healthy foam will billow up with delicate, pearl-like bubbles and a faint yeasty aroma.
Step 2: Build the dough into a shaggy mass
Add the flour, fine sea salt, olive oil and melted butter to the foamy yeast bowl and stir with a wooden spoon until a shaggy, mostly cohesive dough forms. The result should be a rough, flour-dusted mass with streaks of oil and butter visible on the surface and a few dry pockets — not smooth yet, but clearly coming together into a single, tacky mass that will respond to kneading.
Step 3: Knead, oil and let it rise
Knead the dough until it becomes smooth, elastic and slightly tacky; test it by gently stretching a small piece — it should thin without tearing. Shape the dough into a tight ball, place it into the same lightly oiled mixing bowl, turn to coat, then cover and let it rise at room temperature until doubled and softly springy to the fingertip. The risen dough should look pillowy with a taut, slightly glossy skin and a faint dusting of flour where you handled it.
Step 4: Infuse the garlic butter and shape the knots
While the dough is rising, warm the room-temperature butter with olive oil over very low heat until melted, then remove from heat and stir in the minced garlic, salt and optional red pepper flakes; let it steep off-heat until fragrant and pourable. Turn the risen dough out, roll or stretch into an even rectangle, cut into uniform strips, roll each into ropes and tie into loose knots, tucking or leaving ends rustic. Place each knot on a parchment-lined rectangular baking sheet spaced evenly, cover lightly and let them puff for a short second rise.
Step 5: Brush, bake and finish with herb–Parmesan butter
Stir the garlic butter, brush about half lightly over the tops, then bake the knots on the center rack until deep golden brown and evenly colored. Immediately after removing them, stir the chopped parsley and grated Parmesan into the remaining warm butter (rewarm gently if needed), and generously brush this herb–Parmesan mixture over the hot knots so it sizzles on contact. Finish with a light scatter of flaky sea salt, extra grated Parmesan and a little fresh chopped parsley.
Step 6: Serve warm with marinara for dipping
Let the knots rest briefly on the baking sheet so they stay tender inside with a lightly crisp, buttery exterior, then serve warm within the next 30–45 minutes with a small warm bowl of marinara for dipping if desired. The final presentation should highlight the glossy, herb-speckled surfaces, melted Parmesan pockets and tender inner crumb.
Notes
- Let the yeast bloom until foamy to ensure an active rise.
- Use fresh garlic and parsley for the brightest flavor.
- Freeze extra knots on a tray, then bag for up to one month.
- Brush with warmed herb-Parmesan butter after reheating to restore gloss and flavor.

