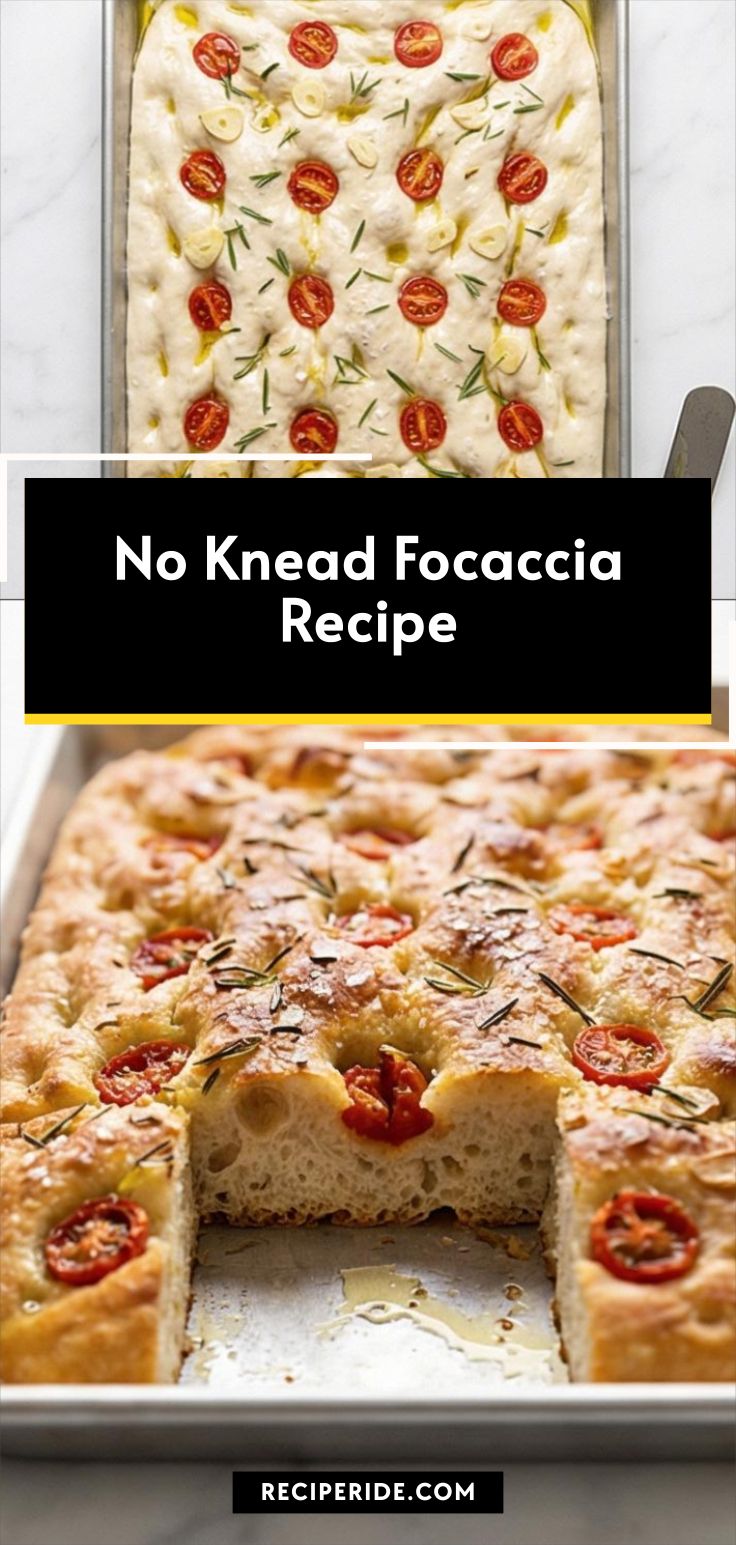
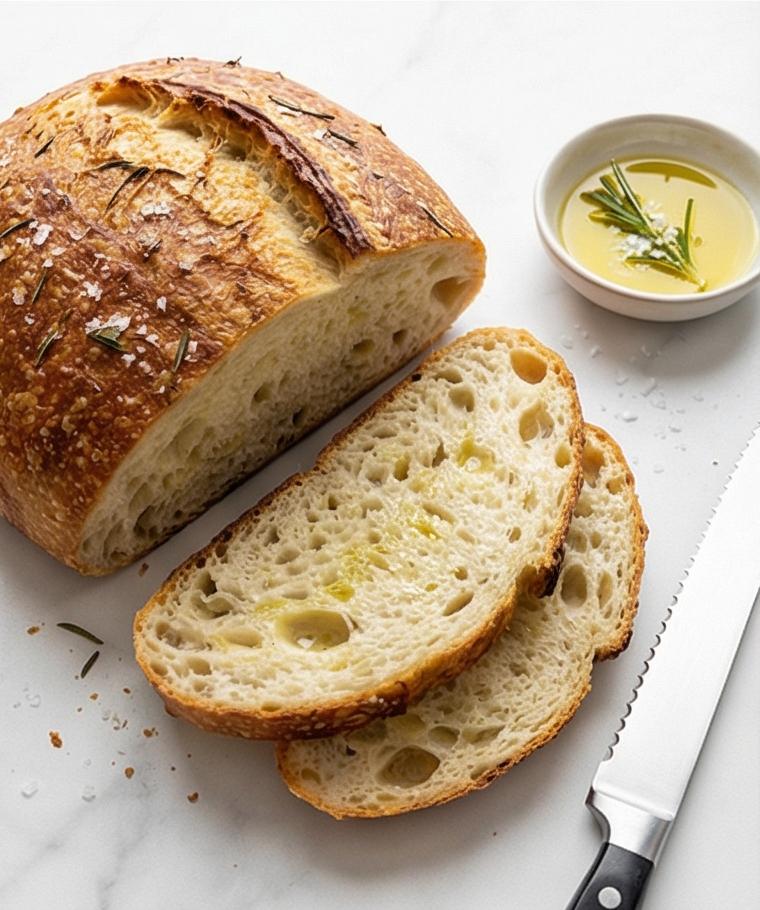
No Knead Focaccia Recipe is the kind of loaf I reach for when I want bakery-quality comfort without a laundry list of steps. It wakes up the kitchen with olive oil perfume, rosemary pops, and that glossy, blistered top you can break apart with your fingers. I love how forgiving this No Knead Focaccia Recipe is; even when my timing is off it still rewards you with an open, tender crumb. Make it once and you’ll see why this No Knead Focaccia Recipe becomes the bread you bake on repeat.
How This Bread Became My Rainy-Day Companion
I still remember the rainy afternoon when I first tried this version. The house smelled like toasted rosemary and hot oil, and the rhythmic tapping of rain on the windows made the slow refrigerator rest feel like part of the ritual. When I pulled the warm pan from the oven the crust crackled softly, and I tore off a corner that steamed into my hands. The first bite was bright with tomato juice and salty crystals and the inside was pillowy and slightly tangy from the long rest. That comfort was almost nostalgic; it felt like a blanket and a conversation wrapped up together. Ever since, whenever I want something that feels like home but also a little sophisticated, I start this recipe and let the dough do the work.
The Ingredients That Make the Crust Sing
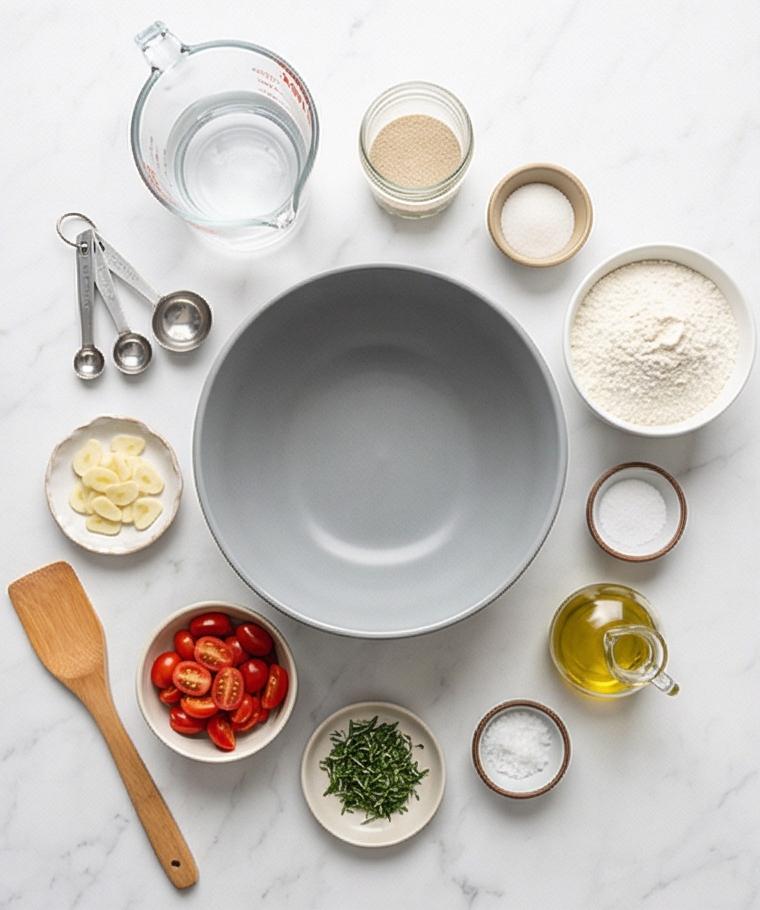
- 2 cups (480 ml) warm water, 95–105°F (35–40°C): Hydrates the dough and activates the yeast; use filtered water if your tap is very chlorinated.
- 2 1/4 teaspoons (7 g) active dry yeast: Provides lift; instant yeast works but reduce bloom time slightly.
- 2 teaspoons (8 g) granulated sugar: Feeds the yeast for a reliable bloom; honey is a good substitute.
- 5 cups (600 g) bread flour: Builds structure and chew; all-purpose will work but expect a softer crumb.
- 2 1/2 teaspoons (15 g) fine sea salt: Balances flavor; kosher salt can be used but adjust by volume.
- Extra-virgin olive oil (various uses): For dough, pan, and finishing; choose a fruity, fresh oil for the best flavor.
- Toppings: flaky sea salt, rosemary, tomatoes, garlic: Add texture and brightness; swap herbs seasonally.
Essential Tools That Make This Easy
A few simple tools will make this No Knead Focaccia Recipe effortless. You do not need fancy gear, just reliable basics.
- Large mixing bowl: Big enough for a bubbly, expanding dough; glass or stainless steel both work.
- Sturdy wooden spatula: Helps mix a sticky dough without scraping your knuckles; a silicone spatula is a fine alternative.
- 9 x 13-inch rectangular metal baking pan: Gives those classic edges and even browning; a rimmed sheet works if you adapt the oil amount.
- Oiled fingertips or bench scraper: For gentle stretching and dimpling; wet tools help prevent tearing.
- Plastic wrap or a tight-fitting lid: Keeps the dough from drying during the long cold ferment; use a damp towel if needed.
Step-by-Step Preparation Guide
Step 1: Activate the Yeast and Sugar
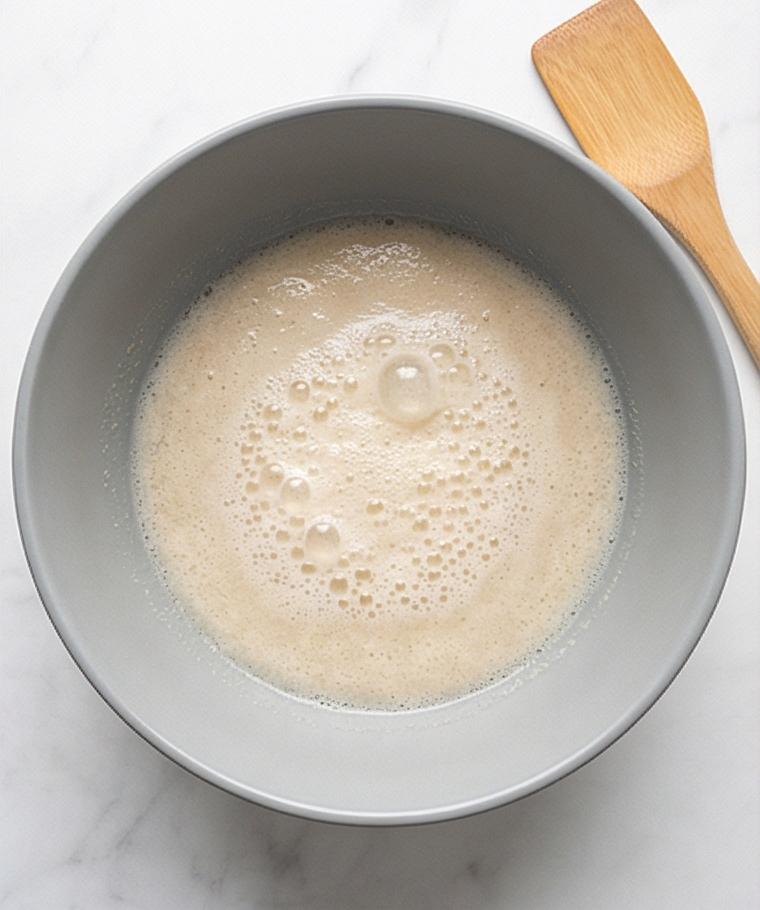
Warm 2 cups (480 ml) water to about 95–105°F (35–40°C) and combine it with the active dry yeast and granulated sugar in a large modern matte grey ceramic mixing bowl; stir just to dissolve. Leave it undisturbed at room temperature for 5–10 minutes until the surface is frothy and bubbly with a yeasty aroma — that glossy foam and fine bubbles are the visual signal you’re ready to move on. Friendly tip: this bloom should sit in the same mixing bowl you’ll use to make the dough so tools and vessels remain constant.
Step 2: Combine Flour, Salt, and Olive Oil into a Shaggy Dough
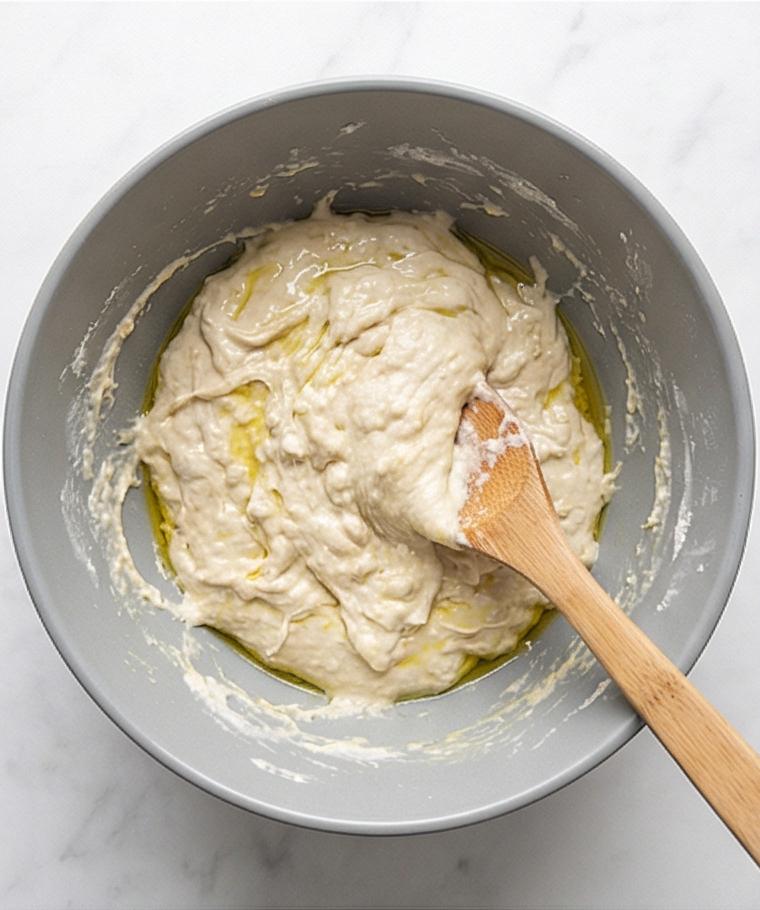
Pour 5 cups (600 g) bread flour and 2 1/2 teaspoons (15 g) fine sea salt into the bowl with the foamy yeast, then add 2 tablespoons (30 ml) extra-virgin olive oil for the dough. Using a sturdy wooden spatula, mix vigorously for 1–2 minutes, scraping the sides until no dry flour remains; the result is a very loose, shaggy, ultra-sticky mass — wet-looking clumps and uneven strands of flour bound by oil and water. Keep the spatula resting on the bowl rim so it’s visually present for the next frames.
Step 3: Cold Fermentation — Dough Doubles and Becomes Bubbly
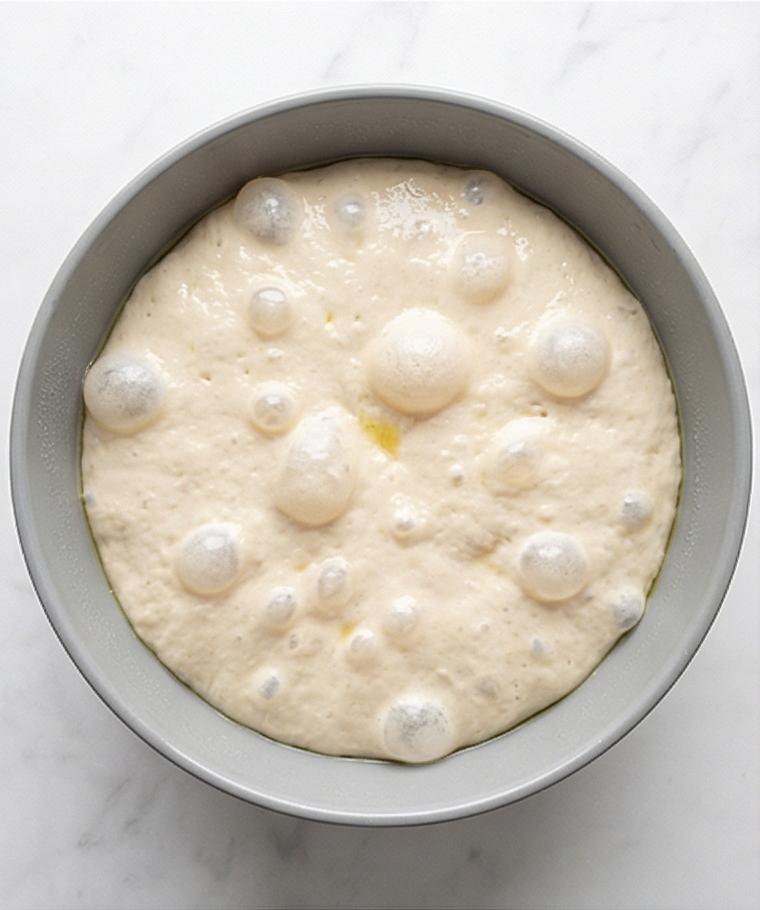
Scrape the dough into a rough ball, cover the bowl tightly, and refrigerate for 12–18 hours for slow cold fermentation at about 40°F (4°C). After the long rest the dough should be visibly expanded, airy and bubbly across the surface, with a soft, relaxed structure and a slightly domed top. This is the mellow, gluten-developed state that gives focaccia its open crumb and tender chew — photograph the bowl with its taut yet fragile bubbly skin.
Step 4: Oil the Pan, Transfer, Gentle Stretching, Proofing, and Dimpling with Toppings
Generously coat a 9 x 13-inch (23 x 33 cm) rectangular metal baking pan with 3 tablespoons (45 ml) extra-virgin olive oil. Using a lightly oiled spatula or your (hidden) oiled tools, gently turn the chilled dough into the pan so it slumps into the center, then with thoroughly oiled fingertips nudge and stretch the dough toward the edges without tearing. Cover and proof at warm room temperature for 45–75 minutes until it puffs and becomes jiggly. Remove the cover, drizzle 2 tablespoons (30 ml) extra-virgin olive oil evenly over the surface, then press deep dimples straight down across the dough with oiled fingertips. Evenly scatter flaky sea salt and 2 tablespoons finely chopped fresh rosemary; if using, nestle halved cherry tomatoes into some dimples and tuck thinly sliced garlic over the top so toppings sit snugly inside the wells. The pan should read glossy with oil, studded with herb green, bright tomato reds, and crystalline sea salt.

Step 5: Bake, Cool, and Serve from the Rectangular Pan
Place the rectangular pan on a rack (not shown) and bake at 450°F (230°C) for 20–25 minutes until the top is deep golden brown, the edges crisp, and the underside a rich golden tone. Let the focaccia cool in the pan for 10–15 minutes so the crumb sets; optionally loosen the edges and transfer but keep the rectangular geometry — finish with an extra 1–2 tablespoons of olive oil and a crack of freshly ground black pepper before cutting into squares or rectangles. The final image shows the baked focaccia still in its 9×13 metal pan: glossy olive oil sheen, blistered tomato jewels, toasted rosemary, flaky salt crystals and an open, tender crumb where a square has been removed.

Making It Your Own
I like to experiment with toppings depending on the season. In spring I swap rosemary for torn basil and scatter thinly sliced spring onions, which gives a fresh, bright lift. For a heartier winter loaf I top with thinly sliced potatoes, thyme, and a light grating of pecorino; it becomes almost a meal.
For dietary swaps, use olive oil liberally and swap in whole wheat pastry flour for up to 25 percent of the dough for a nuttier flavor. To make a vegan garnish, skip the cheese and load up on olives, roasted peppers, and capers. Small experiments make each batch feel like a new discovery.
How to Serve
Treat this loaf like a shareable centerpiece when you host. Cut the focaccia into rectangles and arrange on a wooden board with small bowls of extra oil, flaky salt, and a simple arugula salad tossed with lemon. For larger groups double the recipe and bake in two pans; for a small dinner halve the pan and serve warm slices alongside soup or a stew.
If you want sandwich-style servings, slice the focaccia horizontally and fill with roasted vegetables, mozzarella, and charred peppers. For brunch, serve squares with soft-boiled eggs, smoked salmon, or a cheese plate for a relaxed spread.
Storage and Reheating Tips
Leftover focaccia keeps well at room temperature for a day in a paper bag or wrapped loosely to preserve crust texture. For longer storage, slice and freeze in airtight bags for up to 1 month; thaw at room temperature before reheating.
To refresh, warm slices in a 350°F (175°C) oven for 6–8 minutes or toast them lightly in a skillet with a drizzle of olive oil. Stronger toppings like tomatoes can be heated briefly to avoid turning mushy.
Common Mistakes and How to Avoid Them
Not letting the dough rest long enough usually leads to a tight crumb. Be patient with the cold ferment; it is the secret to flavor and open structure. If you short-change the time, expect a denser loaf.
Overhandling the dough when transferring to the pan can deflate the bubbles you worked for. Use oiled fingertips and gentle nudges to preserve those airy pockets. If the dough resists stretching, let it rest 10 minutes and try again.
Final Thoughts
Give this No Knead Focaccia Recipe a go this weekend and let the slow, simple process surprise you. It is forgiving, bold with flavor, and becomes a reliably impressive loaf whether you bake it for family dinner or a casual get-together. Once you taste that olive oil sheen and tender crumb, I think you will be hooked.
Frequently Asked Questions
- Can I use instant yeast instead of active dry yeast? Yes. If using instant yeast, you can skip the bloom step or shorten it; the dough will still rise but watch timing during the cold ferment.
- How do I get big air pockets in the crumb? Let the dough rest and cold ferment for the full 12 hours or more. Gentle handling preserves the bubbles so they expand in the oven.
- Can I make this gluten-free? This recipe relies on bread flour for structure, so a gluten-free version needs a tailored flour blend and xanthan gum; expect a different texture.
- What if I do not have a 9 x 13-inch pan? Use a rimmed baking sheet or a slightly smaller pan; adjust oil and check bake time as thinner dough will brown faster.
- How long does leftover focaccia keep? At room temperature, 1 day wrapped loosely; refrigerated up to 3 days, and frozen up to 1 month.
No Knead Focaccia Recipe
Bake the No Knead Focaccia Recipe for a glossy, herb-scented loaf that’s easy and crowd-pleasing.
Ingredients
Instructions
Step 1: Activate the Yeast and Sugar
Warm 2 cups (480 ml) water to about 95–105°F (35–40°C) and combine it with the active dry yeast and granulated sugar in a large modern matte grey ceramic mixing bowl; stir just to dissolve. Leave it undisturbed at room temperature for 5–10 minutes until the surface is frothy and bubbly with a yeasty aroma — that glossy foam and fine bubbles are the visual signal you’re ready to move on. Friendly tip: this bloom should sit in the same mixing bowl you’ll use to make the dough so tools and vessels remain constant.
Step 2: Combine Flour, Salt, and Olive Oil into a Shaggy Dough
Pour 5 cups (600 g) bread flour and 2 1/2 teaspoons (15 g) fine sea salt into the bowl with the foamy yeast, then add 2 tablespoons (30 ml) extra-virgin olive oil for the dough. Using a sturdy wooden spatula, mix vigorously for 1–2 minutes, scraping the sides until no dry flour remains; the result is a very loose, shaggy, ultra-sticky mass — wet-looking clumps and uneven strands of flour bound by oil and water. Keep the spatula resting on the bowl rim so it’s visually present for the next frames.
Step 3: Cold Fermentation — Dough Doubles and Becomes Bubbly
Scrape the dough into a rough ball, cover the bowl tightly, and refrigerate for 12–18 hours for slow cold fermentation at about 40°F (4°C). After the long rest the dough should be visibly expanded, airy and bubbly across the surface, with a soft, relaxed structure and a slightly domed top. This is the mellow, gluten-developed state that gives focaccia its open crumb and tender chew — photograph the bowl with its taut yet fragile bubbly skin.
Step 4: Oil the Pan, Transfer, Gentle Stretching, Proofing, and Dimpling with Toppings
Generously coat a 9 x 13-inch (23 x 33 cm) rectangular metal baking pan with 3 tablespoons (45 ml) extra-virgin olive oil. Using a lightly oiled spatula or your (hidden) oiled tools, gently turn the chilled dough into the pan so it slumps into the center, then with thoroughly oiled fingertips nudge and stretch the dough toward the edges without tearing. Cover and proof at warm room temperature for 45–75 minutes until it puffs and becomes jiggly. Remove the cover, drizzle 2 tablespoons (30 ml) extra-virgin olive oil evenly over the surface, then press deep dimples straight down across the dough with oiled fingertips. Evenly scatter flaky sea salt and 2 tablespoons finely chopped fresh rosemary; if using, nestle halved cherry tomatoes into some dimples and tuck thinly sliced garlic over the top so toppings sit snugly inside the wells. The pan should read glossy with oil, studded with herb green, bright tomato reds, and crystalline sea salt.
Step 5: Bake, Cool, and Serve from the Rectangular Pan
Place the rectangular pan on a rack (not shown) and bake at 450°F (230°C) for 20–25 minutes until the top is deep golden brown, the edges crisp, and the underside a rich golden tone. Let the focaccia cool in the pan for 10–15 minutes so the crumb sets; optionally loosen the edges and transfer but keep the rectangular geometry — finish with an extra 1–2 tablespoons of olive oil and a crack of freshly ground black pepper before cutting into squares or rectangles. The final image shows the baked focaccia still in its 9x13 metal pan: glossy olive oil sheen, blistered tomato jewels, toasted rosemary, flaky salt crystals and an open, tender crumb where a square has been removed.
Notes
- Use a fresh, fruity extra-virgin olive oil for finishing to highlight flavor.
- For a chewier crumb, use bread flour as written; all-purpose will yield a softer loaf.
- If dough is hard to stretch, let it rest 10 minutes, then continue shaping.
- Freeze sliced focaccia in a single layer before bagging to prevent sticking.
- Taste and adjust flaky salt after baking; a little more right before serving brightens each bite.
