I have a soft spot for comfort food that also feels a little bit festive, and this Bang Bang Chicken Recipe does exactly that. It started as a weeknight experiment and quickly became a go-to when I want crunchy, saucy, slightly spicy chicken that comes together without a fuss. The balance of a crisp, shatter-ready coating and a glossy, sweet-spicy sauce keeps everyone hovering by the serving platter. If you like a little heat with a lot of texture, this Bang Bang Chicken Recipe is the one to try tonight.
How This Recipe Became My Rainy-Day Favorite
The first time I made this Bang Bang Chicken Recipe I remember the day being cold and wet, and the house smelling like warm oil and honeyed chili. I had the radio on low and a single window cracked open for steam to escape; when the first batch hit the rack the sound alone felt like a small celebration. I tucked a hot, sauced nugget into a bed of crisp shredded lettuce and the contrast — crunchy exterior, silky sauce, warm tender meat — hit every part of my memory. That evening I watched friends close their eyes as they took bites, which is when I knew I had something memorable. Since then I make it when I want comfort without fuss: the tactile crunch, the bright sticky sauce, and the quick clean-up make it a repeat winner.
Primary Ingredients and What They Do
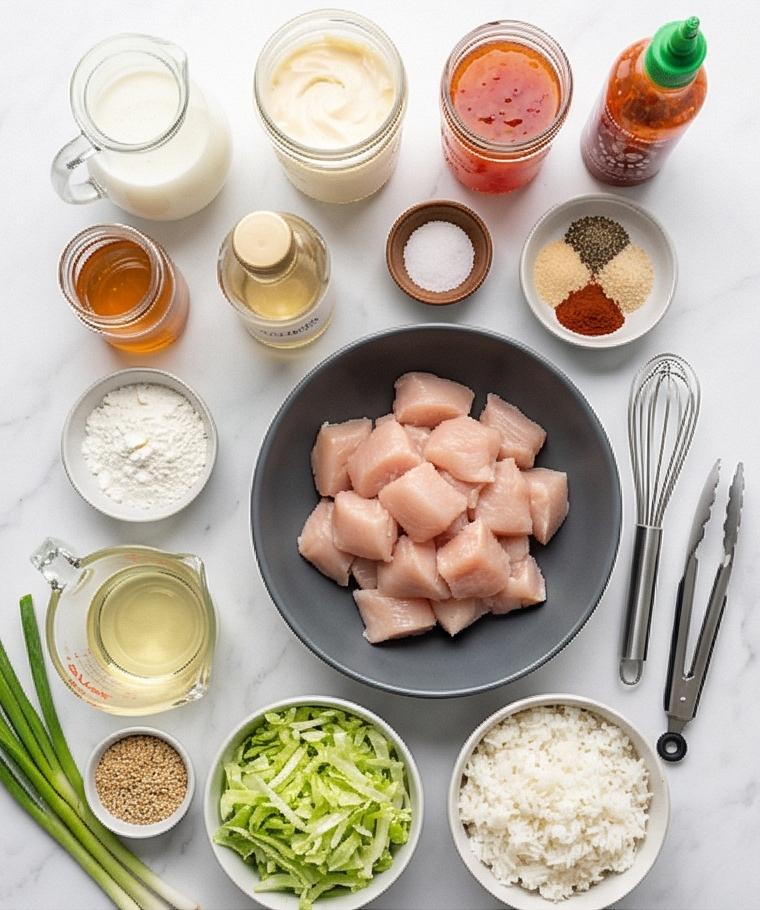
- Chicken: The heart of the dish; boneless, skinless breasts or thighs are recommended for even bites. Thighs give more juiciness, breasts are leaner – both work well.
- Buttermilk: Tenderizes and adds tang; yogurt or milk plus a teaspoon of vinegar can substitute in a pinch.
- Cornstarch and Flour: Create the brittle, crunchy crust; increase cornstarch for extra crisp, or swap some rice flour for a lighter texture.
- Mayonnaise and Thai Sweet Chili Sauce: The sauce base – mayo gives silkiness, chili sauce gives sweet-heat; use Greek yogurt for a tangier, lighter sauce.
- Sriracha and Honey: Heat and balance – adjust to taste. Honey can be swapped for agave or maple syrup.
Essential Kitchen Tools and Why They Matter
A few simple tools make this recipe straightforward and safer. A heavy-bottomed deep pot helps maintain steady frying temperature and prevents hot spots; a thermometer is essential to keep oil at the recommended temperature and to check chicken doneness. A wire rack set over a lined baking sheet lets the chicken drain and stay crisp instead of steaming on paper towels. Large mixing bowls make marinating and tossing the sauce easier, while tongs and a slotted spoon speed up transfers without losing the crust.
- Heavy-bottomed deep pot: Stabilizes oil temperature – alternative: a deep fryer with temperature control.
- Candy or instant-read thermometer: Ensures oil and chicken are at safe temps – no thermometer increases risk of undercooked chicken.
- Wire rack and baking sheet: Keeps crust crisp while draining – substitute with paper towels in a pinch but expect softer crust.
- Mixing bowls, tongs, slotted spoon: For marinating, coating, and frying – use silicone or metal tools that can handle heat.
Step-by-Step Preparation Guide
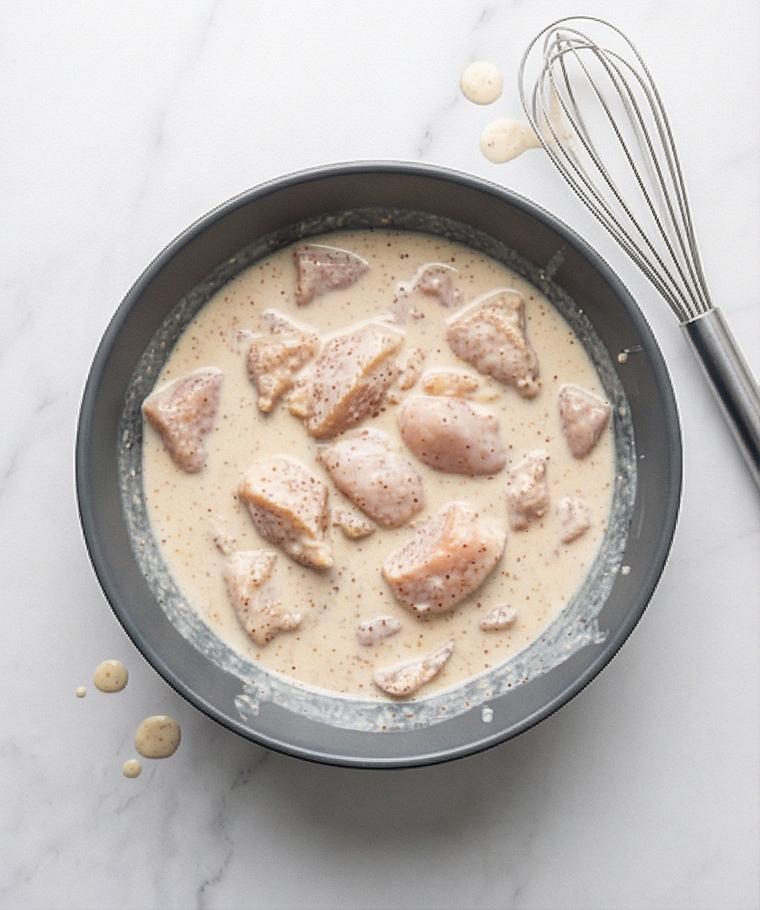
Step 1: Marinate the chicken
In a large matte charcoal-grey ceramic mixing bowl, whisk cold buttermilk with half the kosher salt, half the black pepper, half the garlic powder, half the onion powder, and half the paprika until the seasonings are evenly dispersed and the liquid looks faintly speckled. Add the trimmed, bite-size chicken pieces and stir gently to coat every piece so they are suspended in a thin, creamy marinade. Cover the bowl and let the chicken rest for at least 20–30 minutes at room temperature or up to 4 hours in the refrigerator; when ready to proceed bring it toward room temperature for about 15 minutes.
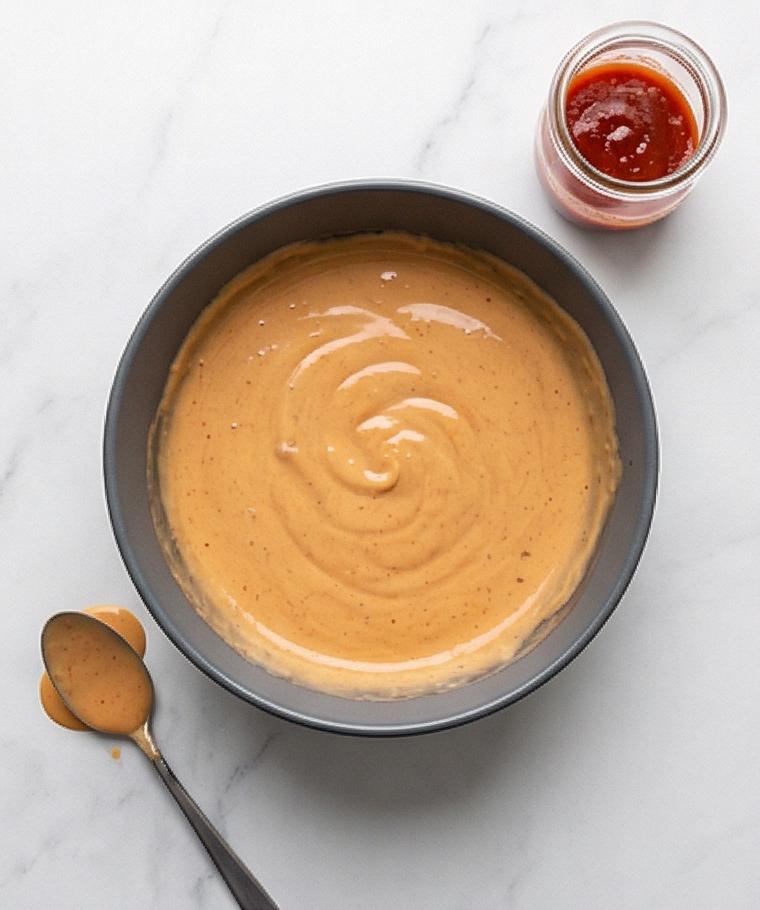
Step 2: Whisk the bang bang sauce to a glossy emulsion
In the same matte charcoal-grey bowl (or a medium glass mixing bowl if preferred for visual contrast), combine mayonnaise, Thai sweet chili sauce, sriracha, rice vinegar, honey, and a pinch of salt. Whisk vigorously until completely smooth and emulsified – the sauce should be homogenous with a satiny, slightly thick sheen and no streaks. Thin with a tablespoon of warm water, then adjust texture by adding up to one more tablespoon in tiny increments until it is thick but pourable, like heavy cream; taste and add more sriracha if you like it spicier. Cover and chill the sauce while you finish the coating.
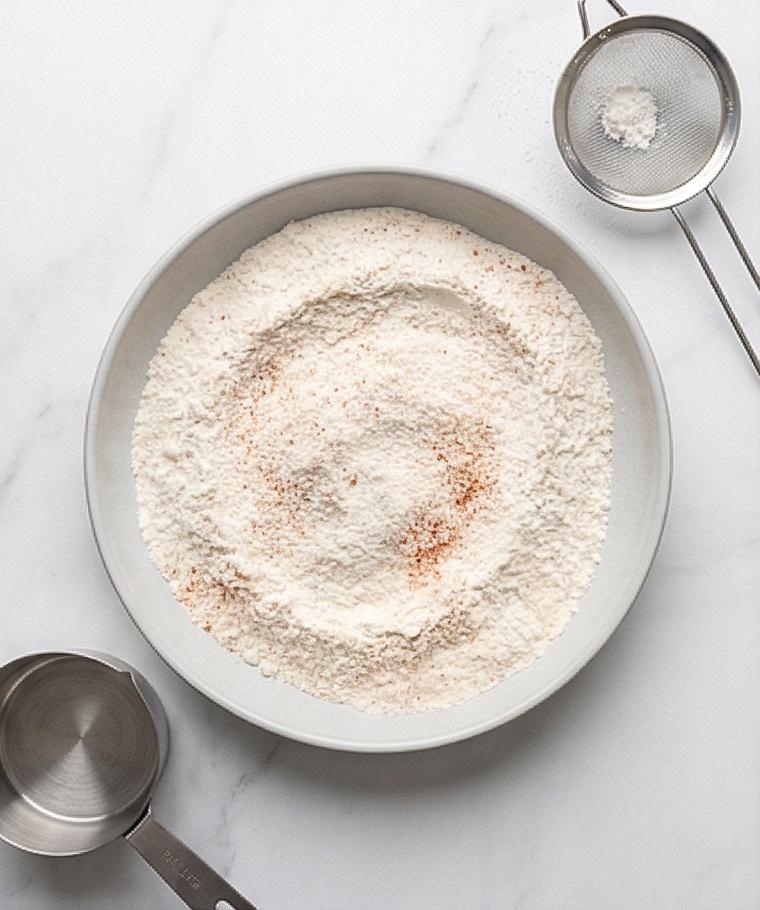
Step 3: Build a uniform dry coating for extra-crisp texture
In a shallow, wide light-grey ceramic dish, whisk together the cornstarch, all-purpose flour, baking powder, the remaining kosher salt, black pepper, garlic powder, onion powder, and paprika until the powder looks completely uniform – no streaks, no clumps. The surface should read as a single pale, fine mound with a faint dusty sheen and tiny specs of red paprika dispersed evenly. This dry mix is intentionally higher in cornstarch for a crunchy, shatter-ready crust.
Step 4: Set up the frying and draining station (no stove shown)
Position a heavy-bottomed deep pot (lid and thermometer clipped but no stove visible) on the marble surface and a lined baking sheet with a wire rack beside it for draining. Fill a clear measuring cup with the neutral oil to show quantity, and have tongs and a slotted spoon resting nearby. This step is about readiness: the oil will reach 350°F when heated, and the drain station must be ready so fried pieces can rest on the rack to crisp. Keep the work area minimal and tidy.
Step 5: Coat the chicken into a shaggy, crunchy exterior
Working in batches, lift chicken pieces from the marinade letting excess drip, then toss and press them into the dry coating until every face is completely covered and the exterior looks rough, shaggy, and slightly textured – the coating should cling in irregular ridges and small floury islands that promise deep crunch after frying. Place coated pieces on a tray and let rest 5–7 minutes; this brief rest helps the crust adhere and prevents shedding in the oil.
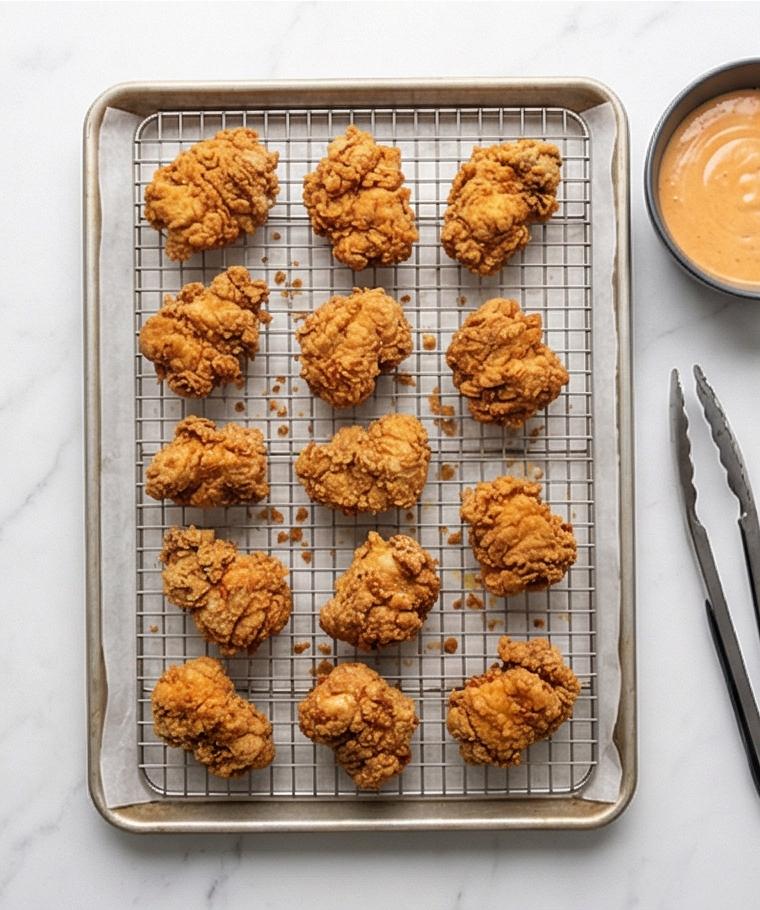
Step 6: Fry until deeply golden, drain and rest briefly
Fry the coated pieces in batches (no stove shown) until the crust is a deep golden-brown and the chicken reaches at least 165°F internally. Transfer hot pieces to the prepared wire rack to drain for 3–5 minutes; the coating will firm up, the surface showing a mix of dark amber ridges, airy pockets, and a very light oil sheen. Keep the fried chicken warm between batches and return oil to the target temperature before adding more.
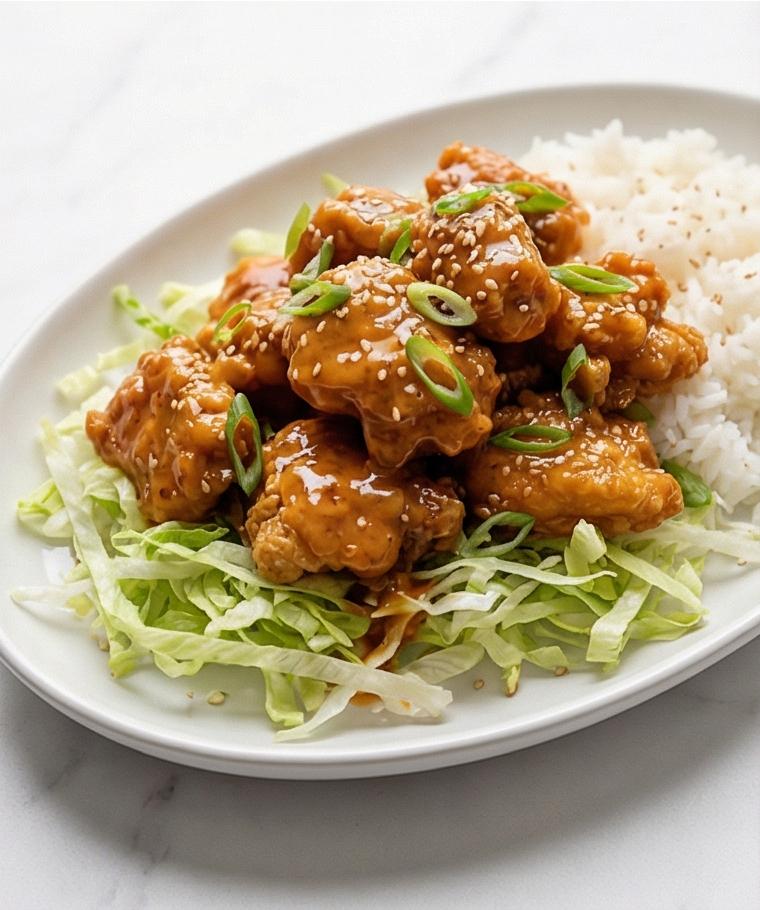
Step 7: Toss with sauce, build the platter and garnish
Place the hot fried chicken into a large clean matte charcoal-grey mixing bowl, drizzle two-thirds to three-quarters of the glossy bang bang sauce over the pieces, and gently fold until each nugget is evenly coated and gleaming with sauce – reserve the remainder for drizzling. Arrange a thin bed of finely shredded crisp lettuce (and hot cooked white rice, if using) on a shallow matte white oval platter, mound the sauced chicken over the bed, then finish with thinly sliced green onions and a sprinkle of toasted sesame seeds. Serve immediately while the contrast between the crisp coating and silky sauce is at its peak.
Making It Your Own
I like to experiment with small swaps. For a lighter version I replace half the mayonnaise with plain Greek yogurt and tone down the honey; the sauce still clings beautifully. For more heat I add an extra teaspoon of sriracha and a pinch of red pepper flakes to the dry mix for a sizzling crust. When I want a gluten-free option I swap the all-purpose flour for rice flour and use a gluten-free baking powder – the crust is slightly different but still satisfying.
If you want to stretch the meal, toss the sauced chicken into a bowl of steamed rice, or tuck it into soft rolls with slaw for handheld sandwiches. Seasonal tweaks like adding finely grated lime zest to the sauce in summer or a whisper of smoked paprika in autumn make this recipe feel new each time.
How to Serve
When I host, presentation and pacing matter. Lay a thin bed of shredded lettuce or cabbage on a large platter, pile the sauced chicken in the center, and leave extra sauce in a small bowl for guests to drizzle. Garnish with sliced green onions and toasted sesame seeds for color and texture. For a family dinner, serve over hot white rice so everyone can spoon the sauce and crumbs over their bowl.
To scale up, double the chicken and sauce and fry in two shallow pots or a fryer to keep batches hot and crispy. For a casual gathering, provide small plates and toothpicks for bite-size grazing, or plate individual portions over rice for a composed main.
Storage and Reheating Tips
Leftovers store well for a short time. Cool the chicken completely, then place in an airtight container and refrigerate for up to 3 days. Keep the reserved sauce in a separate small container to prevent the crust from becoming soggy.
To reheat, preheat the oven to 375°F, arrange pieces on a wire rack over a baking sheet, and heat for 8-10 minutes until warmed through and crisp. Avoid microwaving, which will make the coating limp; if you must microwave briefly, then finish under a hot broiler for a minute to restore texture.
Oops-Proofing: Common Mistakes and How to Avoid Them
Don’t overcrowd the fryer. Crowding drops the oil temperature and yields soggy, greasy pieces – fry in small batches and let the oil return to temperature between batches.
Don’t skip resting the coated pieces before frying; that short rest helps the crust adhere. Finally, keep the sauce chilled until service so the contrast between hot crunch and cool silk is at its best.
Ready to Try It?
If you love a little sweet heat and a lot of crunch, give this Bang Bang Chicken Recipe a try this week. It rewards a small amount of patience with big flavor and great texture, and once you taste that sweet, glossy sauce against the crackly crust you’ll be making it again.
Frequently Asked Questions.
- What cut of chicken is best for this recipe? – Both boneless skinless breasts and thighs work; thighs stay juicier, breasts are leaner.
- Can I make the sauce ahead of time? – Yes, the sauce keeps well in the refrigerator for up to 3 days; thin slightly before serving if it thickens.
- How do I keep the coating extra crispy? – Fry in small batches, drain on a wire rack, and keep pieces warm in a low oven until serving.
- Is there a gluten-free alternative for the coating? – Swap all-purpose flour for rice flour or a gluten-free flour blend and ensure baking powder is gluten-free.
- Can I bake instead of fry? – You can bake at a high temperature on a wire rack for a less-oily result, but the crust will be different – not as shatter-crisp.
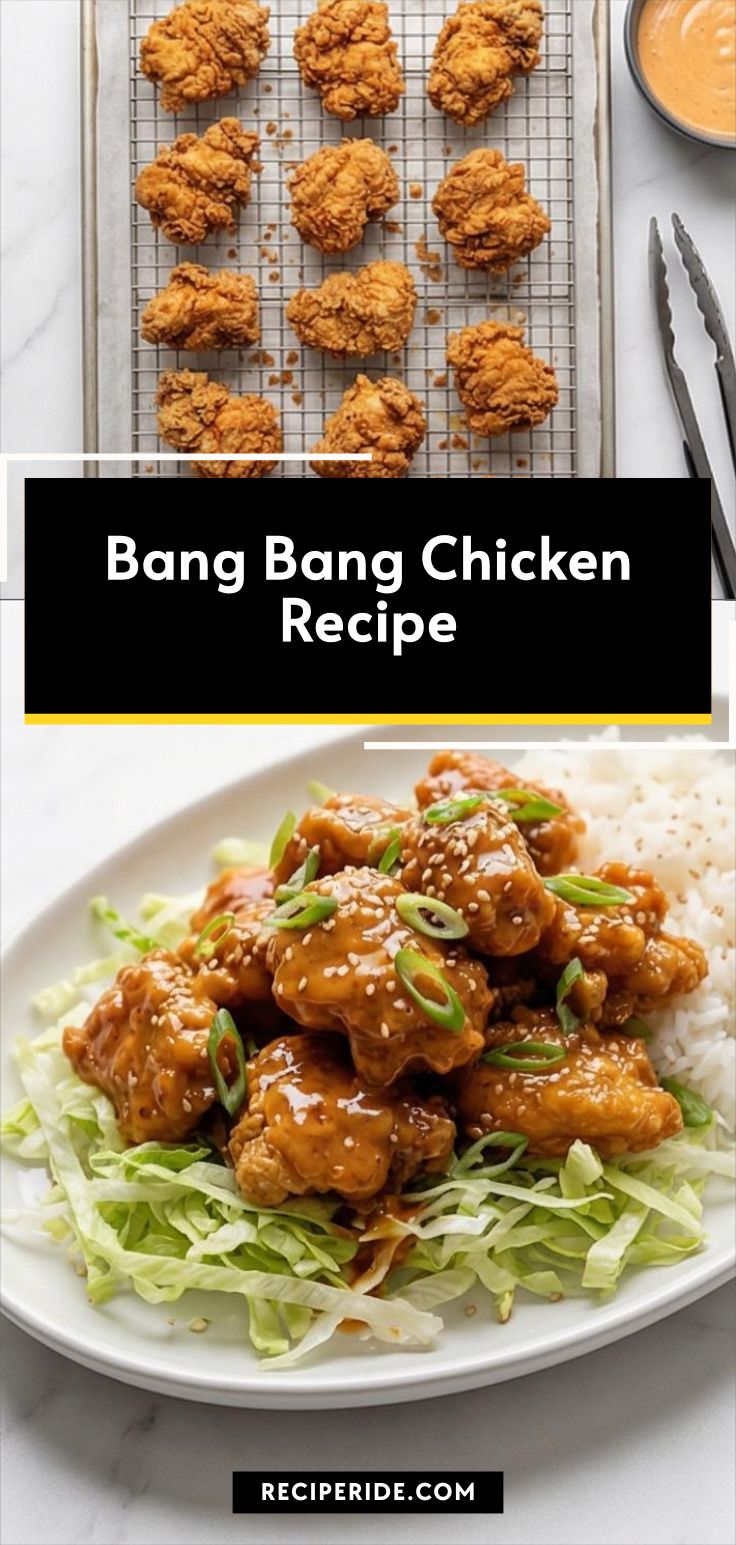
Bang Bang Chicken Recipe
Make Bang Bang Chicken Recipe tonight: crispy fried chicken tossed in a glossy sweet-spicy sauce for an easy, crowd-pleasing meal.
Ingredients
Instructions
Step 1: Marinate the chicken
In a large matte charcoal-grey ceramic mixing bowl, whisk cold buttermilk with half the kosher salt, half the black pepper, half the garlic powder, half the onion powder, and half the paprika until the seasonings are evenly dispersed and the liquid looks faintly speckled. Add the trimmed, bite-size chicken pieces and stir gently to coat every piece so they are suspended in a thin, creamy marinade. Cover the bowl and let the chicken rest for at least 20–30 minutes at room temperature or up to 4 hours in the refrigerator; when ready to proceed bring it toward room temperature for about 15 minutes.
Step 2: Whisk the bang bang sauce to a glossy emulsion
In the same matte charcoal-grey bowl (or a medium glass mixing bowl if preferred for visual contrast), combine mayonnaise, Thai sweet chili sauce, sriracha, rice vinegar, honey, and a pinch of salt. Whisk vigorously until completely smooth and emulsified — the sauce should be homogenous with a satiny, slightly thick sheen and no streaks. Thin with a tablespoon of warm water, then adjust texture by adding up to one more tablespoon in tiny increments until it is thick but pourable, like heavy cream; taste and add more sriracha if you like it spicier. Cover and chill the sauce while you finish the coating.
Step 3: Build a uniform dry coating for extra-crisp texture
In a shallow, wide light-grey ceramic dish, whisk together the cornstarch, all-purpose flour, baking powder, the remaining kosher salt, black pepper, garlic powder, onion powder, and paprika until the powder looks completely uniform — no streaks, no clumps. The surface should read as a single pale, fine mound with a faint dusty sheen and tiny specs of red paprika dispersed evenly. This dry mix is intentionally higher in cornstarch for a crunchy, shatter-ready crust.
Step 4: Set up the frying and draining station (no stove shown)
Position a heavy-bottomed deep pot (lid and thermometer clipped but no stove visible) on the marble surface and a lined baking sheet with a wire rack beside it for draining. Fill a clear measuring cup with the neutral oil to show quantity, and have tongs and a slotted spoon resting nearby. This step is about readiness: the oil will reach 350°F when heated, and the drain station must be ready so fried pieces can rest on the rack to crisp. Keep the work area minimal and tidy.
Step 5: Coat the chicken into a shaggy, crunchy exterior
Working in batches, lift chicken pieces from the marinade letting excess drip, then toss and press them into the dry coating until every face is completely covered and the exterior looks rough, shaggy, and slightly textured — the coating should cling in irregular ridges and small floury islands that promise deep crunch after frying. Place coated pieces on a tray and let rest 5–7 minutes; this brief rest helps the crust adhere and prevents shedding in the oil.
Step 6: Fry until deeply golden, drain and rest briefly
Fry the coated pieces in batches (no stove shown) until the crust is a deep golden-brown and the chicken reaches at least 165°F internally. Transfer hot pieces to the prepared wire rack to drain for 3–5 minutes; the coating will firm up, the surface showing a mix of dark amber ridges, airy pockets, and a very light oil sheen. Keep the fried chicken warm between batches and return oil to the target temperature before adding more.
Step 7: Toss with sauce, build the platter and garnish
Place the hot fried chicken into a large clean matte charcoal-grey mixing bowl, drizzle two-thirds to three-quarters of the glossy bang bang sauce over the pieces, and gently fold until each nugget is evenly coated and gleaming with sauce — reserve the remainder for drizzling. Arrange a thin bed of finely shredded crisp lettuce (and hot cooked white rice, if using) on a shallow matte white oval platter, mound the sauced chicken over the bed, then finish with thinly sliced green onions and a sprinkle of toasted sesame seeds. Serve immediately while the contrast between the crisp coating and silky sauce is at its peak.
Notes
- Marinate the chicken for at least 20-30 minutes for better tenderness; up to 4 hours is fine.
- Keep the sauce chilled and reserve some for drizzling to prevent soggy crust.
- Fry in small batches and use a thermometer to maintain 350°F oil temperature for best crispness.