How To Make Mimosas is one of those impossibly simple pleasures that always feels like a celebration. I reach for this recipe when guests arrive unexpectedly or when a quiet weekend morning deserves a little sparkle. It’s quick, forgiving, and bright, and I’ve learned to favor quality juice over fancy mixers. Over the years I’ve refined the ratio so the balance of bubbly and orange sings every time, and I love how tiny bubbles can lift an ordinary moment into something special.
I still remember the first time I really paid attention to how I make mimosas. It was a sleepy Sunday after a rainstorm and the light through the kitchen window made the orange juice glow like liquid sunshine. I had a cheap bottle of sparkling wine and a carton of juice, but I slowed down and poured with intention. The fizz popped and rose in a steady stream, and the scent of citrus filled the room. Friends arrived and the first sip prompted a chorus of delighted noises. From then on, How To Make Mimosas stopped being a throwaway brunch tip and became a small ritual for turning ordinary mornings into something I looked forward to sharing.
The Main Players and Why They Matter
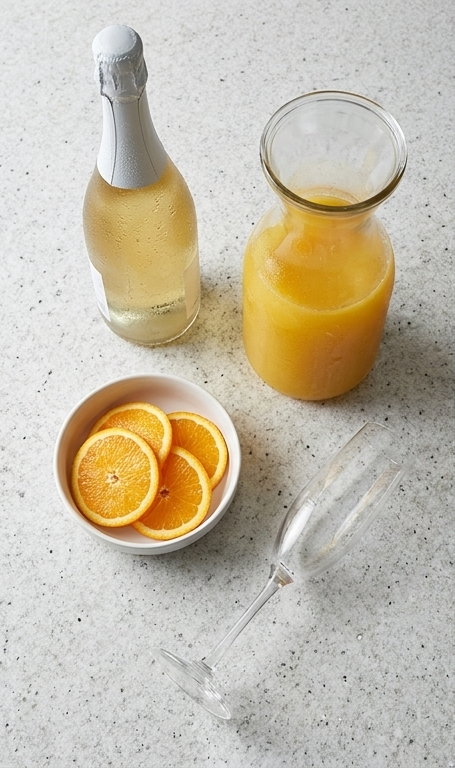
- Dry sparkling wine: The backbone of the drink. Choose a dry, inexpensive sparkling wine like cava, prosecco, or nonvintage brut. If you prefer less alcohol, try a half-dry version or a sparkling wine with lower ABV.
- 100% orange juice: The bright partner. Freshly squeezed is best for brightness and aromatics, but a high-quality store-bought 100% orange juice works well. Avoid pulpy or overly sweet blends if you want a clean flavor.
- Orange slices (optional): For garnish and aroma. Thin wheels add a pretty touch; substitute with a twist of orange peel if you prefer less fruit in the glass.
Essential Kitchen Tools and Why They Help
A few simple tools make How To Make Mimosas feel polished and keep the bubbles where they belong. A chilled champagne flute not only looks elegant but concentrates aromas so each sip feels lively. If you are serving a crowd, a large chilled pitcher lets you assemble multiples quickly while keeping the carbonation intact. A small citrus juicer is a handy alternative to buying juice, and a fine mesh strainer can remove bits of pulp for a cleaner mouthfeel.
- Champagne flutes or wine glasses: Elegant, concentrate aromas, and preserve bubbles.
- Large chilled pitcher: For multiple servings, makes pouring effortless.
- Citrus juicer and strainer: Fresh juice and a clean pour without pulp.
- Wine thermometer (optional): Helpful if you want to ensure ideal serving temperatures.
Step-by-Step Preparation Guide
Step 1: Pour the sparkling wine into the flute or pitcher
Slowly and deliberately pour the chilled dry sparkling wine into a sleek champagne flute until the liquid reaches roughly two-thirds of the glass. If you’re making multiple servings, pour the sparkling wine into a large chilled pitcher instead, letting the pale, effervescent liquid settle with a glossy, bead-speckled surface. Keep the action gentle so the carbonation remains lively and visible; do not stir. This first action sets the airy, fizzy texture that defines a proper mimosa.
Step 2: Top with bright orange juice
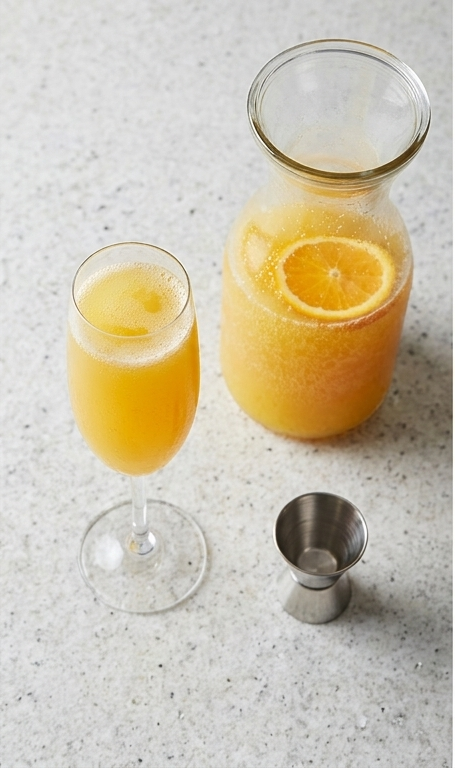
Carefully top the flute or pitcher with chilled 100% orange juice until the glass is full or the pitcher reaches your desired volume (I recommend about 1 1\/2 cups of juice per pitcher). Pour slowly to preserve the sparkling wine’s micro-bubbles and encourage a delicate, shimmering gradient where golden citrus meets pale champagne. Do not stir—allow the two liquids to marry naturally, creating a clear, bright orange hue dotted with tiny rising bubbles and a thin ring of foam at the surface.
Step 3: Chill the pitcher option (if using) and let the flavors settle
If you prepared a pitcher, cover it briefly and refrigerate for up to 10 minutes to let temperature and carbonation equalize; still, avoid stirring. The short chill rounds the edges of the bubbles and keeps the juice vibrant. Leave a few orange wheels or thin slices in a small bowl on the side to use as optional garnish—they should remain crisp, glossy, and fragrant.
Step 4: Pour, present, and garnish
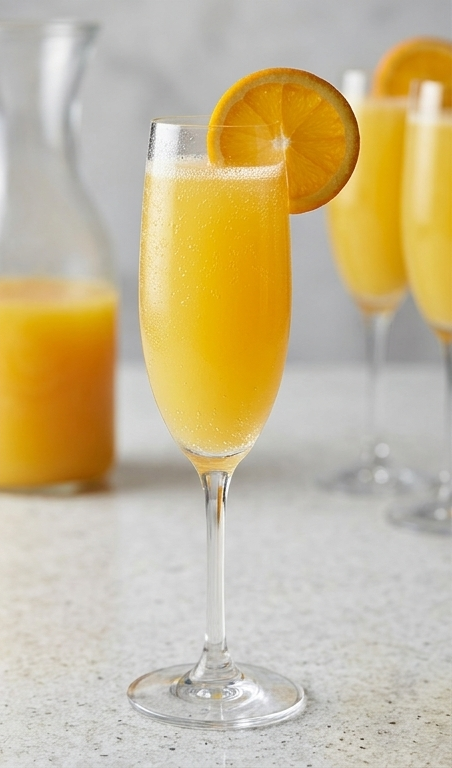
Pour the finished mimosa from the pitcher into individual champagne flutes or, for a single serving, present the filled flute immediately. The final drink should be a luminous, golden-orange liquid with a fine stream of effervescence rising to the surface and a subtle sheen of condensation on the glass. Garnish each flute with a thin orange wheel perched on the rim if desired, and serve right away for best texture and sparkle.
Making It Your Own
I like to experiment with small swaps when I make How To Make Mimosas. For a lower-sugar version, I mix half sparkling water with prosecco and use freshly squeezed orange juice. On warm summer mornings I add a splash of peach nectar for a Bellini-inspired twist. For a festive holiday brunch I try cranberry-orange juice with a rosemary sprig as garnish; the herbal note is surprising and lovely. If guests need a nonalcoholic option, a high quality sparkling nonalcoholic wine keeps the texture while the juice provides the flavor.
How to Serve
When I’m hosting, presentation matters as much as taste. For a casual brunch I set out a chilled pitcher of assembled mimosas, a bowl of sliced oranges, and a stack of chilled flutes so guests can pour their own. For a dinner party arrival drink I pre-fill flutes about two-thirds with sparkling wine and top them right before guests arrive to keep the bubbles fresh. To stretch a bottle for a larger crowd, reduce the wine-to-juice ratio slightly and offer a pitcher of extra chilled juice on the side so guests can tailor their strength.
Storage and Reheating Tips
Mimosas are best enjoyed right away. If you must prepare a pitcher in advance, assemble it and chill for no more than 10 minutes; longer storage makes the sparkling wine go flat and dulls the citrus brightness.
Leftovers lose their fizz quickly. If you find yourself with a partially filled bottle of sparkling wine, reseal it with a tight stopper and refrigerate upright; it will generally keep some sparkle for a day. Orange juice can be stored separately in the fridge for several days in an airtight container.
Common Mistakes and How to Avoid Them
Overfilling glasses or stirring vigorously kills the bubbles and flattens the drink. Pour slowly and resist the urge to mix.
Using overly sweet juice hides the wine’s subtle notes. Choose 100% orange juice or fresh-squeezed for balance.
Final Thoughts and Invitation
How To Make Mimosas is effortless, joyful, and endlessly adaptable. Try keeping a chilled bottle and a jug of good orange juice on hand for those mornings when you want to mark the moment. Pour slowly, savor the bubbles, and share a glass with someone you enjoy.
Frequently Asked Questions
- Q: What sparkling wine is best for How To Make Mimosas?
A: A dry sparkling wine like prosecco, cava, or nonvintage brut gives the right balance of acidity and bubbles without dominating the orange juice. - Q: Can I use store-bought orange juice?
A: Yes, choose a high-quality 100% orange juice. Freshly squeezed is brighter, but a good store brand works well and is more convenient. - Q: How much juice per glass should I use?
A: A common ratio is about one part juice to two parts sparkling wine, but adjust to taste. For a pitcher, roughly 1 1\/2 cups of juice per 750 mL bottle is a helpful guide. - Q: Can I make a nonalcoholic version of How To Make Mimosas?
A: Absolutely. Use a quality nonalcoholic sparkling wine or chilled sparkling water and keep the juice as is for a refreshing mocktail. - Q: How long can I prepare a pitcher in advance?
A: Prepare no more than 10 minutes before serving for best bubbles and brightness; longer storage leads to flatness.
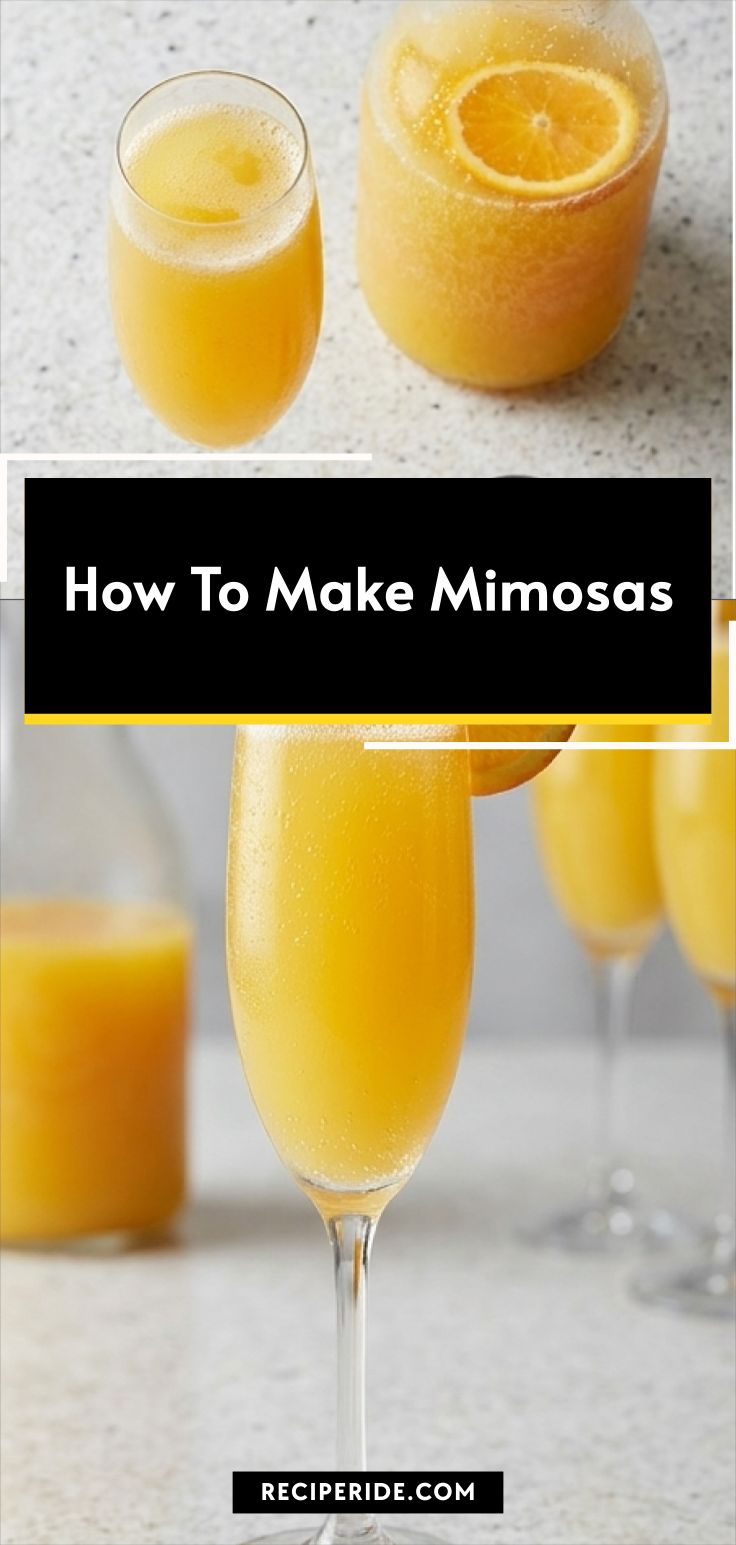
How To Make Mimosas
How To Make Mimosas: Mix chilled dry sparkling wine with 100% orange juice for bright, bubbly brunch drinks.
Ingredients
Instructions
Step 1: Pour the sparkling wine into the flute or pitcher
Slowly and deliberately pour the chilled dry sparkling wine into a sleek champagne flute until the liquid reaches roughly two-thirds of the glass. If you're making multiple servings, pour the sparkling wine into a large chilled pitcher instead, letting the pale, effervescent liquid settle with a glossy, bead-speckled surface. Keep the action gentle so the carbonation remains lively and visible; do not stir. This first action sets the airy, fizzy texture that defines a proper mimosa.
Step 2: Top with bright orange juice
Carefully top the flute or pitcher with chilled 100% orange juice until the glass is full or the pitcher reaches your desired volume (I recommend about 1 ½ cups of juice per pitcher). Pour slowly to preserve the sparkling wine's micro-bubbles and encourage a delicate, shimmering gradient where golden citrus meets pale champagne. Do not stir—allow the two liquids to marry naturally, creating a clear, bright orange hue dotted with tiny rising bubbles and a thin ring of foam at the surface.
Step 3: Chill the pitcher option (if using) and let the flavors settle
If you prepared a pitcher, cover it briefly and refrigerate for up to 10 minutes to let temperature and carbonation equalize; still, avoid stirring. The short chill rounds the edges of the bubbles and keeps the juice vibrant. Leave a few orange wheels or thin slices in a small bowl on the side to use as optional garnish—they should remain crisp, glossy, and fragrant.
Step 4: Pour, present, and garnish
Pour the finished mimosa from the pitcher into individual champagne flutes or, for a single serving, present the filled flute immediately. The final drink should be a luminous, golden-orange liquid with a fine stream of effervescence rising to the surface and a subtle sheen of condensation on the glass. Garnish each flute with a thin orange wheel perched on the rim if desired, and serve right away for best texture and sparkle.
Notes
- Use freshly chilled wine and juice for best bubbles
- Pour slowly and do not stir to preserve carbonation
- Reseal unused sparkling wine with a stopper and refrigerate upright
- Substitute prosecco, cava, or a nonalcoholic sparkling option as needed
- Adjust wine-to-juice ratio to taste
