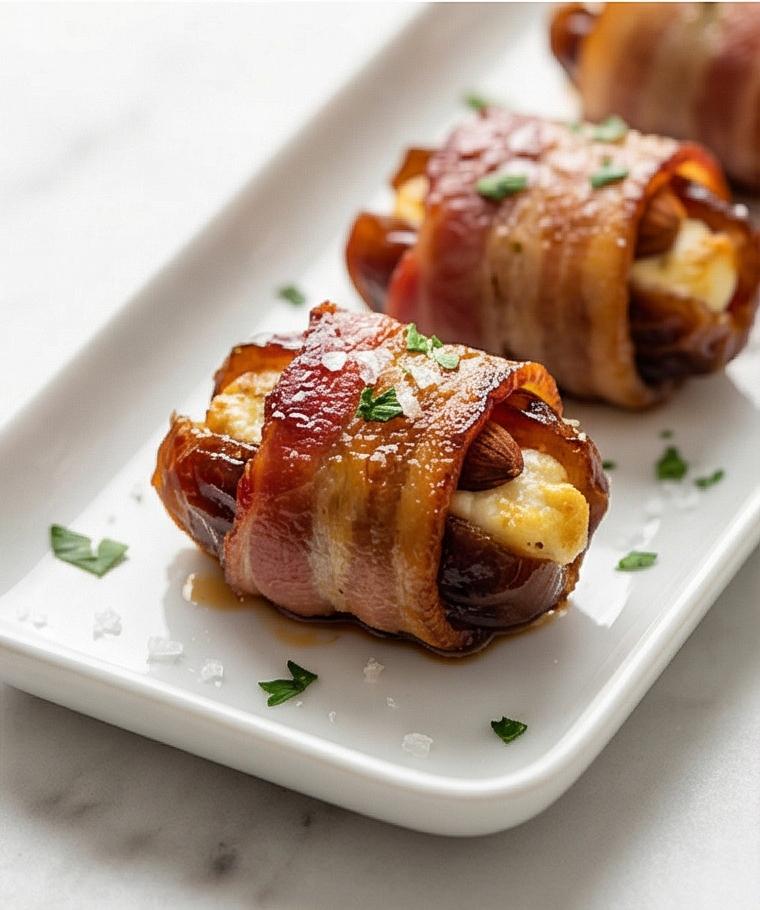
If you love sweet-salty bites, my Bacon Wrapped Dates Recipe is exactly the kind of snack I make when friends drop by unannounced. I started making these years ago and they quickly became my go-to party starter for casual nights and holiday gatherings. The contrast of soft Medjool dates, tangy goat cheese, crunchy almonds, and smoky bacon is one of those simple combos that feels fancy without fuss. You can put this Bacon Wrapped Dates Recipe together in under an hour and still look like you planned the whole thing.
How This Recipe Became My Rainy-Day Favorite
I remember the first time I made the Bacon Wrapped Dates Recipe: it was pouring outside and the house smelled like coffee and warm bacon. I was making something small to cheer up a friend after a long week, and the slow sizzle in the oven felt almost like therapy. The first bite was a tiny explosion of textures – the sticky date, the creamy goat cheese, the toasted almond snap, and the salty bacon finish. We laughed over how something so simple felt celebratory, and from then on these dates meant comfort for me. They are the recipe I reach for when I want an easy, impressive dish that makes people smile.
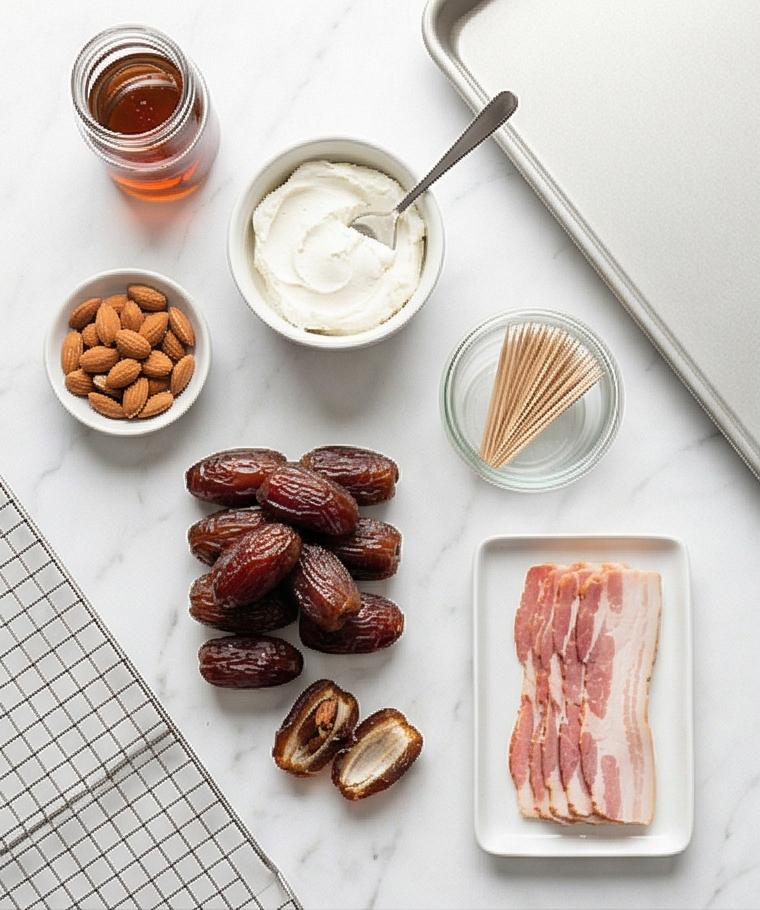
Ingredient Notes and Selection Tips
- Medjool Dates: The star of the show – soft, caramel-like, and easy to stuff. Substitute with large Deglet Noor if needed but they will be less tender.
- Goat Cheese: Adds tang and creaminess; use cream cheese or ricotta for a milder flavor.
- Roasted Almonds: Provide crunch – try pecans or candied walnuts for variation.
- Thin-Cut Bacon: Crisps quickly; use prosciutto for a lighter, saltier wrap.
- Maple Syrup and Black Pepper: Optional glaze to boost caramel and spice; honey works too.
Essential Kitchen Tools
A few reliable tools make this recipe breezy and keep the process relaxed. Use a rimmed baking sheet and a wire rack so bacon crisps evenly and fat drips away; foil or parchment helps with cleanup. A small bowl or piping bag makes filling neat and consistent, and tongs help you turn the dates without losing the filling. If you plan to broil, soak wooden toothpicks so they don’t scorch. Alternatives: if you do not have a wire rack, place the dates directly on parchment and drain fat occasionally with a paper towel.
- Rimmed baking sheet and wire rack: for even crisping and draining.
- Small bowl or piping bag: to fill dates cleanly.
- Tongs: to safely turn dates mid-bake.
- Small jar or spoon: to mix and apply glaze.
- Wooden toothpicks: to secure the bacon wraps.
Step-by-Step Preparation Guide
Step 1: Preheat and prepare the pan and toothpicks
Preheat the oven to 400°F (200°C) and position a rack in the middle. Line a rimmed baking sheet with parchment or foil and, if you have one, set a wire rack inside the sheet so rendered bacon fat can drip away. If you plan to broil at the end, soak the wooden toothpicks in cool water for at least 10 minutes while the oven heats; this reduces scorching. Keep the prepared rimmed baking sheet and a small plate nearby on the Carrara surface.
Step 2: Pit and slit the dates so they can open like a book
If your Medjool dates aren’t already pitted, use a small sharp knife to make a lengthwise slit and gently remove each pit without cutting through the date. Even if they are pitted, make a small slit along one side so each date opens like a little pocket. Inspect each date and remove any pit fragments so the interior is clean and ready for filling.
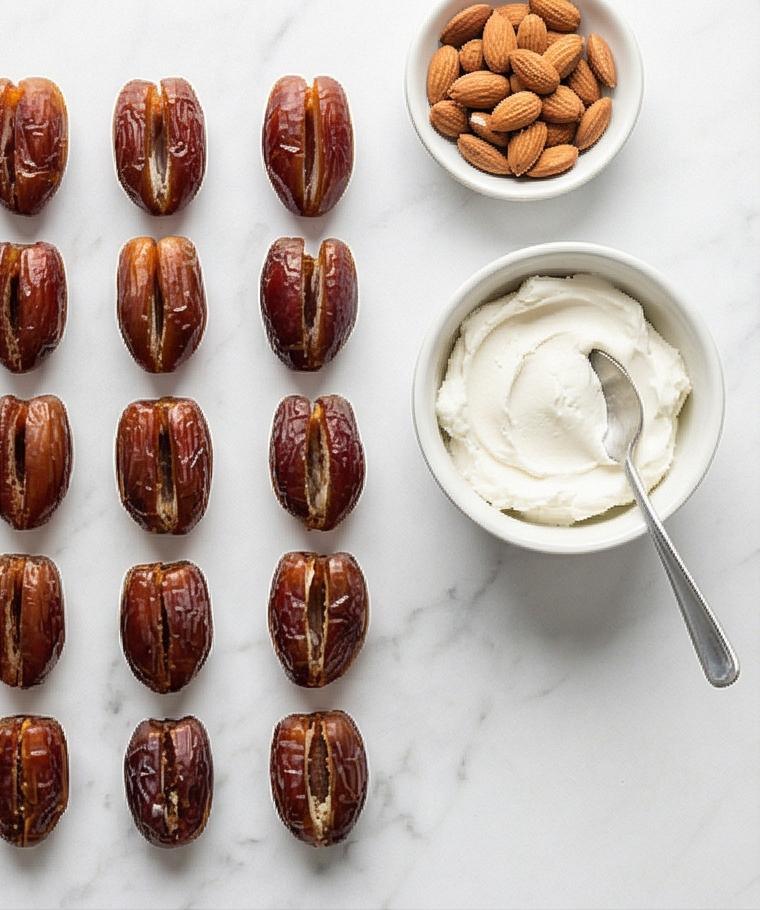
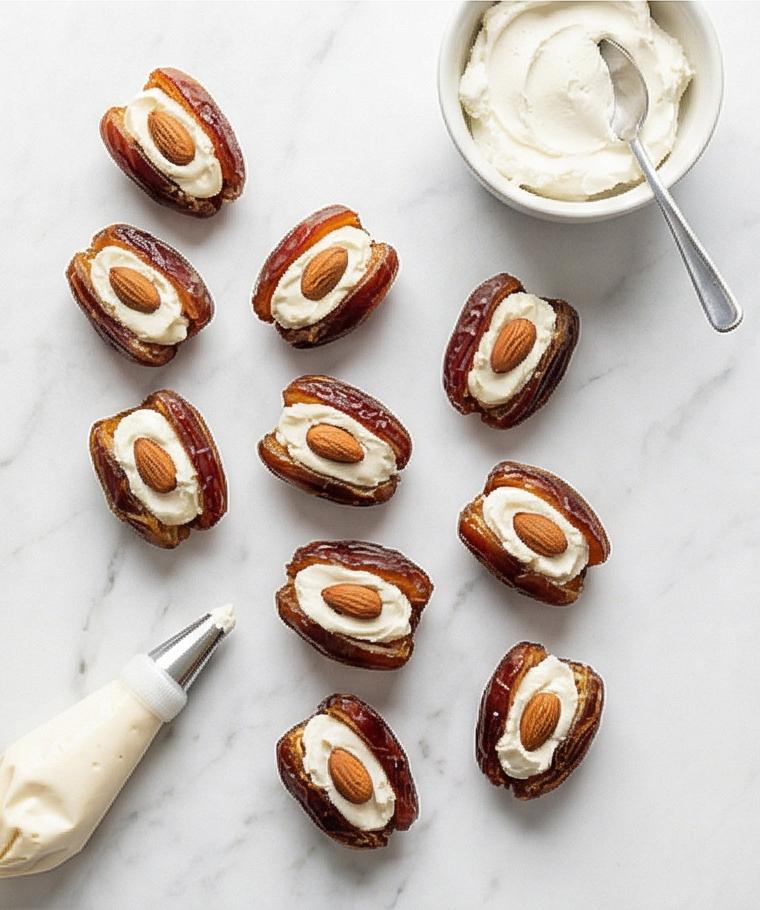
Step 3: Soften and smooth the goat cheese, then fill the dates
Place the room-temperature goat cheese in a small matte white ceramic bowl and stir until silky and spreadable with a small spoon – keep that same bowl and spoon for later steps. Using a teaspoon or a small piping bag, spoon about 1 teaspoon of goat cheese into each date cavity, pushing the cheese into the center so it nests there. Gently press one roasted almond into the cheese in each date, then close the date around the filling; a little cheese peeking out is perfectly charming.
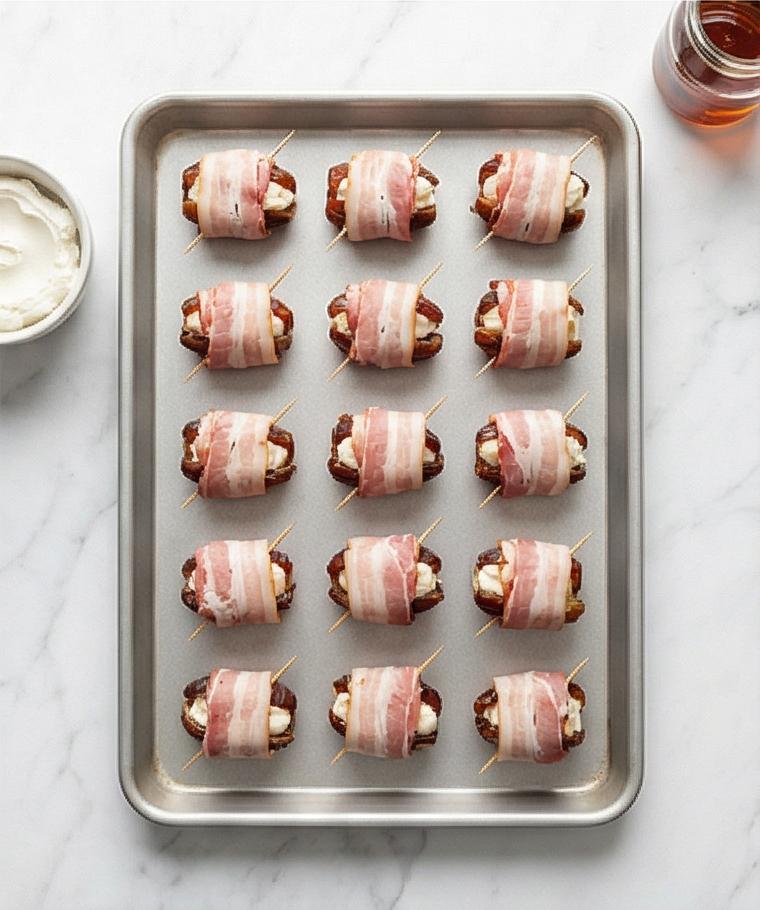
Step 4: Cut bacon and wrap each filled date
Cut the thin-cut bacon slices in half crosswise so you have 18 shorter strips. Place a filled date at one end of a bacon strip and roll it so the bacon overlaps slightly but doesn’t double up into a thick layer – this helps even crisping. Tuck the seam to the bottom. Keep a small dish for the toothpicks and the same spoon/bowl visible nearby for continuity and utensil persistence.
Step 5: Secure the rolls and arrange them on the baking sheet
Remove the soaked toothpicks from the water and pat them dry. Pierce each bacon-wrapped date through the center with a toothpick to secure the bacon and place each seam-side down on the prepared rimmed baking sheet (or wire rack set inside it), spacing them about 1 inch (2.5 cm) apart so air circulates and bacon crisps evenly.
Step 6: Make the optional maple-pepper glaze and lightly coat
In the same small glass jar used for liquids, stir together 2 tablespoons pure maple syrup with 1/4 teaspoon freshly ground black pepper if using. Using a small spoon or pastry brush, very lightly brush or drizzle a thin, even layer of the maple mixture over the tops and sides of the bacon-wrapped dates – just enough to encourage caramelization without pooling or burning. Keep any excess glaze in the jar on the marble.
Step 7: Bake, turn, and brown for even crispness
Place the baking sheet on the middle oven rack and bake for 8–10 minutes until the first side is deep golden. Carefully remove the tray, use tongs to turn each date so the opposite side can brown, rotate the tray 180° for even heat, and return to the oven for another 7–10 minutes (about 15–20 minutes total) until bacon is deep golden and edges are crisp and you can see the cheese just beginning to bubble at the ends.
Step 8: Optional quick broil to finish the edges
If you want extra crispness, switch to high broil briefly with the rack still in the middle and broil for 1–3 minutes while watching constantly so the glaze doesn’t burn. The bacon edges should darken slightly and snap. Remove immediately when you see the desired color.
Step 9: Rest and blot excess fat
Remove the baking sheet from the oven and let the bacon-wrapped dates rest on the pan for about 5 minutes; the filling will be extremely hot. If desired, gently blot any excess rendered fat around the dates with a paper towel while leaving the tops intact, then transfer them carefully to a serving platter.
Step 10: Finish with salt, parsley, and any glaze drizzle
If any maple glaze pooled on the sheet, spoon a little back over the warm dates. Lightly sprinkle flaky sea salt over the tops and scatter finely chopped fresh flat-leaf parsley for color and brightness. Leave the toothpicks in place for easy picking and serving.
Step 11: Serve suggestions and pairing
Serve the warm bacon-wrapped dates as an hors d’oeuvre alongside something crisp and fresh – a simple green salad or crunchy crudites balances the richness beautifully. They pair wonderfully with sparkling wine, a dry white, or a light beer. Plan on 2–3 dates per person depending on appetite.
Step 12: Make-ahead and reheating notes
To make ahead, assemble the stuffed and bacon-wrapped dates up to securing with toothpicks, cover tightly, and refrigerate for up to 24 hours; when ready to serve, add the glaze and bake, adding 1–2 extra minutes if they are cold. Leftover cooked dates keep in an airtight container for up to 3 days and reheat on a baking sheet at 350°F (175°C) for 8–10 minutes until warmed and re-crisped.
Making It Your Own
Try the small experiments I love when I want to shake things up. Swap goat cheese for blue cheese and add a touch of honey for a bolder, more savory bite. For a vegetarian take, wrap marinated halloumi or a thin slice of smoked tempeh instead of bacon; broil carefully to crisp without overcooking. In winter, use candied pecans and a drizzle of aged balsamic for a festive edge. In summer, add a sliver of fresh peach or a basil leaf inside the date for brightness.
I often test regional twists – a dusting of smoked paprika for Spanish flair, or zaatar and lemon zest for an Eastern Mediterranean note. Small changes keep this Bacon Wrapped Dates Recipe feeling new at every gathering.
How to Serve
When I host, presentation matters as much as flavor. Arrange warm Bacon Wrapped Dates Recipe on a long wooden board with small bowls of mustard or extra maple glaze for dipping. For a cocktail party, leave the toothpicks in and serve on tiered trays so guests can graze.
If you need to scale up, double the batches and bake on two sheets, rotating them midway. For a more formal plate, place two dates per person on a bed of microgreens and add a tiny sprinkle of flaky sea salt and chopped parsley for color. Keep crackers or a crisp salad nearby to balance the richness.
Storage and Reheating Tips
Leftovers store well if you keep them in an airtight container in the refrigerator for up to 3 days. I like to separate layers with parchment so they do not stick together.
To reheat, spread the dates on a baking sheet and warm in a 350°F (175°C) oven for 8-10 minutes to re-crisp the bacon. Avoid microwaving if you want to preserve texture, but a quick zap is fine if you are short on time.
Common Mistakes and How to Avoid Them
A common mistake is overfilling the dates – too much cheese can ooze out and make the bacon slip. Use about 1 teaspoon of cheese and press the almond in so it stays put.
Another slip-up is baking at too-high a rack position which can burn the glaze. Keep the rack in the middle, watch during any broil, and rotate the pan for even color.
Final Thoughts and Encouragement
Give the Bacon Wrapped Dates Recipe a try – it rewards a little attention with big flavor and looks like you spent far more time on it than you did. Invite someone over, turn on a playlist, and enjoy how a simple recipe can lift an evening.
Frequently Asked Questions
- Can I make Bacon Wrapped Dates Recipe ahead of time? – Yes, you can assemble them up to 24 hours ahead, then bake when ready. Keep them tightly covered in the fridge.
- What is a good substitute for goat cheese? – Cream cheese, ricotta, or mascarpone work well for a milder profile.
- How should I reheat leftovers? – Reheat on a baking sheet at 350°F (175°C) for 8-10 minutes to restore crispness.
- Can I use thick-cut bacon? – You can, but it will need more time to render and crisp; consider partially cooking it first.
- Are there nut-free options? – Yes, skip the almonds and use a small piece of crispy prosciutto inside or just double the cheese.
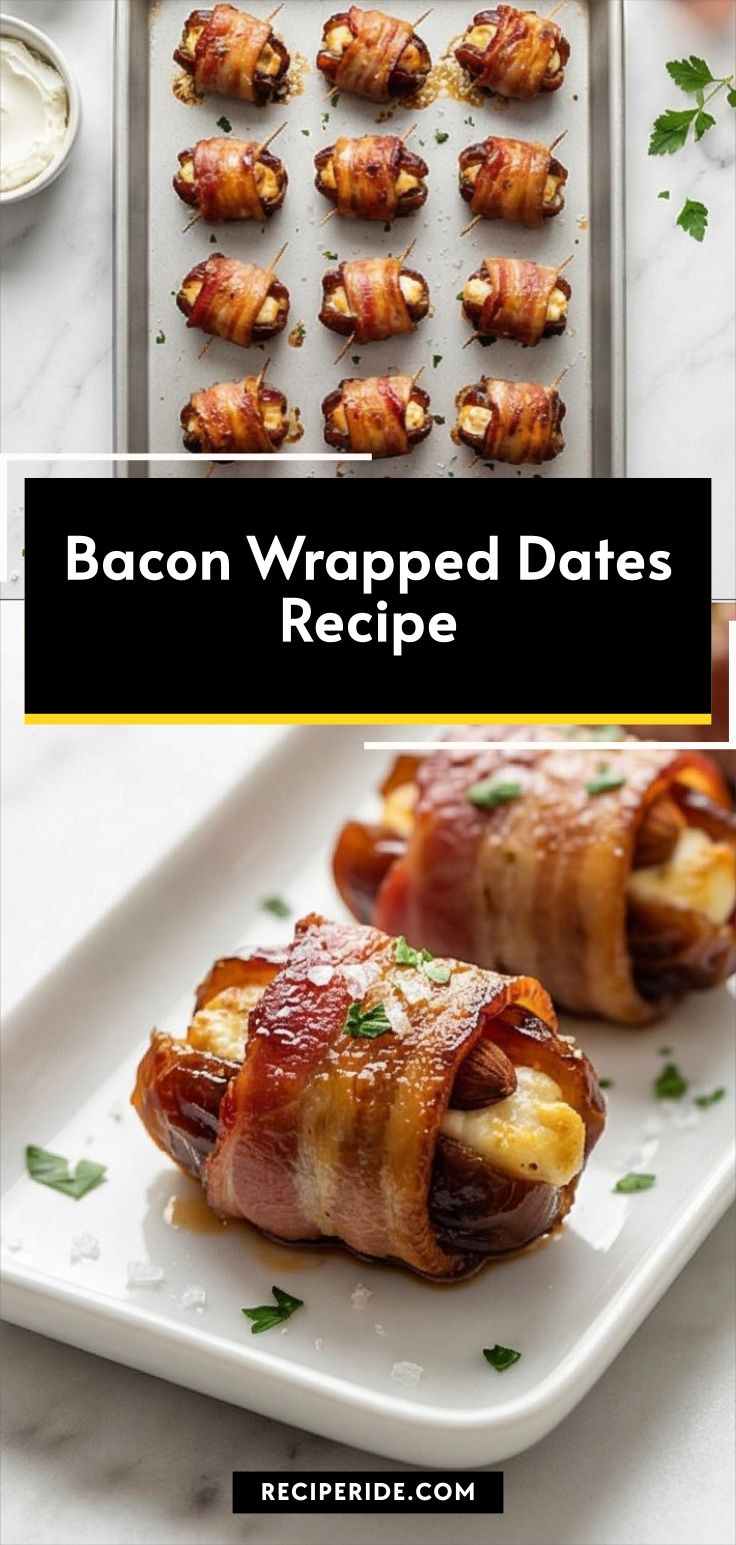
Bacon Wrapped Dates Recipe
Make Bacon Wrapped Dates Recipe: sweet Medjool dates stuffed with goat cheese, almonds and wrapped in bacon for a crowd-pleasing appetizer.
Ingredients
Instructions
Step 1: Preheat and prepare the pan and toothpicks
Preheat the oven to 400°F (200°C) and position a rack in the middle. Line a rimmed baking sheet with parchment or foil and, if you have one, set a wire rack inside the sheet so rendered bacon fat can drip away. If you plan to broil at the end, soak the wooden toothpicks in cool water for at least 10 minutes while the oven heats; this reduces scorching. Keep the prepared rimmed baking sheet and a small plate nearby on the Carrara surface.
Step 2: Pit and slit the dates so they can open like a book
If your Medjool dates aren’t already pitted, use a small sharp knife to make a lengthwise slit and gently remove each pit without cutting through the date. Even if they are pitted, make a small slit along one side so each date opens like a little pocket. Inspect each date and remove any pit fragments so the interior is clean and ready for filling.
Step 3: Soften and smooth the goat cheese, then fill the dates
Place the room-temperature goat cheese in a small matte white ceramic bowl and stir until silky and spreadable with a small spoon — keep that same bowl and spoon for later steps. Using a teaspoon or a small piping bag, spoon about 1 teaspoon of goat cheese into each date cavity, pushing the cheese into the center so it nests there. Gently press one roasted almond into the cheese in each date, then close the date around the filling; a little cheese peeking out is perfectly charming.
Step 4: Cut bacon and wrap each filled date
Cut the thin-cut bacon slices in half crosswise so you have 18 shorter strips. Place a filled date at one end of a bacon strip and roll it so the bacon overlaps slightly but doesn’t double up into a thick layer — this helps even crisping. Tuck the seam to the bottom. Keep a small dish for the toothpicks and the same spoon/bowl visible nearby for continuity and utensil persistence.
Step 5: Secure the rolls and arrange them on the baking sheet
Remove the soaked toothpicks from the water and pat them dry. Pierce each bacon-wrapped date through the center with a toothpick to secure the bacon and place each seam-side down on the prepared rimmed baking sheet (or wire rack set inside it), spacing them about 1 inch (2.5 cm) apart so air circulates and bacon crisps evenly.
Step 6: Make the optional maple-pepper glaze and lightly coat
In the same small glass jar used for liquids, stir together 2 tablespoons pure maple syrup with 1/4 teaspoon freshly ground black pepper if using. Using a small spoon or pastry brush, very lightly brush or drizzle a thin, even layer of the maple mixture over the tops and sides of the bacon-wrapped dates — just enough to encourage caramelization without pooling or burning. Keep any excess glaze in the jar on the marble.
Step 7: Bake, turn, and brown for even crispness
Place the baking sheet on the middle oven rack and bake for 8–10 minutes until the first side is deep golden. Carefully remove the tray, use tongs to turn each date so the opposite side can brown, rotate the tray 180° for even heat, and return to the oven for another 7–10 minutes (about 15–20 minutes total) until bacon is deep golden and edges are crisp and you can see the cheese just beginning to bubble at the ends.
Step 8: Optional quick broil to finish the edges
If you want extra crispness, switch to high broil briefly with the rack still in the middle and broil for 1–3 minutes while watching constantly so the glaze doesn’t burn. The bacon edges should darken slightly and snap. Remove immediately when you see the desired color.
Step 9: Rest and blot excess fat
Remove the baking sheet from the oven and let the bacon-wrapped dates rest on the pan for about 5 minutes; the filling will be extremely hot. If desired, gently blot any excess rendered fat around the dates with a paper towel while leaving the tops intact, then transfer them carefully to a serving platter.
Step 10: Finish with salt, parsley, and any glaze drizzle
If any maple glaze pooled on the sheet, spoon a little back over the warm dates. Lightly sprinkle flaky sea salt over the tops and scatter finely chopped fresh flat-leaf parsley for color and brightness. Leave the toothpicks in place for easy picking and serving.
Step 11: Serve suggestions and pairing
Serve the warm bacon-wrapped dates as an hors d'oeuvre alongside something crisp and fresh — a simple green salad or crunchy crudités balances the richness beautifully. They pair wonderfully with sparkling wine, a dry white, or a light beer. Plan on 2–3 dates per person depending on appetite.
Step 12: Make-ahead and reheating notes
To make ahead, assemble the stuffed and bacon-wrapped dates up to securing with toothpicks, cover tightly, and refrigerate for up to 24 hours; when ready to serve, add the glaze and bake, adding 1–2 extra minutes if they are cold. Leftover cooked dates keep in an airtight container for up to 3 days and reheat on a baking sheet at 350°F (175°C) for 8–10 minutes until warmed and re-crisped.
Notes
- Soak wooden toothpicks for 10 minutes to prevent burning.
- Use room-temperature goat cheese for easier filling.
- If using thick-cut bacon, par-cook slightly to render fat before wrapping.
- Reheat on a baking sheet at 350°F (175°C) to re-crisp bacon.
- Store cooked dates in an airtight container for up to 3 days.
