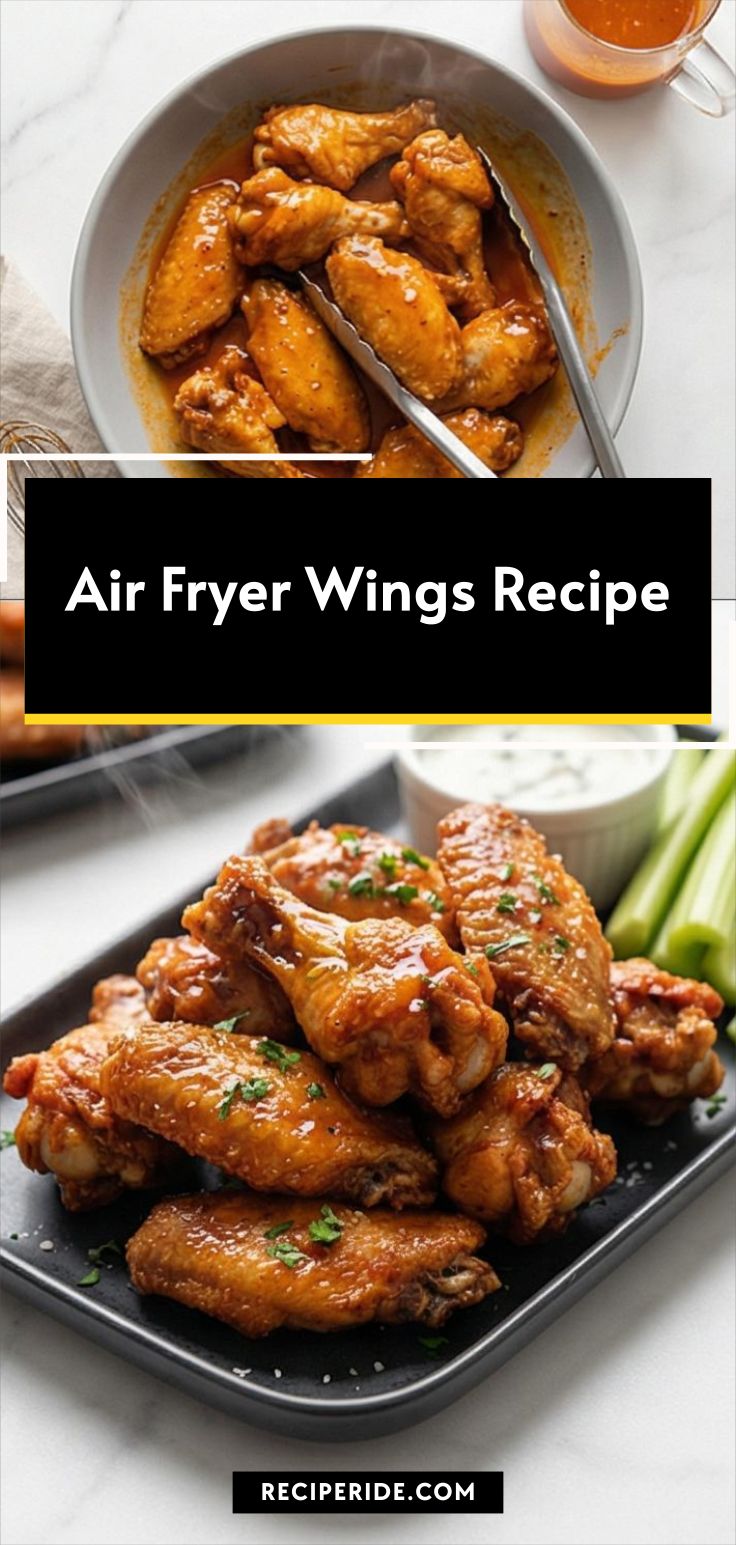
Air Fryer Wings Recipe
I make this Air Fryer Wings Recipe whenever friends drop by or when I need an easy, showstopping snack. The crunch from the air fryer and the glossy hot sauce glaze always wins the room, and it’s become my go-to for last-minute entertaining. I love that the method gives the skin a crackly texture without deep frying, so you get that satisfying bite with less fuss. It’s simple, fast, and reliably delicious every time.
How This Recipe Became My Friday-Night Staple
There was one rainy evening when I had more appetite than energy and a bag of wings in the fridge. I tested a quick crisping method in the air fryer, added a tiny bit of baking powder to the dry rub, and the result was startlingly good: skin that puffed and snapped beneath the sauce, while the meat stayed juicy. The sound of those wings coming out of the basket, hot and crackling, is a small, domestic celebration to me. I remember the orange steam of the butter-hot sauce hitting the wings and the first bite—bright vinegar heat wrapped in silky butter, with a smoky edge from the paprika. Since then the Air Fryer Wings Recipe has been my fallback for casual dinners, game nights, and the occasional midnight snack, always promising crispness and comfort with minimal effort.
What Makes Each Ingredient Sing
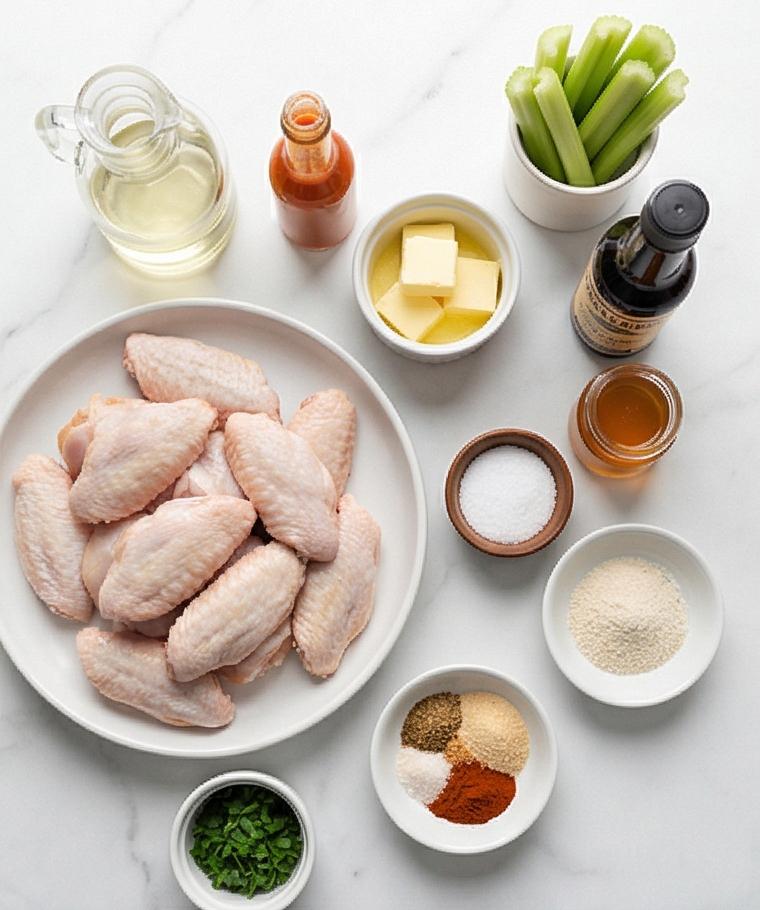
- Chicken Wings: The foundation of the recipe; choose split wings with tips removed for even cooking and easy handling. Larger wings need a bit more time; smaller ones crisp faster.
- Kosher Salt: Draws moisture and seasons through; if you use fine table salt, reduce the amount slightly. Pick a flaky variety if you like a finishing crunch.
- Aluminum-Free Baking Powder: The secret for puffed, crackly skin. Do not substitute with baking soda. Use fresh powder for best lift.
- Smoked Paprika: Adds color and a gentle smoky note; regular paprika works in a pinch.
- Neutral Oil: A tablespoon helps spices adhere and promotes even browning; use canola or grapeseed for a neutral flavor.
- Unsalted Butter and Hot Sauce: Together they create the classic glossy lacquer. Use a cayenne-forward hot sauce for more heat, or a milder sauce if you prefer less punch.
Essential Kitchen Tools and Why They Matter
A few simple tools make this Air Fryer Wings Recipe easier and more reliable. The air fryer itself is obvious, but small additions change the outcome.
- Air Fryer: Circulates hot air for crisp skin without oil immersion. If yours is small, cook in batches.
- Instant-Read Thermometer: Confirms the interior hits 185°F so wings are fully cooked and juicy.
- Wire Rack and Baking Sheet: Let wings rest and stay crisp while you finish others; a low oven can keep batches warm.
- Large Mixing Bowls: One for seasoning and one clean bowl for saucing so you don’t contaminate finished wings.
- Tongs: For flipping and tossing so you keep fingers safe and the coating intact.
Alternatives like a convection oven or a grill can be used, but timings and spacing may need adjusting.
Step-by-Step Preparation Guide
Step 1: Pat the wings very dry
Start by laying the split chicken wings (tips removed) on a clean sheet of paper towels and patting them completely dry until there is no visible surface moisture; the skin should look matte and taut rather than wet. Drying is the single most important textural step for crisp skin in the air fryer—think satin, not glossy. Transfer the dried wings to a large clean bowl and leave them uncovered briefly so any remaining surface dampness evaporates while you mix seasonings.
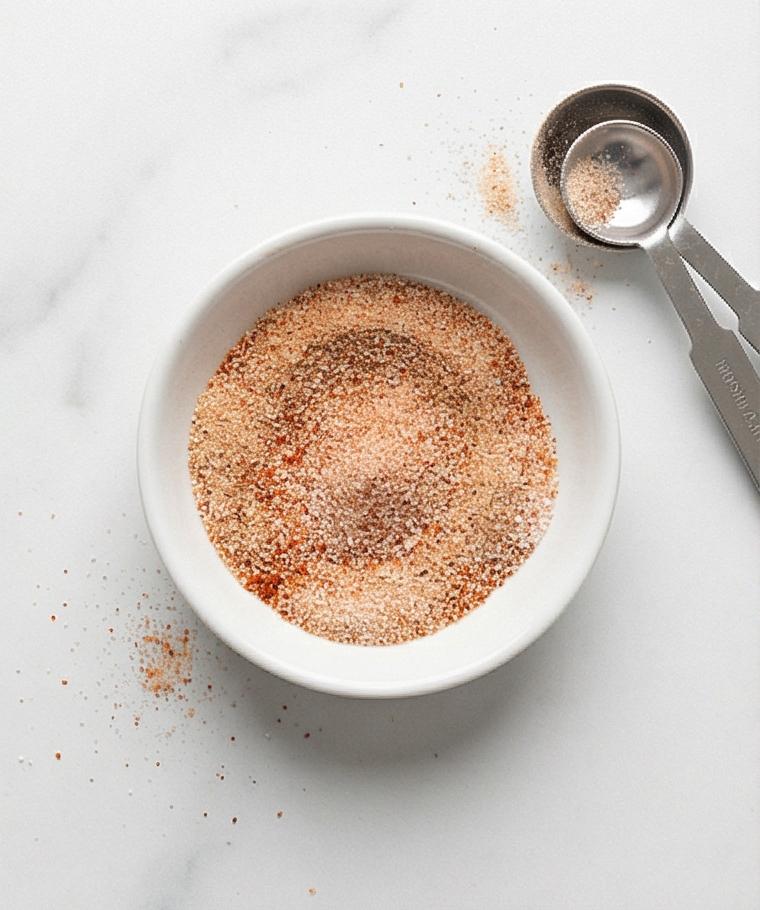
Step 2: Mix the dry seasoning blend
In a small bowl combine kosher salt, aluminum-free baking powder, garlic powder, onion powder, smoked paprika, freshly ground black pepper and cayenne (if using). Stir until uniform: the mixture should read as a fine, slightly gritty powder with tiny rust-colored flecks of paprika and a few pale grains of baking powder visible—no clumps. This is a seasoning paste’s dry cousin: even distribution is everything for consistent browning and crunch.
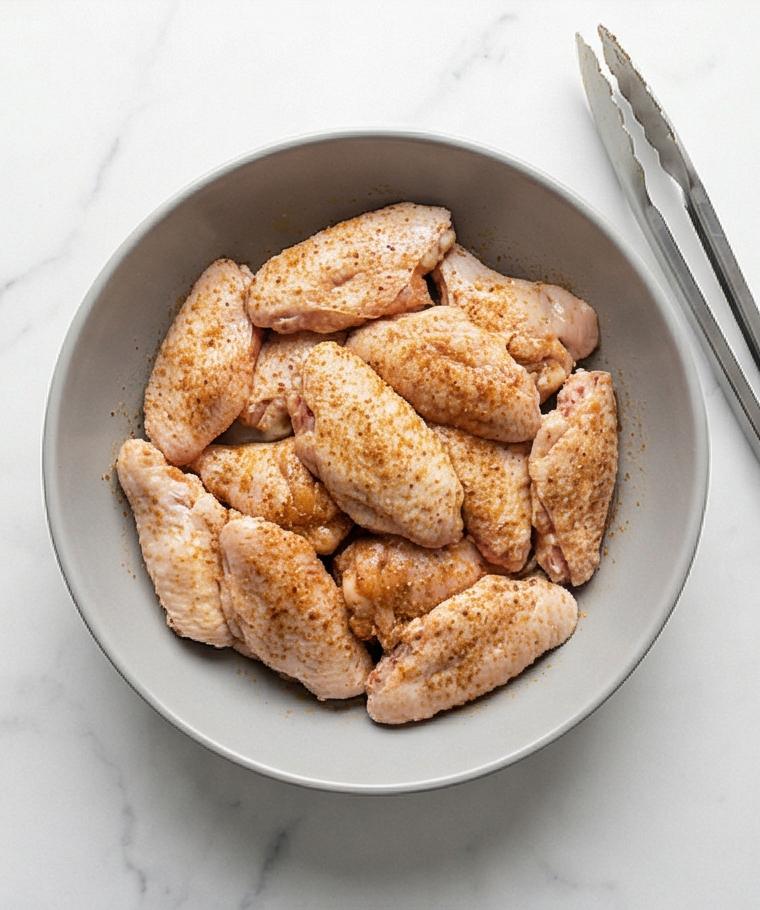
Step 3: Lightly oil the wings and toss with seasoning
Place the dried wings in a large mixing bowl, drizzle a tablespoon of neutral oil over them, and toss so each piece gets a whisper of sheen—no pooling oil, just a delicate film that catches the light. Sprinkle the seasoning blend over the oiled wings in two or three additions, turning and folding after each addition so every surface has a thin, even coating of spices. Visually you want each wing to show an even dusting of orange-red and brown spices on satin skin, not thick clumps.
Step 4: Preheat the air fryer and arrange wings for cooking
Preheat the air fryer to 380°F (193°C) for five minutes so the basket is hot and ready—this preheat jump-starts crisping. Arrange the seasoned wings in a single layer so hot air circulates around each piece; leave breathing room between them and work in batches if necessary rather than overcrowding. The visual milestone here is evenly spaced, seasoned wings laid flat with visible gaps between pieces so the airflow can crispen every edge.
Step 5: Air fry until golden, flipping halfway
Air fry at 380°F (193°C) for about 20 minutes, flipping or shaking at the 10-minute mark so both sides brown evenly. After this stage the skin should show a medium golden hue and tightened texture—no deep mahogany yet, but clearly approaching crisp.
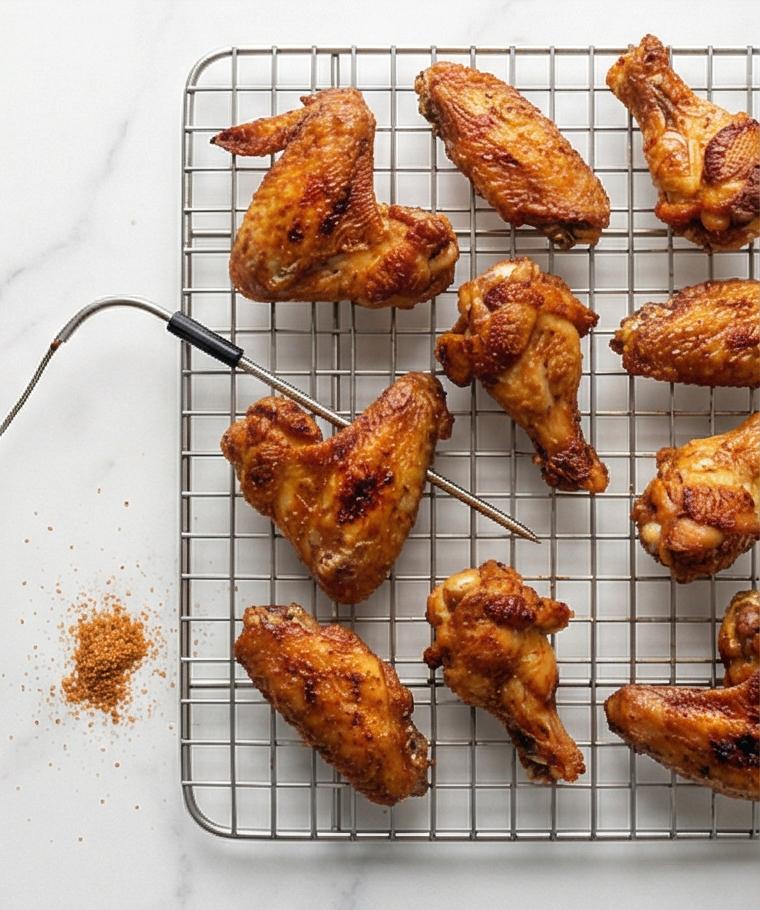
Step 6: Finish at higher heat until very crisp
Increase the air fryer temperature to 400°F (205°C) and continue cooking for 5–8 more minutes, watching for deep golden-brown color and an exterior that feels very crisp to the touch. The internal temperature target is 185°F (85°C) in the thickest part—when properly done, the skin will be puffy, crackly, and dry to the finger (use an instant-read thermometer to confirm). Transfer the cooked wings to a wire rack briefly to rest and retain maximum crunch.
Step 7: Gently melt butter for the sauce
While the wings finish, melt unsalted butter gently until just liquefied—warm and glossy, not browned. Use low heat and keep the melted butter warm but not bubbling; its silky texture is the backbone of the sauce’s mouthfeel, turning hot sauce from thin and sharp into a clingy lacquer.
Step 8: Whisk the hot sauce and seasonings into the butter
Whisk the hot sauce, Worcestershire, garlic powder and honey (or sugar, if using) into the warm butter until the mixture becomes unified and slightly thickened, a smooth, glossy orange-red emulsion that clings to the whisk. The sauce should bead and coat the back of a spoon; it’s bright, piquant, and viscous enough to glaze.
Step 9: Alternatively melt and combine in the microwave
If using the microwave, melt the butter in short 10–15 second bursts until just liquefied, then whisk in the hot sauce and seasonings until perfectly smooth. Either method yields the same visual: a shiny, pourable sauce with a wet-surfaced gloss and fine suspended flecks of seasoning.
Step 10: Transfer cooked wings to a clean bowl while hot
Quickly move the very hot, crispy wings from the resting rack into a large, clean mixing bowl so they remain hot and retain texture for saucing; the wings should still steam faintly and display deepening color from the final high-heat step.
Step 11: Pour warm sauce over the hot wings
Pour the warm sauce over the steaming wings in one steady stream so it flows and pools briefly before being worked into the meat—this is the moment the glossy lacquer forms. The contrast between the matte, crackly skin and the slick, vibrant sauce is crucial here.
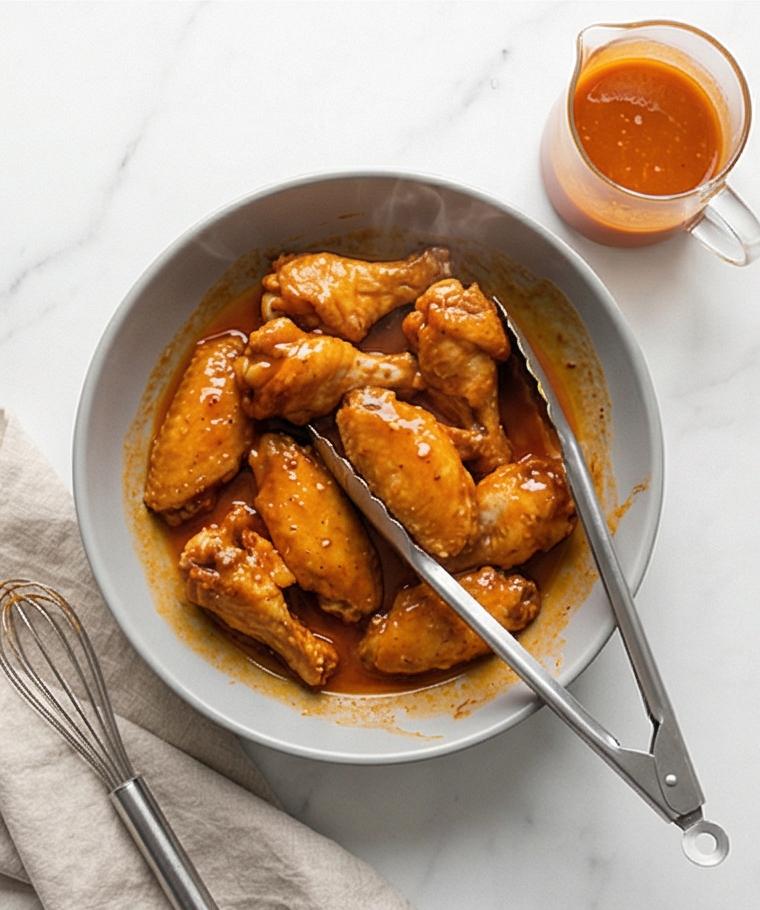
Step 12: Toss vigorously until every wing is evenly coated
Toss the wings immediately and vigorously with tongs or a large spoon until each wing is uniformly glossy and clinging with sauce; for a lighter glaze, begin with two-thirds of the sauce and add more to taste. The finished state should read as glossy, jewel-toned wings with sauce pooling slightly at the bowl’s base.
Step 13: Option for dry-rub style
If you prefer dry-rub wings, skip the saucing step and instead while the wings are hot sprinkle a pinch of additional kosher salt and a little extra smoked paprika or cayenne, tossing to coat. The final texture here is drier and more textured—visible granules of salt and spice create a rustic, matte crust.
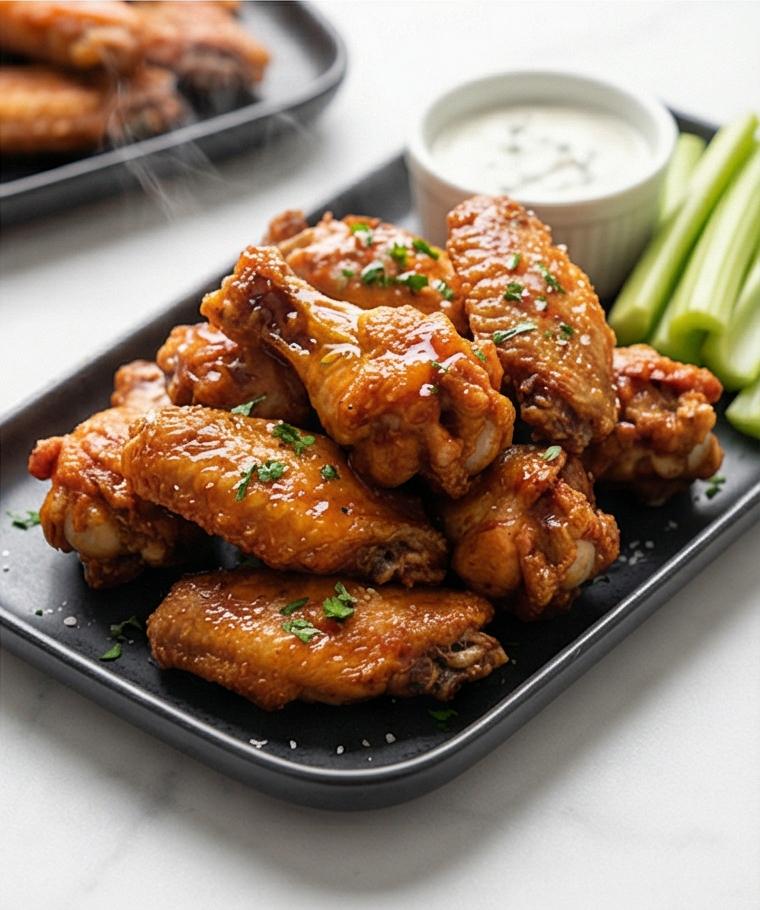
Step 14: Garnish with fresh herbs
Transfer the finished wings to a serving platter and sprinkle with finely chopped fresh parsley or chives for a bright green punctuation against the warm amber and mahogany tones. The herbs add a tiny, crisp freshness both in color and a faint herbal texture.
Step 15: Serve immediately with accompaniments
Serve the air-fried wings immediately while hot and crisp, accompanied by celery sticks and a ramekin of ranch or blue cheese dressing. For optimal texture enjoy within 15–20 minutes; the skin will begin to soften as it cools, so speed is part of the experience.
Step 16: Keep batches warm if cooking in turns
If you cook in multiple batches, keep earlier batches warm and relatively crisp on a wire rack set over a baking sheet in a low oven (about 250°F /120°C) while finishing remaining wings, then toss all wings together with sauce just before serving so every piece shares the fresh gloss.
Making It Your Own
Try a few small experiments to make this Air Fryer Wings Recipe your signature. Swap smoked paprika for cayenne and cumin for a Tex-Mex vibe. For a sweeter barbecue-style glaze, stir in a tablespoon of brown sugar or swap some hot sauce for ketchup and a splash of apple cider vinegar.
For a low-sugar or paleo option, use coconut aminos and a touch of maple instead of honey. If you want truly dry, extra-crisp wings, skip the sauce and experiment with finishing salts and citrus zest. I like to test small batches with varied spice levels so guests can pick their favorite.
How to Serve
When hosting, plate these Air Fryer Wings Recipe wings on a large, shallow platter so they stay visible and crisp. For a casual party, stack wings artfully with parsley sprinkled over the top and bowls of ranch and blue cheese on the side. Add celery sticks and lemon wedges to brighten the plate.
Scale up by working in parallel batches: keep finished wings on a wire rack in a low oven to hold them warm without steaming. If serving for a crowd, offer multiple sauces – a classic hot-butter, a sticky honey-sriracha, and a dry-rub option – so everyone can customize.
Storage and Reheating Tips
Leftover wings keep well for up to 3 days refrigerated in an airtight container. Separate sauced wings from dry-rub wings if you want the best texture later.
To reheat and revive crispness, use the air fryer at 375°F for 4-6 minutes, flipping once. For sauced wings, brief reheat keeps the glaze glossy; do not overcook or they will dry out.
Common Mistakes and How to Avoid Them
Crowding the basket is the most frequent error; it traps steam and yields limp skin. Work in batches so each wing gets air on all sides.
Using old baking powder or skipping the drying step will prevent that puffy crisp. Pat wings bone-dry and use fresh aluminum-free baking powder for guaranteed lift.
Final Thoughts
Give this Air Fryer Wings Recipe a try the next time you want something fast and impressive. It rewards the small details: dry skin, even seasoning, and a hot glossy sauce. When you nail those, the results are reliably addictive.
Frequently Asked Questions.
- Q: Can I use frozen wings for this Air Fryer Wings Recipe? A: Yes, but thaw first for best texture; frozen wings release moisture and may steam instead of crisp.
- Q: How do I make the wings less spicy? A: Reduce the cayenne in the dry rub and use a milder hot sauce or less hot sauce in the butter glaze.
- Q: What is the purpose of baking powder? A: Baking powder helps dry and puff the skin so it crisps more like fried wings.
- Q: Can I make these without an air fryer? A: You can use a convection oven at similar temperatures, but you may need more time and should space wings on a rack for airflow.
- Q: How do I keep wings crispy for a party? A: Keep cooked wings on a wire rack in a low oven (about 250°F /120°C) and toss with sauce just before serving.
Air Fryer Wings Recipe
Make Air Fryer Wings Recipe for crispy, saucy wings in under 45 minutes; perfect for game day.
Ingredients
Instructions
Step 1: Pat the wings very dry
Start by laying the split chicken wings (tips removed) on a clean sheet of paper towels and patting them completely dry until there is no visible surface moisture; the skin should look matte and taut rather than wet. Drying is the single most important textural step for crisp skin in the air fryer—think satin, not glossy. Transfer the dried wings to a large clean bowl and leave them uncovered briefly so any remaining surface dampness evaporates while you mix seasonings.
Step 2: Mix the dry seasoning blend
In a small bowl combine kosher salt, aluminum-free baking powder, garlic powder, onion powder, smoked paprika, freshly ground black pepper and cayenne (if using). Stir until uniform: the mixture should read as a fine, slightly gritty powder with tiny rust-colored flecks of paprika and a few pale grains of baking powder visible—no clumps. This is a seasoning paste’s dry cousin: even distribution is everything for consistent browning and crunch.
Step 3: Lightly oil the wings and toss with seasoning
Place the dried wings in a large mixing bowl, drizzle a tablespoon of neutral oil over them, and toss so each piece gets a whisper of sheen—no pooling oil, just a delicate film that catches the light. Sprinkle the seasoning blend over the oiled wings in two or three additions, turning and folding after each addition so every surface has a thin, even coating of spices. Visually you want each wing to show an even dusting of orange-red and brown spices on satin skin, not thick clumps.
Step 4: Preheat the air fryer and arrange wings for cooking
Preheat the air fryer to 380°F (193°C) for five minutes so the basket is hot and ready—this preheat jump-starts crisping. Arrange the seasoned wings in a single layer so hot air circulates around each piece; leave breathing room between them and work in batches if necessary rather than overcrowding. The visual milestone here is evenly spaced, seasoned wings laid flat with visible gaps between pieces so the airflow can crispen every edge.
Step 5: Air fry until golden, flipping halfway
Air fry at 380°F (193°C) for about 20 minutes, flipping or shaking at the 10-minute mark so both sides brown evenly. After this stage the skin should show a medium golden hue and tightened texture—no deep mahogany yet, but clearly approaching crisp.
Step 6: Finish at higher heat until very crisp
Increase the air fryer temperature to 400°F (205°C) and continue cooking for 5–8 more minutes, watching for deep golden-brown color and an exterior that feels very crisp to the touch. The internal temperature target is 185°F (85°C) in the thickest part—when properly done, the skin will be puffy, crackly, and dry to the finger (use an instant-read thermometer to confirm). Transfer the cooked wings to a wire rack briefly to rest and retain maximum crunch.
Step 7: Gently melt butter for the sauce
While the wings finish, melt unsalted butter gently until just liquefied—warm and glossy, not browned. Use low heat and keep the melted butter warm but not bubbling; its silky texture is the backbone of the sauce’s mouthfeel, turning hot sauce from thin and sharp into a clingy lacquer.
Step 8: Whisk the hot sauce and seasonings into the butter
Whisk the hot sauce, Worcestershire, garlic powder and honey (or sugar, if using) into the warm butter until the mixture becomes unified and slightly thickened, a smooth, glossy orange-red emulsion that clings to the whisk. The sauce should bead and coat the back of a spoon; it’s bright, piquant, and viscous enough to glaze.
Step 9: Alternatively melt and combine in the microwave
If using the microwave, melt the butter in short 10–15 second bursts until just liquefied, then whisk in the hot sauce and seasonings until perfectly smooth. Either method yields the same visual: a shiny, pourable sauce with a wet-surfaced gloss and fine suspended flecks of seasoning.
Step 10: Transfer cooked wings to a clean bowl while hot
Quickly move the very hot, crispy wings from the resting rack into a large, clean mixing bowl so they remain hot and retain texture for saucing; the wings should still steam faintly and display deepening color from the final high-heat step.
Step 11: Pour warm sauce over the hot wings
Pour the warm sauce over the steaming wings in one steady stream so it flows and pools briefly before being worked into the meat—this is the moment the glossy lacquer forms. The contrast between the matte, crackly skin and the slick, vibrant sauce is crucial here.
Step 12: Toss vigorously until every wing is evenly coated
Toss the wings immediately and vigorously with tongs or a large spoon until each wing is uniformly glossy and clinging with sauce; for a lighter glaze, begin with two-thirds of the sauce and add more to taste. The finished state should read as glossy, jewel-toned wings with sauce pooling slightly at the bowl’s base.
Step 13: Option for dry-rub style
If you prefer dry-rub wings, skip the saucing step and instead while the wings are hot sprinkle a pinch of additional kosher salt and a little extra smoked paprika or cayenne, tossing to coat. The final texture here is drier and more textured—visible granules of salt and spice create a rustic, matte crust.
Step 14: Garnish with fresh herbs
Transfer the finished wings to a serving platter and sprinkle with finely chopped fresh parsley or chives for a bright green punctuation against the warm amber and mahogany tones. The herbs add a tiny, crisp freshness both in color and a faint herbal texture.
Step 15: Serve immediately with accompaniments
Serve the air-fried wings immediately while hot and crisp, accompanied by celery sticks and a ramekin of ranch or blue cheese dressing. For optimal texture enjoy within 15–20 minutes; the skin will begin to soften as it cools, so speed is part of the experience.
Step 16: Keep batches warm if cooking in turns
If you cook in multiple batches, keep earlier batches warm and relatively crisp on a wire rack set over a baking sheet in a low oven (about 250°F /120°C) while finishing remaining wings, then toss all wings together with sauce just before serving so every piece shares the fresh gloss.
Notes
- Pat wings thoroughly dry before seasoning to ensure maximum crispness.
- Use aluminum-free baking powder and ensure it is fresh for the best puff and crunch.
- Work in batches to avoid overcrowding the air fryer basket and steaming the wings.
- Keep cooked wings on a wire rack in a low oven to stay warm and crisp while finishing other batches.
- Toss wings with sauce just before serving to maintain the contrasting textures.