I still remember the exact crunch the first time I made the Crispy Chickpeas Recipe at home: a tiny, bright pop of toasted skin and a warm trail of smoky spices that made me forget I was snacking alone on a weeknight. This Crispy Chickpeas Recipe is one of those recipes that feels fancy but is ridiculously easy, and I keep finding new ways to fold it into meals. You only need a can of chickpeas, a bit of oil, and a handful of pantry spices to get a snack that outperforms store-bought crunchies. Give it a try and you may never toss a can of beans into a salad without thinking about roasting them first.
How This Recipe Became My Rainy-Day Favorite
There was a rainy Sunday when I was craving something warm and crunchy but not heavy. I opened the pantry and found a lonely can of chickpeas and a jar of smoked paprika that smelled like autumn. I rinsed and dried the beans, tossed them with oil and spice, and slid the tray into the oven. As the apartment filled with the smell of toasted cumin and roasted chickpeas, I could barely keep from sneaking one or two. The first bite was warm, crisp, and slightly nutty, with a bright citrus finish from lemon zest. That simple sensory memory turned the Crispy Chickpeas Recipe into a go-to small comfort: it is quick, forgiving, and somehow both snack and garnish. I now bring a tray to gatherings not to show off, but to watch people quiet down and reach for another handful.
The Ingredients That Make These Crispy Chickpeas Recipe Sing
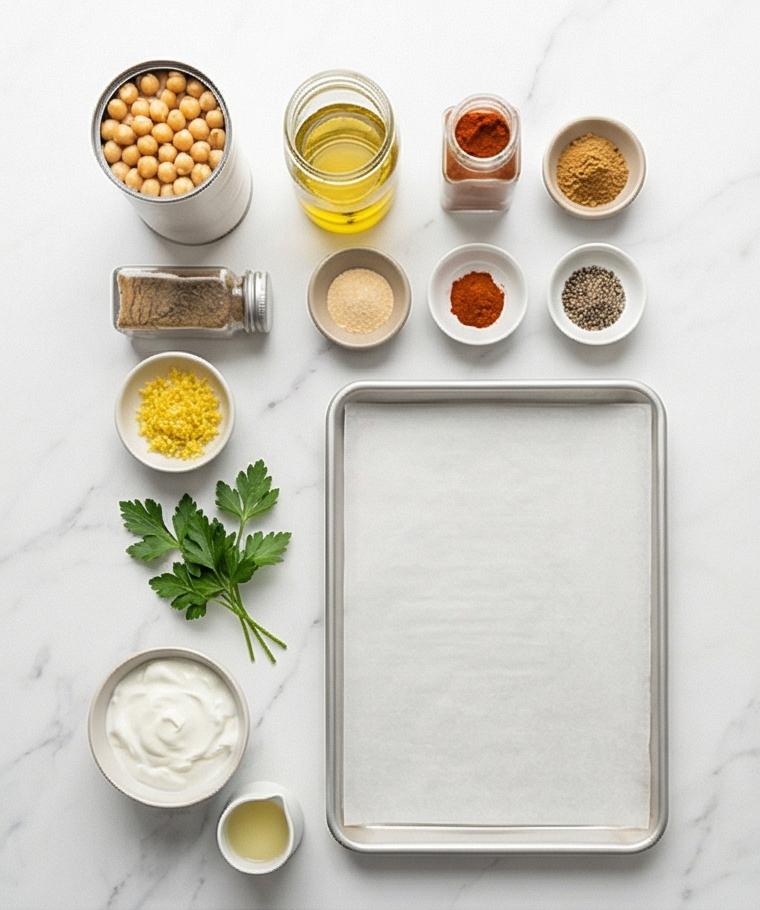
These ingredients are pantry-friendly and build layered flavor: oil for browning, salt and spices for depth, and optional lemon and herbs for brightness. Choose quality olive oil and fresh spices when possible for the best aroma. If you need to swap things, keep the proportions similar to preserve texture. The list below highlights the main contributors and quick selection tips.
- Chickpeas: The star and base texture; use a 15-ounce can, drain, rinse, and dry well. Swap with cooked white beans for a softer bite, but roast time may vary.
- Extra-virgin olive oil: Helps spices cling and promotes browning; neutral oil is fine if you prefer a lighter olive flavor.
- Sea salt and black pepper: Basic seasoning; kosher salt works too but adjust amounts by taste.
- Smoked paprika and ground cumin: Provide warm, smoky notes; try sweet paprika if you want less smoke.
- Garlic powder and cayenne: Add savory depth and optional heat; reduce cayenne for mild palates.
- Lemon zest and parsley: Bright finishing touches; swap zest for a splash of lemon juice if needed.
Essential Kitchen Tools and Why They Matter
A few simple tools make this Crispy Chickpeas Recipe foolproof. The right equipment controls moisture, spacing, and heat so your chickpeas come out crackly instead of soft. You do not need fancy gadgets, but each tool saves time and frustration.
- Fine-mesh sieve: For draining and rinsing the chickpeas so you can remove canning liquid quickly and evenly.
- Clean kitchen towel or paper towels: Critical for patting chickpeas very dry; excess water ruins crisping.
- Large mixing bowl: For tossing chickpeas with oil and spices so they coat evenly; a shallow bowl works too.
- Rimmed baking sheet lined with parchment: Ensures a single layer and easy cleanup while promoting even browning.
- Oven thermometer (optional): Helps verify your oven is near 400F for consistent results; an air fryer can be used as an alternative for smaller batches.
Step-by-Step Preparation Guide
Step 1: Dry and prepare the chickpeas
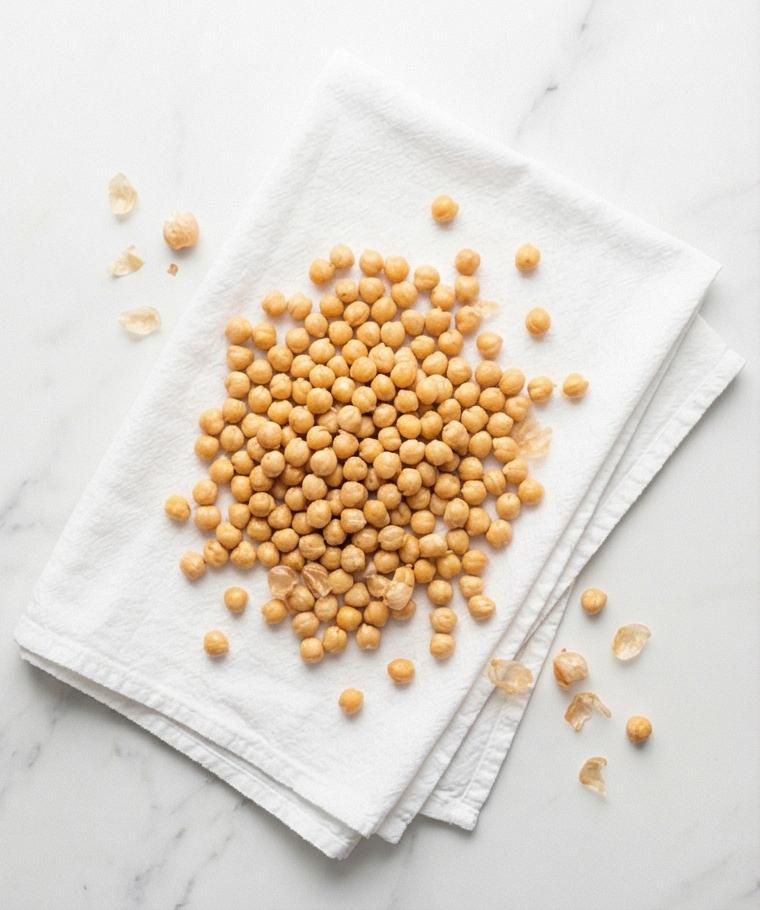
Preheat the oven and start by thoroughly draining the canned chickpeas in a fine-mesh sieve, rinsing under cool water and shaking off excess. Spread the rinsed beans on a clean kitchen towel or several layers of paper towels and pat and rub them very dry for several minutes, coaxing off any loose skins and discarding them. For best results let the chickpeas air-dry briefly while the oven finishes preheating — the drier they are, the crispier they’ll roast. This step leaves you with visibly matte, slightly wrinkled, and mostly skinless chickpeas ready for seasoning.
Step 2: Oil, season, and toss until evenly coated
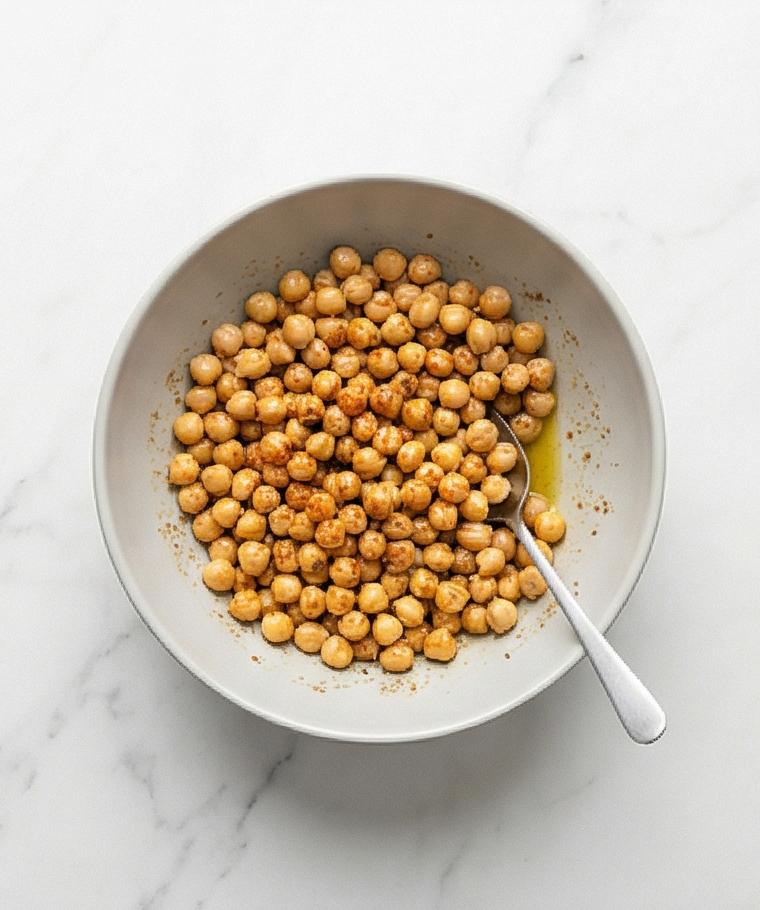
Move the dried chickpeas into a single large mixing bowl (keep this same bowl for visual continuity). Add 1 1/2 tablespoons extra-virgin olive oil and toss until every chickpea looks evenly glossy but not oily, then sprinkle fine sea salt, black pepper, smoked paprika, ground cumin, garlic powder and optional cayenne. Toss repeatedly until the surface of each chickpea is uniformly speckled with spice — no clumps, no dry powdery patches. You should see warm reddish-brown paprika and cumin specks clinging to the glossy bean skins and a faint sheen from the oil.
Step 3: Arrange in a single layer for even roasting
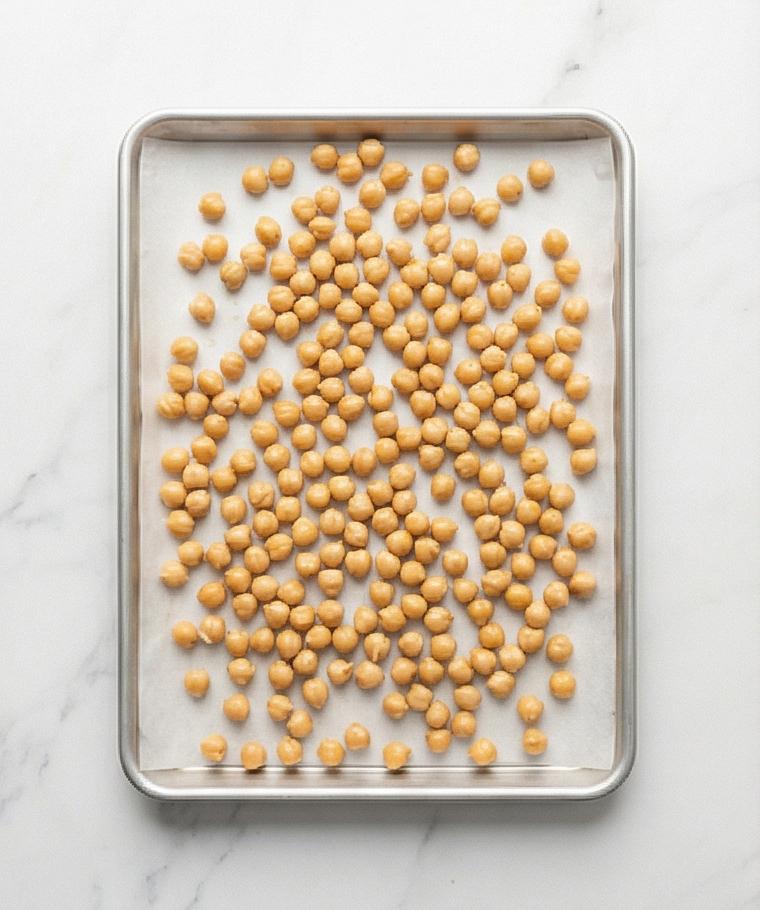
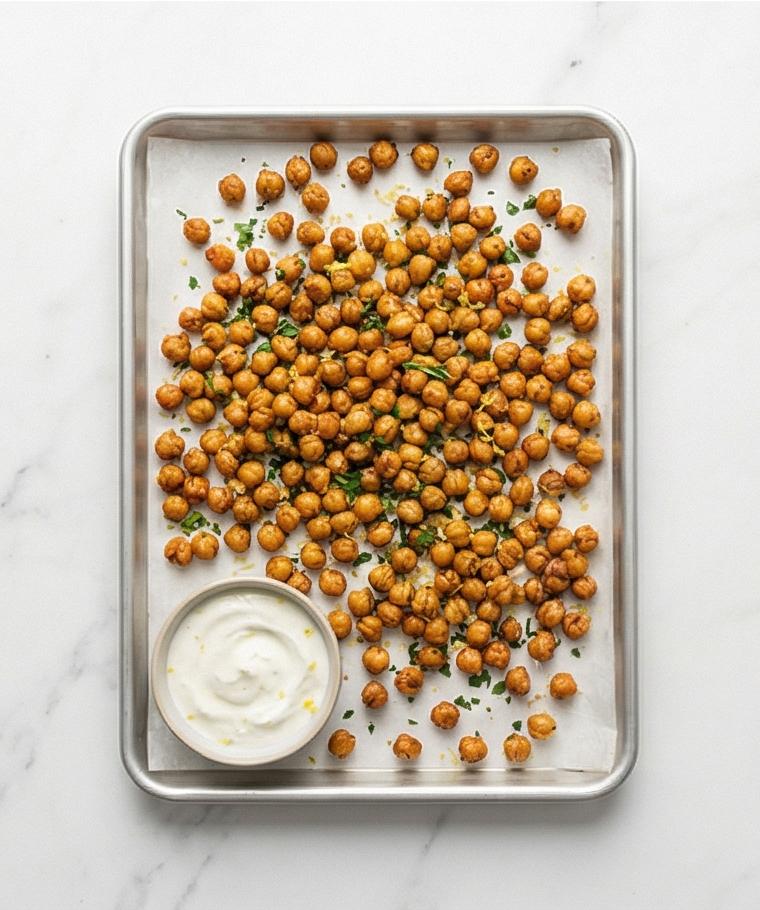
Pour the seasoned chickpeas onto a large rimmed rectangular baking sheet lined with parchment (retain this sheet as the serving geometry). Use your hands or an offset spatula to spread them into a single, even layer with small gaps between individual chickpeas so hot air can circulate. The objective here is a neat flatbed of little domes, each bean isolated, no overlapping — this is the pre-roast visual milestone, a grid-like field of oiled, spiced spheres poised for browning.
Step 4: Roast until deep golden and finish with aromatics
Roast at 400°F (200°C), shaking or stirring every 10–12 minutes until the chickpeas are deep golden-brown and audibly light and crisp when tapped. When they come out of the oven, while still hot, scatter finely grated lemon zest and chopped flat-leaf parsley over the tray so the aromatics cling to the warm surfaces; you’ll notice steam lifting and the chickpeas turning even more matte and crackly as they cool. While they cool, if serving with sauce, whisk together plain Greek yogurt, lemon juice, minced garlic, olive oil, salt and pepper until smooth — a cool, creamy contrast to the crunchy beads.
Step 5: Serve, store, and enjoy
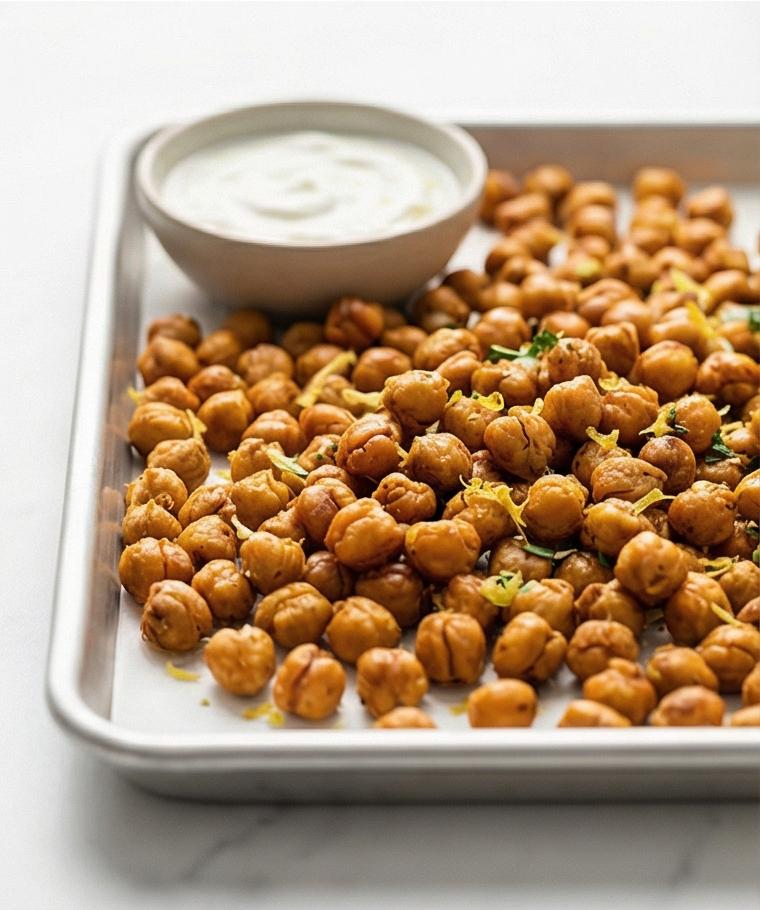
Transfer the cooled, crispy chickpeas back to the same rectangular rimmed sheet or a matching rectangular serving tray (keeping the rectangular geometry from roasting). Serve warm or at room temperature — scattered over salads or presented alongside a small bowl of the lemon-garlic yogurt for dipping. Leftovers should be fully cooled before storing in an airtight container at room temperature for up to 2 days; re-crisp briefly in a 350°F oven or air fryer if they soften. The final image captures a very close, eye-level view of the crackly, golden-browned chickpeas on the rectangular tray with the yogurt dip nearby, emphasizing texture and crispness.
Making It Your Own
I like to experiment with small swaps to see how the Crispy Chickpeas Recipe adapts. For a Mediterranean spin I add zaatar and a squeeze of lemon after roasting. For a smoky-sweet variant I try smoked paprika and a pinch of brown sugar to create a caramelized edge. If you need them nut-free and oil-free, toss with a light spray of oil substitute and increase roasting time slightly to coax out crunch. For a plant-based dip option, swap Greek yogurt for a tahini-lemon sauce or a mashed avocado-lime crema. Seasonal twists work well too: in winter, a sprinkle of warm spices like cinnamon and a touch of maple can make them comfortingly snackable.
How to Serve
If I am hosting, I arrange the Crispy Chickpeas Recipe on a shallow platter with small bowls of dips and garnishes. For a party size, multiply the recipe by the number of expected guests and roast on multiple sheets so nothing steams. Scatter chickpeas over mixed greens with roasted beets and feta for a composed salad, or pile them into grain bowls alongside roasted vegetables and a drizzle of tahini. For a casual approach, set out a bowl for snacking and a ramekin of lemon-garlic yogurt for dipping. Adjust seasoning to taste right before serving, adding flaky sea salt for the finishing crunch.
Storage and Reheating Tips
Cool the chickpeas completely before storing to avoid trapped steam that makes them soft. Store in an airtight container at room temperature for up to two days; keep them away from humidity and strong odors.
If they soften, re-crisp in a 350F oven for 5 to 8 minutes or a 3 to 5 minute blast in an air fryer set to 350F. Avoid microwaving because that will create steam and soften the crunch.
Common Mistakes and How to Avoid Them
The most common mistake is not drying the chickpeas thoroughly. Water traps steam and will stop them from crisping, so pat and air-dry until the skins are matte.
Another pitfall is overcrowding the pan. Roast in a single layer with space between beans so hot air circulates and browning is even. If you need a quick fix, split the batch across two sheets.
Final Thoughts
Give this Crispy Chickpeas Recipe a try the next time you want a fast, flavorful snack or an easy salad topper. It is forgiving, quick, and endlessly adaptable, and I think you will find it becomes a small staple in your recipe rotation.
Frequently Asked Questions.
- Can I use dried chickpeas instead of canned? Yes, you can use cooked dried chickpeas. Cook them until tender, dry thoroughly, and expect slight differences in roast time and texture.
- How long do crispy chickpeas stay crunchy? Stored properly in an airtight container at room temperature they stay crunchy for up to 2 days; re-crisp in an oven or air fryer if they soften.
- Can I make these in an air fryer? Yes, roast in an air fryer at 350F for 10 to 15 minutes, shaking halfway through, watching closely to avoid burning.
- What if my chickpeas are not getting crispy? Make sure they are very dry before oiling and do not overcrowd the pan. A higher temperature for a shorter time helps; finish in a warm oven if needed.
- Are these suitable for gluten-free or vegan diets? The basic Crispy Chickpeas Recipe is naturally gluten-free and vegan; choose vegan dip options to keep the whole snack plant-based.

Crispy Chickpeas Recipe
Make Crispy Chickpeas Recipe for a crunchy, smoky snack or salad topper — fast, oven-roasted chickpeas with simple spices.
Ingredients
Instructions
Step 1: Dry and prepare the chickpeas
Preheat the oven and start by thoroughly draining the canned chickpeas in a fine-mesh sieve, rinsing under cool water and shaking off excess. Spread the rinsed beans on a clean kitchen towel or several layers of paper towels and pat and rub them very dry for several minutes, coaxing off any loose skins and discarding them. For best results let the chickpeas air-dry briefly while the oven finishes preheating — the drier they are, the crispier they’ll roast. This step leaves you with visibly matte, slightly wrinkled, and mostly skinless chickpeas ready for seasoning.
Step 2: Oil, season, and toss until evenly coated
Move the dried chickpeas into a single large mixing bowl (keep this same bowl for visual continuity). Add 1 1/2 tablespoons extra-virgin olive oil and toss until every chickpea looks evenly glossy but not oily, then sprinkle fine sea salt, black pepper, smoked paprika, ground cumin, garlic powder and optional cayenne. Toss repeatedly until the surface of each chickpea is uniformly speckled with spice — no clumps, no dry powdery patches. You should see warm reddish-brown paprika and cumin specks clinging to the glossy bean skins and a faint sheen from the oil.
Step 3: Arrange in a single layer for even roasting
Pour the seasoned chickpeas onto a large rimmed rectangular baking sheet lined with parchment (retain this sheet as the serving geometry). Use your hands or an offset spatula to spread them into a single, even layer with small gaps between individual chickpeas so hot air can circulate. The objective here is a neat flatbed of little domes, each bean isolated, no overlapping — this is the pre-roast visual milestone, a grid-like field of oiled, spiced spheres poised for browning.
Step 4: Roast until deep golden and finish with aromatics
Roast at 400°F (200°C), shaking or stirring every 10–12 minutes until the chickpeas are deep golden-brown and audibly light and crisp when tapped. When they come out of the oven, while still hot, scatter finely grated lemon zest and chopped flat-leaf parsley over the tray so the aromatics cling to the warm surfaces; you’ll notice steam lifting and the chickpeas turning even more matte and crackly as they cool. While they cool, if serving with sauce, whisk together plain Greek yogurt, lemon juice, minced garlic, olive oil, salt and pepper until smooth — a cool, creamy contrast to the crunchy beads.
Step 5: Serve, store, and enjoy
Transfer the cooled, crispy chickpeas back to the same rectangular rimmed sheet or a matching rectangular serving tray (keeping the rectangular geometry from roasting). Serve warm or at room temperature — scattered over salads or presented alongside a small bowl of the lemon-garlic yogurt for dipping. Leftovers should be fully cooled before storing in an airtight container at room temperature for up to 2 days; re-crisp briefly in a 350°F oven or air fryer if they soften. The final image captures a very close, eye-level view of the crackly, golden-browned chickpeas on the rectangular tray with the yogurt dip nearby, emphasizing texture and crispness.
Notes
- Pat chickpeas very dry; moisture prevents crisping.
- Roast in a single layer with space between chickpeas for even browning.
- Re-crisp softened chickpeas in a 350F oven for 5 to 8 minutes or air fryer for 3 to 5 minutes.
- Use fresh spices for brighter flavor and adjust cayenne to control heat.
- Store in an airtight container at room temperature for up to 2 days.

