I still remember the first time I made Red White and Blue Popsicles for a backyard picnic; they were a total hit and disappeared faster than I could take a photo. They feel like summer in handheld form: bright strawberry top, creamy banana mid, and a deep blueberry base that pops against the other layers. I started making Red White and Blue Popsicles because I wanted something simple, cooling, and a little nostalgic—plus my kids loved helping spoon the layers into the molds. These popsicles are forgiving, colorful, and fun to personalize, and they always bring a smile at barbecues and pool days.
How This Recipe Became My Rainy-Day Favorite
On an unexpected rainy July afternoon, I decided to treat the kids to a patriotic surprise even though the weather had washed out our plans. I chopped strawberries until the kitchen smelled like summer, pulsing the berries while the rain drummed on the roof. The banana layer tasted like a creamy lullaby and the blueberry base reminded me of camping trips and late-night s’mores by the fire. We layered them slowly, sticky fingers pressing the mold edges, laughing as the kids watched each color settle in. When they finally bit in, there was a chorus of delighted squeals—the simple joy of something sweet and cold on a damp day. That memory made Red White and Blue Popsicles more than a treat; they became a little ritual I reach for when I want comfort in color and texture.
Meet the Main Ingredients and Why They Matter
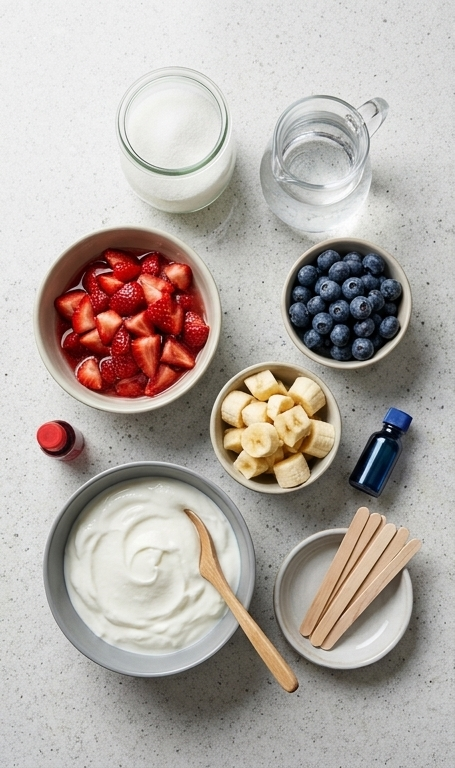
- Strawberries: The star of the red layer, strawberries bring bright acidity and natural sweetness. Substitute with raspberries for a tangier note and pick firm, fragrant berries for the best flavor.
- Blueberries: Provide deep color and a sweet-tart foundation. Frozen berries work fine; thaw slightly before pureeing to get a smoother texture.
- Banana: The creamy middle layer uses banana for its natural sweetness and silky body. Use perfectly ripe bananas for maximum flavor or swap in canned coconut cream for a dairy-free option.
- Plain Greek Yogurt: Adds creaminess and tang while helping the layers freeze with a soft, spoonable texture. Choose full-fat for richness or low-fat for a lighter pop.
- Granulated Sugar: Balances tartness in the berries. Honey or maple syrup work as swaps but change the flavor slightly.
Essential Kitchen Tools and Why I Reach for Them
You don’t need a lot to make these, but a few key tools make the process easy and tidy. Start with a good blender or food processor to get each fruit layer silky smooth. A tall measuring cup or a funnel helps pour layers without overfilling the molds. If you like a neat finish, use silicone molds; metal molds are great too but can be trickier to unmold. Keep a small spatula or silicone spoon nearby to scrape down sides.
- Blender or food processor: For smooth, even layers and quick work.
- Popsicle molds: Silicone or plastic molds make unmolding simpler; metal molds are fine if you run warm water briefly around the exterior.
- Measuring cups and spoons: For consistent sweetness and texture across batches.
- Small spatula/tall cup: To layer cleanly and avoid spills.
Step-by-Step Preparation Guide
Step 1: Blend the Strawberry Layer
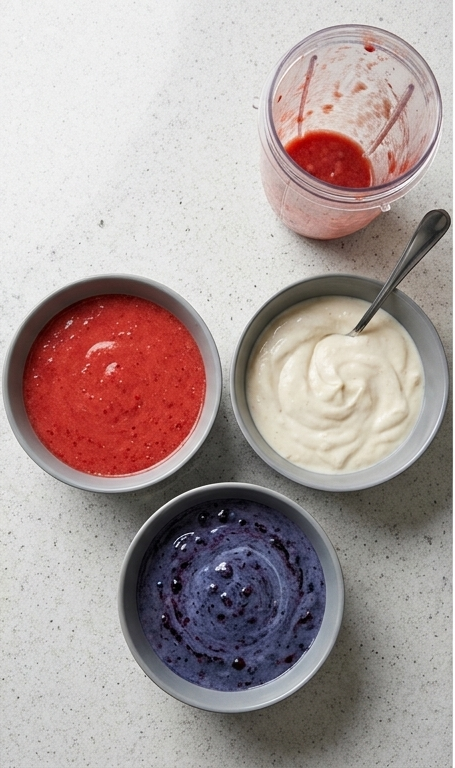
Place the chopped strawberries into a blender or tall cup with ½ tablespoon of the granulated sugar and ¼ cup of the water. Pulse until the strawberries are broken down but still retain tiny seed flecks for texture, then add 1 cup of plain Greek yogurt and blend briefly until fully smooth and creamy. If you want a brighter hue, stir in up to three drops of red food coloring — entirely optional. Transfer the strawberry-yogurt mixture into a covered container and keep refrigerated while you prepare the other layers.
Step 2: Blend the Blueberry and Banana Layers
Repeat the same process with the blueberries: pulse the berries with ½ tablespoon sugar and ¼ cup water until deeply puréed, then fold in 1 cup of Greek yogurt and optionally tint slightly with blue food coloring for a truer blue. For the white/neutral middle layer, pulse the chopped banana briefly with a tablespoon of water just to loosen it, then blend with 1 cup of Greek yogurt until smooth and silky — this yields a naturally off-white, creamy banana-yogurt layer. Taste and adjust sweetness as desired. Chill all three mixtures until cold and ready for layering.
Step 3: Layer the Popsicles in Molds
Begin by spooning or pouring the blueberry mixture into the bottom of each popsicle mold to form the blue base, tap gently to remove air bubbles, then insert popsicle sticks (or place provided sticks). Freeze this first layer until firm (about 2 hours). Follow by adding a layer of the banana-yogurt mixture on top of the frozen blue base, freeze again until solid to the touch, then finish with the strawberry-yogurt mixture as the top layer. Work patiently and allow each layer to set so the three distinct bands remain clean and separate.
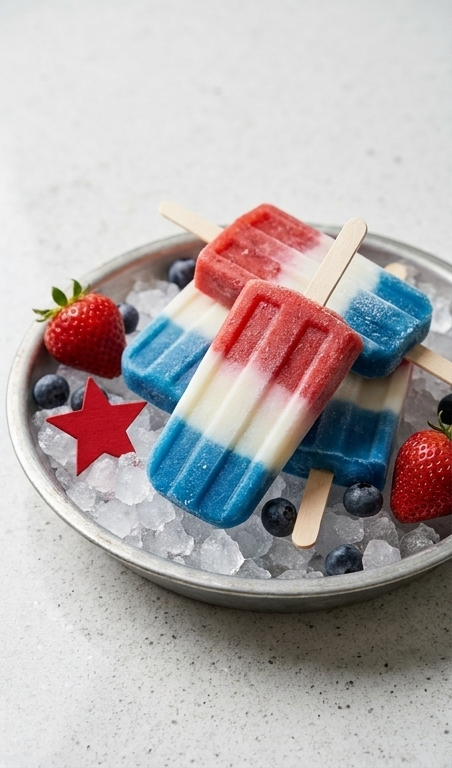
Step 4: Fully Freeze and Serve
Allow the filled molds to freeze completely (several hours or overnight) until rock solid. Unmold the popsicles and arrange them for service on a shallow metal bowl filled with crushed ice so the frozen surfaces bead slightly with frost. Garnish the ice with a few fresh strawberries and blueberries for color echo, then serve immediately for best texture and visual contrast.
Making It Your Own
I like to experiment with textures and flavors. For a dairy-free version, swap the Greek yogurt for coconut yogurt and use maple syrup instead of granulated sugar. The banana layer becomes wonderfully tropical that way. If you prefer a more intense berry flavor, macerate the strawberries with a little extra sugar for 20 minutes before blending. For a kid-friendly twist, fold in tiny chocolate chip sprinkles into the banana layer just before freezing.
Seasonal changes are easy. In late summer, add a few chopped peaches to the strawberry mix for added depth. In cooler months, try using thawed frozen berries—just reduce added water to keep the mixture from getting too icy. Small experiments like these keep Red White and Blue Popsicles feeling fresh and personal.
How to Serve
If I’m hosting a small get-together, I lay the popsicles on a bed of crushed ice in a wide, shallow bowl and tuck a few mint leaves and whole berries around them. For larger crowds, unwrap and stand the popsicles upright in a shallow tray lined with rock salt and ice to prevent sliding. Consider making double batches: one tray for kids with fun paper wrappers and another more elegant tray for adults garnished with citrus twists.
For parties, label each flavor variation so guests know what they are choosing. You can also halve the molds and create bite-size pops for dessert platters. Red White and Blue Popsicles scale really well, so you can multiply quantities without adding complexity.
Storage and Freezing Tips
Store leftover popsicles in an airtight freezer-safe container or zip-top bag to avoid freezer burn and keep odors out. If you stack them, separate layers with parchment to prevent sticking and preserve those crisp color bands. When you pull them from the freezer, allow 1 to 2 minutes at room temperature and then run the mold briefly under warm water to ease removal.
If you need to keep popsicles longer than a week or two, they’ll still be safe but may develop a bit more ice crystal texture. For best flavor and creaminess, enjoy within 7 to 10 days.
Common Mistakes and How to Avoid Them
One common slip-up is rushing the freezing between layers; pour a new layer onto a soft base and the colors will blur. Plan for patience and freeze each layer until firm to the touch. Another mistake is overly watery fruit purées. If your berries are very juicy, reduce the water slightly so the popsicles retain a creamy consistency rather than turning icy.
Don’t over-sweeten early. Taste each layer before you freeze—cold dulls sweetness slightly, so small adjustments are fine, but you can always add a touch more sugar later rather than overpowering the fresh fruit taste right away.
Final Thoughts and an Invitation
If you love simple, colorful treats, give Red White and Blue Popsicles a try this weekend. They are forgiving, customizable, and perfect for sharing with friends and family. Once you make a batch, experiment with flavors and keep the ritual alive—these popsicles are as much about the memories as they are about the taste.
Frequently Asked Questions.
- Can I use frozen berries instead of fresh? Yes, frozen berries work well; thaw them slightly and reduce added water so the purée does not get too runny.
- How long do the popsicles need to freeze? Freeze each layer until firm—about 2 hours for the base—and then several hours or overnight for the whole popsicle to be rock solid.
- Can I make these dairy-free? Absolutely. Swap Greek yogurt for coconut yogurt or a plant-based yogurt and use maple syrup if you prefer.
- How do I unmold the popsicles without breaking them? Run the outside of the mold briefly under warm water for 10 to 20 seconds, then pull gently on the stick while holding the mold.
- Can I sweeten with honey or maple syrup? Yes, but remember honey and maple bring their own flavors, so use them sparingly and taste before freezing.
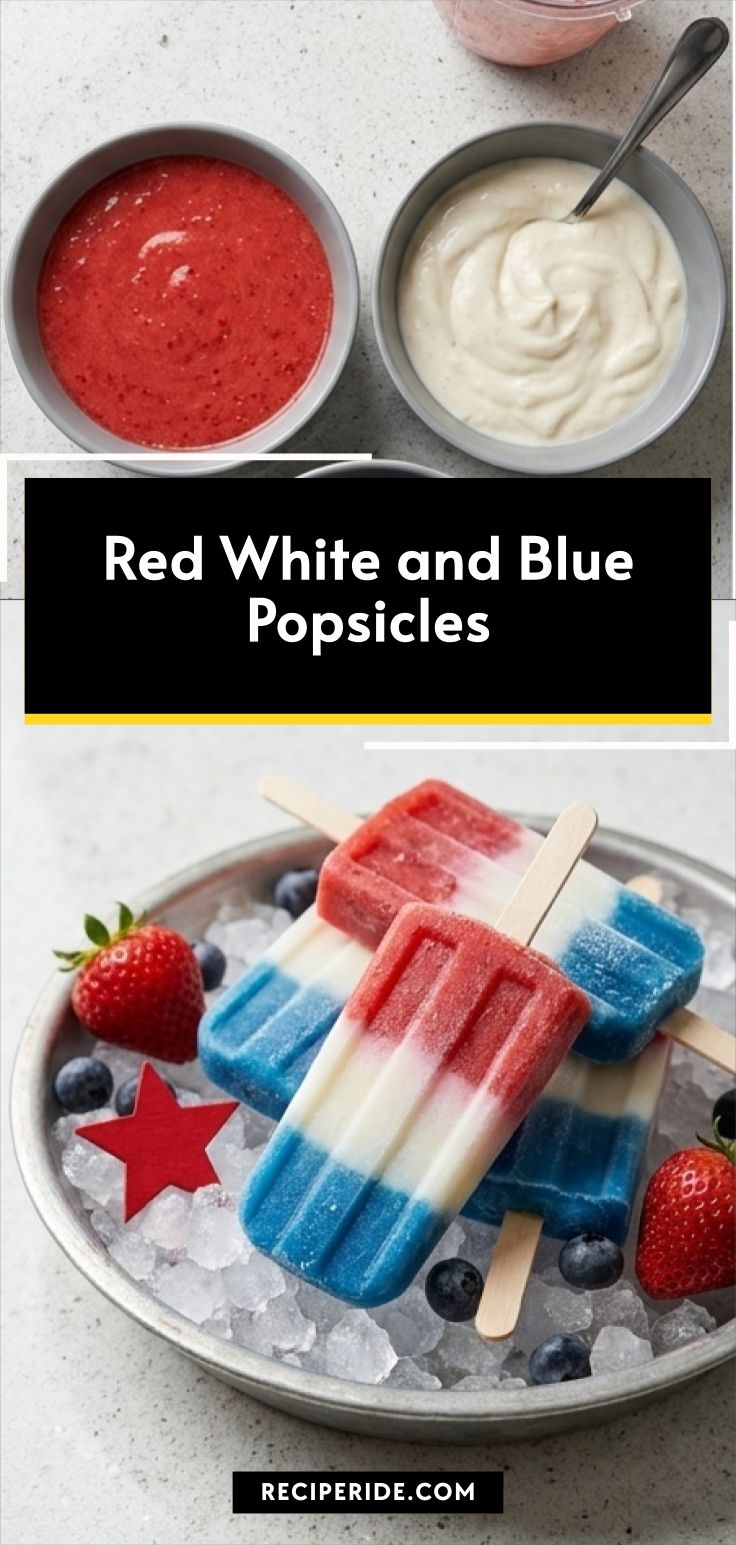
Red White and Blue Popsicles
Make Red White and Blue Popsicles for a creamy, patriotic frozen treat—fun to layer and perfect for summer gatherings.
Ingredients
Instructions
Step 1: Blend the Strawberry Layer
Place the chopped strawberries into a blender or tall cup with ½ tablespoon of the granulated sugar and ¼ cup of the water. Pulse until the strawberries are broken down but still retain tiny seed flecks for texture, then add 1 cup of plain Greek yogurt and blend briefly until fully smooth and creamy. If you want a brighter hue, stir in up to three drops of red food coloring — entirely optional. Transfer the strawberry-yogurt mixture into a covered container and keep refrigerated while you prepare the other layers.
Step 2: Blend the Blueberry and Banana Layers
Repeat the same process with the blueberries: pulse the berries with ½ tablespoon sugar and ¼ cup water until deeply puréed, then fold in 1 cup of Greek yogurt and optionally tint slightly with blue food coloring for a truer blue. For the white/neutral middle layer, pulse the chopped banana briefly with a tablespoon of water just to loosen it, then blend with 1 cup of Greek yogurt until smooth and silky — this yields a naturally off-white, creamy banana-yogurt layer. Taste and adjust sweetness as desired. Chill all three mixtures until cold and ready for layering.
Step 3: Layer the Popsicles in Molds
Begin by spooning or pouring the blueberry mixture into the bottom of each popsicle mold to form the blue base, tap gently to remove air bubbles, then insert popsicle sticks (or place provided sticks). Freeze this first layer until firm (about 2 hours). Follow by adding a layer of the banana-yogurt mixture on top of the frozen blue base, freeze again until solid to the touch, then finish with the strawberry-yogurt mixture as the top layer. Work patiently and allow each layer to set so the three distinct bands remain clean and separate.
Step 4: Fully Freeze and Serve
Allow the filled molds to freeze completely (several hours or overnight) until rock solid. Unmold the popsicles and arrange them for service on a shallow metal bowl filled with crushed ice so the frozen surfaces bead slightly with frost. Garnish the ice with a few fresh strawberries and blueberries for color echo, then serve immediately for best texture and visual contrast.
Notes
- Use very ripe bananas for the creamiest middle layer.
- Chill each layer before assembly to keep clean color bands.
- Run warm water briefly around molds to release popsicles.
- Store in an airtight container and use within 7 to 10 days.