The Best Cauliflower Pizza Crust is my go-to when I want a lighter take on comfort food that still delivers big on texture and flavor. I make The Best Cauliflower Pizza Crust whenever friends pop by and everyone wants something sharable but not heavy. It crisps up beautifully and holds toppings with surprising chew, which always makes people ask for the recipe. For me, this recipe bridges weeknight ease and a little weekend celebration, so it lives on repeat.
How This Recipe Became My Rainy-Day Favorite
One rainy afternoon I decided to try a cauliflower pizza because I wanted the smell of baking to fill the house without the usual flour dust. I chopped the cauliflower while the rain pattered on the windows and noticed how the kitchen felt cozier with each step. Pressing the crust into that long rectangle felt almost meditative, and when the cheese melted and the pepperoni browned, the room lit up with warmth and the scent of toasted Parmesan. The first bite was crisp at the edges, tender in the center, and a little smoky from the oven. That day it became more than a recipe; it became a comfort ritual I return to when I want something simple, satisfying, and a little playful.
Pantry Stars and Why They Matter
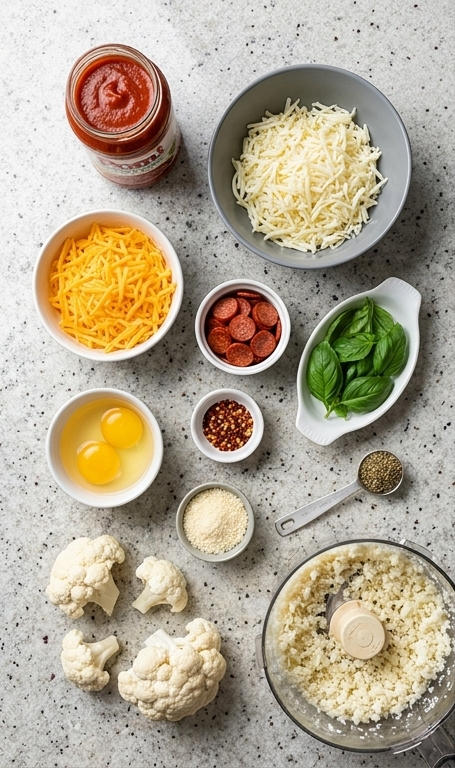
- Cauliflower: The base of the crust and the primary texture driver. Choose a firm, white head; avoid limp florets. Substitute with riced broccoli for a different green note.
- Eggs: Bind everything together so the crust holds. Use large eggs; if vegan, try a flax egg plus a binder like almond flour.
- Mozzarella: Provides melt and stretch. Use low-moisture for a firmer crust, or fresh for a creamier top.
- Parmesan: Adds savory depth and helps browning. Pecorino Romano can step in for a sharper bite.
- Italian seasoning: Aromatics that lift the crust. Fresh herbs work too but reduce quantity.
- Pomi pizza sauce, cheddar, pepperoni, basil: Finish the pie with classic flavors; swap with roasted veggies or chicken for variety.
Essential Kitchen Tools and Why They Help
You don’t need a pro kitchen to make this, but a few tools make the process calmer and the crust more reliable.
- Food processor: Quickly turns florets into fine “rice”; a blender will work in short bursts but watch the motor.
- Clean dish towel or cheese cloth: Critical for squeezing moisture out; paper towels are slower and messier.
- Baking sheet and parchment: Ensure even baking and easy transfer; a silicone mat is a great alternative.
- Measuring cups and a small bowl: For whisking eggs and measuring cheeses; a fork can replace a whisk.
- Oven thermometer (optional): Helps you trust that 425°F is accurate for a crisp edge.
Step-by-Step Preparation Guide
Step 1: Preheat the oven and ready the pan
Preheat the oven to 425°F and line a 15- by 10-inch baking sheet with parchment paper or a silicone baking mat; set it aside so it’s primed and waiting. This first small ritual keeps your workflow calm and ensures the cauliflower crust will have a clean, even surface to form on. Lightly spray the lined sheet right before you shape the crust to prevent sticking.
Step 2: Pulse and gently soften the cauliflower
Cut the cauliflower into florets and pulse in a food processor until the texture is very fine – you should have 2-3 cups of cauliflower “rice” with a soft granular texture. Transfer the riced cauliflower to a microwave – safe bowl, cover loosely, and microwave for 4-5 minutes until just softened; cooling briefly makes the next step easier while preserving moisture that will later be drained.
Step 3: Drain and wring the cauliflower dry
Using a clean dish towel or cheese cloth, gather the warm cauliflower rice and squeeze it until almost no water remains. This squeezing step is crucial: removing that excess moisture concentrates the cauliflower’s crumbly texture and helps the crust bind and crisp rather than steam in the oven.
Step 4: Combine the wet and dry into a cohesive crust mixture
Return the drained cauliflower to a large mixing bowl and stir in the two beaten eggs, 1/2 cup shredded mozzarella, 2 tablespoons grated Parmesan, a tablespoon of Italian seasoning, and salt and pepper to taste. Mix until the ingredients form a slightly tacky, malleable mixture – it should hold together when pressed, with visible flecks of cheese and herbs throughout. This combined batter is the true structural base of your cauliflower rectangle.
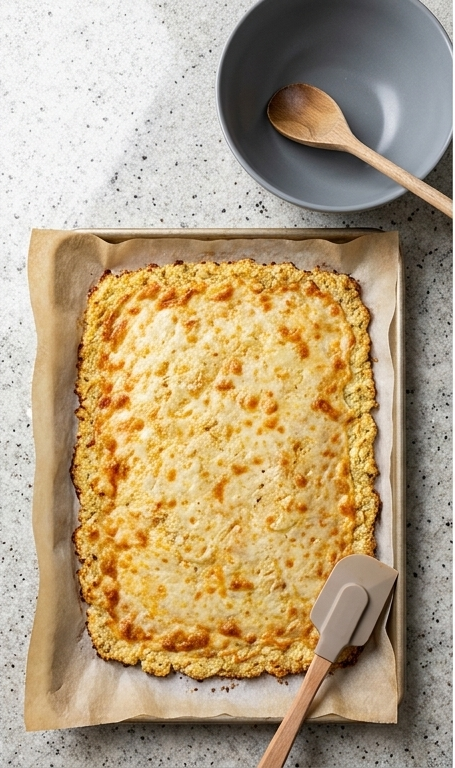
Step 5: Shape the rectangle and bake until golden
Spread the cauliflower mixture evenly into a 15- by 10-inch rectangle on the prepared sheet, pressing the surface so edges are compact and the center is uniform in thickness. Lightly spray the top and slide the tray into the preheated oven; bake for 12-15 minutes, watching for a subtle golden-brown surface and firmer, drier edges – the crust should feel set and slightly crisp to the touch.
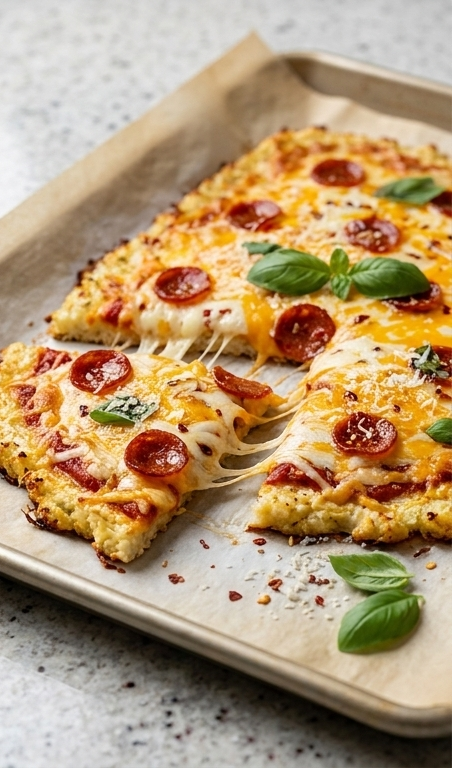
Step 6: Top with sauce, cheeses and pepperoni, finish baking
Remove the baked rectangle and spread 1/2 cup Pomi pizza sauce evenly over the warm crust, sprinkle the combined cup shredded mozzarella and 1/2 cup shredded cheddar over the sauce, and arrange the pepperoni minis across the top. Return to the oven just until the cheeses melt and begin to gloss, about 3-5 minutes; the cheeses should be molten, slightly bubbling, and the pepperoni edges curled and a touch crisp.
Step 7: Serve and garnish immediately
Slide the finished cauliflower pizza onto the lined baking sheet and serve right away, scattering fresh basil leaves and a pinch of crushed red pepper flakes if you like heat. Pull a slice to reveal the stretchy mozzarella, the layered cheddar sheen, and the crumbly, golden cauliflower base – best enjoyed hot while the textures are at their peak.
Making It Your Own
I like to think of The Best Cauliflower Pizza Crust as a template you can riff on. For a vegetarian twist, skip the pepperoni and add roasted red peppers, caramelized onions, or blanched asparagus tips. If you want it gluten free and heartier, stir in a couple of tablespoons of almond meal into the crust for extra body. For a spicier regional take, swap Italian seasoning for smoked paprika and a pinch of cayenne, then top with chorizo or spicy sausage. In winter, try a sage-browned butter drizzle after baking and top with thin pear slices and a scatter of walnuts for a seasonal approach.
How to Serve
When I host, I bake the rectangle and slice it into generous squares so people can graze and chat. For a small dinner, cut the rectangle into six pieces and pair with a crisp green salad and a light vinaigrette. For a crowd, slice into 12 bite-sized squares and serve on large platters with bowls of extra basil and red pepper flakes so guests can customize. If you want a more refined presentation, finish each slice with a tiny basil chiffonade and a quick grind of black pepper. The Best Cauliflower Pizza Crust holds toppings well, so you can scale up easily without losing texture.
Storage and Reheating Tips
Let any leftovers cool completely before storing. Wrap individual slices tightly in plastic wrap or place them in an airtight container with paper towels to absorb moisture; they will keep 3 to 4 days in the refrigerator.
To reheat, pop slices under a broiler or in a hot oven at 400°F for 5-8 minutes to revive crispness, or warm in a nonstick skillet over medium heat for a few minutes so the bottom crisps back up. Avoid microwaving if you want to keep the edge crisp.
Oops-Proofing: Common Mistakes and Fixes
A frequent slip is not squeezing enough water from the riced cauliflower. If your crust turns soggy, you likely left too much moisture; reheat the riced cauliflower and wring again to remove more liquid. Another misstep is overcrowding the baking sheet or making the crust too thick; press it to a uniform thickness so it bakes evenly.
Final Thoughts and an Invitation
If you try The Best Cauliflower Pizza Crust, treat it like a friendly experiment. Adjust herbs, cheeses, and toppings until it sings for you. Invite a friend, slice it up, and enjoy the little surprise that such a simple base can become the center of a cozy meal.
Frequently Asked Questions.
- How long does it take to make The Best Cauliflower Pizza Crust? It takes about 20 minutes of active prep and roughly 20 minutes of baking, so plan for about 40 minutes total.
- Can I make the crust ahead of time? Yes, you can bake the crust and refrigerate it for up to 3 days before adding toppings and finishing it in the oven.
- Is this recipe gluten free? Yes, when you stick to the listed ingredients, The Best Cauliflower Pizza Crust is gluten free.
- How do I keep the crust from being soggy? The key is squeezing out as much moisture as possible from the riced cauliflower and keeping the crust a uniform thickness.
- Can I freeze leftovers? You can freeze baked slices for up to 1 month; wrap tightly and reheat from frozen in a hot oven until heated through.
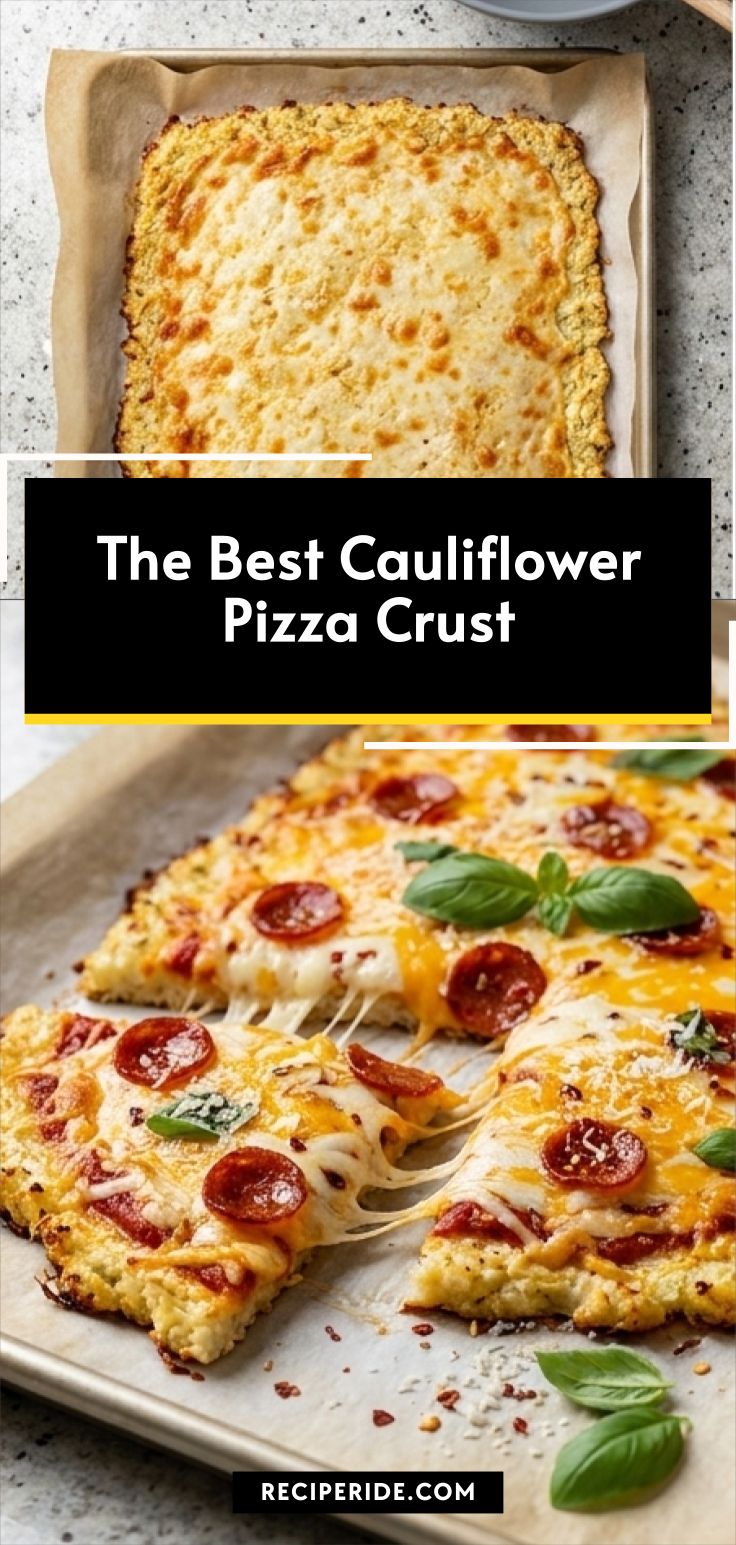
The Best Cauliflower Pizza Crust
Make The Best Cauliflower Pizza Crust tonight: a crispy, cheesy rectangular pizza ready in about 40 minutes.
Ingredients
Instructions
Step 1: Preheat the oven and ready the pan
Preheat the oven to 425°F and line a 15- by 10-inch baking sheet with parchment paper or a silicone baking mat; set it aside so it's primed and waiting. This first small ritual keeps your workflow calm and ensures the cauliflower crust will have a clean, even surface to form on. Lightly spray the lined sheet right before you shape the crust to prevent sticking.
Step 2: Pulse and gently soften the cauliflower
Cut the cauliflower into florets and pulse in a food processor until the texture is very fine — you should have 2–3 cups of cauliflower "rice" with a soft granular texture. Transfer the riced cauliflower to a microwave‑safe bowl, cover loosely, and microwave for 4–5 minutes until just softened; cooling briefly makes the next step easier while preserving moisture that will later be drained.
Step 3: Drain and wring the cauliflower dry
Using a clean dish towel or cheese cloth, gather the warm cauliflower rice and squeeze it until almost no water remains. This squeezing step is crucial: removing that excess moisture concentrates the cauliflower’s crumbly texture and helps the crust bind and crisp rather than steam in the oven.
Step 4: Combine the wet and dry into a cohesive crust mixture
Return the drained cauliflower to a large mixing bowl and stir in the two beaten eggs, 1/2 cup shredded mozzarella, 2 tablespoons grated Parmesan, a tablespoon of Italian seasoning, and salt and pepper to taste. Mix until the ingredients form a slightly tacky, malleable mixture — it should hold together when pressed, with visible flecks of cheese and herbs throughout. This combined batter is the true structural base of your cauliflower rectangle.
Step 5: Shape the rectangle and bake until golden
Spread the cauliflower mixture evenly into a 15- by 10-inch rectangle on the prepared sheet, pressing the surface so edges are compact and the center is uniform in thickness. Lightly spray the top and slide the tray into the preheated oven; bake for 12–15 minutes, watching for a subtle golden-brown surface and firmer, drier edges — the crust should feel set and slightly crisp to the touch.
Step 6: Top with sauce, cheeses and pepperoni, finish baking
Remove the baked rectangle and spread 1/2 cup Pomi pizza sauce evenly over the warm crust, sprinkle the combined cup shredded mozzarella and 1/2 cup shredded cheddar over the sauce, and arrange the pepperoni minis across the top. Return to the oven just until the cheeses melt and begin to gloss, about 3–5 minutes; the cheeses should be molten, slightly bubbling, and the pepperoni edges curled and a touch crisp.
Step 7: Serve and garnish immediately
Slide the finished cauliflower pizza onto the lined baking sheet and serve right away, scattering fresh basil leaves and a pinch of crushed red pepper flakes if you like heat. Pull a slice to reveal the stretchy mozzarella, the layered cheddar sheen, and the crumbly, golden cauliflower base — best enjoyed hot while the textures are at their peak.
Notes
- Squeeze the cauliflower rice very well to avoid a soggy crust.
- Use low-moisture mozzarella for better structure in the crust.
- Reheat slices in a hot oven or skillet to restore crispness.
