Crispy Smashed Potatoes Recipe has been my go-to for easy entertaining and weeknight comfort. I love how the outside crackles while the center stays pillowy-soft, and this recipe always delivers that perfect contrast. I first learned the technique from a weekend cooking class, then tweaked the garlic-herb fat until it felt like home. If you want a crowd-pleaser that feels elevated but is ridiculously simple, this Crispy Smashed Potatoes Recipe is worth your oven rack.
How This Recipe Became My Cozy-Weekend Staple
I remember the first time I made the Crispy Smashed Potatoes Recipe for a small dinner – the house smelled of browned butter and garlic, and my neighbor knocked on the door before the main course was even plated. There was something joyful about the ritual of boiling the tiny potatoes until just tender, then watching them shatter and bloom as I pressed them down on the hot pan. I felt a little like a baker, coaxing texture and color out of humble spuds. The crunchy shards of skin and the pillowy interior always made people close their eyes and smile. It turned a simple side into a centerpiece, and now whenever I smell rosemary and garlic I get a happy flash of that evening – warm light, clinking glasses, and the satisfying crunch of a perfectly crisp potato.
Ingredients Spotlight and Tips
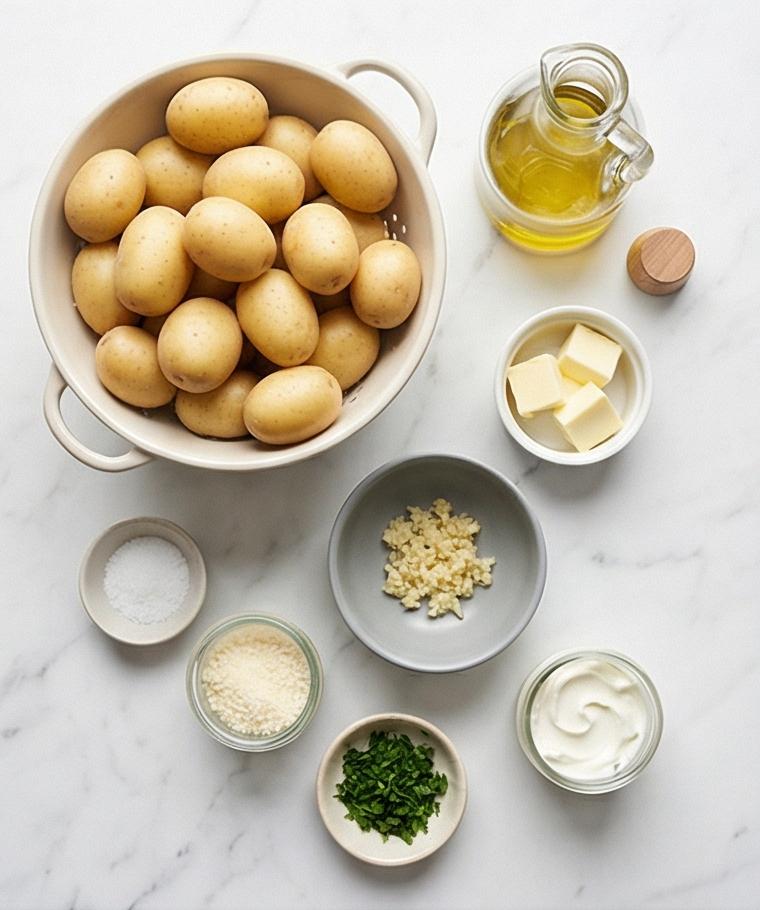
- Small waxy potatoes: The star of the show – baby Yukon Gold or red potatoes hold shape and crisp beautifully. Substitute with fingerlings if needed; avoid starchy russets which fall apart. Choose firm, blemish-free tubers.
- Olive oil and butter: Provide browning, flavor and blistering – use a good extra-virgin olive oil and real butter; ghee works for a higher smoke point.
- Garlic and rosemary: Aromatics that perfume the fat; swap rosemary for thyme or oregano if you prefer.
- Parmesan, parsley and lemon zest: Optional finishers that add salt, herb freshness and brightness; use Pecorino for a sharper bite.
Essential Kitchen Tools and Why They Matter
A few simple tools make a big difference when you want great texture and easy cleanup. A heavy rimmed baking sheet that can take high heat gives consistent browning – a light-colored sheet helps you judge color. A flat-bottomed glass or metal measuring cup is perfect for smashing evenly; anything too sharp will tear the potatoes instead of creating crisp edges. A fine grater for the lemon and Parmesan makes a gentle finish, and a thin metal spatula helps transfer the fragile crisps. If you lack a rimmed sheet, a cast-iron skillet works as an alternative for smaller batches.
- Rimmed baking sheet: For even heat and blistered undersides.
- Flat-bottomed glass or metal measuring cup: To smash potatoes into even discs.
- Fine grater (zester): For lemon zest and finely grated cheese.
- Thin metal spatula: To lift without breaking the crisp edges.
Step-by-Step Preparation Guide
Step 1: Preheat and Warm the Baking Sheet
Preheat the oven to 450°F (230°C) and slide a large, light-colored rimmed baking sheet onto the middle rack so it becomes very hot – the pan’s heat is part of the recipe. Leave the sheet in the oven while you work; this simple thermal step ensures instant sizzle and rapid crisping when the potatoes hit the surface. Treat the pan as an active tool: imagine it glowing warm, ready on the marble surface, but never show the oven or any hands.
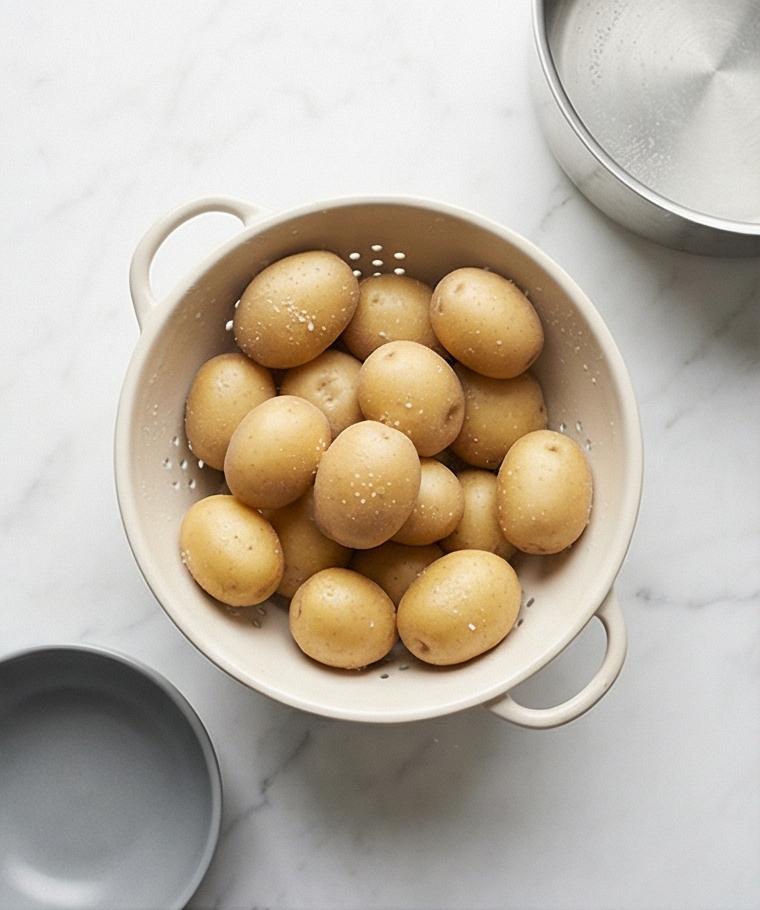
Step 2: Boil the Potatoes until Tender
Place the scrubbed small waxy potatoes into salted cold water and bring them to a steady boil until a fork slips through each potato easily but they remain intact. Drain thoroughly in a colander and let them sit 2–3 minutes so surface steam escapes and skins dry slightly – this drying is crucial for later crisp texture. The potatoes should look plump, smooth-skinned, and gently matte from the steam release.
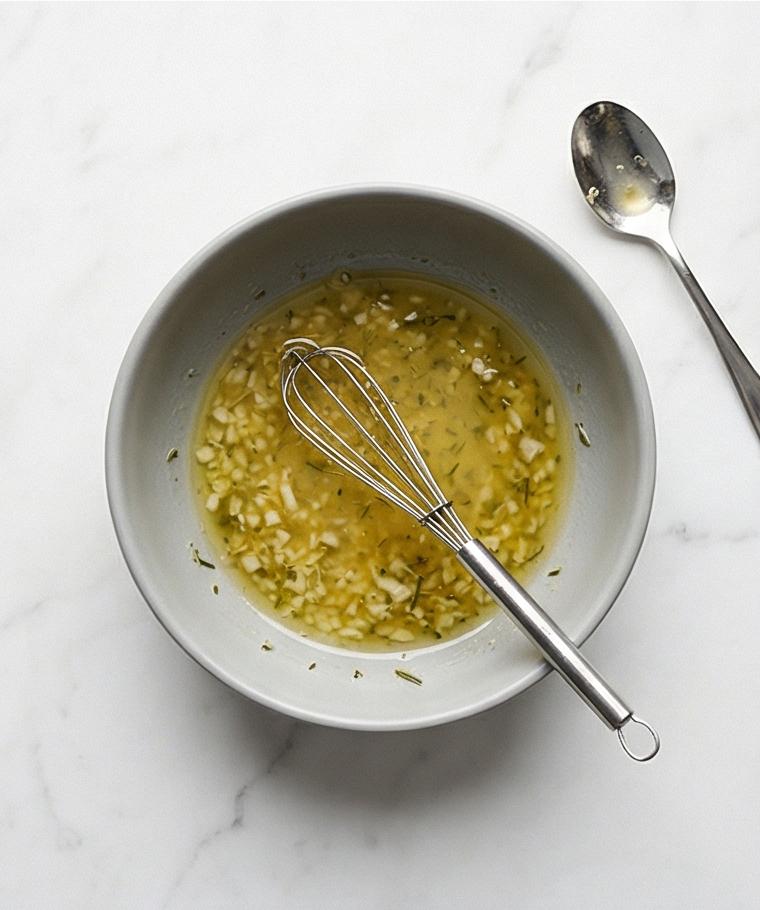
Step 3: Whisk the Garlic‑Herb Fat
In a small matte grey ceramic bowl whisk together olive oil, melted and cooled butter, the finely minced garlic, chopped rosemary, smoked paprika (if using), salt and black pepper until a cohesive, glossy herb‑speckled fat appears. The mixture should read as a pale golden emulsion dotted with green rosemary flecks and tiny garlic pieces, viscous but pourable. Keep the whisk or a small spoon resting in the bowl to show utensil persistence.
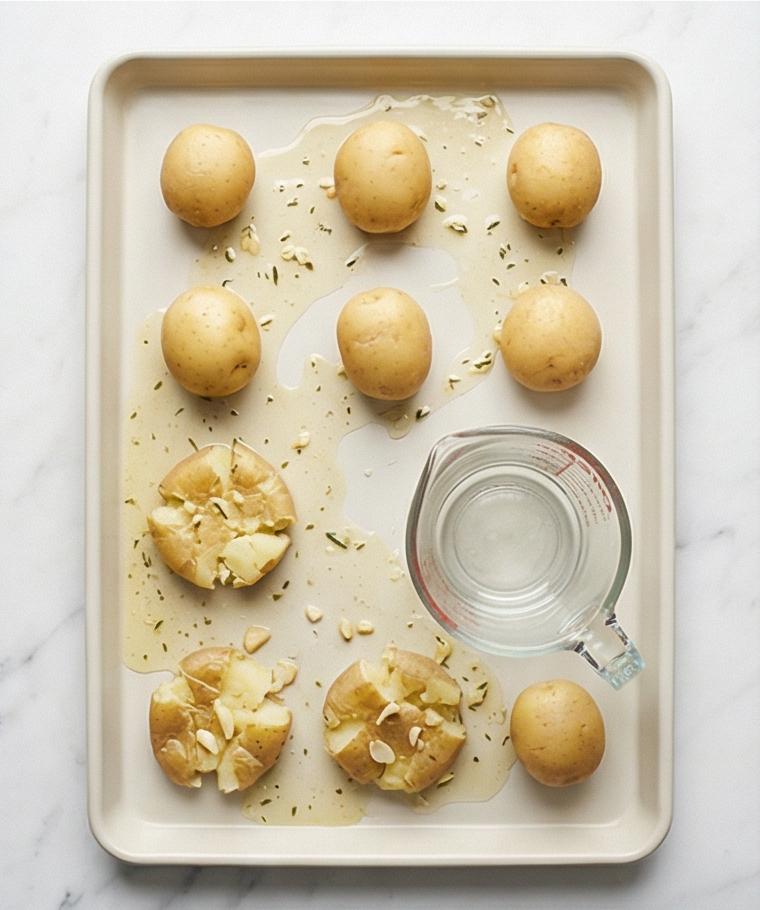
Step 4: Oil the Hot Pan, Arrange and Smash
Remove the preheated rimmed baking sheet to a heatproof surface, drizzle a thin sheen of the garlic‑herb fat across the hot sheet, then transfer the drained potatoes evenly, leaving small gaps. Using a flat-bottomed glass or metal measuring cup, press each potato to about 1/2 inch thick so each potato cracks and fans at the edges – edges break off into crisp shards while the centers remain a cohesive flattened mound. The scene should capture the textured, torn potato skins, exposed fluffy interior, and scattered garlic bits. A flat-bottomed glass or the metal cup used for smashing remains on the scene as the active tool.
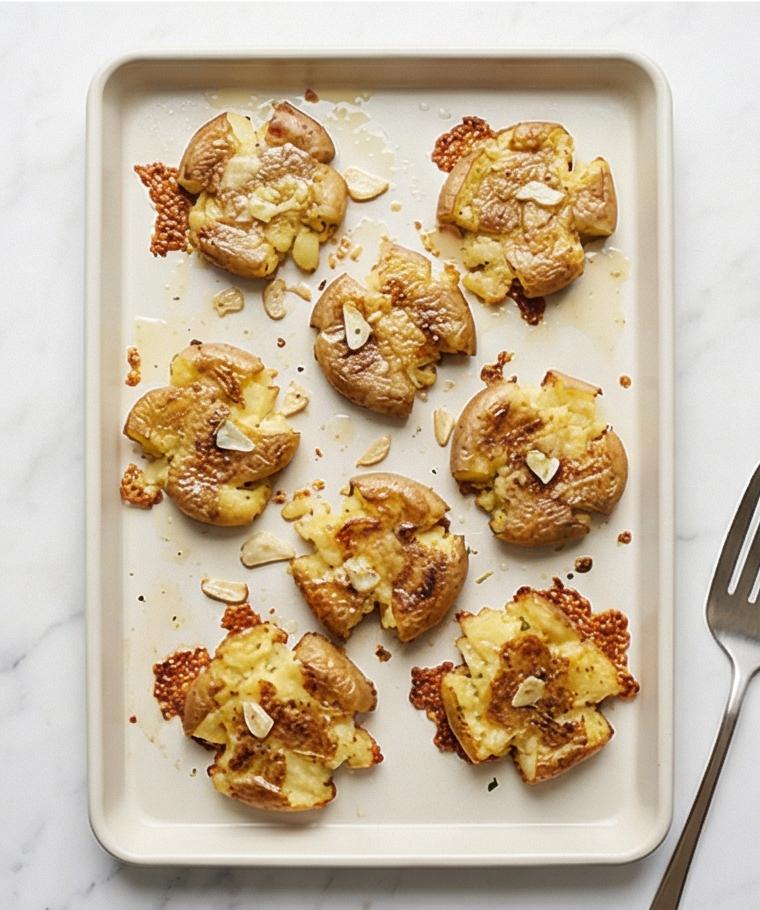
Step 5: Roast to Deep Crispness and Finish with Parmesan (Optional)
Roast the smashed potatoes until the undersides blister to deep golden-brown and the edges are lacy and crisp; rotate the pan for even browning and, in the final 5 minutes, scatter finely grated Parmesan if using so it melts and crisps into delicate browned patches. The potatoes should look puffed in places, with bubbling browned butter and lightly golden garlic shards dotting the surface – a clear contrast between crunchy edges and tender interior. Keep the same rectangular rimmed sheet visible as the cooking and presentation vessel for geometry continuity.
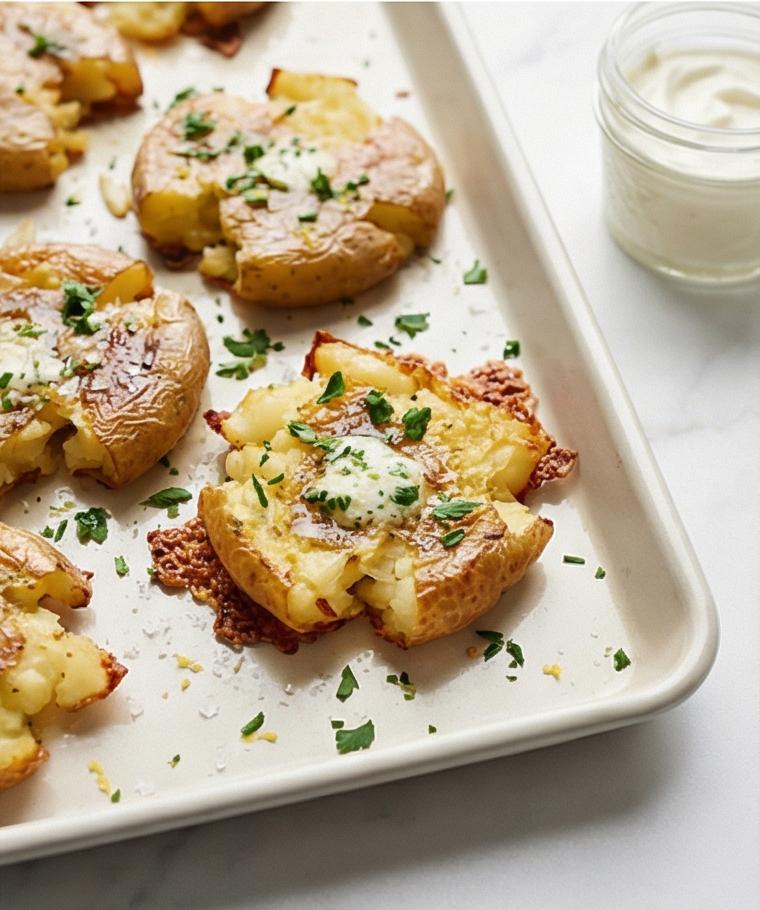
Step 6: Season, Garnish and Serve Immediately
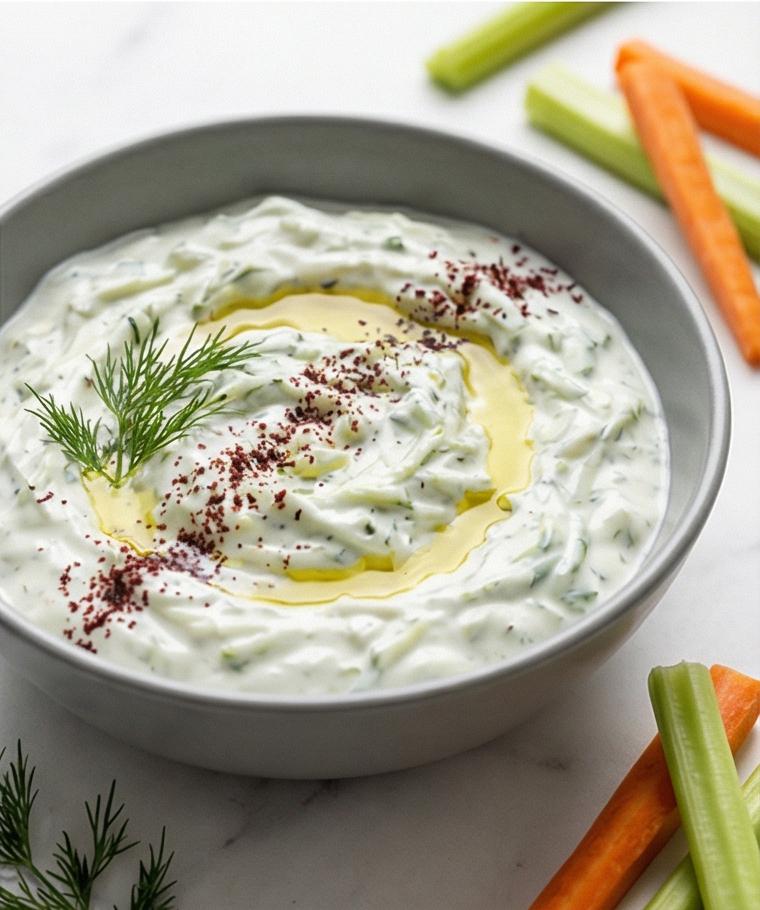
When removed, immediately finish the potatoes with a sprinkle of flaky sea salt, a scatter of finely chopped parsley or chives, and a whisper of lemon zest for brightness; present alongside a small glass jar of chilled sour cream or a ramekin of room-temperature butter for serving. Transfer carefully with a thin spatula to a rectangular serving tray or leave on the rimmed baking sheet – preserving as many crispy bits as possible – and serve hot within minutes so the exteriors remain very crisp and shatter on the first bite.
Making It Your Own
I like to experiment with small swaps – sometimes I fold smoked paprika into the garlic fat for warmth, sometimes I skip the cheese and add capers for a briny pop. For vegetarian guests I keep the butter but use plant-based butter and serve with Greek yogurt instead of sour cream. In winter I add a pinch of ground cumin and swap parsley for thyme to match roasted root veg. In summer I finish with a shower of fresh lemon and extra herbs to make the potatoes feel bright and light. Each tweak changes the mood of the same Crispy Smashed Potatoes Recipe, and that flexibility is part of the fun.
How to Serve
If you are hosting, arrange the potatoes on a warm rectangular tray and keep a small ramekin of sour cream or softened butter nearby so guests can top as they like. For a casual dinner, serve straight from the sheet pan with a scattering of chopped chives and lemon zest. Scale up by doubling potatoes and using two rimmed sheets side by side in the oven, staggering timing so both come out equally crisp. For a party platter, add a bowl of herb aioli and a sprinkle of toasted pine nuts for texture contrast.
Storage and Reheating Tips
Cool leftovers completely before storing in an airtight container to preserve texture. Refrigerate up to 2 days for best results.
Reheat on a wire rack over a rimmed sheet in a 425°F oven until crisp, about 8-12 minutes. A quick pan-fry in a hot skillet with a touch of oil will also revive the edges; microwaving will soften crispness, so avoid it unless you plan to re-crisp afterward.
Common Pitfalls and How to Avoid Them
Undercooking the potatoes makes smashing messy – cook until a fork slides in easily but the potato still holds shape. Overcooking makes them fall apart when smashed – test one early to find the sweet spot.
Crowding the pan prevents crisping – give each potato some breathing room and work in batches if needed. Using cold pan or low oven heat will lead to limp, pale potatoes, so preheat properly and keep the oven hot.
Final Thoughts
I hope you give this Crispy Smashed Potatoes Recipe a try and enjoy the joyful crunch it brings to any meal. It is forgiving, versatile, and always a crowd-pleaser; once you taste the crispy edges and creamy centers together, you might find yourself making it again and again.
Frequently Asked Questions.
- Q: Can I use russet potatoes instead of waxy potatoes? A: You can, but russets are starchier and may fall apart; small waxy potatoes or fingerlings hold their shape better for smashing.
- Q: How do I get extra-crispy edges? A: Make sure the baking sheet is very hot and avoid crowding; a little extra oil on each potato helps too.
- Q: Can I prepare these ahead of time? A: Parboil and cool the potatoes in advance, then smash and roast just before serving to keep crispness.
- Q: Is there a dairy-free option? A: Yes, replace butter with plant-based butter or olive oil and serve with a dairy-free yogurt dip.
- Q: What is the best way to reheat leftovers? A: Reheat on a wire rack in a hot oven or pan-fry briefly to revive the crisp texture.

Crispy Smashed Potatoes Recipe
Make Crispy Smashed Potatoes Recipe for golden, crunchy potatoes with garlic-herb butter and a parmesan finish.
Ingredients
Instructions
Step 1: Preheat and Warm the Baking Sheet
Preheat the oven to 450°F (230°C) and slide a large, light-colored rimmed baking sheet onto the middle rack so it becomes very hot — the pan’s heat is part of the recipe. Leave the sheet in the oven while you work; this simple thermal step ensures instant sizzle and rapid crisping when the potatoes hit the surface. Treat the pan as an active tool: imagine it glowing warm, ready on the marble surface, but never show the oven or any hands.
Step 2: Boil the Potatoes until Tender
Place the scrubbed small waxy potatoes into salted cold water and bring them to a steady boil until a fork slips through each potato easily but they remain intact. Drain thoroughly in a colander and let them sit 2–3 minutes so surface steam escapes and skins dry slightly — this drying is crucial for later crisp texture. The potatoes should look plump, smooth-skinned, and gently matte from the steam release.
Step 3: Whisk the Garlic‑Herb Fat
In a small matte grey ceramic bowl whisk together olive oil, melted and cooled butter, the finely minced garlic, chopped rosemary, smoked paprika (if using), salt and black pepper until a cohesive, glossy herb‑speckled fat appears. The mixture should read as a pale golden emulsion dotted with green rosemary flecks and tiny garlic pieces, viscous but pourable. Keep the whisk or a small spoon resting in the bowl to show utensil persistence.
Step 4: Oil the Hot Pan, Arrange and Smash
Remove the preheated rimmed baking sheet to a heatproof surface, drizzle a thin sheen of the garlic‑herb fat across the hot sheet, then transfer the drained potatoes evenly, leaving small gaps. Using a flat-bottomed glass or metal measuring cup, press each potato to about 1/2 inch thick so each potato cracks and fans at the edges — edges break off into crisp shards while the centers remain a cohesive flattened mound. The scene should capture the textured, torn potato skins, exposed fluffy interior, and scattered garlic bits. A flat-bottomed glass or the metal cup used for smashing remains on the scene as the active tool.
Step 5: Roast to Deep Crispness and Finish with Parmesan (Optional)
Roast the smashed potatoes until the undersides blister to deep golden-brown and the edges are lacy and crisp; rotate the pan for even browning and, in the final 5 minutes, scatter finely grated Parmesan if using so it melts and crisps into delicate browned patches. The potatoes should look puffed in places, with bubbling browned butter and lightly golden garlic shards dotting the surface — a clear contrast between crunchy edges and tender interior. Keep the same rectangular rimmed sheet visible as the cooking and presentation vessel for geometry continuity.
Step 6: Season, Garnish and Serve Immediately
When removed, immediately finish the potatoes with a sprinkle of flaky sea salt, a scatter of finely chopped parsley or chives, and a whisper of lemon zest for brightness; present alongside a small glass jar of chilled sour cream or a ramekin of room-temperature butter for serving. Transfer carefully with a thin spatula to a rectangular serving tray or leave on the rimmed baking sheet — preserving as many crispy bits as possible — and serve hot within minutes so the exteriors remain very crisp and shatter on the first bite.
Notes
- Use firm, blemish-free small waxy potatoes for best texture.
- Make sure the baking sheet is preheated and very hot to achieve crispness.
- Parboil until just tender to avoid falling-apart potatoes when smashing.
- Reheat in a hot oven or skillet to revive crisp edges, avoid microwaving alone.
- Swap herbs and finishes to adapt seasonally or for dietary preferences.

