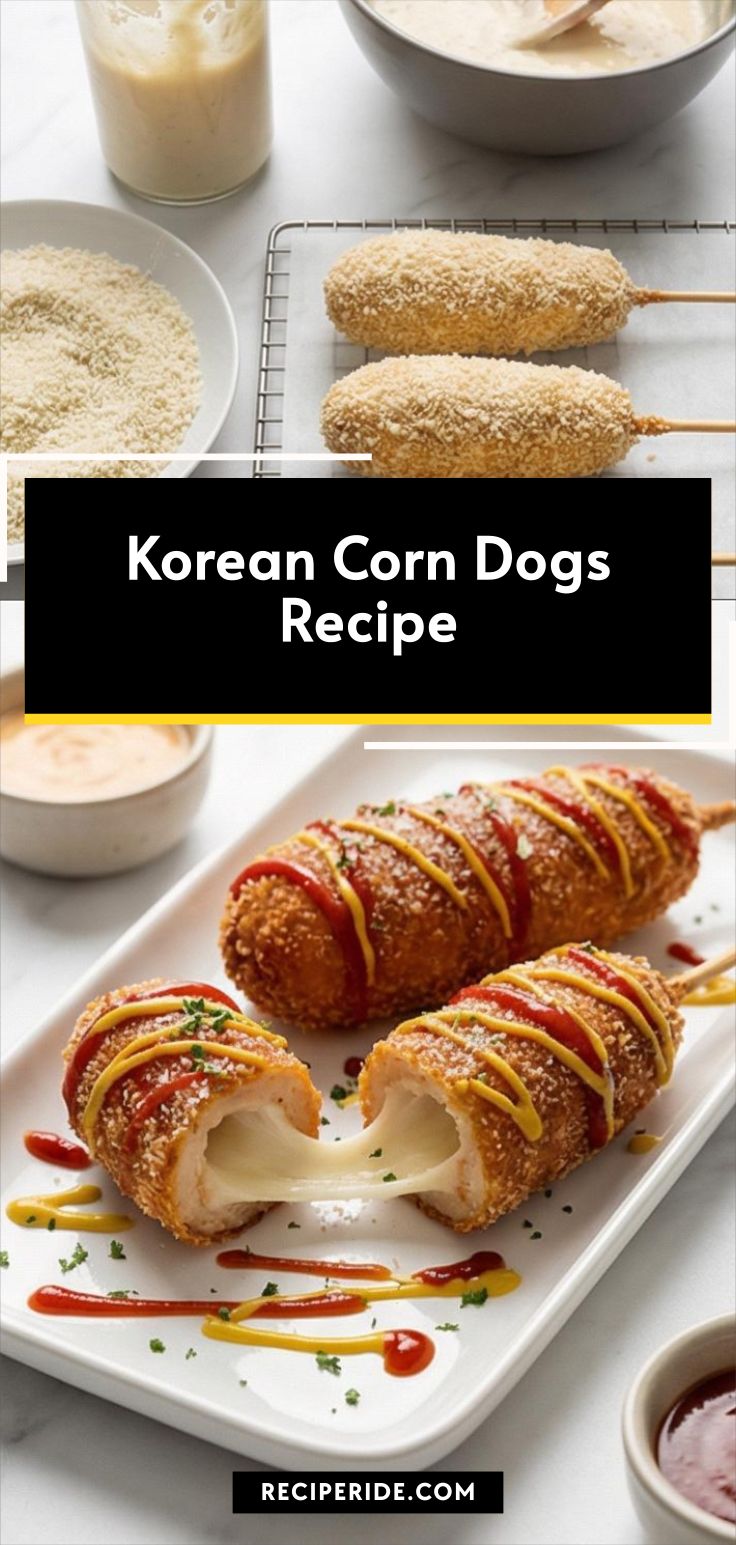
Korean Corn Dogs Recipe: A warm, crispy comfort food I keep coming back to. I fell for this Korean Corn Dogs Recipe the first time I bit into its sweet, crackly shell and pulled out molten mozzarella that stretched for days. I make these when friends come over or when a solo night needs something fun and oddly fancy. The balance of sugar on the crust and the tangy dipping sauces makes this Korean Corn Dogs Recipe feel like a festival on a plate.
How This Recipe Became My Rainy-Day Favorite
There was one evening when a sudden downpour stranded my neighborhood group at my apartment, and I needed something quick, cheerful, and shareable. I remember the smell of frying oil mixing with warm milk and sugar while rain tapped the windows. I threaded skewers by feel, laughing as cheese squeaked against my palms, and the first batch vanished in moments. The memory of steam, sticky fingers, and that first elastic cheese pull stayed with me. Making these is not just about the food, it is about the small, slightly chaotic ritual of frying, saucing, and handing warm corn dogs to smiling people on a drizzly night.
Key Players in the Batter and Filling
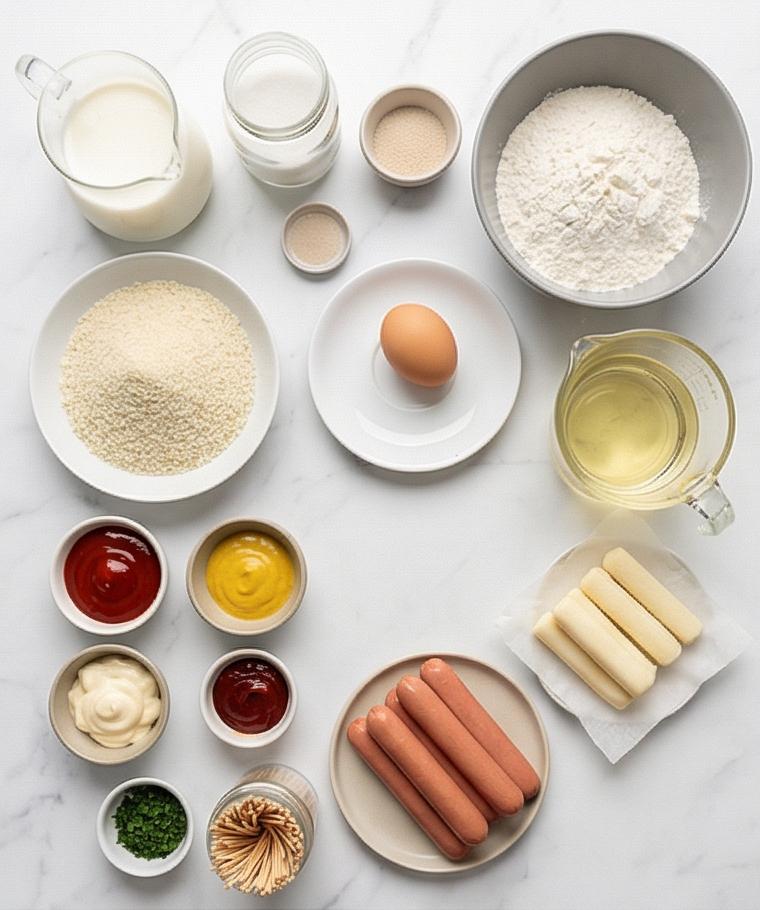
- Whole Milk: Adds warmth and tenderness to the batter; use full-fat for the richest texture, or replace with unsweetened almond milk for a dairy-free twist though results will be slightly less tender.
- Granulated Sugar: Feeds the yeast and sweetens the crust; brown sugar can be used for deeper flavor.
- Active Dry Yeast: The leavening life of the batter; instant yeast works too if you skip the proof step and mix it directly with the dry ingredients.
- All-Purpose Flour: The structure; bread flour gives chewier results while a gluten-free blend needs xanthan gum to hold the batter.
- Egg: Binds and adds richness; for an egg-free batter try a flax “egg” though the coating will be less glossy.
- Panko Breadcrumbs: Create the signature crunchy outer texture; crushed cornflakes or tempura bits can be fun substitutes.
- Hot Dogs and Mozzarella: The classic filling combo; use vegetarian dogs or smoked tofu for a meatless version.
- Neutral Oil and Granulated Sugar for Coating: For frying and that sweet finish; choose oil with a high smoke point.
Essential Kitchen Tools
Start with a short intro: a few simple tools will make these corn dogs easy, safe, and more consistent.
- Deep pot or Dutch oven: Holds oil steadily and prevents splatter; if you do not have one, a wide, deep skillet works but monitor oil temperature carefully.
- Candy or instant-read thermometer: Keeps oil at 350 F so the crust crisps without burning; without one, test with a small drop of batter – it should sizzle steadily and float.
- Wooden skewers: Long skewers give a secure handle; metal skewers can get hot so wrap the end with foil or use wooden ones.
- Wire rack and baking sheet: Drain and cool the corn dogs evenly; paper towels are an acceptable short-term substitute but make the crust soggy.
- Shallow dishes and tall glass for dipping: A wide dish for panko and a tall jar for batter make coating easier; using a bowl and spoon works in a pinch.
Step-by-Step Preparation Guide
Step 1: Activate the yeast and incorporate the egg
Warm the milk to a gentle 105–110°F (40–43°C) and whisk it with the sugar and active dry yeast until combined; leave the bowl undisturbed at room temperature for 5–10 minutes until the surface is foamy and slightly expanded. Once the yeast is clearly active and bubbly, whisk in the room-temperature egg until the liquid is glossy and homogeneous – this warm, airy liquid is the thin backbone that will make the batter rise and cling later.
Step 2: Make the thick, sticky batter
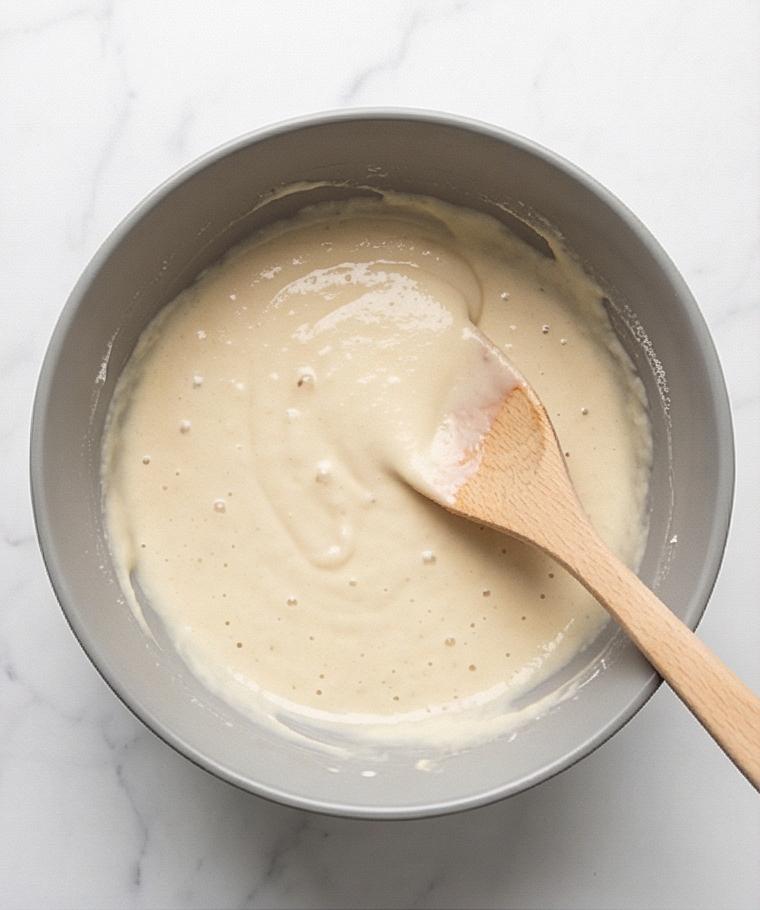
In the same modern matte grey ceramic mixing bowl, whisk the all-purpose flour with the fine sea salt, then pour the foamy yeast-egg mixture into the dry ingredients and stir with a spatula or wooden spoon until a uniformly thick, smooth, sticky batter forms with no dry pockets. The batter should be dense and tacky – more like a soft dough than a pourable pancake batter – with a satin sheen from the egg and tiny suspended air pockets showing cohesion.
Step 3: Proof until airy and roughly doubled
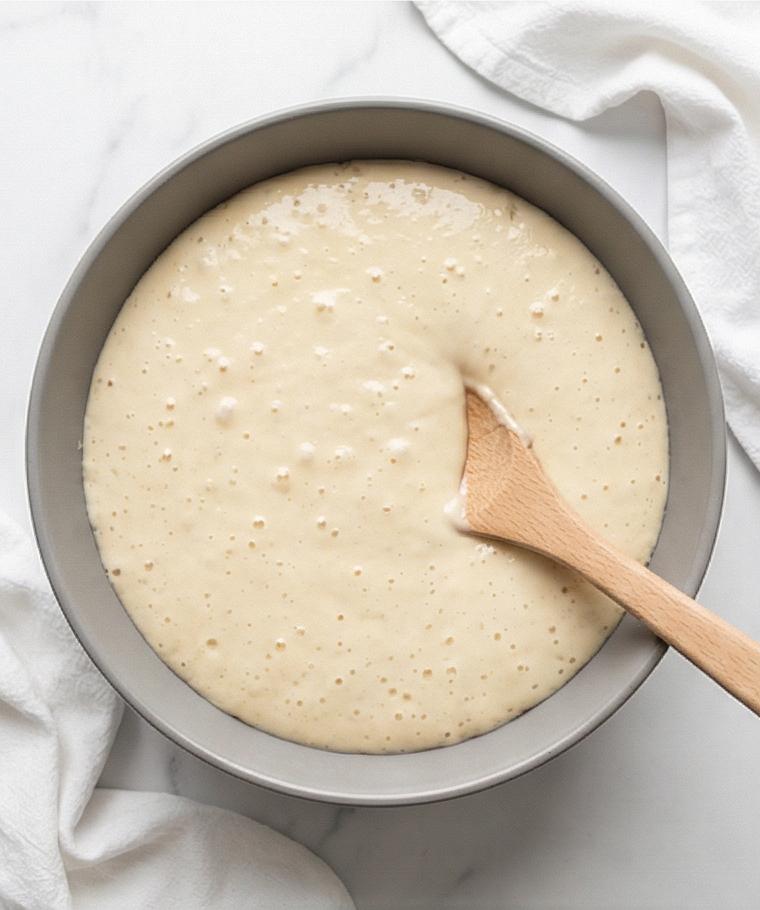
Cover the bowl tightly and let the batter rest in a warm spot for 40–60 minutes. When it’s ready the batter surface will be airy, puffed, and dotted with small bubbles; the texture will feel pillowy if you stir gently 4–5 times, and it will stretch slightly without breaking. Lift the cover to reveal a glossy, voluminous batter that holds peaks and clings to the spatula.
Step 4: Dry and assemble the skewers
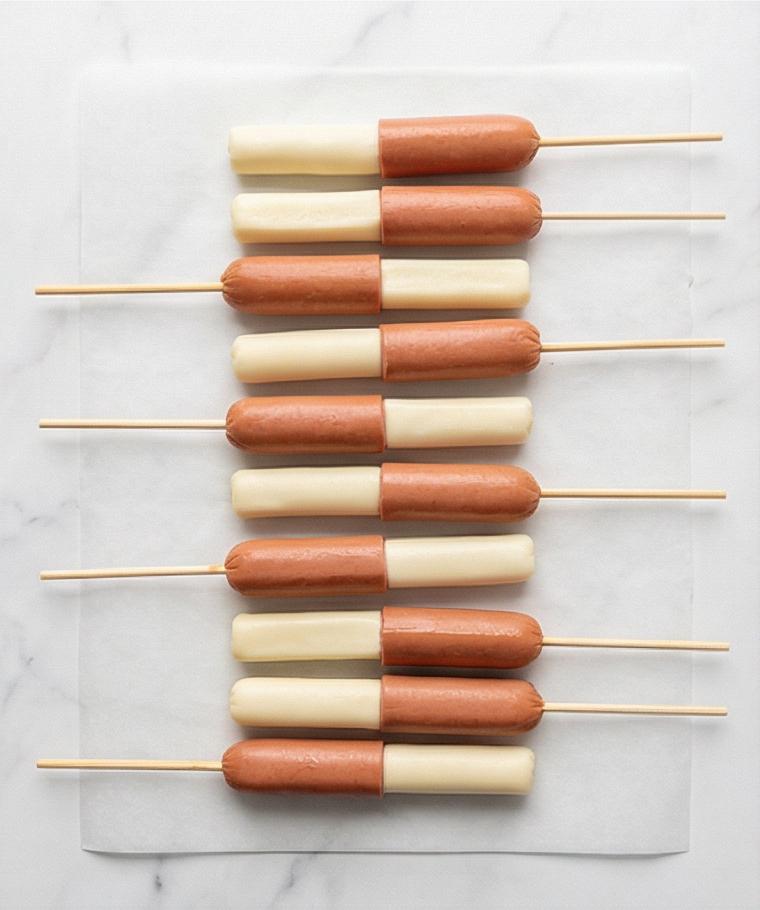
Pat the hot dogs completely dry and cut them in half crosswise; cut mozzarella into 3-inch sticks and dry those thoroughly too. Thread a mozzarella stick onto each wooden skewer, leaving a comfortable exposed handle, then press a half-hot dog directly against the cheese so there’s no gap between them. Line up the eight assembled skewers neatly on a parchment-lined tray — cheese flush against hot dog, handles aligned — ready for battering.
Step 5: Build the coating station and coat each skewer
Spread panko breadcrumbs in a wide shallow dish. Check the batter: if it’s too thin to cling, fold in 1–2 tablespoons of flour; if too stiff, stir in a splash of milk until it’s thick and sticky. Transfer the batter into a tall narrow glass or jar for easier dipping, smooth the top with a spatula, and set the matte grey bowl and wooden spatula nearby for continuity. Dip each assembled skewer into the tall container so it becomes evenly coated in a generous layer of batter, let excess drip briefly, then roll it thoroughly in panko pressing gently so the crumbs adhere into a thick, textured crust. Arrange the finished, crumbed corn dogs on a wire rack or parchment — each one uniformly covered in a grainy, even panko shell and ready to be fried.

Step 6: Fry, drain, and sugar the crisp shells
With a deep pot of neutral oil heated to 350°F (175°C) and a wire rack set for draining, lower 2–3 coated corn dogs at a time into the oil and fry until the crust is a deep, even golden brown and very crisp, turning gently so they color uniformly. Transfer to the rack to drain briefly, then while still warm but cool enough to handle, roll each corn dog in granulated sugar so the sugar clings to the crisp surface. The result should be a satiny, sugary sheen over a textured, crackling crust that gives a satisfying crunch.
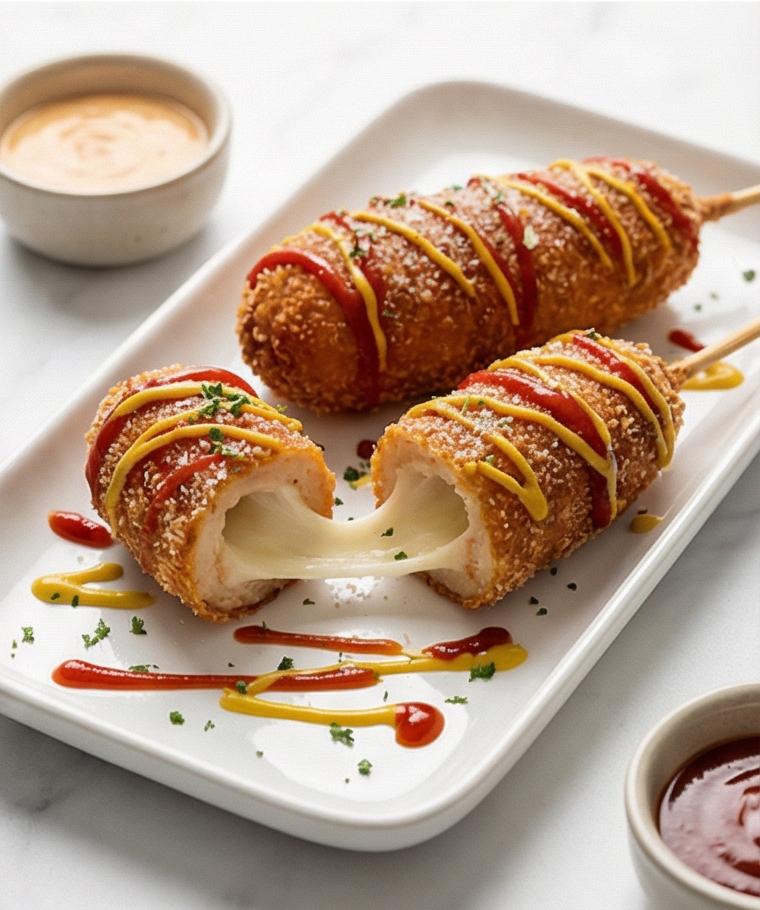
Step 7: Dress and serve hot with sauces
Mix mayonnaise with gochujang to a smooth spicy mayo, arrange the sugared Korean corn dogs on an elongated rectangular serving platter, and drizzle with ketchup, yellow mustard, and the spicy mayo as desired. Sprinkle finely chopped parsley for a fresh contrast and serve immediately while the cheese is molten and stretchable; the final plate should read as warm, glossy, sugar-dusted, and intensely textural.
Making It Your Own
I like to experiment by swapping proteins and coatings in small batches to see what sticks. Try replacing half the hot dogs with smoked tofu and see how the flavor balance changes; the smokiness pairs nicely with the sugary shell. For a seasonal twist, add finely chopped jalapeno to the batter for heat or roll the finished corn dogs in crushed toasted sesame seeds for extra crunch. For a vegetarian version, use plant-based hot dogs and dairy-free mozzarella. Small experiments like these let you discover a favorite variation without losing the soul of the Korean Corn Dogs Recipe.
How to Serve
If I am hosting, I lay out a long platter with the sugared corn dogs arranged in a neat row and small dipping bowls along the side. Offer classic ketchup and mustard, plus a small bowl of gochujang mayo for a spicy kick. For larger gatherings double the batch and keep cooked corn dogs in a single layer on a low oven rack at 200 F to stay warm without steaming.
For kids or a casual party, slice corn dogs into bite-size rounds and serve on toothpicks with a trio of sauces for dipping. If you want a composed plate, add a simple slaw or pickled cucumber to cut through the richness.
Storage and Reheating Tips
Leftovers are best within 24 hours. Store cooled corn dogs in an airtight container in the refrigerator. To prevent sogginess, keep the sugared coating separate and re-sugar after reheating if desired.
Reheat in a 350 F oven or an air fryer until warmed through and crisp, about 6-8 minutes in an air fryer or 10-12 minutes in a conventional oven. Avoid microwaving unless you do not mind a softer crust and uneven cheese texture.
Common Mistakes and How to Avoid Them
Skipping the proof step will give you a dense, flat batter that does not cling properly. Always proof until bubbly and slightly expanded for the light crumb and good adhesion.
Overcrowding the oil lowers the temperature and yields greasy corn dogs. Fry in small batches and monitor oil temperature so the crust browns quickly and stays crisp.
Final Thoughts
Give the Korean Corn Dogs Recipe a try this weekend. It is playful, forgiving, and surprisingly communal. You will love the crackly crust, the sweet finish, and that glorious stretch of cheese.
Frequently Asked Questions.
- What is the best cheese to use for Korean corn dogs? – Low-moisture mozzarella is ideal for its melt and stretch; fresh mozzarella releases too much moisture.
- Can I make the batter ahead of time? – You can mix the batter and refrigerate for up to 8 hours, then bring to room temperature and proof briefly before using.
- How do I keep the corn dogs from falling off the skewer? – Press the hot dog tightly against the cheese when assembling and make sure both are dry so the batter adheres.
- Are there gluten-free options for this recipe? – Yes, use a gluten-free all-purpose flour blend and panko alternatives like crushed rice crackers; bind with xanthan gum if needed.
- Can I bake these instead of frying? – Baking will work but you lose the signature ultra-crispy shell; brush with oil and bake at 425 F until golden, though results differ from frying.
Korean Corn Dogs Recipe
Make Korean Corn Dogs Recipe for crispy, cheesy corn dogs with a sweet, crunchy shell and spicy dipping sauce.
Ingredients
Instructions
Step 1: Activate the yeast and incorporate the egg
Warm the milk to a gentle 105–110°F (40–43°C) and whisk it with the sugar and active dry yeast until combined; leave the bowl undisturbed at room temperature for 5–10 minutes until the surface is foamy and slightly expanded. Once the yeast is clearly active and bubbly, whisk in the room-temperature egg until the liquid is glossy and homogeneous — this warm, airy liquid is the thin backbone that will make the batter rise and cling later.
Step 2: Make the thick, sticky batter
In the same modern matte grey ceramic mixing bowl, whisk the all-purpose flour with the fine sea salt, then pour the foamy yeast-egg mixture into the dry ingredients and stir with a spatula or wooden spoon until a uniformly thick, smooth, sticky batter forms with no dry pockets. The batter should be dense and tacky — more like a soft dough than a pourable pancake batter — with a satin sheen from the egg and tiny suspended air pockets showing cohesion.
Step 3: Proof until airy and roughly doubled
Cover the bowl tightly and let the batter rest in a warm spot for 40–60 minutes. When it’s ready the batter surface will be airy, puffed, and dotted with small bubbles; the texture will feel pillowy if you stir gently 4–5 times, and it will stretch slightly without breaking. Lift the cover to reveal a glossy, voluminous batter that holds peaks and clings to the spatula.
Step 4: Dry and assemble the skewers
Pat the hot dogs completely dry and cut them in half crosswise; cut mozzarella into 3-inch sticks and dry those thoroughly too. Thread a mozzarella stick onto each wooden skewer, leaving a comfortable exposed handle, then press a half-hot dog directly against the cheese so there’s no gap between them. Line up the eight assembled skewers neatly on a parchment-lined tray — cheese flush against hot dog, handles aligned — ready for battering.
Step 5: Build the coating station and coat each skewer
Spread panko breadcrumbs in a wide shallow dish. Check the batter: if it’s too thin to cling, fold in 1–2 tablespoons of flour; if too stiff, stir in a splash of milk until it’s thick and sticky. Transfer the batter into a tall narrow glass or jar for easier dipping, smooth the top with a spatula, and set the matte grey bowl and wooden spatula nearby for continuity. Dip each assembled skewer into the tall container so it becomes evenly coated in a generous layer of batter, let excess drip briefly, then roll it thoroughly in panko pressing gently so the crumbs adhere into a thick, textured crust. Arrange the finished, crumbed corn dogs on a wire rack or parchment — each one uniformly covered in a grainy, even panko shell and ready to be fried.
Step 6: Fry, drain, and sugar the crisp shells
With a deep pot of neutral oil heated to 350°F (175°C) and a wire rack set for draining, lower 2–3 coated corn dogs at a time into the oil and fry until the crust is a deep, even golden brown and very crisp, turning gently so they color uniformly. Transfer to the rack to drain briefly, then while still warm but cool enough to handle, roll each corn dog in granulated sugar so the sugar clings to the crisp surface. The result should be a satiny, sugary sheen over a textured, crackling crust that gives a satisfying crunch.
Step 7: Dress and serve hot with sauces
Mix mayonnaise with gochujang to a smooth spicy mayo, arrange the sugared Korean corn dogs on an elongated rectangular serving platter, and drizzle with ketchup, yellow mustard, and the spicy mayo as desired. Sprinkle finely chopped parsley for a fresh contrast and serve immediately while the cheese is molten and stretchable; the final plate should read as warm, glossy, sugar-dusted, and intensely textural.
Notes
- Pat hot dogs and mozzarella completely dry to ensure the batter adheres well
- Fry in small batches and maintain oil at 350 F to keep crust crisp and avoid greasiness
- Reheat in an air fryer or oven to restore crispness rather than using a microwave
