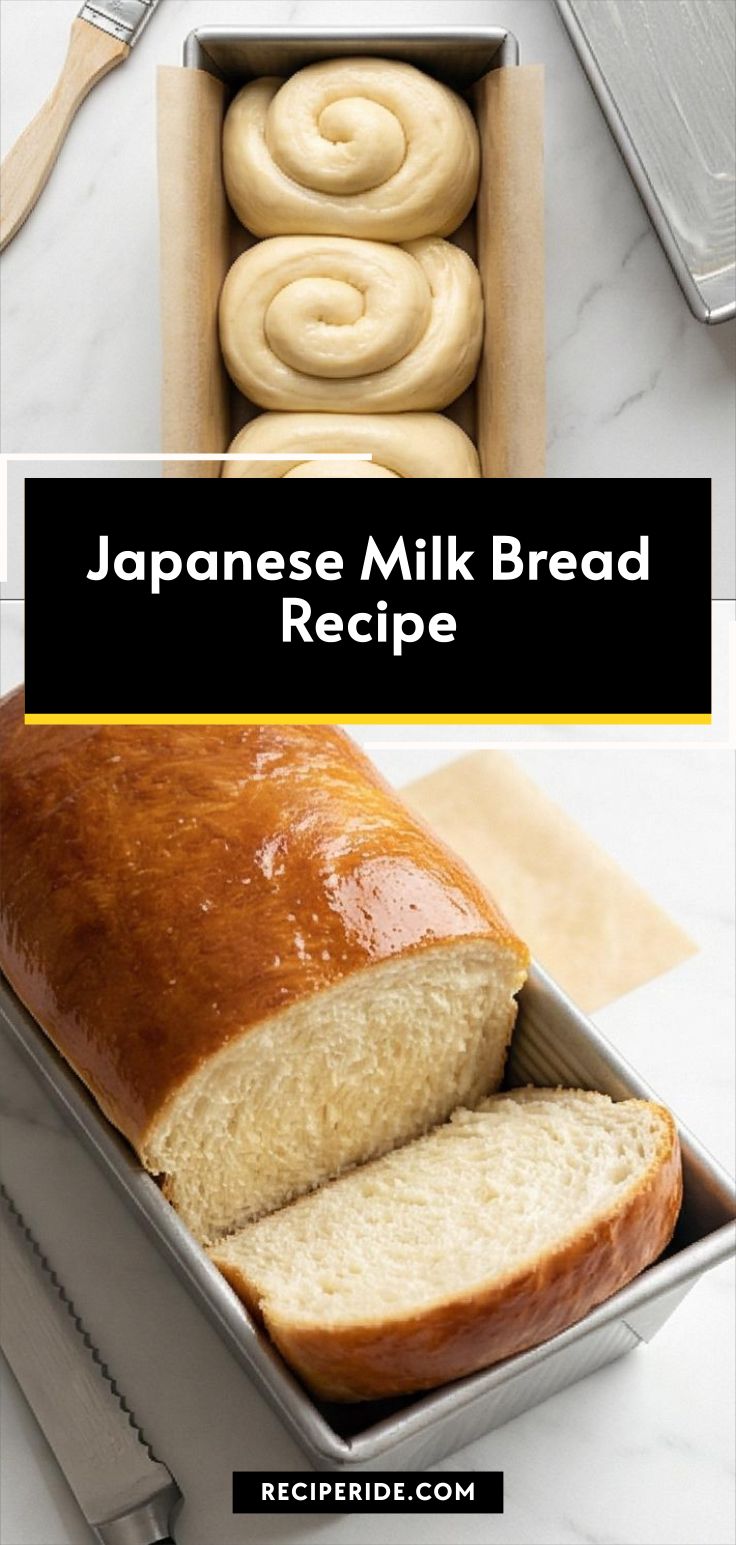
Japanese Milk Bread Recipe
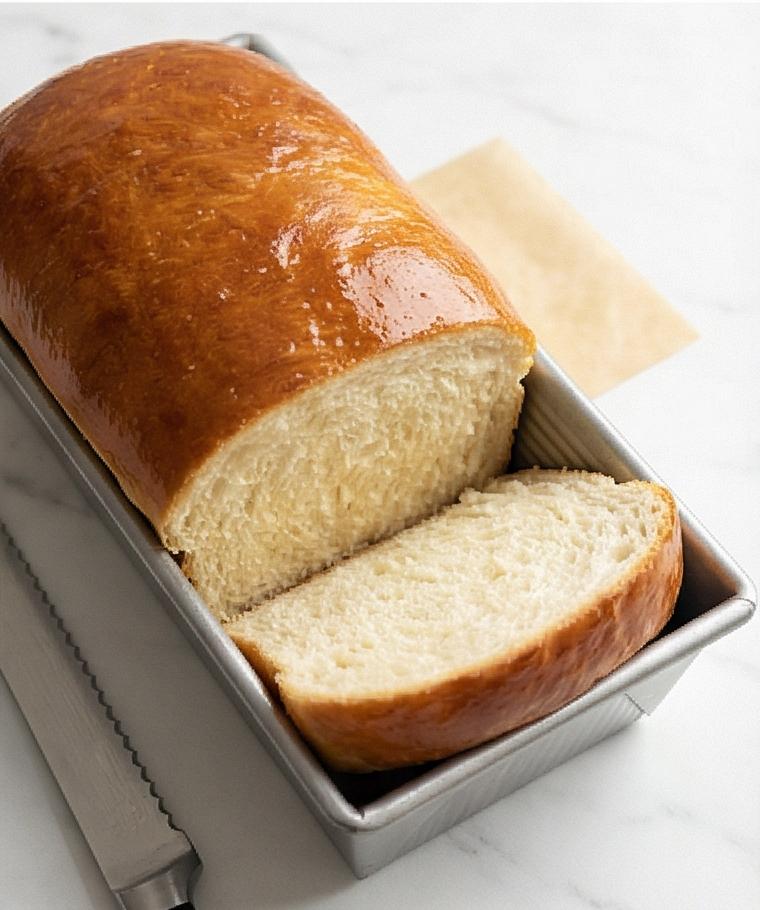
I still remember the first time I baked this Japanese Milk Bread Recipe and how the whole kitchen filled with a sweet, toasty smell that felt like a warm blanket. Over the years I’ve tweaked small things, but the heart of this Japanese Milk Bread Recipe has always been its pillowy crumb and glossy, tender crust. It’s the kind of loaf that makes weekday breakfasts feel special and weekend sandwiches downright luxurious. If you like soft, slightly sweet bread that toasts beautifully, you will love this Japanese Milk Bread Recipe.
How This Recipe Became My Rainy-Day Favorite
One rainy afternoon I found myself craving something comforting, and the memory of a bakery loaf I loved years ago nudged me into the kitchen. As the tangzhong simmered and thickened, the scent of warm milk filled the room and I felt an instant shift from gray to cozy. Kneading the dough became a kind of calm ritual, each fold making the dough smoother and more alive. When the loaf finally emerged golden and glossy, I remember slicing into it and watching steam curl up from the soft crumb. That first bite was quiet joy: slightly sweet, pillowy, and just begging for a smear of butter. From then on, this Japanese Milk Bread Recipe became my go-to for rainy days, lazy brunches, and any time I wanted something that felt like a small celebration.
The Ingredients That Make This Sing
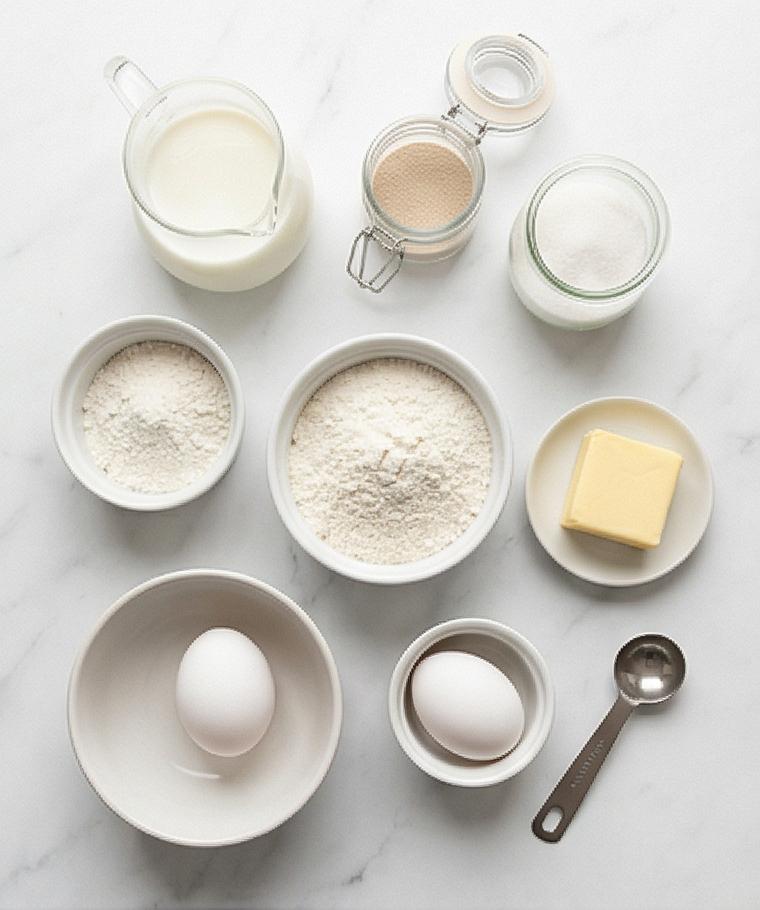
- Bread Flour: Provides structure and chew; choose high-protein bread flour for the signature fine crumb. Substitutes: all-purpose in a pinch, but expect a slightly softer, less elastic loaf. Selection tip: look for 11-12% protein for best results.
- Whole Milk: Adds richness and tenderness; warms the dough and helps the crust brown. Substitute: dairy milk alternatives will change texture and flavor.
- Sugar: Balances the savory notes and helps with browning; adjust slightly for sweetness preference.
- Yeast: Instant yeast gives a reliable rise; active dry can be used if proofed first. Store in a cool place.
- Egg and Butter: Egg adds richness and color, butter gives silkiness and flavor; use unsalted butter so you can control the salt.
Tools I Rely On
Start with a short intro: the right tools make this Japanese Milk Bread Recipe feel easier and more predictable.
- Stand mixer with dough hook: Speeds up kneading and helps develop the windowpane. Alternative: hand-knead for 15–20 extra minutes.
- Digital scale: Accurate measurements matter for texture; cups can vary. Alternative: measure by level tablespoon for small amounts.
- Instant-read thermometer: Check tangzhong temperature and final internal loaf temp. Alternative: test tangzhong visually and loaf for color and bounce.
- 9×5-inch loaf pan: Gives the classic shape; a slightly larger pan will flatten the loaf. Alternative: freeform in a Dutch oven for a more rustic shape.
- Pastry brush and plastic wrap: For egg wash and preventing a skin on the tangzhong.
Step-by-Step Preparation Guide
Step 1: Make and cool the tangzhong
Whisk the measured 3 tablespoons (25 g) of bread flour into 1/2 cup (120 ml) whole milk until perfectly lump-free, then cook over gentle heat while stirring constantly until the mixture thickens into a smooth, glossy paste that forms soft lines when stirred and reaches around 150°F (65°C). Transfer the hot paste into a small shallow white ceramic bowl, press plastic wrap directly onto the surface to prevent a skin, and let it cool to lukewarm/room temperature for about 15–20 minutes so it’s ready to enrich the dough without overheating the yeast.

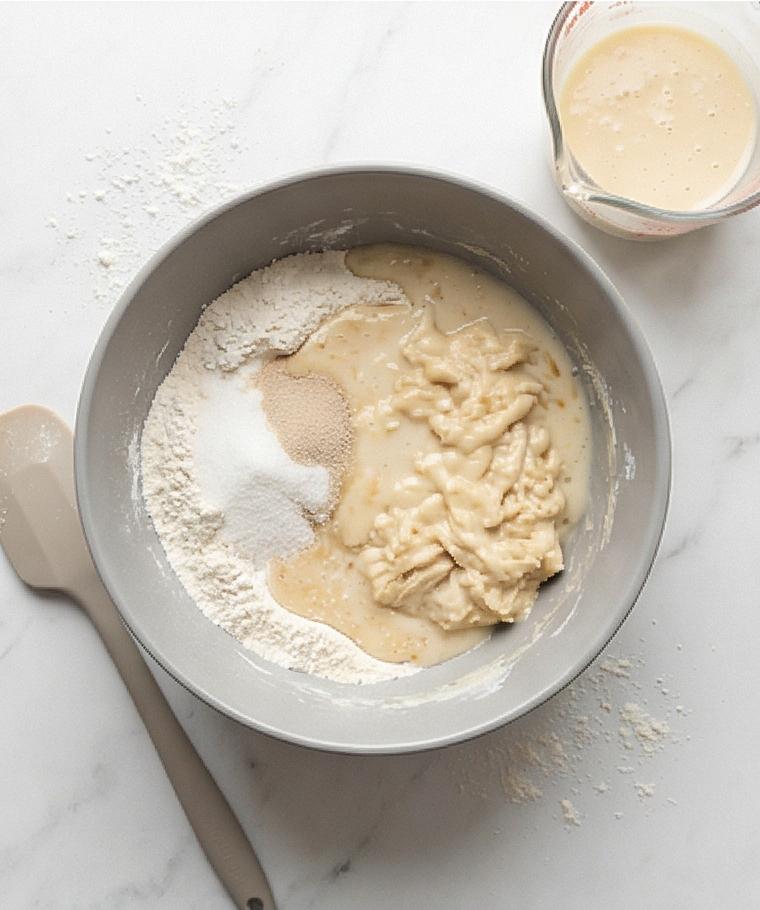
Step 2: Combine dry ingredients and make the wet mix
Into a modern matte grey ceramic mixing bowl add 2 3/4 cups bread flour, the sugar, salt and instant yeast, giving them a quick whisk to distribute the grains evenly. In a medium measuring jug whisk together the lukewarm 1/3 cup milk, one room-temperature egg, and the cooled tangzhong until smooth and homogenous. Pour the wet mixture into the grey bowl and mix on low until a shaggy, cohesive dough forms with no dry flour pockets—an irregular, slightly tacky mass that promises a soft crumb once worked.
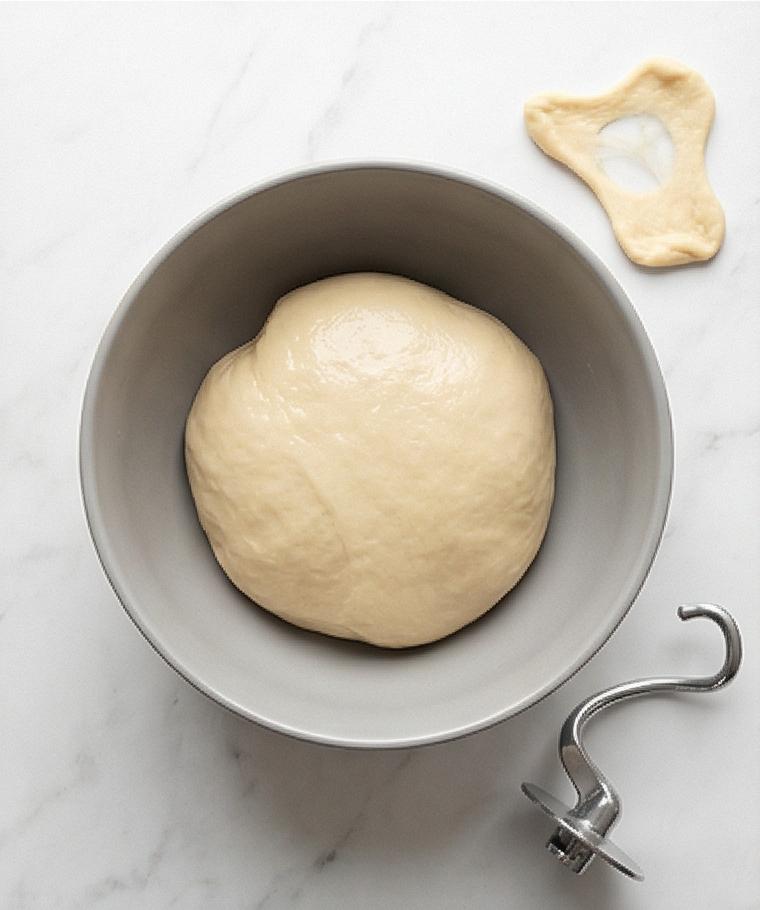
Step 3: Rest briefly, then knead and incorporate butter
Let the shaggy dough rest for ten minutes to hydrate the flour, then resume kneading in the same matte grey bowl with the dough hook attached. Add the very soft 4 tablespoons of butter piece by piece while kneading on medium speed until each addition is fully absorbed. Continue until the dough is very smooth, elastic, slightly tacky but not sticky—soft, glossy surface, springs back when pressed. Test a small piece to find a thin, translucent windowpane; this glossy, extensible texture is the hallmark of a properly kneaded milk bread dough.
Step 4: First rise and prepare the pan
Shape the dough into a smooth ball and place it into a lightly buttered bowl (use a thin film of softened butter). Cover tightly with plastic wrap and let it rise in a warm, draft-free spot until doubled and airy—about 60–90 minutes—until the surface looks puffy and domed. While it rises, thoroughly grease a 9×5-inch rectangular loaf pan with the reserved tablespoon of butter and, if you prefer, line the bottom and long sides with a parchment sling for easy removal.
Step 5: Deflate, divide, rest, shape, and arrange for proofing
Turn the risen dough out gently onto a lightly floured work surface, press out gas without tearing, then weigh and divide into three equal pieces. Pre-shape each into a loose ball, cover and rest for 10 minutes so the gluten relaxes. Roll each rested piece into a 6–7″ oval, fold like a letter, turn and roll tightly into neat logs, pinching seams closed. Place the logs seam-side down into the prepared rectangular pan, snug but with room to expand. Cover loosely and proof until the rolls puff, touch and rise about 1–1½” above the rim, jiggle lightly when shaken.
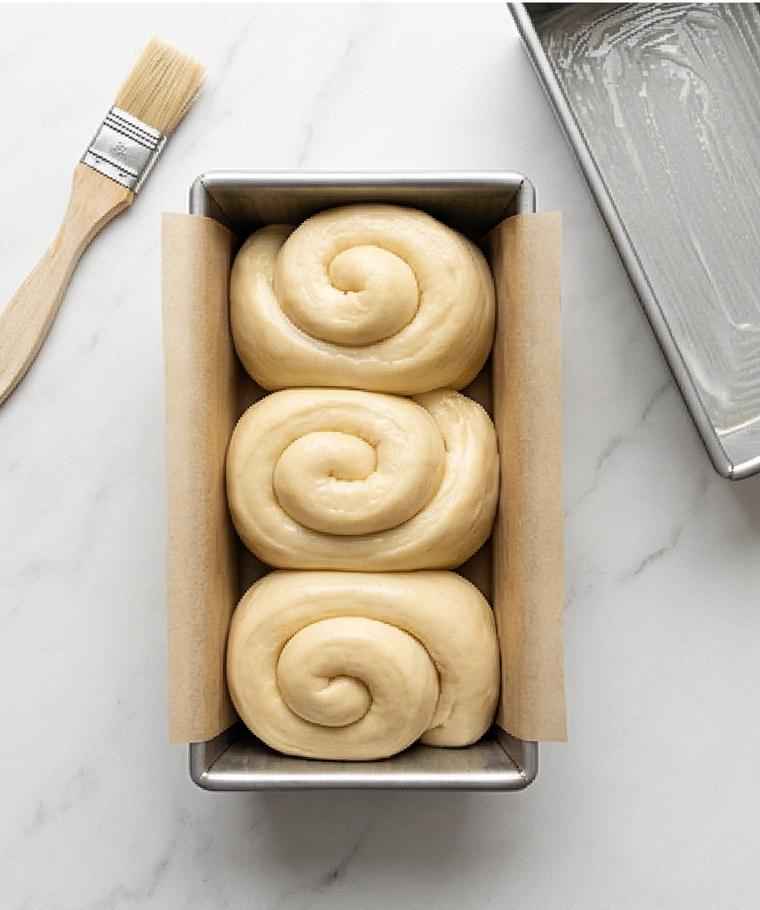
Step 6: Egg wash, bake, cool, and finish
During the last twenty minutes of proofing preheat the oven to 350°F (175°C). Blend one egg with one tablespoon milk to a smooth, uniform egg wash and gently brush the risen dough with a soft pastry brush, avoiding deflation. Bake the pan at 350°F for 25–30 minutes until the top is a deep, even golden brown and the interior reads about 190–195°F (88–90°C). Remove from the oven and immediately brush the hot loaf with 1 tablespoon melted butter for softness and sheen. Let the loaf cool in the pan for 10–15 minutes, then transfer to a wire rack to cool further before slicing.
Step 7: Slice, serve, and store
Once mostly cooled, slice the milk bread into thick or thin slices to taste: the crumb should be pillowy, tender, and slightly elastic; the crust soft and glossy. Serve plain, toasted, or with butter, jam, or honey; store completely cooled in an airtight bag at room temperature up to three days, or slice and freeze for longer storage.
Making It Your Own
I experimented with small changes over a few months to see what amplifies the texture. Adding a touch more tangzhong makes the crumb even softer, while a slightly longer chill in the fridge develops flavor and slows the yeast for a more nuanced profile.
For a nutty twist, I folded in a tablespoon of toasted sesame paste during shaping. For dietary tweaks, swapping some milk for coconut milk works, but the crumb shifts a bit. If you want whole-grain notes, replace up to 25 percent of the bread flour with whole wheat and increase hydration slightly.
Seasonal fruit swirls are fun: spread a thin layer of jam or thin apple compote before rolling for a sweet breakfast loaf. Each variation taught me how forgiving the dough is and which changes are worth keeping.
How to Serve
If I’m hosting brunch, I slice the loaf thicker and arrange on a wooden board with small bowls of cultured butter, honey, and seasonal jam. Toasted slices go on a separate platter with smoked salmon and cream cheese for savory guests.
For a dinner party, cut thin slices, toast them lightly, and serve as crostini with toppings like miso butter and sliced cucumber, or with a sweet ricotta and citrus drizzle for dessert. To scale up, double the recipe and bake in two pans or a larger pull-apart pan; for fewer people, freeze sliced pieces and toast as needed.
Storage and Reheating Tips
Store completely cooled slices in an airtight bag at room temperature; they stay fresh up to three days. If you want longer storage, slice and freeze the loaf flat in freezer bags so you can pull out individual pieces.
To reheat, toast frozen slices straight from the freezer or warm a whole loaf wrapped in foil at 300°F for 10–15 minutes until soft. A quick brush of melted butter after warming brings back the glossy finish and makes each slice taste freshly baked.
Common Mistakes and How to Avoid Them
Under-kneading is common; the dough should feel smooth and elastic and pass the windowpane test. If the dough tears easily, knead a bit longer or give it a short rest and continue.
Overproofing will make the loaf collapse in the oven. Watch the dough rather than the clock: it should be puffy and jiggle slightly but still hold some spring when touched.
Ready to Bake?
Give this Japanese Milk Bread Recipe a try and enjoy the soft, tender results. It rewards a little patience with a beautifully textured loaf that turns ordinary meals into something special.
Frequently Asked Questions.
- Q: Can I use all-purpose flour instead of bread flour? A: Yes, you can, but the loaf will be slightly less elastic and the crumb a bit softer. For closer results, add 1 tablespoon of vital wheat gluten per cup of all-purpose flour.
- Q: How long can I keep this bread at room temperature? A: Stored in an airtight bag, it will stay fresh up to three days; after that freeze slices for longer storage.
- Q: Can I make the dough in a food processor? A: A food processor can mix the dough, but it will finish different in texture; stand mixer or hand-kneading are preferred.
- Q: Is tangzhong necessary? A: Tangzhong adds moisture and keeps the crumb tender longer; skipping it will still yield a nice loaf, but texture and shelf life will change.
- Q: Can I use active dry yeast instead of instant yeast? A: Yes, but dissolve and proof it in warm milk first and reduce the mixing time slightly.
Japanese Milk Bread Recipe
Bake a soft, pillowy Japanese Milk Bread Recipe for tender slices and glossy crust.
Ingredients
Instructions
Step 1: Make and cool the tangzhong
Whisk the measured 3 tablespoons (25 g) of bread flour into 1/2 cup (120 ml) whole milk until perfectly lump-free, then cook over gentle heat while stirring constantly until the mixture thickens into a smooth, glossy paste that forms soft lines when stirred and reaches around 150°F (65°C). Transfer the hot paste into a small shallow white ceramic bowl, press plastic wrap directly onto the surface to prevent a skin, and let it cool to lukewarm/room temperature for about 15–20 minutes so it’s ready to enrich the dough without overheating the yeast.
Step 2: Combine dry ingredients and make the wet mix
Into a modern matte grey ceramic mixing bowl add 2 3/4 cups bread flour, the sugar, salt and instant yeast, giving them a quick whisk to distribute the grains evenly. In a medium measuring jug whisk together the lukewarm 1/3 cup milk, one room-temperature egg, and the cooled tangzhong until smooth and homogenous. Pour the wet mixture into the grey bowl and mix on low until a shaggy, cohesive dough forms with no dry flour pockets—an irregular, slightly tacky mass that promises a soft crumb once worked.
Step 3: Rest briefly, then knead and incorporate butter
Let the shaggy dough rest for ten minutes to hydrate the flour, then resume kneading in the same matte grey bowl with the dough hook attached. Add the very soft 4 tablespoons of butter piece by piece while kneading on medium speed until each addition is fully absorbed. Continue until the dough is very smooth, elastic, slightly tacky but not sticky—soft, glossy surface, springs back when pressed. Test a small piece to find a thin, translucent windowpane; this glossy, extensible texture is the hallmark of a properly kneaded milk bread dough.
Step 4: First rise and prepare the pan
Shape the dough into a smooth ball and place it into a lightly buttered bowl (use a thin film of softened butter). Cover tightly with plastic wrap and let it rise in a warm, draft-free spot until doubled and airy—about 60–90 minutes—until the surface looks puffy and domed. While it rises, thoroughly grease a 9×5-inch rectangular loaf pan with the reserved tablespoon of butter and, if you prefer, line the bottom and long sides with a parchment sling for easy removal.
Step 5: Deflate, divide, rest, shape, and arrange for proofing
Turn the risen dough out gently onto a lightly floured work surface, press out gas without tearing, then weigh and divide into three equal pieces. Pre-shape each into a loose ball, cover and rest for 10 minutes so the gluten relaxes. Roll each rested piece into a 6–7" oval, fold like a letter, turn and roll tightly into neat logs, pinching seams closed. Place the logs seam-side down into the prepared rectangular pan, snug but with room to expand. Cover loosely and proof until the rolls puff, touch and rise about 1–1½" above the rim, jiggle lightly when shaken.
Step 6: Egg wash, bake, cool, and finish
During the last twenty minutes of proofing preheat the oven to 350°F (175°C). Blend one egg with one tablespoon milk to a smooth, uniform egg wash and gently brush the risen dough with a soft pastry brush, avoiding deflation. Bake the pan at 350°F for 25–30 minutes until the top is a deep, even golden brown and the interior reads about 190–195°F (88–90°C). Remove from the oven and immediately brush the hot loaf with 1 tablespoon melted butter for softness and sheen. Let the loaf cool in the pan for 10–15 minutes, then transfer to a wire rack to cool further before slicing.
Step 7: Slice, serve, and store
Once mostly cooled, slice the milk bread into thick or thin slices to taste: the crumb should be pillowy, tender, and slightly elastic; the crust soft and glossy. Serve plain, toasted, or with butter, jam, or honey; store completely cooled in an airtight bag at room temperature up to three days, or slice and freeze for longer storage.
Notes
- Chill the dough briefly if it becomes too sticky; a short rest makes shaping easier.
- Use an instant-read thermometer to confirm internal loaf temperature of 190–195°F for doneness.
- Slice after partial cooling to maintain the pillowy texture and avoid squashing the crumb.