Nutella Lava Cake Recipe is my go-to celebration dessert when I need something that feels fancy but comes together fast. I first learned this Nutella Lava Cake Recipe at a late-night baking session with friends, and it has been a crowd-pleaser ever since. The molten Nutella center and the tender cake exterior are what keep me returning to this recipe, especially when I want a show-stopping finish with minimal fuss. You will love how the aroma fills the kitchen the minute those ramekins come out of the oven.
How This Recipe Became My Cozy-Weekend Treat
The first time I made this Nutella Lava Cake Recipe it was raining and my apartment smelled like hot chocolate and toasted sugar. I remember pressing the chilled Nutella rounds with cold fingers and watching them shine before freezing, then pacing the kitchen while the cakes baked. When I finally inverted a ramekin and the glossy center flowed out, it felt like a tiny edible victory. I felt proud, a little giddy, and oddly comforted. That memory is why this recipe now lives in my rotation for cozy nights in and last-minute celebrations.
The Ingredients That Make It Sing
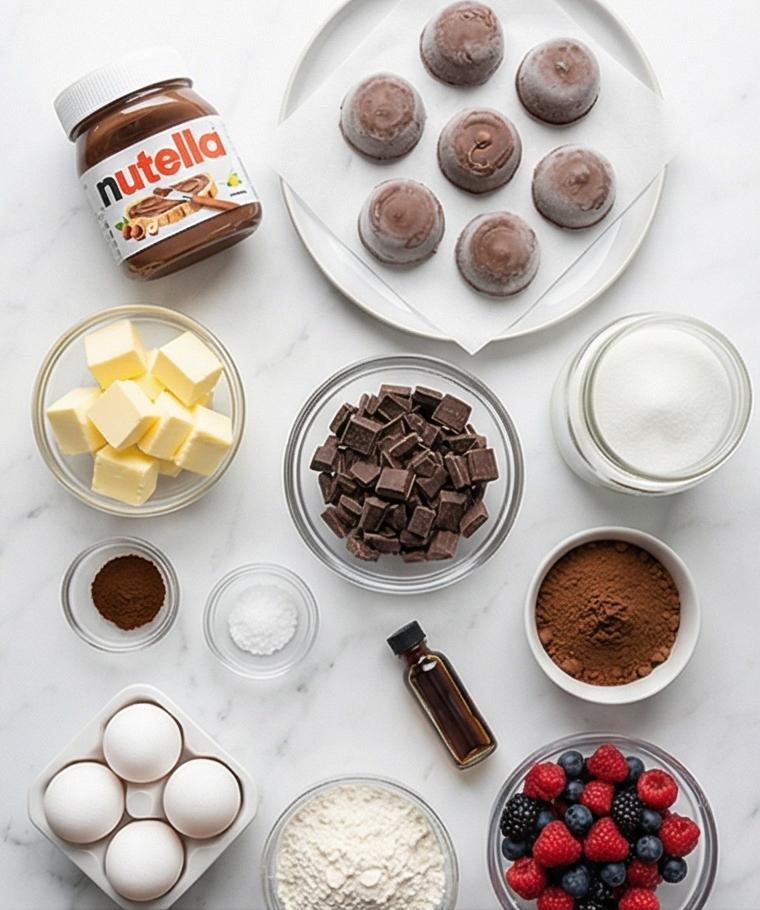
Each ingredient plays a clear role: texture, structure, or molten magic. Choose quality chocolate and Nutella for best flavor; substitute a high-quality chocolate-hazelnut spread if needed. Use room-temperature eggs for smooth emulsions and sifted flour to avoid lumps. If you want a hint of coffee, the optional espresso powder wakes the chocolate without tasting like coffee. For dairy-free or vegan swaps, try vegan butter and a plant-based chocolate, though textures will vary.
- Nutella (for lava centers): The liquid gold that becomes the molten core; freeze firm. Substitute: any chocolate-hazelnut spread.
- Bittersweet chocolate: Provides deep chocolate structure and glossy shine; pick 60–70% cocoa. Substitute: high-quality semisweet.
- Unsalted butter: Adds silkiness and richness; salted is fine if you reduce added salt.
- Eggs and yolks: Build lift and tender crumb; room temperature is best.
- Granulated sugar: Sweetens and helps with structure; can reduce slightly for less sweetness.
- All-purpose flour: Gives body with minimal flour for tender cake.
- Cocoa powder: Coats ramekins and adds chocolate aroma.
Essential Tools in My Kitchen
A few reliable tools make these cakes effortless. A good set of ramekins ensures uniform baking; I prefer 6-ounce ramekins for consistent centers. A rimmed baking sheet helps transfer and catch drips, and a heatproof bowl or double boiler makes melting chocolate smooth and safe. A whisk and rubber spatula are essential for building the egg ribbon and folding without deflating. If you don’t have a double boiler, use short microwave bursts, stirring often. These small tool choices save time and give you predictable, repeatable results.
- 6-ounce ramekins: For even portions and predictable bake times.
- Rimmed baking sheet: For safe oven transfer and catching spills.
- Heatproof bowl or double boiler: For melting chocolate gently.
- Whisk and rubber spatula: For mixing and folding without losing air.
- Digital timer: To hit the precise 11–13 minute window.
Step-by-Step Preparation Guide
Step 1: Prepare the Nutella lava centers
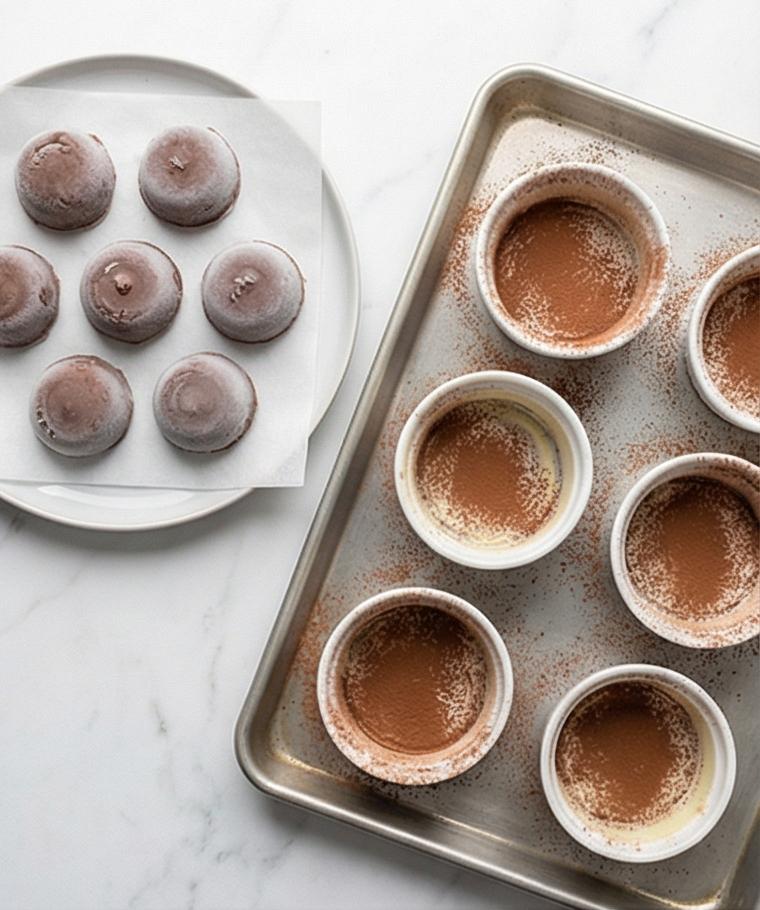
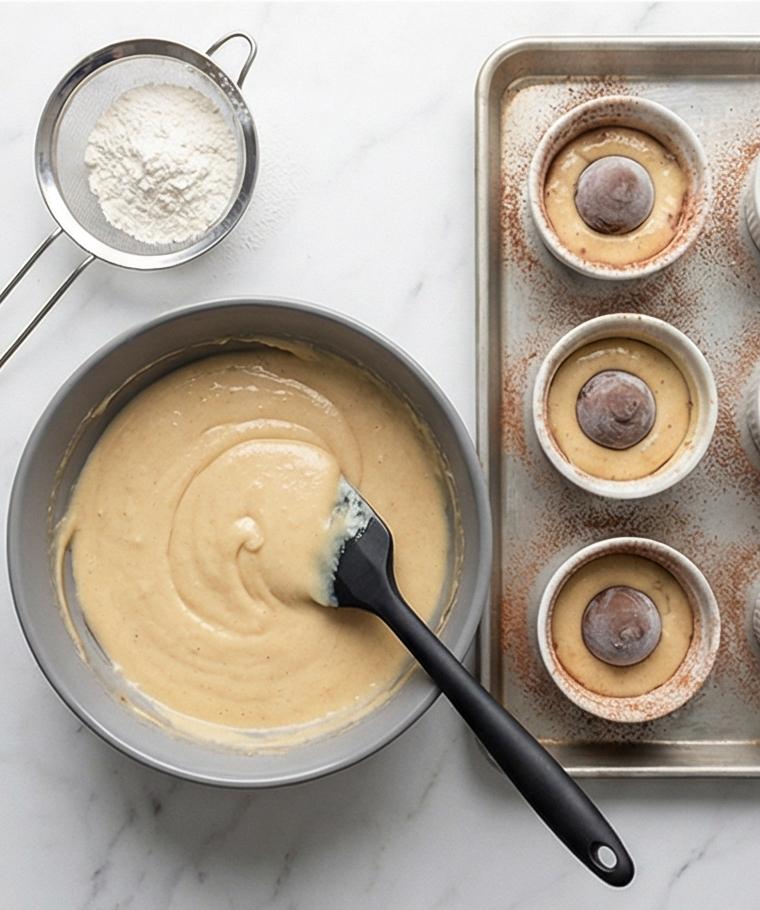
Spoon the reserved chilled Nutella into six equal generous tablespoon mounds on a small parchment-lined plate or tray, press them into compact rounds and freeze until rock-solid (at least 30–45 minutes). Work cleanly and quickly so the Nutella retains a smooth, glossy surface before freezing — these frozen cores are the molten heart of the cakes and should read dense, satiny and well-defined when removed from the freezer.
Step 2: Preheat and ready the ramekins
While the Nutella centers firm up, preheat the oven to 425°F (220°C) and place a sturdy rimmed baking sheet inside to heat. Thoroughly butter six 6-ounce ramekins, dust the insides with unsweetened cocoa and tap out the excess so each cavity is evenly coated. Arrange the prepared ramekins on the hot or warming sheet (or on the counter if still heating), bottoms and sides gleaming with a thin cocoa veil — this creates a satin, nonstick cradle for the batter to climb and set with a clean edge.
Step 3: Melt chocolate and marry with Nutella
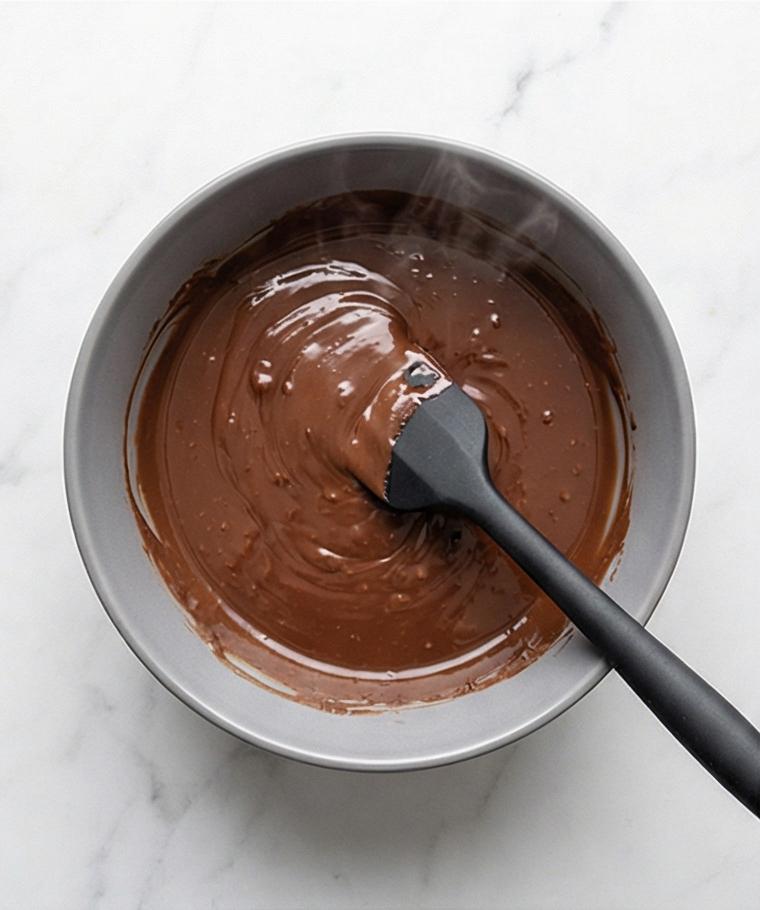
Gently melt the butter and finely chopped bittersweet chocolate together in a medium heatproof bowl set over barely simmering water (or in short microwave bursts), stirring until the mixture is fully smooth and glossy; remove from heat and let it cool until just warm. Whisk in the room-temperature Nutella until the entire mixture becomes seamless, velvety and slightly viscous — a deep, reflective chocolate ribbon that reads molten but stable. Keep this heatproof bowl handy; it will be the same vessel used to combine components so the visual story remains consistent.
Step 4: Whisk eggs, sugar and flavor
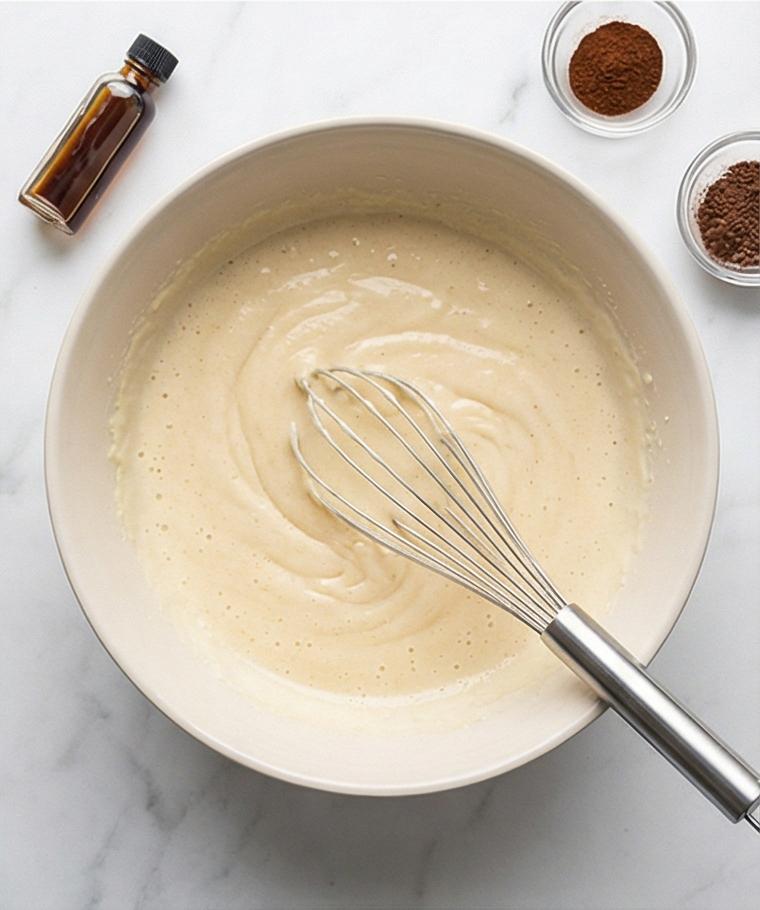
In a large mixing bowl whisk the whole eggs, extra yolks, granulated sugar and salt vigorously until pale, thickened and ribboning — the mixture should look airy but glossy, falling off the whisk in wide slow ribbons. Stir in the vanilla and a touch of espresso powder so the aroma lifts the chocolate notes; the whipped eggs should feel light yet structured, promising puff and tender edges once baked. Keep a clean whisk resting across the bowl rim to show active tool continuity.
Step 5: Combine and fold to create the batter
Slowly stream the warm chocolate–Nutella into the whipped eggs while whisking steadily to temper and create a unified emulsion. Sift the flour over the glossy chocolate-egg mix and fold gently with a rubber spatula until the batter is smooth, cohesive and just homogenous — glossy, thick but pourable, with no dry streaks. Portion the batter into each prepared ramekin to about halfway; the batter should cling softly to the spoon and display a silky sheen. Keep the same heatproof bowl and a matte spatula in frame for continuity.
Step 6: Assemble, bake and rest
Work quickly: press one frozen Nutella mound into the center of every half-filled ramekin, pushing it down slightly without touching sides or bottom, then spoon the reserved batter over to fill each ramekin to roughly three-quarters. Transfer the ramekins on the preheated sheet and bake until the edges are set, tops puffed and slightly matte while centers still jiggle gently (approximately 11–13 minutes). Remove to a cooling rack, let stand 1–2 minutes so the edges firm but the core remains molten, then loosen the cake edges with a thin knife and invert each ramekin onto a dessert plate.
Step 7: Garnish and serve warm
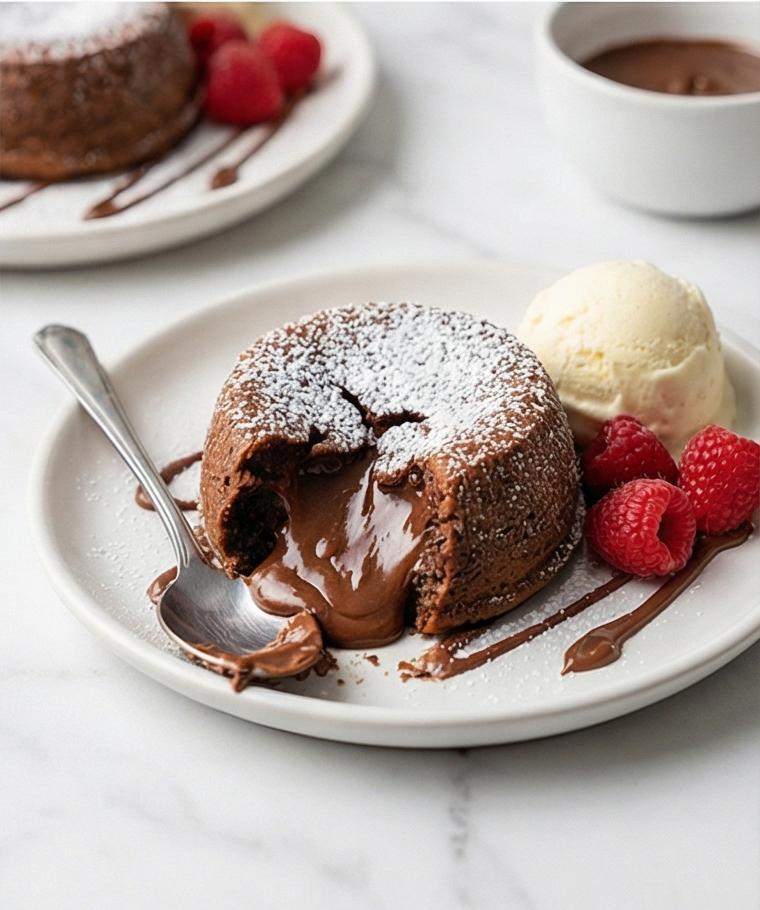
Immediately dust each warm cake with a light shower of powdered sugar, add a few fresh berries alongside and a scoop of vanilla ice cream. Optionally drizzle gently warmed Nutella over the cake and ice cream for an extra glossy lava ribbon. Serve straight away so the interior spills molten and satiny when cut — the contrast of the matte cake exterior, satin lava flow, cool creamy ice cream and jewel-bright berries is the point of pleasure.
Making It Your Own
I like to play with small swaps to suit seasons and diets. For a nuttier, crunch-forward twist, fold in a tablespoon of toasted hazelnuts into the batter just before pouring; it gives a subtle texture contrast and echoes the Nutella center.
Try a citrus lift in summer by serving with orange-scented whipped cream or a zest sprinkle. For vegan or dairy-free versions, use plant-based butter and a vegan chocolate; expect a slightly different mouthfeel but similar satisfaction. If you want more chocolate punch, use a darker chocolate in the batter and a lighter-tasting Nutella center for balance.
How to Serve
If I am hosting, I bake the cakes in batches and time plating so each guest gets a hot center. For a small dinner party of six, bake all ramekins and serve immediately with a small scoop of vanilla ice cream and a few berries on the side. If serving a larger group, keep baked cakes on a warming tray for a few minutes and then invert right before serving to preserve the lava effect.
Presentation tweaks lift the experience: use chilled dessert plates for contrast, dust the tops with powdered sugar through a tiny sieve, and drizzle a thin stream of warmed Nutella for an extra glossy finish. Garnish with a single mint leaf or a few edible flowers for a refined look.
Storage and Reheating Tips
Leftover unbaked batter can be stored in the fridge for up to 24 hours; cover the bowl tightly and bring to room temperature before baking. The frozen Nutella centers keep well in a sealed container for up to a month, making them a handy make-ahead component.
Fully baked cakes are best eaten the same day, but you can refrigerate them for up to 2 days. To reheat, warm in a 325°F oven for 5–6 minutes so the center loosens slightly but does not fully set. Microwaving risks overcooking the edges and should be used only for small quick warms.
Common Pitfalls and How to Dodge Them
Overbaking is the most frequent mistake; watch the 11–13 minute window and look for set edges with a gently jiggling center. If the cakes feel firm in the center, they are likely overbaked and will lose their lava texture.
Skipping the freeze step for the Nutella centers can lead to too-thin filling. Freeze the centers until rock-solid so they stay intact during baking and create a molten reveal when inverted.
Final Thoughts
I hope this Nutella Lava Cake Recipe becomes one of your favorites for quick celebrations and cozy nights in. It rewards small care with a dramatic result, and once you master the timing it is wonderfully reliable. Try it, share it, and savor that first warm, glossy spoonful.
Frequently Asked Questions.
- What if I do not have a ramekin of the exact size? You can use slightly larger or smaller ramekins, but adjust the bake time by a minute or two and aim for gently jiggly centers.
- Can I make the Nutella centers ahead of time? Yes, freeze them on a parchment-lined tray for at least 30 minutes and store in an airtight container for up to a month.
- How do I know the cakes are done? The edges should be set and the top slightly matte while the center still jiggles gently when you nudge the ramekin.
- Can I substitute the chocolate with milk chocolate? You can, but the cake will be sweeter and less intensely chocolatey; consider reducing sugar slightly.
- Is there a dairy-free option? Yes, use a vegan butter and dairy-free chocolate; results will be slightly different but delicious.

Nutella Lava Cake Recipe
Make Nutella Lava Cake Recipe for molten, indulgent desserts in about an hour—serve warm for maximum wow.
Ingredients
Instructions
Step 1: Prepare the Nutella lava centers
Spoon the reserved chilled Nutella into six equal generous tablespoon mounds on a small parchment-lined plate or tray, press them into compact rounds and freeze until rock-solid (at least 30–45 minutes). Work cleanly and quickly so the Nutella retains a smooth, glossy surface before freezing — these frozen cores are the molten heart of the cakes and should read dense, satiny and well-defined when removed from the freezer.
Step 2: Preheat and ready the ramekins
While the Nutella centers firm up, preheat the oven to 425°F (220°C) and place a sturdy rimmed baking sheet inside to heat. Thoroughly butter six 6-ounce ramekins, dust the insides with unsweetened cocoa and tap out the excess so each cavity is evenly coated. Arrange the prepared ramekins on the hot or warming sheet (or on the counter if still heating), bottoms and sides gleaming with a thin cocoa veil — this creates a satin, nonstick cradle for the batter to climb and set with a clean edge.
Step 3: Melt chocolate and marry with Nutella
Gently melt the butter and finely chopped bittersweet chocolate together in a medium heatproof bowl set over barely simmering water (or in short microwave bursts), stirring until the mixture is fully smooth and glossy; remove from heat and let it cool until just warm. Whisk in the room-temperature Nutella until the entire mixture becomes seamless, velvety and slightly viscous — a deep, reflective chocolate ribbon that reads molten but stable. Keep this heatproof bowl handy; it will be the same vessel used to combine components so the visual story remains consistent.
Step 4: Whisk eggs, sugar and flavor
In a large mixing bowl whisk the whole eggs, extra yolks, granulated sugar and salt vigorously until pale, thickened and ribboning — the mixture should look airy but glossy, falling off the whisk in wide slow ribbons. Stir in the vanilla and a touch of espresso powder so the aroma lifts the chocolate notes; the whipped eggs should feel light yet structured, promising puff and tender edges once baked. Keep a clean whisk resting across the bowl rim to show active tool continuity.
Step 5: Combine and fold to create the batter
Slowly stream the warm chocolate–Nutella into the whipped eggs while whisking steadily to temper and create a unified emulsion. Sift the flour over the glossy chocolate-egg mix and fold gently with a rubber spatula until the batter is smooth, cohesive and just homogenous — glossy, thick but pourable, with no dry streaks. Portion the batter into each prepared ramekin to about halfway; the batter should cling softly to the spoon and display a silky sheen. Keep the same heatproof bowl and a matte spatula in frame for continuity.
Step 6: Assemble, bake and rest
Work quickly: press one frozen Nutella mound into the center of every half-filled ramekin, pushing it down slightly without touching sides or bottom, then spoon the reserved batter over to fill each ramekin to roughly three-quarters. Transfer the ramekins on the preheated sheet and bake until the edges are set, tops puffed and slightly matte while centers still jiggle gently (approximately 11–13 minutes). Remove to a cooling rack, let stand 1–2 minutes so the edges firm but the core remains molten, then loosen the cake edges with a thin knife and invert each ramekin onto a dessert plate.
Step 7: Garnish and serve warm
Immediately dust each warm cake with a light shower of powdered sugar, add a few fresh berries alongside and a scoop of vanilla ice cream. Optionally drizzle gently warmed Nutella over the cake and ice cream for an extra glossy lava ribbon. Serve straight away so the interior spills molten and satiny when cut — the contrast of the matte cake exterior, satin lava flow, cool creamy ice cream and jewel-bright berries is the point of pleasure.
Notes
- Freeze Nutella centers until rock-solid to preserve the molten core.
- Use room-temperature eggs for smoother emulsions and better rise.
- Watch the oven closely between 11 and 13 minutes to avoid overbaking.
- Warm Nutella slightly before drizzling to create a glossy finish.