I still remember the first time I made the Air Fryer Garlic Bread Recipe for an impromptu movie night – the kitchen smelled like pure comfort and everyone kept coming back for more. It became my go-to when I wanted something quick, crowd-pleasing, and impossibly buttery without heating the whole house. This Air Fryer Garlic Bread Recipe makes crisp-edged, soft-centered slices that pair with soups, salads, or anything saucy. You’ll love how fast it comes together and how easy it is to tweak to your taste.
How This Recipe Became My Cozy Crowd-Pleaser
That night, the apartment was half full of mismatched chairs and half a dozen friends, and I had just one baguette left. I mashed the garlic into softened butter and tossed it on slices, not expecting much. But when the Air Fryer Garlic Bread Recipe came out, the tops were golden, the garlic perfume was alive, and people cheered like it was a small miracle. I remember the heat radiating off the platter, the way the parsley looked like tiny green stars, and the first bite – crunchy around the edges, pillowy inside, with a hit of parmesan and garlic that felt like a warm handshake. It taught me that simple ingredients done well make a gathering feel deliberate and kind, and that I could make something celebratory in under 20 minutes.
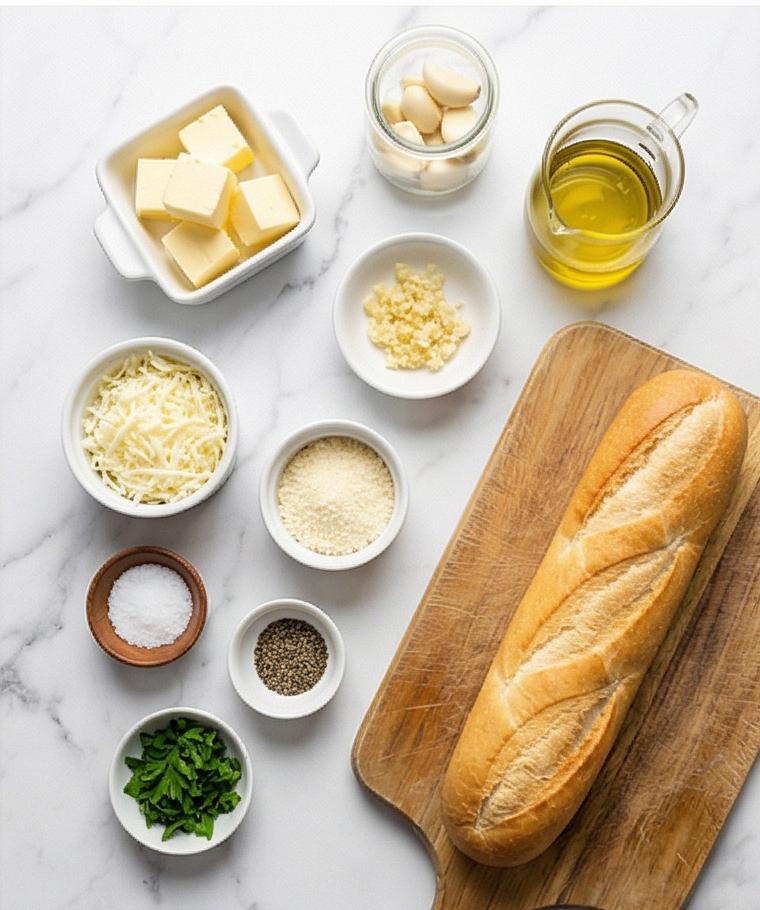
The Main Ingredients and Why They Matter
- Unsalted Butter: The backbone of the flavor and texture – use room temperature butter so it spreads easily. Substitute with vegan margarine for a dairy-free version, but watch for salt differences.
- Garlic: Freshly minced gives the brightest, most aromatic result. Garlic powder can be used in a pinch, but it lacks the fresh bite.
- Parsley: Fresh flat-leaf parsley adds color and an herbal lift; cilantro makes a more assertive twist.
- Parmesan Cheese: Adds savory depth and tiny salty granules that contrast with the butter – try Pecorino for a sharper note.
- Baguette: A crusty French or Italian loaf gives the best crisp-to-soft ratio – day-old bread actually absorbs butter beautifully.
Essential Tools for the Best Result
Start small – you don’t need a kitchen full of gadgets to make great garlic bread. Here are the tools that really matter and why.
- Air Fryer: The star for quick, even browning and super-crisp edges. If you don’t have one, a hot oven on a perforated tray is the best alternative.
- Offset Spatula or Butter Knife: For spreading the garlic-parsley butter evenly into the bread’s nooks. A small spoon works in a pinch.
- Microplane or Fine Grater: For finely grating Parmesan so it melds into the butter – pre-grated cheese won’t integrate as smoothly.
- Tongs: For safely moving hot slices without puncturing them – use a spatula if you lack tongs.
- Small Mixing Bowl: To whip the butter and herbs into a spreadable consistency – any bowl will do.
These simple tools keep the process clean and fast, and you can usually improvise without losing the result.
Step-by-Step Preparation Guide
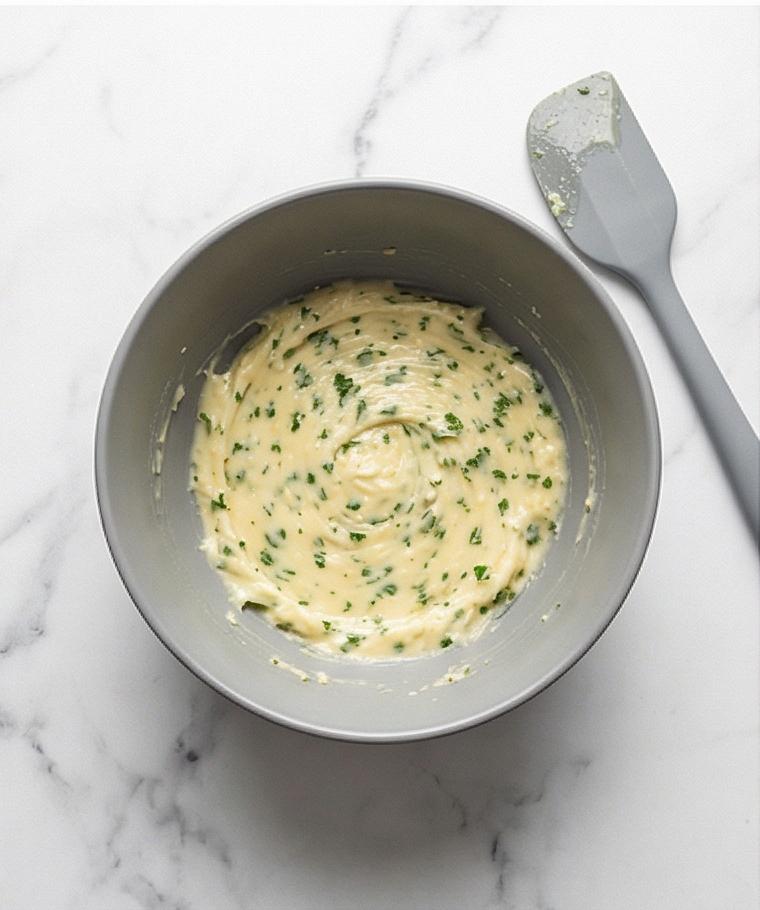
Step 1: Make the garlic-parsley butter
Soften the butter until it is spreadable but not melted, then finely mince or press the garlic and finely chop the parsley. In a medium matte grey ceramic bowl combine the softened butter with the minced garlic, grated Parmesan, chopped parsley, a pinch of fine sea salt, freshly ground black pepper, and the red pepper flakes if you like a little heat. Mash and fold with a small offset spatula until the mixture is utterly smooth, creamy, and homogeneous – no streaks of plain butter – the surface should look satiny with little green flecks and tiny cheese granules. Taste and adjust seasoning gently.
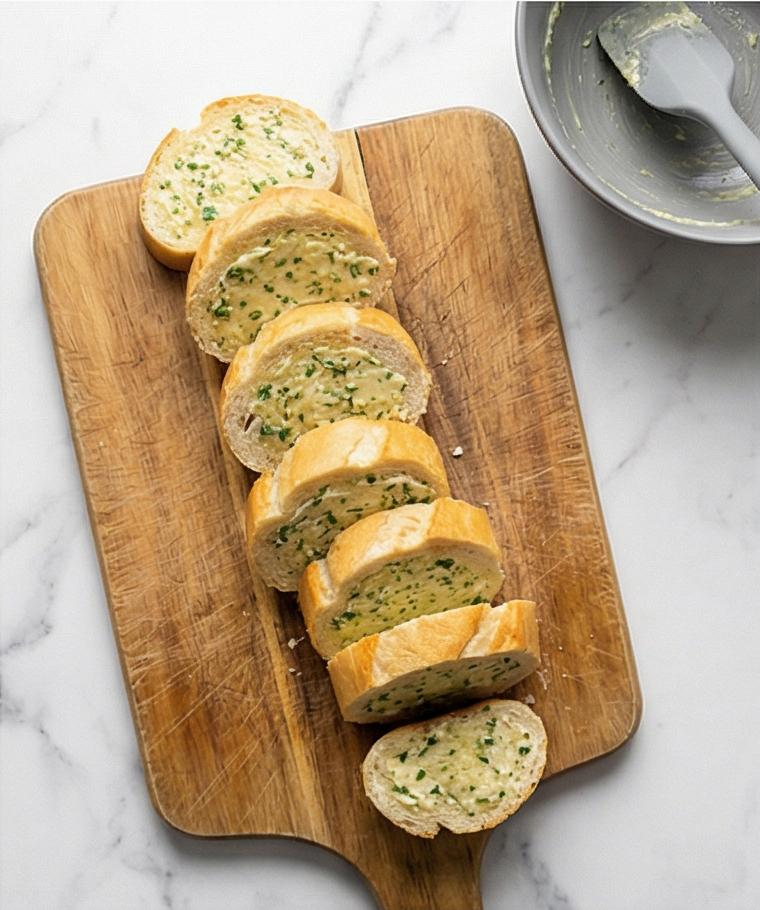
Step 2: Slice the loaf and spread the butter
Slice the baguette on a slight diagonal into roughly 3/4-inch (2 cm) pieces and arrange them in a single layer on a wooden cutting board. Using the same offset spatula, spread a generous, even layer of the garlic-parsley butter across the cut side of each slice, covering edge-to-edge so each piece has a glossy, buttery face; you should see the soft, whipped texture of the butter pressed into the porous crumb and tiny parsley flecks embedded in the surface. Keep the mixing bowl and spatula nearby – utensil persistence keeps the scene natural and readable.
Step 3: Optional cheese finish and assembly for cooking
If you want cheesy garlic bread, sprinkle a thin, even layer of shredded low-moisture mozzarella atop the buttered slices, pressing the shreds very lightly into the butter so they cling. Reserve a small handful of extra cheese in a little white ramekin to add later for extra browning. Lightly brush a perforated stainless tray with olive oil (or rub a little oil on its surface) and arrange the slices buttered-side-up in a single layer with a little space between each slice for air circulation; keep the mixing bowl and spatula visible at the edge for continuity. The assembled, cheese-topped slices should read as poised: butter glossy, cheese dry and structured, crumbs clean.

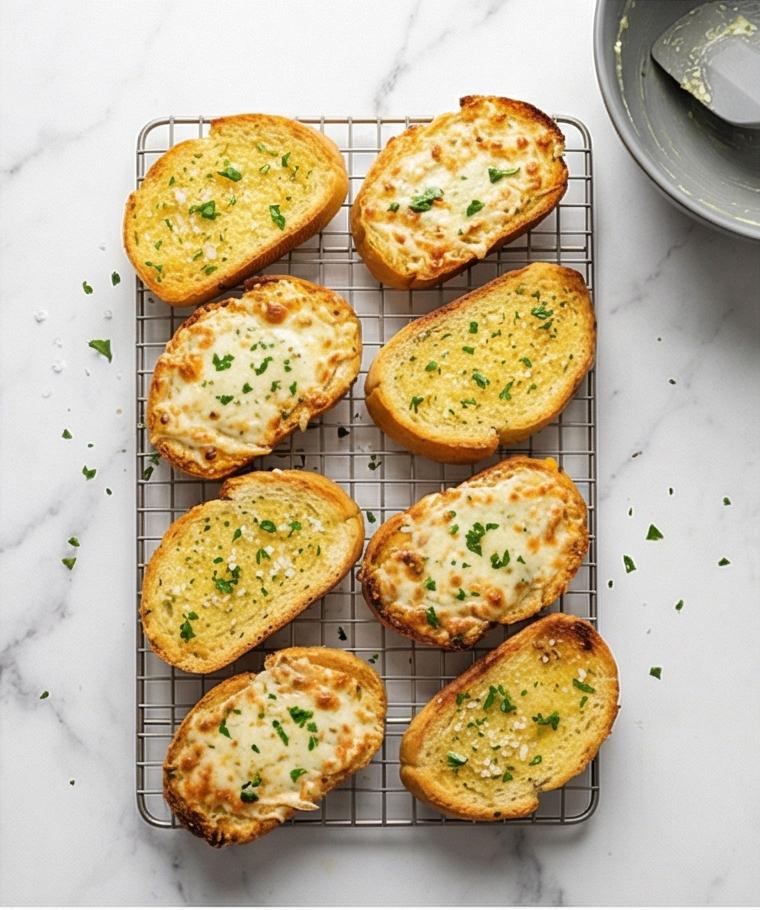
Step 4: Cooked transformation and resting
After a short hot-air cook the bread will transform: the butter will be fully melted into the crumb, the tops will show light golden spots, and the edges become crisp and slightly deeper in color. If cheesed, the mozzarella softens and then becomes bubbly with lightly bronzed edges. Transfer the hot slices with tongs to a wire cooling rack set on the marble so the bottoms stay crisp; sprinkle immediately with the reserved chopped parsley and a pinch of flaky sea salt to finish. The slices should glisten with melted butter and show contrast between crisp crust, soft interior, and molten cheese where present.
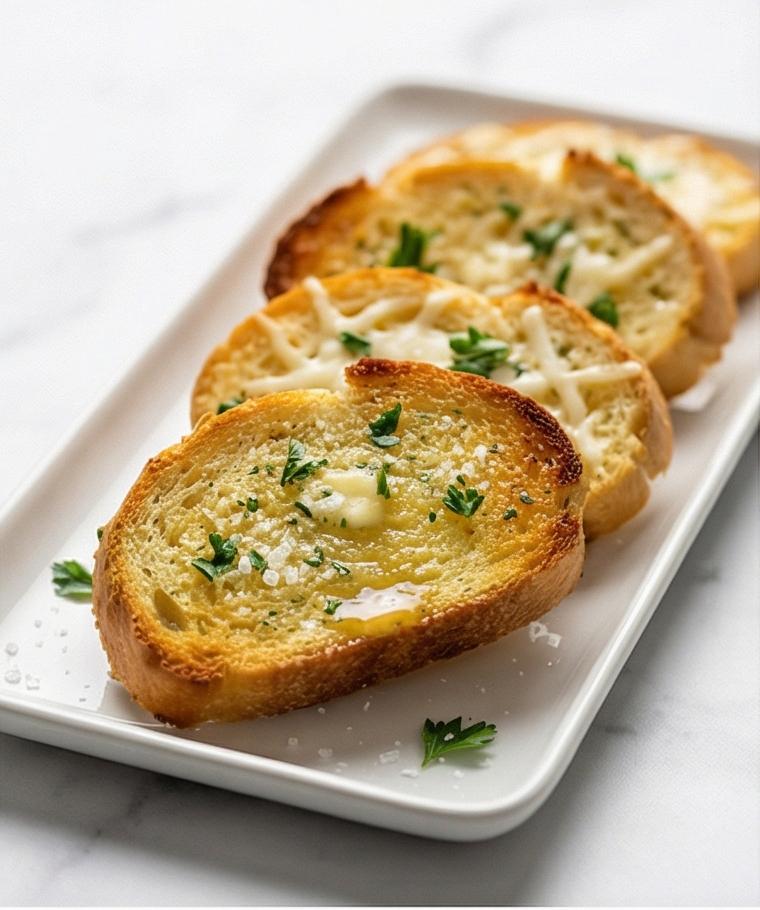
Step 5: Plate and serve warm
Arrange the slices on a long rectangular matte white ceramic platter for serving, slightly overlapping for a composed, appetizing stack. Garnish with the remaining chopped parsley and a few visible flakes of sea salt; if cheesy, show gentle strings of melted mozzarella and tiny browned bubbles at the edges. Serve immediately while warm – the texture story is clear: crisp, golden edges; glossy, fragrant butter pockets; delicate parmesan granularity; and bright herb flecks.
Making It Your Own
I like to play with this Air Fryer Garlic Bread Recipe depending on the season and what’s in my pantry. For a herby summer twist I add a teaspoon of lemon zest to the butter and swap half the parsley for basil – it brightens the butter and pairs beautifully with fresh tomatoes. For a smoky winter version, stir a pinch of smoked paprika into the butter and swap mozzarella for a sharp aged cheddar for a fuller, rustic flavor. If you need a vegan option, use plant-based butter and omit the Parmesan or replace it with nutritional yeast for that savory umami lift. Small tweaks like crushed red pepper, olives, or roasted garlic heads can make the recipe feel entirely new.
How to Serve
If I’m hosting, the Air Fryer Garlic Bread Recipe is my opening act. For a small dinner, arrange 8 to 10 slices on a long platter, garnish with extra parsley, and place a small bowl of marinara for dipping. For a buffet or party, keep several batches warm in a low oven on a wire rack over a sheet pan and replenish the platter as guests graze. To stretch servings, cut thinner slices and serve alongside a bold soup or a meaty pasta – the bread becomes a great vehicle for sauces. For kids, skip the red pepper flakes and keep the cheese plain; for adults, serve with a sprinkle of flaky sea salt and a glass of crisp white wine.
Storage and Reheating Tips
Leftover garlic bread stores well for a day or two at room temperature in a paper bag so the crust stays crisp. For longer storage, wrap cooled slices in foil and refrigerate up to 3 days or freeze for up to 1 month.
To reheat refrigerated slices, place them in a 350 F oven or in the air fryer for a few minutes until warmed through and crisped. For frozen slices, thaw briefly at room temperature then re-crisp in the air fryer – the result is often better than microwave reheating.
Common Mistakes and How to Avoid Them
Soggy bottoms happen when slices are overcrowded or the butter is too runny – give each piece room for air to circulate and use softened but not melted butter. If your bread browns too quickly, lower the air fryer temperature by 10 to 20 degrees and give it a little more time.
Another slip is under-seasoning the butter. Taste before spreading and remember that stale bread benefits from a touch more salt or a sprinkle of Parmesan. Finally, avoid pre-shredded cheese labeled as anti-caking – it can repel butter and not melt as smoothly.
Final Thoughts
Give the Air Fryer Garlic Bread Recipe a try tonight – it’s fast, forgiving, and always feels a little special. Whether you make the classic version or try a twist, it’s a tiny kitchen victory that brings people together.
Frequently Asked Questions
- Q: How long should I cook garlic bread in an air fryer and at what temperature?
A: Cook at 370 F for about 4 to 6 minutes, checking at 3 minutes to prevent over-browning. Times vary by air fryer model. - Q: Can I use frozen bread for this Air Fryer Garlic Bread Recipe?
A: Yes, you can – thaw slightly so the butter spreads, then air-fry a little longer until crisped and warmed. - Q: What can I use instead of Parmesan in this recipe?
A: Pecorino or grated Asiago make great substitutes; for vegan options, use nutritional yeast or a plant-based hard cheese. - Q: How do I make this recipe dairy-free?
A: Use a plant-based butter and swap the Parmesan for nutritional yeast; the texture will be slightly different but still delicious. - Q: Why did my garlic taste bitter?
A: Garlic can become bitter if overworked or if you use too much raw garlic for the quantity of butter – mince finely and taste as you go.
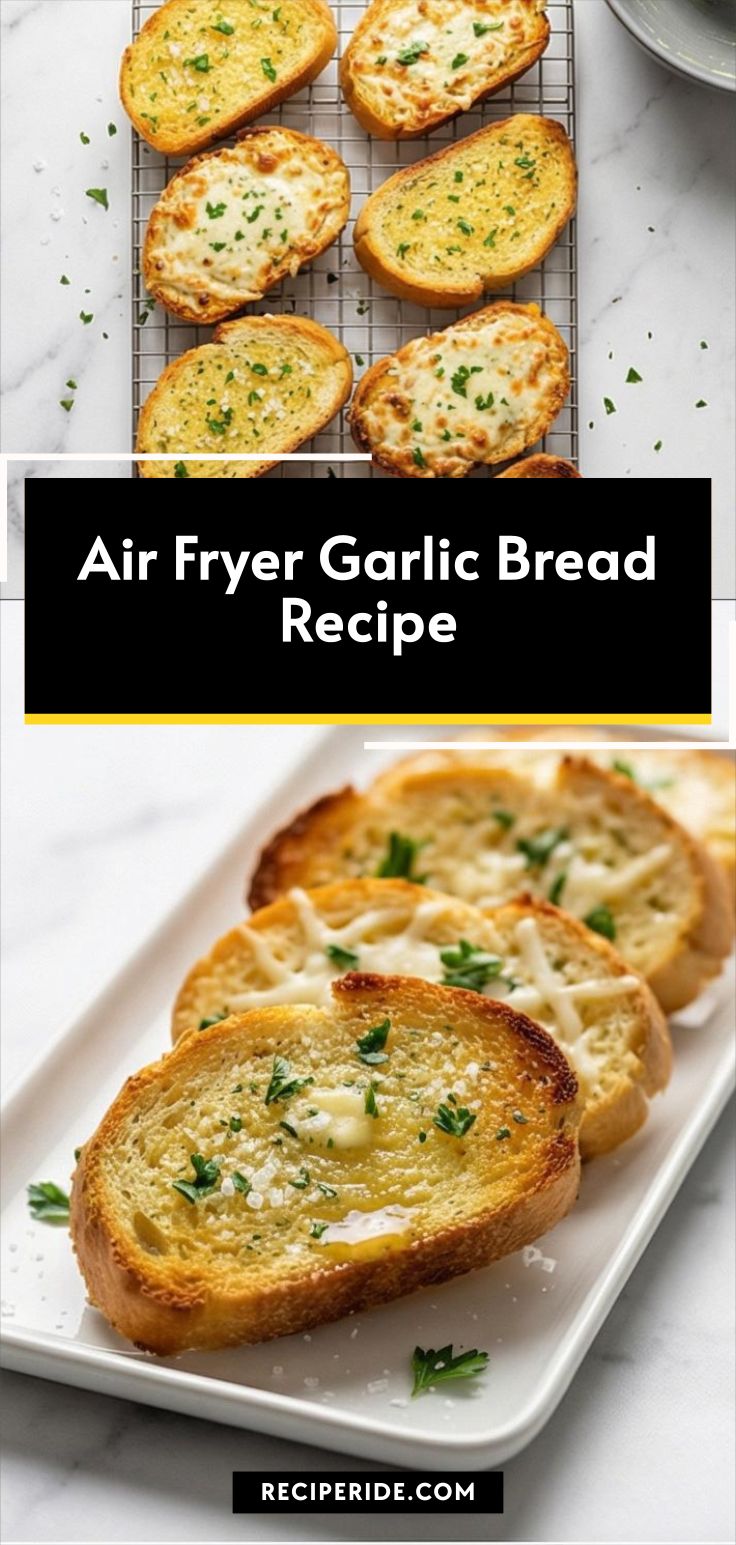
Air Fryer Garlic Bread Recipe
Make Air Fryer Garlic Bread Recipe now: crisp, buttery garlic bread in minutes with simple ingredients - Air Fryer Garlic Bread Recipe.
Ingredients
Instructions
Step 1: Make the garlic-parsley butter
Soften the butter until it is spreadable but not melted, then finely mince or press the garlic and finely chop the parsley. In a medium matte grey ceramic bowl combine the softened butter with the minced garlic, grated Parmesan, chopped parsley, a pinch of fine sea salt, freshly ground black pepper, and the red pepper flakes if you like a little heat. Mash and fold with a small offset spatula until the mixture is utterly smooth, creamy, and homogeneous — no streaks of plain butter — the surface should look satiny with little green flecks and tiny cheese granules. Taste and adjust seasoning gently.
Step 2: Slice the loaf and spread the butter
Slice the baguette on a slight diagonal into roughly 3/4-inch (2 cm) pieces and arrange them in a single layer on a wooden cutting board. Using the same offset spatula, spread a generous, even layer of the garlic-parsley butter across the cut side of each slice, covering edge-to-edge so each piece has a glossy, buttery face; you should see the soft, whipped texture of the butter pressed into the porous crumb and tiny parsley flecks embedded in the surface. Keep the mixing bowl and spatula nearby — utensil persistence keeps the scene natural and readable.
Step 3: Optional cheese finish and assembly for cooking
If you want cheesy garlic bread, sprinkle a thin, even layer of shredded low-moisture mozzarella atop the buttered slices, pressing the shreds very lightly into the butter so they cling. Reserve a small handful of extra cheese in a little white ramekin to add later for extra browning. Lightly brush a perforated stainless tray with olive oil (or rub a little oil on its surface) and arrange the slices buttered-side-up in a single layer with a little space between each slice for air circulation; keep the mixing bowl and spatula visible at the edge for continuity. The assembled, cheese-topped slices should read as poised: butter glossy, cheese dry and structured, crumbs clean.
Step 4: Cooked transformation and resting
After a short hot-air cook the bread will transform: the butter will be fully melted into the crumb, the tops will show light golden spots, and the edges become crisp and slightly deeper in color. If cheesed, the mozzarella softens and then becomes bubbly with lightly bronzed edges. Transfer the hot slices with tongs to a wire cooling rack set on the marble so the bottoms stay crisp; sprinkle immediately with the reserved chopped parsley and a pinch of flaky sea salt to finish. The slices should glisten with melted butter and show contrast between crisp crust, soft interior, and molten cheese where present.
Step 5: Plate and serve warm
Arrange the slices on a long rectangular matte white ceramic platter for serving, slightly overlapping for a composed, appetizing stack. Garnish with the remaining chopped parsley and a few visible flakes of sea salt; if cheesy, show gentle strings of melted mozzarella and tiny browned bubbles at the edges. Serve immediately while warm — the texture story is clear: crisp, golden edges; glossy, fragrant butter pockets; delicate parmesan granularity; and bright herb flecks.
Notes
- Use room-temperature butter so it spreads smoothly without melting into the bread before cooking.
- If you prefer a milder garlic flavor, roast the cloves first and mash them into the butter.
- To keep slices crisp for serving, reheat briefly in the air fryer or oven rather than the microwave.