Za’atar Flatbread Recipe has become one of my go-to weekend bakes, a simple dough that yields gloriously aromatic, blistered flatbreads. I love how the za’atar paste perfumes the kitchen the moment it hits the hot surface, and how a few fresh accents transform it into a show-stopping snack or light meal. I first made this Za’atar Flatbread Recipe on a quiet Saturday and it immediately felt like something worth repeating and sharing. If you like bold, herby flavors and crisp-edged bread, this recipe will become a fast favorite.
How This Recipe Became My Rainy-Day Favorite
One rainy afternoon I made this Za’atar Flatbread Recipe with a distracted mind and ended up discovering the best part of the process: the slow, fragrant proofing. I remember peeking through the oven light as the dough bloomed into soft pillows, the scent of olive oil and za’atar warming the whole kitchen. When the first flatbread came out, puffed at the edges and flecked with sesame, I felt a little proud and a lot comforted. Tearing a warm wedge, I scooped chilled labneh on top and the contrast of hot, salty, herby bread with cool cream made the rain feel oddly celebratory. It is a recipe that holds memories of quiet afternoons and friends gathered around a simple, satisfying table.
Main Ingredients and Why They Matter
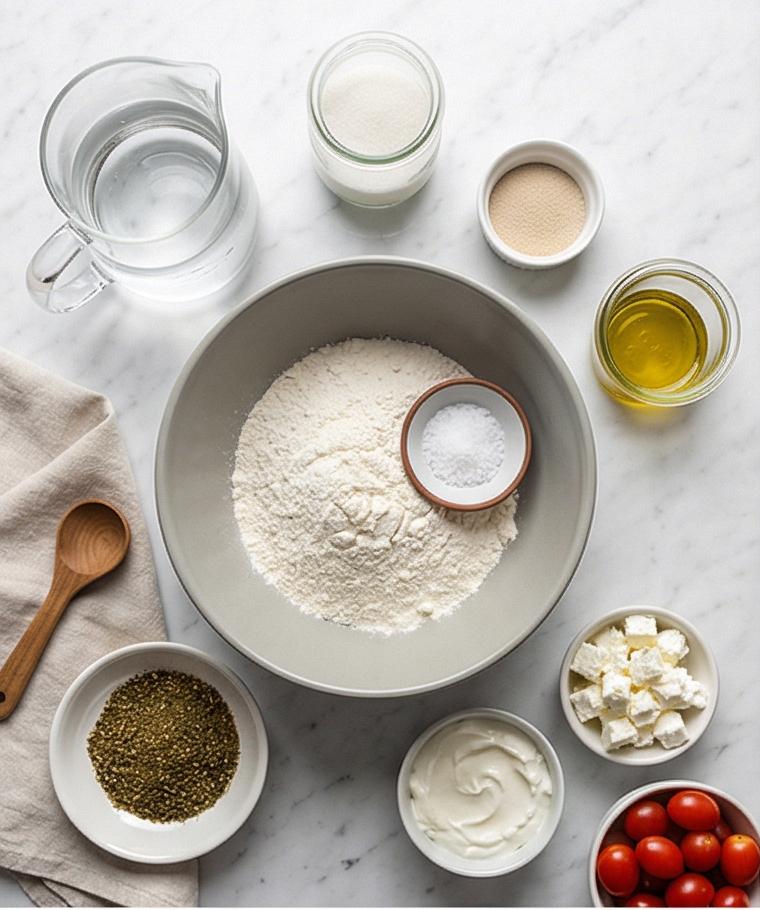
- Warm Water: Activates the yeast and sets the dough temperature. Use filtered water at 105-110°F for best results; if unavailable, warm tap water is fine.
- Granulated Sugar: Feeds the yeast for a reliable bloom. Honey or maple syrup can work in a pinch.
- Active Dry Yeast: The leavening agent that gives lift and airiness. Instant yeast can replace it but reduce proofing time slightly.
- All-Purpose Flour: The structure of the flatbread. Bread flour gives more chew, while a portion whole wheat will add nuttiness.
- Extra-Virgin Olive Oil: Adds richness and keeps the crumb tender; a neutral oil can be used but will lose olive flavor.
- Za’atar Spice Blend: The star flavor; if homemade, adjust sumac and salt to taste. Store in a cool place.
- Labneh/Greek Yogurt, Feta, Tomatoes, Herbs, Lemon: Optional finishing accents that add creaminess, tang, and freshness.
Essential Kitchen Tools and Why They Help
A few simple tools take this Za’atar Flatbread Recipe from good to great. Each one makes a specific step easier and more reliable, but none are strict requirements.
- Mixing Bowl: For combining and proofing the dough; any large bowl will do.
- Wooden Spoon or Bench Scraper: Helps mix and handle the dough cleanly; a spoon works if you do not have a scraper.
- Baking Stone or Heavy Baking Sheet: Gives the intense bottom heat for quick oven rise; an upside-down heavy sheet is an effective substitute.
- Rolling Pin and Parchment: For shaping and transferring the flatbreads easily; hand-stretching is fine if you prefer.
- Oven Mitts and Cooling Rack: Protect hands and let flatbreads rest so the crumb sets properly.
These tools make the process smoother and protect the delicate texture you want in the finished flatbread.
Step-by-Step Preparation Guide
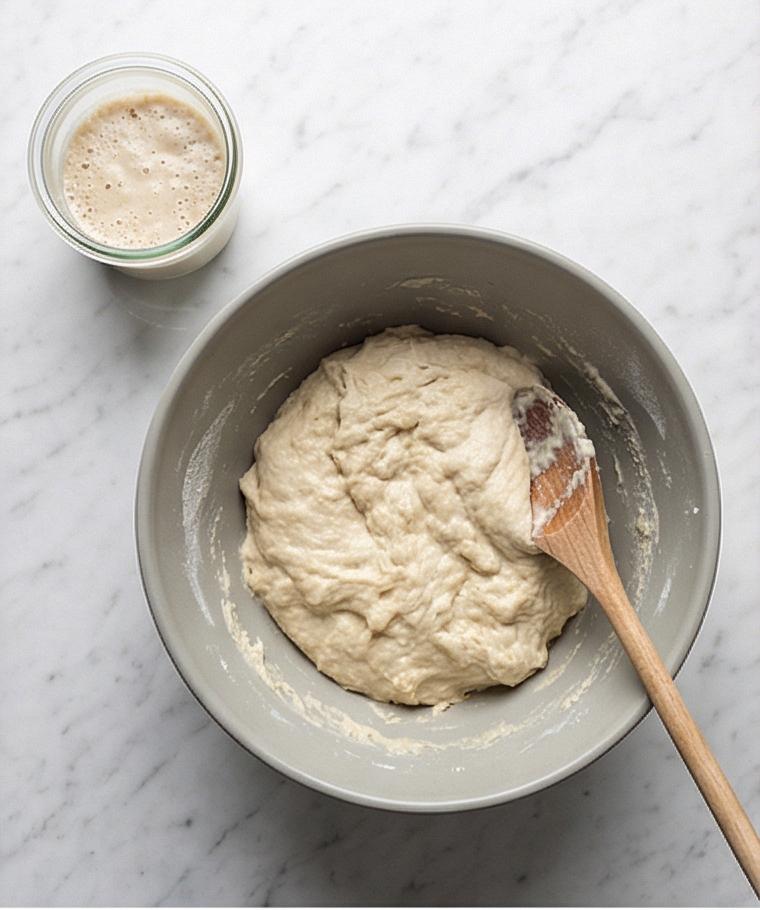
Step 1: Bloom the Yeast and Combine the Wet
Warm the water to a gentle 105–110°F and stir in the granulated sugar, then sprinkle the active dry yeast over the surface. After a brief stir, let it sit until the surface becomes distinctly foamy and bubbly — that airy, ephemeral foam is your signal that the yeast is alive and ready. In a separate large mixing bowl whisk the all-purpose flour with the fine sea salt, make a well, and pour the foamy yeast mixture with the olive oil into the center. Using a wooden spoon or your fingertips, mix from the center outward until a shaggy mass forms and most of the flour is incorporated; this rough dough will look uneven, slightly dry in places, but clearly coming together.
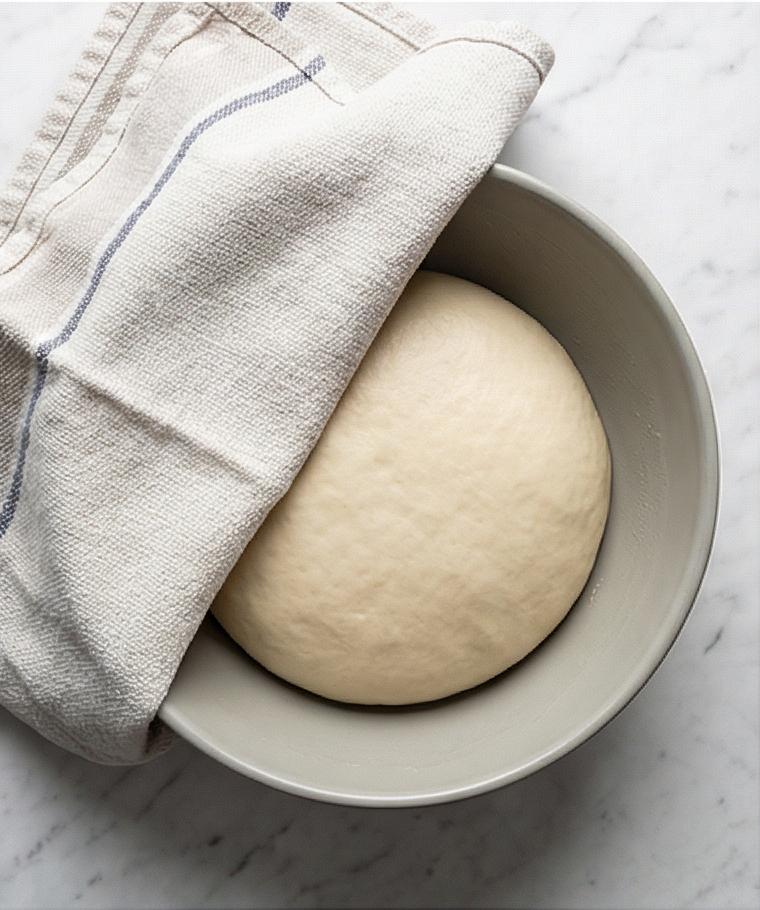
Step 2: Knead to a Smooth, Elastic Dough and Proof
Turn the shaggy dough out onto a lightly floured surface and knead by hand for 8–10 minutes until it transforms into a smooth, elastic ball that is slightly tacky but not sticky. Keep flour usage minimal — just a light dusting to prevent sticking — so the crumb stays tender and airy. Lightly oil a clean bowl, shape the dough into a tight smooth ball, place it inside and turn to coat. Cover snugly with plastic wrap or a damp towel and set in a warm, draft-free spot to rise for about 60–75 minutes, until noticeably doubled, pillowy, and springy when gently pressed.
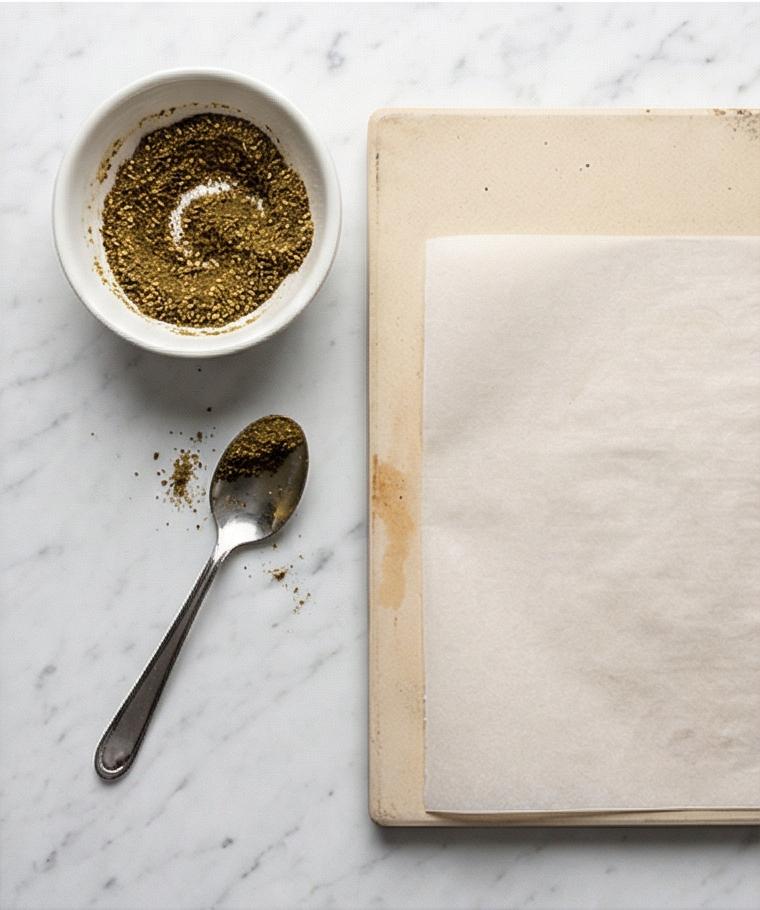
Step 3: Prepare the Za’atar Topping and Heat Setup
While the dough proofs, whisk the za’atar, olive oil and a pinch of fine sea salt in a small bowl until a cohesive, spreadable paste forms — glossy flecks of green and sesame suspended in olive oil, the texture like loose pesto. If needed, add a tablespoon of room-temperature water to loosen it to a spreadable consistency. About 20 minutes before baking, move a heavy upside-down baking sheet or baking stone to the center of the oven and allow it to preheat thoroughly so it will give the flatbreads an immediate blast of heat when transferred.
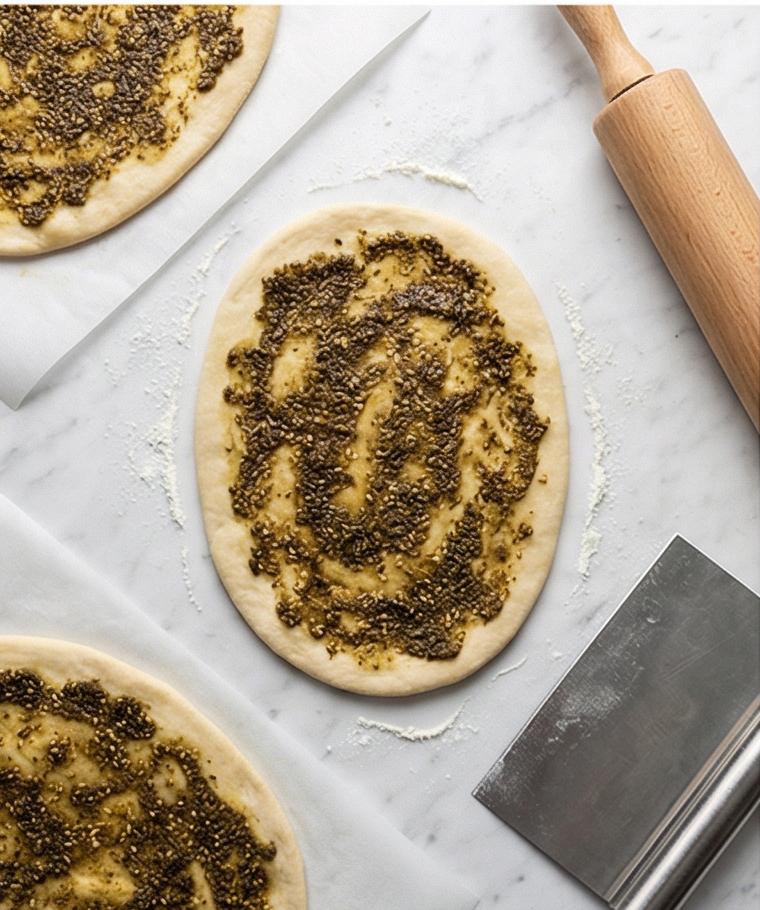
Step 4: Divide, Rest, Roll and Top
Gently deflate the risen dough, shape into a rough log and divide into equal pieces depending on your desired size. Lightly shape each piece into a tight ball, cover and rest 10–15 minutes so the gluten relaxes, then roll each on a lightly floured parchment into 7–8 inch ovals about 1/4 inch thick. Spread a generous, even layer of the za’atar paste to the edge, using the back of a spoon to push it almost to the rim without spilling. The dough should look thin, slightly dimpled, and saturated with a fragrant, herb-flecked oil.
Step 5: Bake Until Puffy, Golden and Sizzling
Slide each parchment-mounted flatbread onto the hot stone or sheet and bake at high heat until the edges puff and show light golden browning and the topping is sizzling but not charred. Each flatbread will come out with crisp, blistered edges, an airy interior, and a glossy, herb-studded surface with tiny oil pools glinting. Transfer to a rack to rest 3–5 minutes so the crumb sets and the topping settles; repeat until all pieces are baked.
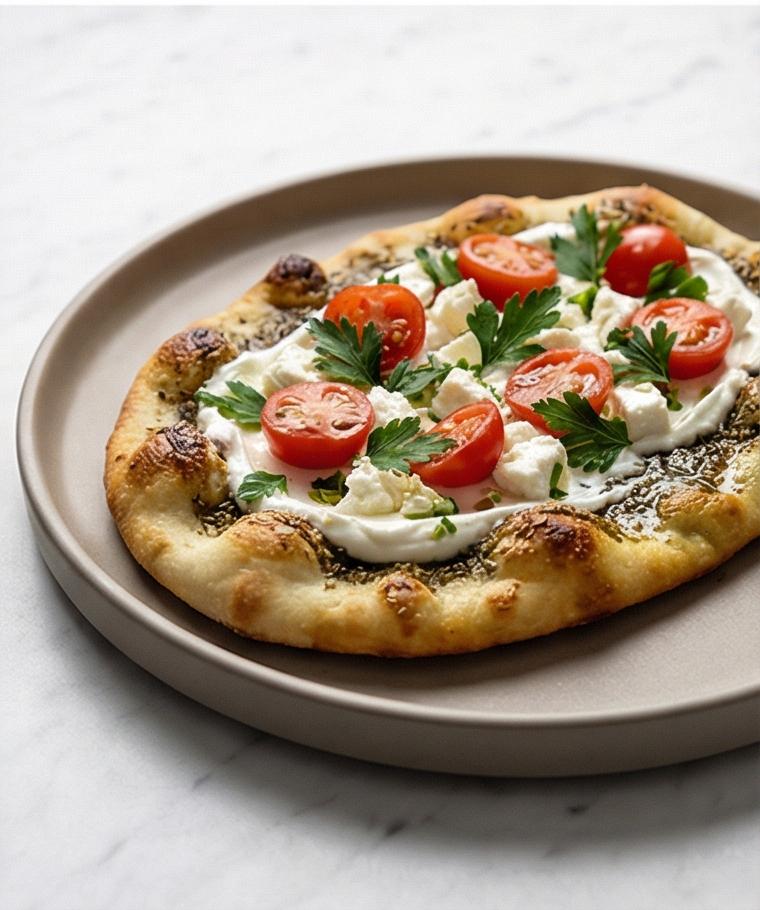
Step 6: Finish and Serve Warm with Fresh Accents
If you like, dollop chilled labneh or thick Greek yogurt across each warm flatbread, scatter crumbled feta, halved cherry tomatoes and roughly chopped parsley or mint, and finish with a light squeeze of lemon. Serve warm or at room temperature, cut into wedges. The finished flatbread should read as crisp-edged yet pillowy-centered, the za’atar paste imparting an aromatic, savory sheen that contrasts with cool creamy dollops when used.
Making It Your Own
I like to experiment with this Za’atar Flatbread Recipe by swapping finishes and adjusting textures. For a dairy-free version I skip labneh and use smashed avocado with lemon and flaky salt as a creamy topper. In cooler months I fold a tablespoon of roasted garlic into the za’atar oil for a deeper flavor; in summer I scatter ripe halved tomatoes and fresh mint. For a heartier loaf, try half bread flour for more chew and a little extra olive oil for softness. Each small change feels like a new recipe while keeping the same comforting base.
How to Serve
If you are hosting, bake the flatbreads in batches and keep finished pieces warm wrapped in a clean towel on a cooling rack over a sheet pan. Serve on a large platter with bowls of chilled labneh, crumbled feta, halved cherry tomatoes, lemon wedges, and herbs so guests can top their own slices. For a casual gathering, cut into wedges and arrange overlapping on a board with pickles and olives. For a more formal dinner, pair each wedge with a small salad and a drizzle of extra virgin olive oil just before serving. Scale the dough up or down easily to feed a crowd.
Storage and Reheating Tips
Store leftover flatbreads in an airtight container or wrapped in foil at room temperature for up to 2 days. If you refrigerated them, bring them to room temperature before reheating to avoid a tough crumb.
To reheat, warm a skillet over medium-high heat and flash each flatbread 30-60 seconds per side until crisp and warmed through, or reheat in a 350°F oven for 5-8 minutes. For best texture, avoid the microwave unless you plan to finish in a skillet to restore crisp edges.
Common Mistakes and How to Avoid Them
Underproofing the dough yields dense flatbreads; be patient and wait until the dough is noticeably doubled and springy. If your kitchen is cool, proof in a warm oven with the light on or near a warm appliance.
Overloading with topping can make the flatbread soggy and prevent blistering; spread the za’atar paste thinly and evenly. Use a hot preheated stone or inverted sheet to get that immediate oven spring.
Final Thoughts
Give this Za’atar Flatbread Recipe a try the next time you want something hands-on and rewarding. It is forgiving, full of flavor, and perfect for sharing. Tweak the toppings, make a few variations, and enjoy the simple pleasure of warm, herby bread right out of the oven.
Frequently Asked Questions
- What is the best way to store leftover flatbread? Answer: Keep leftovers wrapped in foil or in an airtight container at room temperature for up to 48 hours; reheat in a skillet or oven for best texture.
- Can I use instant yeast instead of active dry yeast? Answer: Yes, you can substitute instant yeast; mix it with the flour and reduce the bloom time slightly since it activates faster.
- How can I make the topping less oily? Answer: Reduce the olive oil in the za’atar mixture by a tablespoon and whisk in a splash of water to reach a spreadable paste.
- Is it possible to make the dough ahead of time? Answer: Yes, refrigerate the shaped dough for up to 24 hours for slow fermentation; bring to room temperature before rolling and baking.
- Can I bake these on a grill? Answer: Yes, a very hot grill with a preheated pizza stone or heavy sheet works well; watch closely as they will blister quickly.
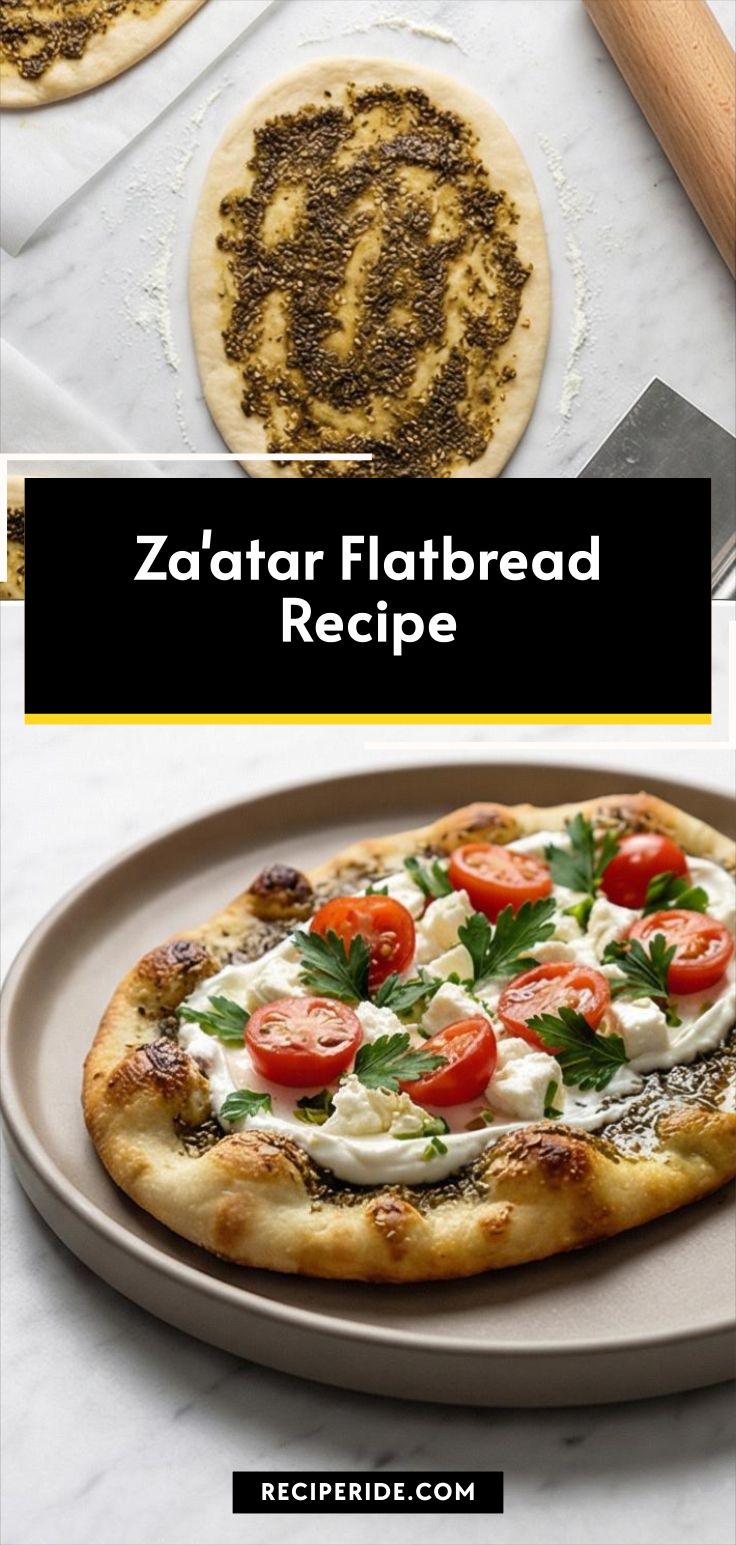
Za'atar Flatbread Recipe
Make Za'atar Flatbread Recipe: crisp, herb-studded flatbreads ready to bake and share.
Ingredients
Instructions
Step 1: Bloom the Yeast and Combine the Wet
Warm the water to a gentle 105–110°F and stir in the granulated sugar, then sprinkle the active dry yeast over the surface. After a brief stir, let it sit until the surface becomes distinctly foamy and bubbly — that airy, ephemeral foam is your signal that the yeast is alive and ready. In a separate large mixing bowl whisk the all-purpose flour with the fine sea salt, make a well, and pour the foamy yeast mixture with the olive oil into the center. Using a wooden spoon or your fingertips, mix from the center outward until a shaggy mass forms and most of the flour is incorporated; this rough dough will look uneven, slightly dry in places, but clearly coming together.
Step 2: Knead to a Smooth, Elastic Dough and Proof
Turn the shaggy dough out onto a lightly floured surface and knead by hand for 8–10 minutes until it transforms into a smooth, elastic ball that is slightly tacky but not sticky. Keep flour usage minimal — just a light dusting to prevent sticking — so the crumb stays tender and airy. Lightly oil a clean bowl, shape the dough into a tight smooth ball, place it inside and turn to coat. Cover snugly with plastic wrap or a damp towel and set in a warm, draft-free spot to rise for about 60–75 minutes, until noticeably doubled, pillowy, and springy when gently pressed.
Step 3: Prepare the Za'atar Topping and Heat Setup
While the dough proofs, whisk the za'atar, olive oil and a pinch of fine sea salt in a small bowl until a cohesive, spreadable paste forms — glossy flecks of green and sesame suspended in olive oil, the texture like loose pesto. If needed, add a tablespoon of room-temperature water to loosen it to a spreadable consistency. About 20 minutes before baking, move a heavy upside-down baking sheet or baking stone to the center of the oven and allow it to preheat thoroughly so it will give the flatbreads an immediate blast of heat when transferred.
Step 4: Divide, Rest, Roll and Top
Gently deflate the risen dough, shape into a rough log and divide into equal pieces depending on your desired size. Lightly shape each piece into a tight ball, cover and rest 10–15 minutes so the gluten relaxes, then roll each on a lightly floured parchment into 7–8 inch ovals about 1/4 inch thick. Spread a generous, even layer of the za'atar paste to the edge, using the back of a spoon to push it almost to the rim without spilling. The dough should look thin, slightly dimpled, and saturated with a fragrant, herb-flecked oil.
Step 5: Bake Until Puffy, Golden and Sizzling
Slide each parchment-mounted flatbread onto the hot stone or sheet and bake at high heat until the edges puff and show light golden browning and the topping is sizzling but not charred. Each flatbread will come out with crisp, blistered edges, an airy interior, and a glossy, herb-studded surface with tiny oil pools glinting. Transfer to a rack to rest 3–5 minutes so the crumb sets and the topping settles; repeat until all pieces are baked.
Step 6: Finish and Serve Warm with Fresh Accents
If you like, dollop chilled labneh or thick Greek yogurt across each warm flatbread, scatter crumbled feta, halved cherry tomatoes and roughly chopped parsley or mint, and finish with a light squeeze of lemon. Serve warm or at room temperature, cut into wedges. The finished flatbread should read as crisp-edged yet pillowy-centered, the za'atar paste imparting an aromatic, savory sheen that contrasts with cool creamy dollops when used.
Notes
- Use a preheated baking stone or inverted heavy sheet for best oven spring.
- Keep extra flour minimal while kneading to maintain a tender crumb.
- Adjust za'atar and salt to taste; store spice blend in a cool place.
- For dairy-free toppings, use smashed avocado or a lemony tahini drizzle.
- Refrigerate shaped dough up to 24 hours for deeper flavor and easier scheduling.

