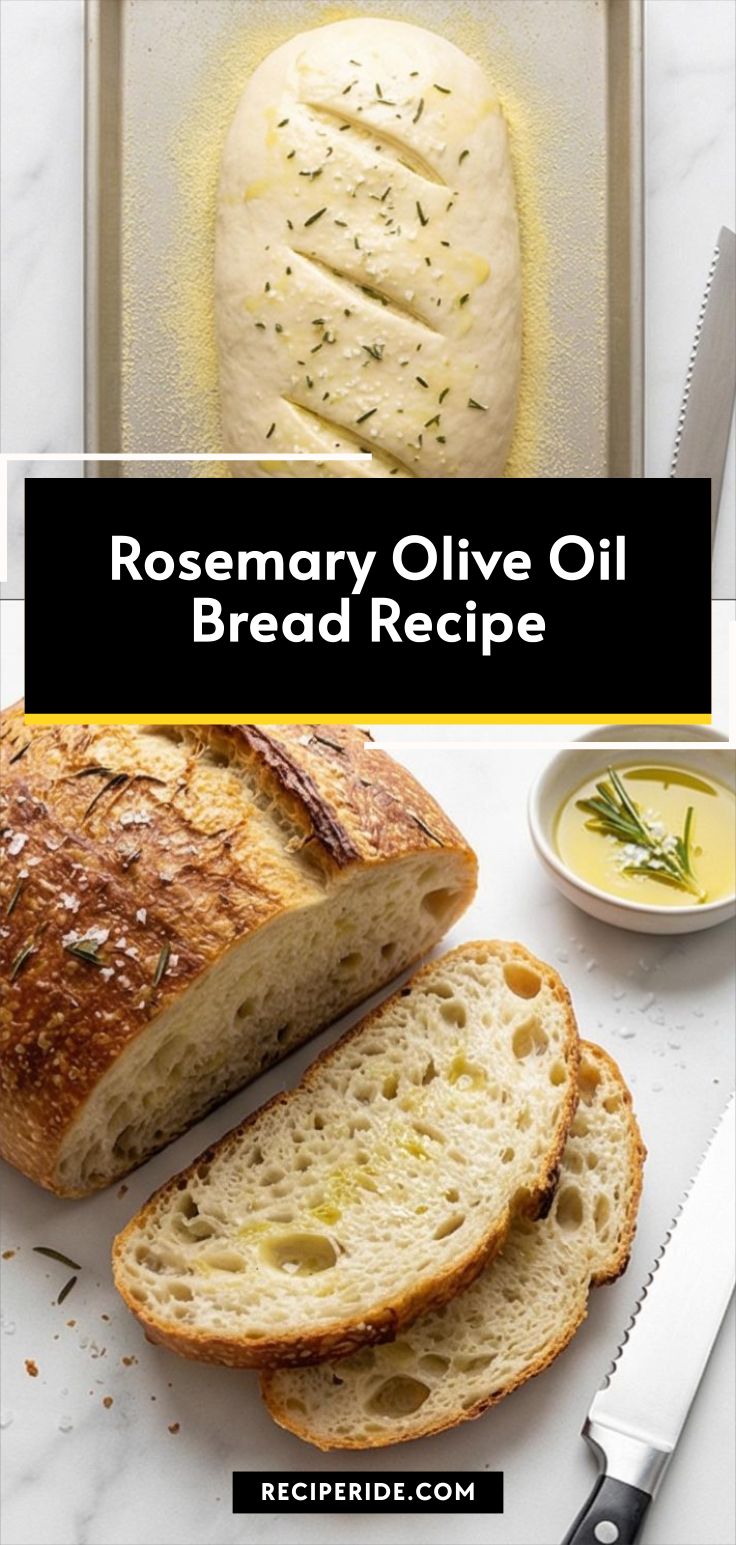
Rosemary Olive Oil Bread Recipe
I fell for this Rosemary Olive Oil Bread Recipe the first time I tore into a slice that was still warm from the oven. The crust sang with golden crunch and the crumb glistened faintly with olive oil, flecked with green rosemary like confetti. I bake it on slow Sundays and bring loaves to friends because it travels well and delights nearly everyone. It feels rustic but surprisingly effortless once you get the rhythm of mixing, kneading, and waiting.
How This Recipe Became My Rainy-Day Favorite
The first loaf I made of the Rosemary Olive Oil Bread Recipe was during a rainy Saturday when the house smelled like wood smoke and coffee. I remember pressing my palm to the dough as it warmed under a damp towel and feeling the slow, stubborn life of the yeast. The rosemary scent woke me up in a gentle, nostalgic way; I kept stealing tiny crumbs as the loaf cooled. Sharing that first slice with a neighbor felt honest and small, the kind of comfort that comes from simple ingredients treated kindly. That memory is why I reach for this recipe whenever I want something that tastes like home.
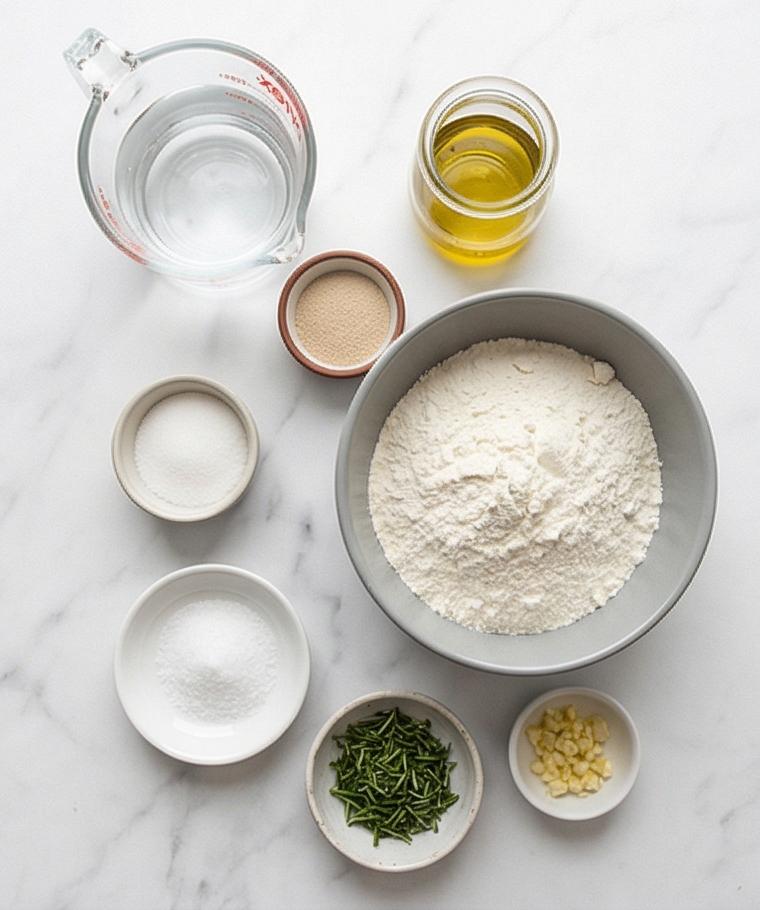
Primary Ingredients and Why They Matter
- Warm Water: Activates the yeast and sets the dough temperature; if water is too hot it will kill the yeast, too cool and rise will be slow.
- Sugar: Feeds the yeast for a confident first bloom; maple syrup can replace it in a pinch.
- Active Dry Yeast: The leavening backbone; instant yeast can be used but skip the bloom step and add directly to dry ingredients.
- Bread Flour: Gives strong gluten structure; all-purpose will work for a slightly softer crumb.
- Fine Sea Salt: Balances flavor and regulates yeast activity; kosher salt needs a small adjustment.
- Fresh Rosemary: Aromatic signature; dried rosemary works if crushed finely.
- Extra-Virgin Olive Oil: Adds tenderness and flavor; use a fruity bottle for brightness.
Essential Kitchen Tools and Why They Help
I keep the tool list short because this Rosemary Olive Oil Bread Recipe rewards simple equipment used well. A few reliable pieces make the process smooth and enjoyable.
- Large Mixing Bowl: Gives the dough room to bloom; any large, nonreactive bowl will do.
- Wooden Spoon or Dough Hook: For initial mixing; a stand mixer with a dough hook speeds kneading.
- Bench Scraper: Makes handling and shaping dough neat; a flexible spatula works in a pinch.
- Baking Sheet and Cornmeal: Cornmeal prevents sticking and adds texture; parchment is a good alternative.
- Sharp Serrated Knife or Lame: For clean scoring so the loaf opens predictably in the oven.
- Wire Rack: Ensures the crust stays crisp while cooling.
Step-by-Step Preparation Guide
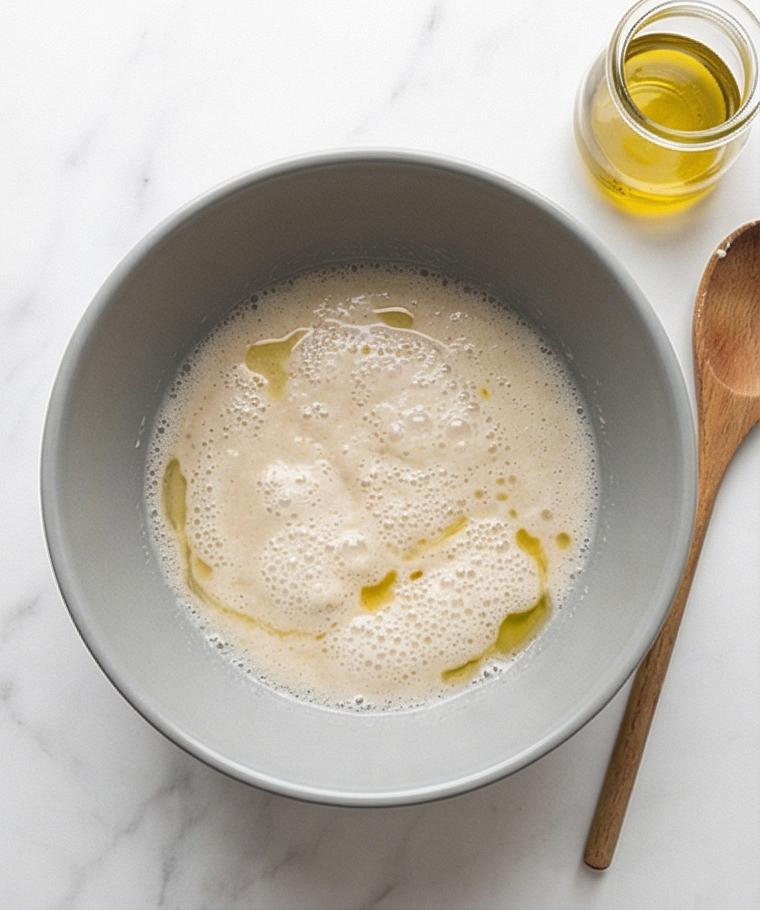
Step 1: Bloom the yeast and marry it with oil
In a large matte grey ceramic mixing bowl pour the warm water and stir in the sugar, then sprinkle the active dry yeast evenly across the surface; watch and wait until the mixture becomes visibly foamy and creamy with fine, pillowy bubbles at the surface. Once the yeast is alive and frothy, stir in the room-temperature extra-virgin olive oil until the liquid surface looks glossy and uniformly combined — this foamy, slightly pearlescent pool is the foundation of the dough.
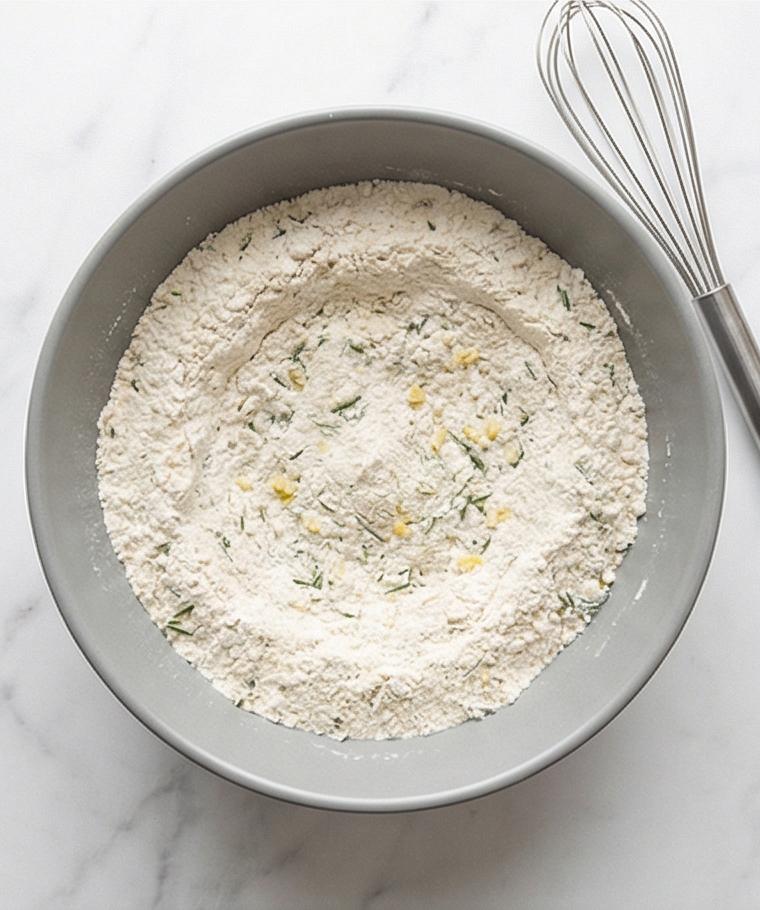
Step 2: Blend the aromatic dry mix
In a separate medium matte grey ceramic bowl whisk together the bread flour, fine sea salt, and the finely chopped fresh rosemary until the green flecks are evenly distributed through the pale flour; if using, fold in the minced garlic so every scoop will carry a fleck of herb or garlic. The texture here should read dry and powdery with contrasting specks of green; you want the herbs dispersed but not mashed. This dry bowl will stay visually consistent with the mixing bowl used earlier.
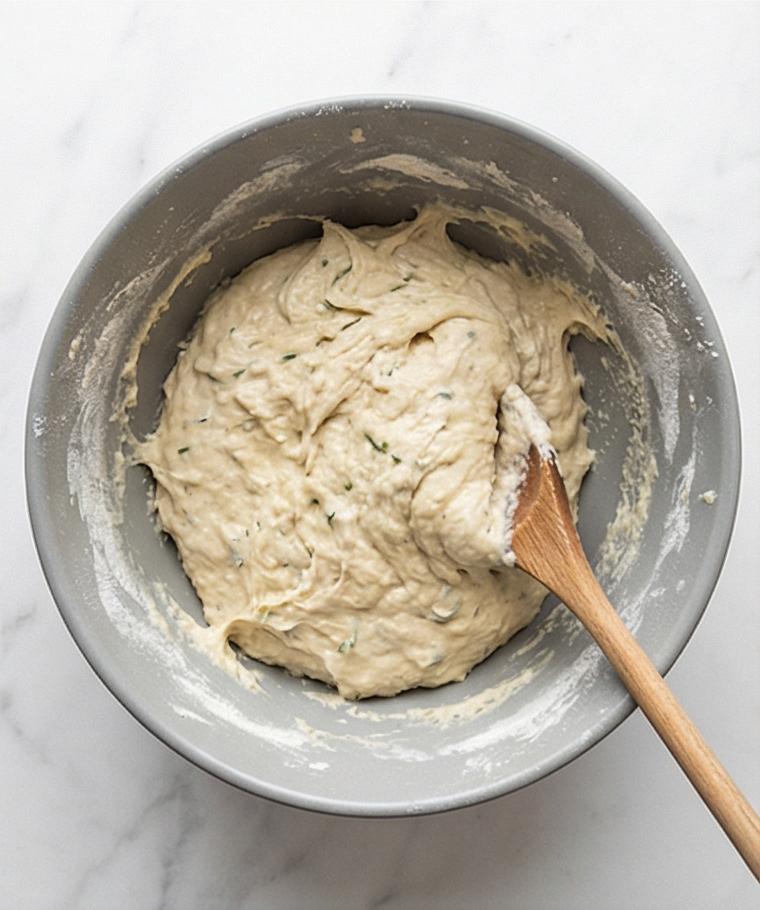
Step 3: Build the shaggy dough
Add about two-thirds of the flour-herb mixture to the foamy yeast-oil bowl and stir with a wooden spoon until a thick, shaggy batter forms — strands of dough clinging to the spoon, no large dry islands remaining. Gradually incorporate the remaining flour in small additions, stirring after each, until a soft dough forms that begins to pull away from the bowl sides; it should be slightly tacky but not wet, with visible flecks of rosemary embedded throughout the surface. Allow a few light dustings of flour on the rim and work surface as needed to manage tackiness.
Step 4: Knead to smooth and elastic
Turn the dough out onto a very lightly floured surface and knead by hand using the heel-and-fold technique (or continue in the bowl with a dough hook) until the dough becomes smooth, elastic, and springs back gently when pressed — the interior will feel airy and the exterior satiny, with faint drag from the herbs. Small threads of gluten and a clean pull from the bowl are the visual cues; keep a wooden spoon or dough scraper nearby as the persistent tool in the composition.
Step 5: First rise in an oiled bowl
Lightly oil the same large mixing bowl with olive oil, shape the dough into a tight smooth ball and place seam-side down; turn once to coat lightly so the surface glistens and will not form a dry skin. Cover and let rise in a warm, draft-free spot until doubled and jiggly — the surface should look puffy with a few irregular dimples from trapped gas. When ready, gently deflate the dough and prepare to shape.
Step 6: Shape into a loaf and prepare the pan
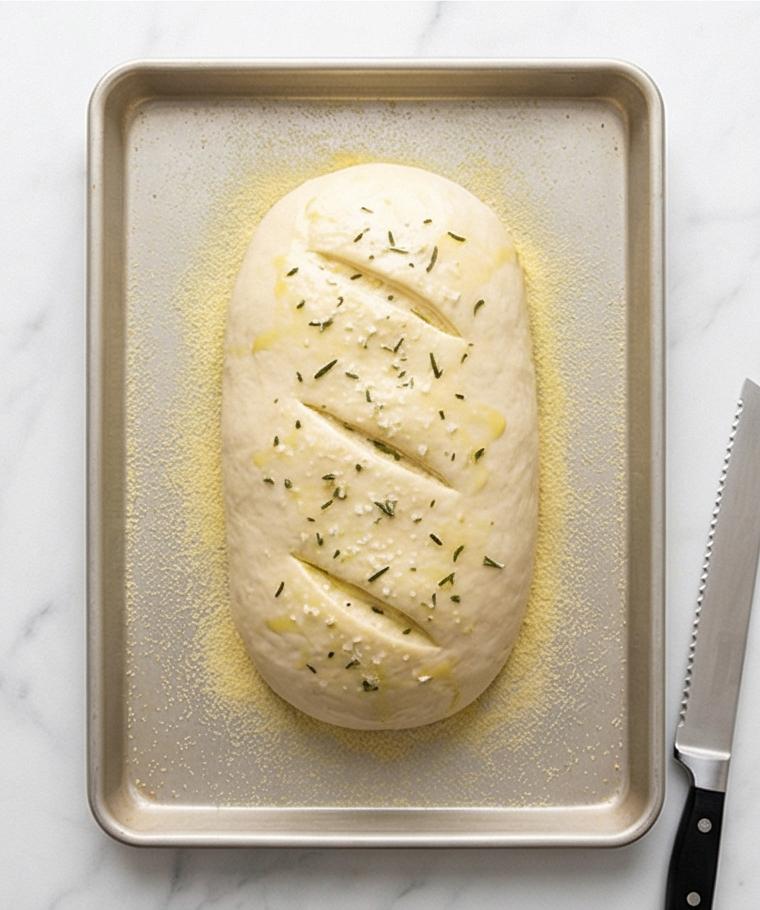
Flatten the risen dough into a rectangle, fold the long edges toward the center and roll it tightly, pinching the seam closed and tucking the ends under to create surface tension; the shaped loaf should hold a smooth outer dome. Lightly grease a baking sheet with olive oil and dust with cornmeal or semolina so the base will have fine granular texture. Place the shaped loaf seam-side down on the prepared sheet, brush the top with a thin sheen of olive oil, and let the dough rest for a shorter second rise until puffy.
Step 7: Final proof, score, and finish
Just before baking, uncover and use a sharp serrated knife or lame to make two to three shallow diagonal slashes across the top about 6 mm deep; brush again with a light film of olive oil and sprinkle a little flaky sea salt and a few pinches of finely chopped rosemary for visible surface contrast. The loaf at this stage should read soft, slightly glossy from the oil, and dotted with green and salt crystals — ready to go into the hot oven on the same geometry-preserving baking surface.
Step 8: Bake, cool, and serve
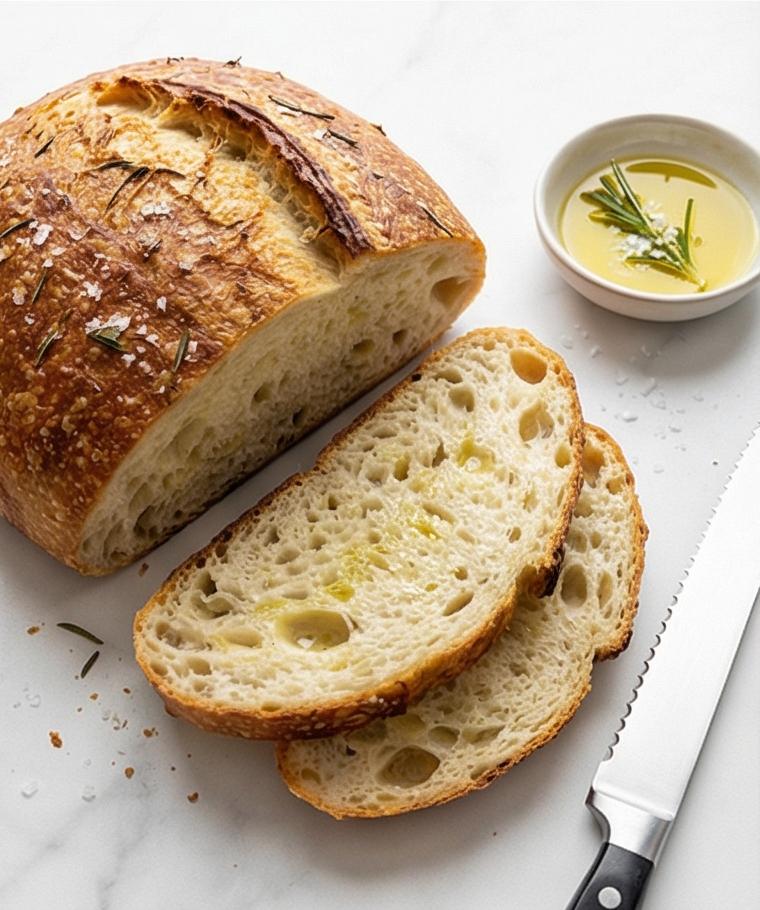
After baking until deep golden-brown with a crisp, crackly crust and a hollow sound when tapped, transfer the loaf to a wire rack to cool; when cooled at least 30–45 minutes, slice with a serrated knife to reveal an open, olive-oil-sheen crumb with irregular holes and flecks of rosemary. Serve slightly warm or at room temperature with a small shallow dish of extra-virgin olive oil and a pinch of flaky salt for dipping; store cooled leftovers wrapped or frozen.
Making It Your Own
I like to experiment with the Rosemary Olive Oil Bread Recipe depending on the season. In autumn I fold in a quarter cup of roasted pumpkin seeds for nuttiness and extra texture. For a dairy-free but richer crumb, swap half the water for unsweetened soy milk.
If you want a lighter, whole-grain loaf, replace up to half the bread flour with high-protein whole wheat and extend the first rise slightly. For a garlic-forward version, increase the minced garlic and add a teaspoon of garlic powder to the dough. Tiny experiments like these keep the loaf interesting without changing the method that makes it reliable.
How to Serve
Picture a casual dinner: slice the Rosemary Olive Oil Bread Recipe thinly and arrange on a wooden board with a shallow dish of olive oil, a grind of black pepper, and a small bowl of olives. That presentation invites nibbling.
For a larger gathering double the batch and slice before guests arrive so it’s easy to hand out. Toasted slices dressed with ricotta and lemon zest make a bright appetizer. For sandwiches, cut thicker slices and let the loaf cool fully so it slices cleanly.
Storage and Reheating Tips
Cool the loaf fully at least 30 minutes before wrapping to avoid sogginess. For short-term storage keep it in a paper bag inside a bread box to maintain crust; plastic wrap will soften the crust but preserve softness for longer.
To refresh a slice, sprinkle lightly with water and warm in a 350°F oven for 5 to 7 minutes or toast until edges are crisp. For longer storage, slice and freeze; reheat slices straight from the freezer in a toaster or warm in a low oven.
Baking Bloopers and How to Avoid Them
If the dough does not rise, check your water temperature and yeast freshness first. Water that is too hot will kill yeast and too cold will not activate it; aim for a warm bath feel.
If the crumb is too dense, you may be under-kneading or using too much flour while shaping. Try a gentler hand with less added flour and give the dough time to relax during shaping.
Final Thoughts and an invitation
This Rosemary Olive Oil Bread Recipe is a small, dependable ritual: simple ingredients, an honest process, and a loaf that rewards patience. Give it a try this weekend and see which variation becomes your favorite.
Frequently Asked Questions.
- Q: Can I use instant yeast instead of active dry yeast? A: Yes, you can use instant yeast; add it to the dry ingredients and skip the bloom step, though you may need a slightly shorter rise.
- Q: How long will the bread stay fresh? A: At room temperature wrapped in plastic it keeps well for about 2 to 3 days; crust will soften faster than the crumb.
- Q: Can I make this gluten-free? A: This recipe relies on gluten for structure, so use a tested gluten-free bread flour blend and add xanthan gum as the blend recommends; expect a different texture.
- Q: What if I want a stronger rosemary flavor? A: Fold extra finely chopped fresh rosemary into the dough and sprinkle more on top before baking, or infuse oil with rosemary beforehand.
- Q: Can I bake this in a loaf pan? A: Yes, shape to fit a loaf pan and reduce baking time a little; the loaf will have a tighter crumb when pan-baked.
Rosemary Olive Oil Bread Recipe
Bake the Rosemary Olive Oil Bread Recipe for a golden, herby loaf with crisp crust and olive oil sheen.
Ingredients
Instructions
Step 1: Bloom the yeast and marry it with oil
In a large matte grey ceramic mixing bowl pour the warm water and stir in the sugar, then sprinkle the active dry yeast evenly across the surface; watch and wait until the mixture becomes visibly foamy and creamy with fine, pillowy bubbles at the surface. Once the yeast is alive and frothy, stir in the room-temperature extra-virgin olive oil until the liquid surface looks glossy and uniformly combined — this foamy, slightly pearlescent pool is the foundation of the dough.
Step 2: Blend the aromatic dry mix
In a separate medium matte grey ceramic bowl whisk together the bread flour, fine sea salt, and the finely chopped fresh rosemary until the green flecks are evenly distributed through the pale flour; if using, fold in the minced garlic so every scoop will carry a fleck of herb or garlic. The texture here should read dry and powdery with contrasting specks of green; you want the herbs dispersed but not mashed. This dry bowl will stay visually consistent with the mixing bowl used earlier.
Step 3: Build the shaggy dough
Add about two-thirds of the flour-herb mixture to the foamy yeast-oil bowl and stir with a wooden spoon until a thick, shaggy batter forms — strands of dough clinging to the spoon, no large dry islands remaining. Gradually incorporate the remaining flour in small additions, stirring after each, until a soft dough forms that begins to pull away from the bowl sides; it should be slightly tacky but not wet, with visible flecks of rosemary embedded throughout the surface. Allow a few light dustings of flour on the rim and work surface as needed to manage tackiness.
Step 4: Knead to smooth and elastic
Turn the dough out onto a very lightly floured surface and knead by hand using the heel-and-fold technique (or continue in the bowl with a dough hook) until the dough becomes smooth, elastic, and springs back gently when pressed — the interior will feel airy and the exterior satiny, with faint drag from the herbs. Small threads of gluten and a clean pull from the bowl are the visual cues; keep a wooden spoon or dough scraper nearby as the persistent tool in the composition.
Step 5: First rise in an oiled bowl
Lightly oil the same large mixing bowl with olive oil, shape the dough into a tight smooth ball and place seam-side down; turn once to coat lightly so the surface glistens and will not form a dry skin. Cover and let rise in a warm, draft-free spot until doubled and jiggly — the surface should look puffy with a few irregular dimples from trapped gas. When ready, gently deflate the dough and prepare to shape.
Step 6: Shape into a loaf and prepare the pan
Flatten the risen dough into a rectangle, fold the long edges toward the center and roll it tightly, pinching the seam closed and tucking the ends under to create surface tension; the shaped loaf should hold a smooth outer dome. Lightly grease a baking sheet with olive oil and dust with cornmeal or semolina so the base will have fine granular texture. Place the shaped loaf seam-side down on the prepared sheet, brush the top with a thin sheen of olive oil, and let the dough rest for a shorter second rise until puffy.
Step 7: Final proof, score, and finish
Just before baking, uncover and use a sharp serrated knife or lame to make two to three shallow diagonal slashes across the top about 6 mm deep; brush again with a light film of olive oil and sprinkle a little flaky sea salt and a few pinches of finely chopped rosemary for visible surface contrast. The loaf at this stage should read soft, slightly glossy from the oil, and dotted with green and salt crystals — ready to go into the hot oven on the same geometry-preserving baking surface.
Step 8: Bake, cool, and serve
After baking until deep golden-brown with a crisp, crackly crust and a hollow sound when tapped, transfer the loaf to a wire rack to cool; when cooled at least 30–45 minutes, slice with a serrated knife to reveal an open, olive-oil-sheen crumb with irregular holes and flecks of rosemary. Serve slightly warm or at room temperature with a small shallow dish of extra-virgin olive oil and a pinch of flaky salt for dipping; store cooled leftovers wrapped or frozen.
Notes
- Use an oven thermometer to ensure accurate baking temperature.
- Fresh rosemary gives a brighter flavor than dried; chop finely.
- If dough is sticky, resist adding too much flour; chill briefly to make shaping easier.
- For deeper flavor, let the shaped loaf proof in the refrigerator overnight and bake the next day.
- Slice only after cooling at least 30 minutes to avoid gummy texture.
