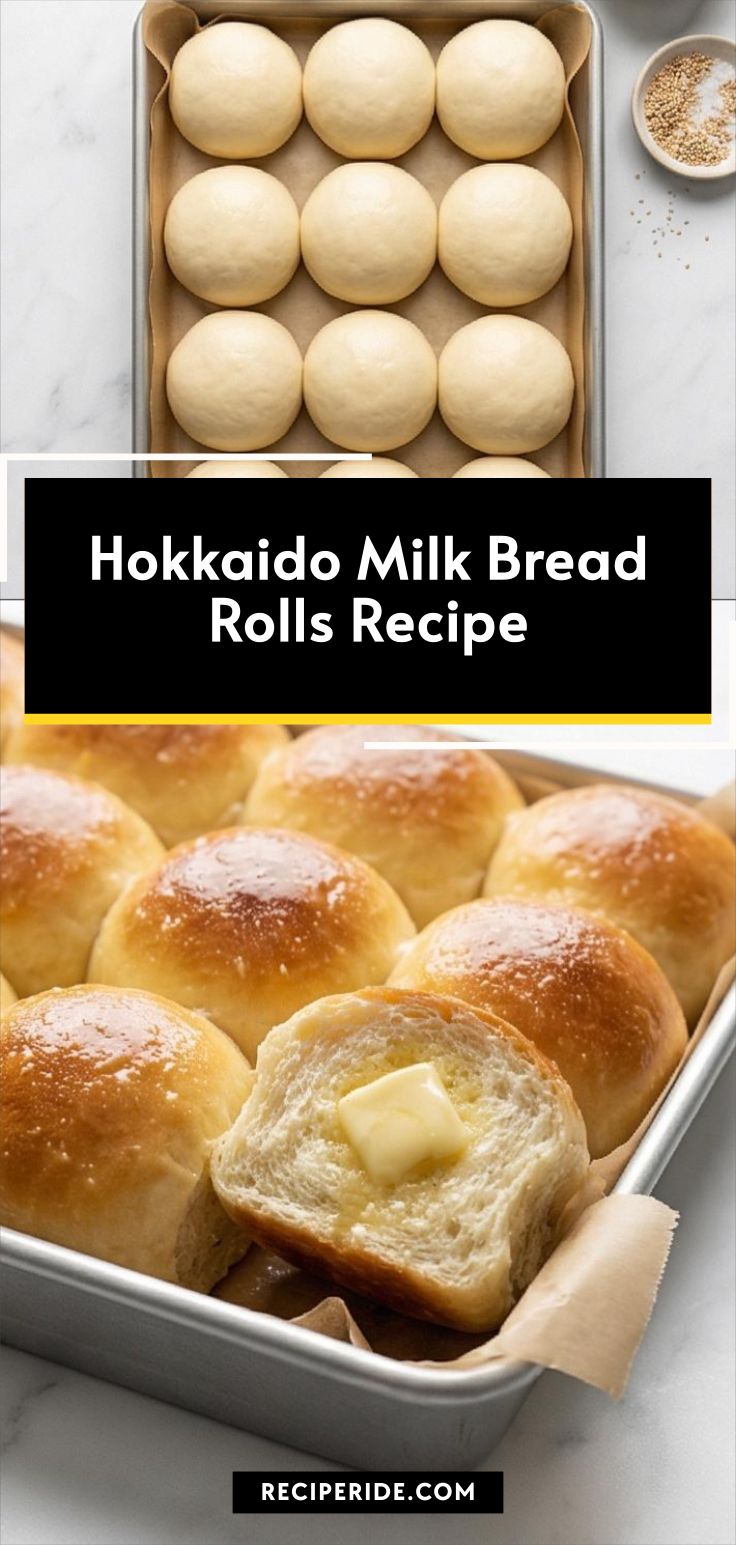
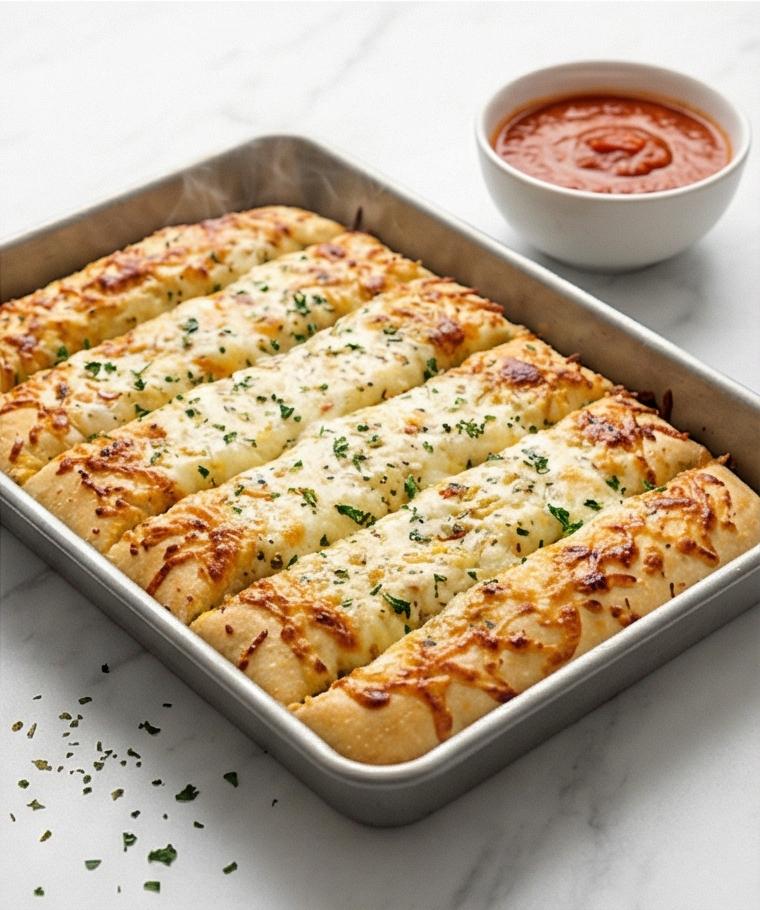
Hokkaido Milk Bread Rolls Recipe
I fell for these Hokkaido Milk Bread Rolls Recipe the first time I pulled a tray of warm rolls from the oven. The smell of milk and butter fills the kitchen and somehow makes everything feel cozier. I love how the crumb is tender and slightly sweet, perfect for spreading with jam or using for tiny sandwiches. Over the years I have tweaked the technique to make the process calm and dependable, and I still get a little thrill every time a roll tears open to reveal that soft interior.
The pillowlike texture and gentle sweetness are what make the Hokkaido Milk Bread Rolls Recipe special, and they reward a bit of patience with a bakery-quality result. If you enjoy soft, rich bread that stays fresh for days, these rolls are absolutely worth trying.
How This Recipe Became My Rainy-Day Favorite
One rainy afternoon, I decided to finally try making Hokkaido Milk Bread Rolls Recipe because the rhythm of folding dough felt like a quiet counterpoint to the rain. I remember the warm kitchen, a mug of tea on the counter, and the steady whisking of milk for the tangzhong. When the dough came together it was sticky and forgiving, and the first rise filled the room with a soft, sweet aroma that made me smile. Shaping the rolls was almost meditative; each smooth ball felt like a small promise. Baking brought a glossy, golden surface that I brushed with melted butter so they gleamed. I served them to a friend who had been having a hard week, and watching her smile as she tore a roll in half felt like the best kind of proof that baking can warm more than just the body. That afternoon turned this recipe into a go-to comfort ritual.
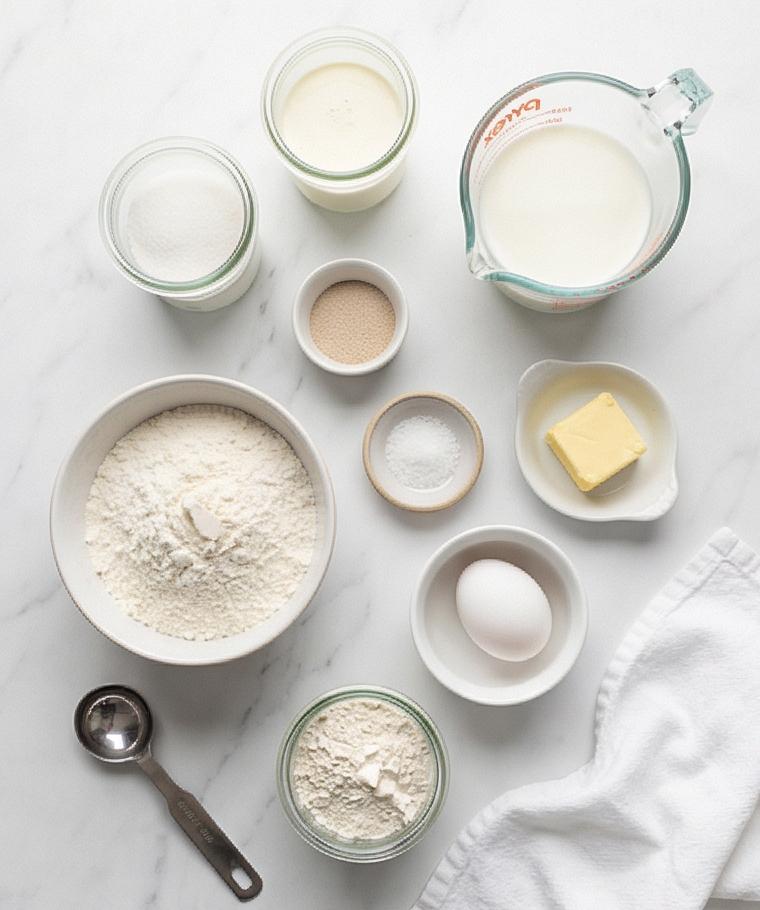
The Primary Ingredients and Why They Matter
- Bread Flour: Provides the structure and chew that differentiate these rolls from softer sandwich breads; substitute with all-purpose in a pinch but expect a slightly less elastic dough.
- Whole Milk: Adds fat and flavor for a tender crumb; for a lighter touch try low-fat milk, or use oat milk for dairy-free notes though texture will change.
- Eggs: Enrich the dough and give color to the crumb and crust; egg replacer can work for vegans but expect a different rise.
- Butter: Delivers richness and softness; use European-style butter for extra flavor or a mild oil if dairy-free.
- Sugar: Sweetens and feeds the yeast; reduce slightly if you prefer less sweetness.
- Yeast: The lift engine; instant yeast speeds things up but active dry yeast works if you bloom it first.
Essential Kitchen Tools and Why They Help
A few simple tools make the Hokkaido Milk Bread Rolls Recipe much easier and more reliable. An electric stand mixer with a dough hook saves effort and gives a consistent knead, but you can knead by hand if you have time and want the tactile feedback. A digital thermometer helps you hit the warm milk temperature for yeast activation and confirm dough doneness in the oven. A 9 x 13-inch pan lined with parchment lets the rolls rise together and makes lifting them easier after baking. Finally, a small ceramic bowl for the tangzhong and plastic wrap pressed to the surface prevents a skin.
- Stand mixer with dough hook: Speeds kneading and develops gluten evenly; use a sturdy hand mixer or hand kneading as an alternative.
- Digital thermometer: Ensures correct milk temperature and oven finish; if you do not have one, aim for a warm but not hot milk by touch.
- 9 x 13-inch baking pan and parchment: Keeps rolls tidy and makes removal simple; use a similar-size pan if needed.
- Small saucepan and ceramic bowl: For cooking and cooling the tangzhong; a heavy-bottomed pan helps prevent scorching.
Step-by-Step Preparation Guide.
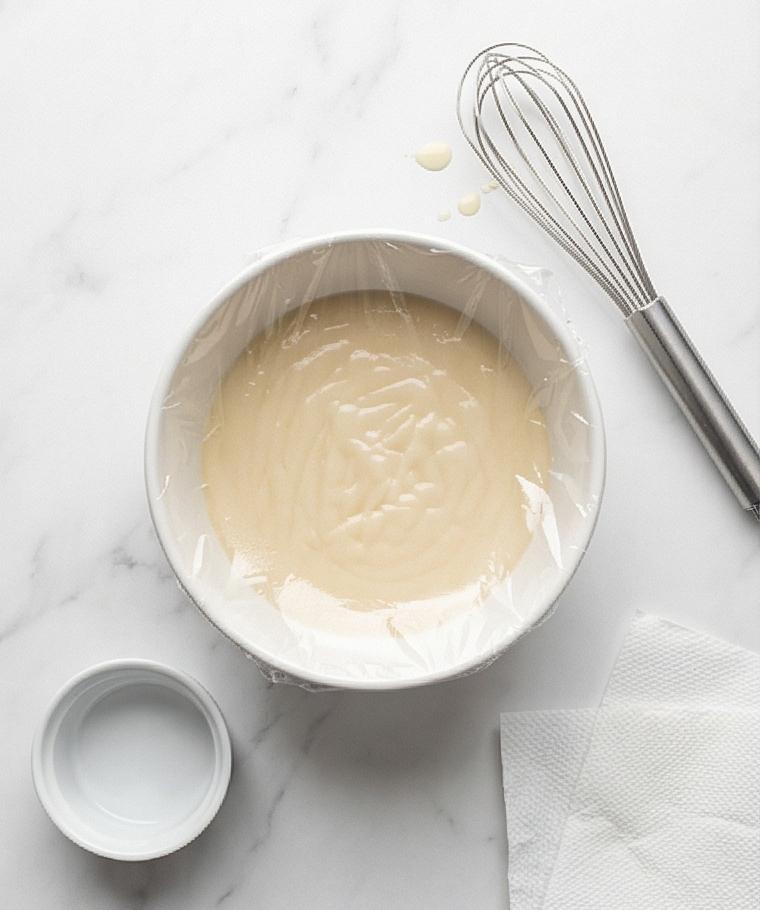
Step 1: Make and cool the tangzhong
Begin by whisking the bread flour and milk together until perfectly lump-free, then cook gently until the mixture thickens to a pudding-like paste that leaves visible lines behind the whisk. Transfer the warm tangzhong into a small ceramic bowl, press plastic wrap directly onto its surface to prevent a skin, and let it cool to just-warm or room temperature — the texture should be glossy, dense, and spoonable, like a thick custard that still yields slightly when scooped. This stage sets the tender crumb foundation for the entire loaf, so take a calm breath and let it rest a short while before continuing.
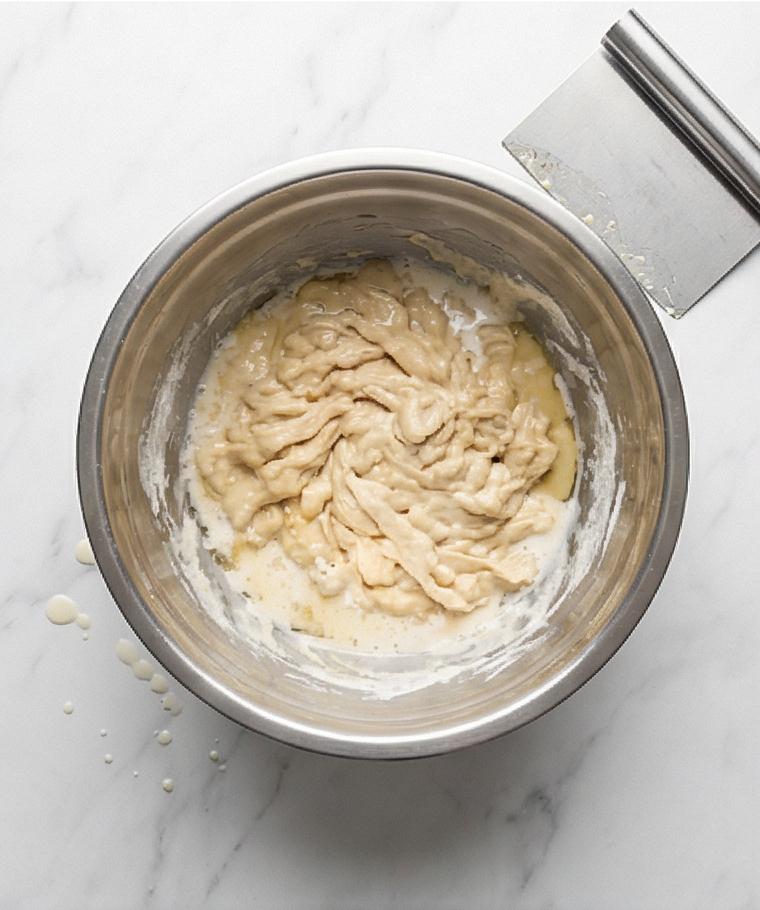
Step 2: Mix the dough — dry, wet, and tangzhong together
While the tangzhong cools, whisk together the bread flour, sugar, yeast, and salt until evenly distributed. In another bowl whisk the room-temperature egg with the warm milk and heavy cream until smooth. Add the cooled tangzhong into the dry ingredients, pour in the egg–milk–cream, and mix on low just until a shaggy, cohesive dough forms; scrape the bowl as necessary. The result is a sticky, patchy mass with visible ribbons of wet and dry that will look irregular at first — exactly what you expect before the butter goes in.
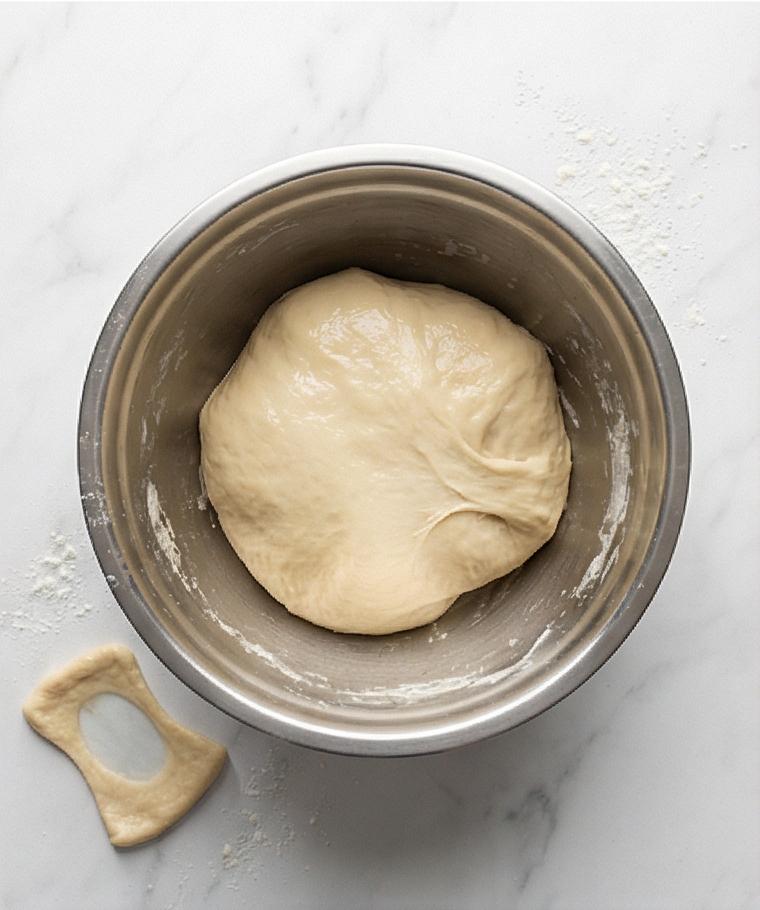
Step 3: Incorporate butter and knead to a smooth, elastic dough
Add very soft butter in small pieces while mixing on low so each portion fully blends into the dough. As the fat is incorporated the dough will transition from streaky and sticky to smoother and silkier. Increase the mixer speed and knead until the dough becomes glossy, elastic, and pulls away from the bowl, still slightly tacky to the touch. Perform a windowpane check by pinching off a small piece and stretching it until translucent; if it tears, keep kneading briefly. The finished dough should look homogenous, supple, and slightly shiny — a soft, tactile promise of pillowy rolls.
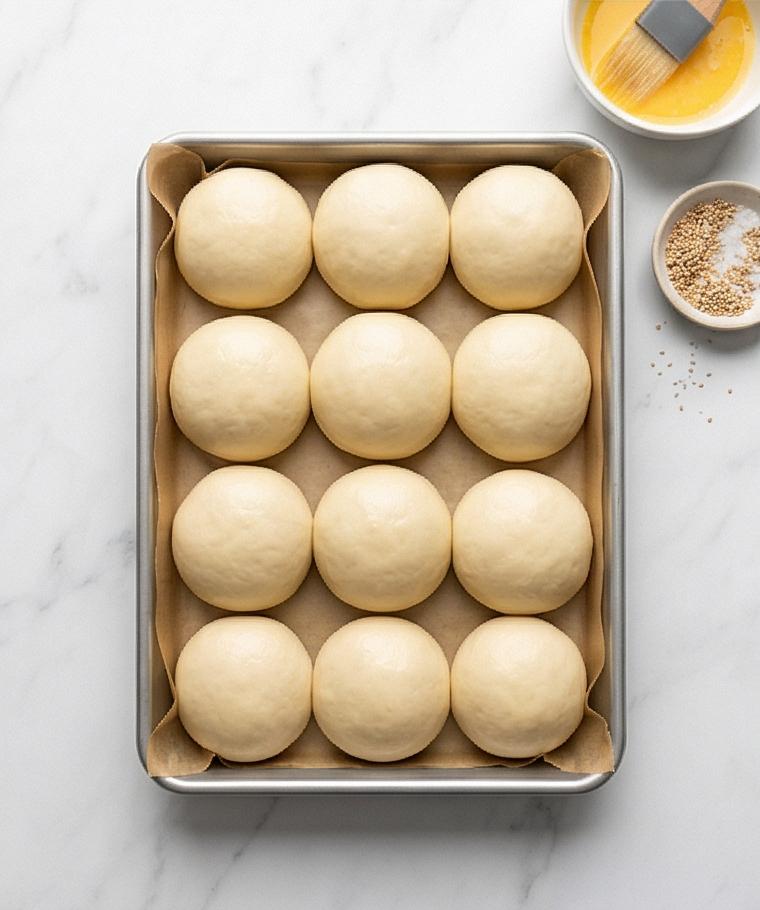
Step 4: First rise, divide, pre-shape and shape into tight balls
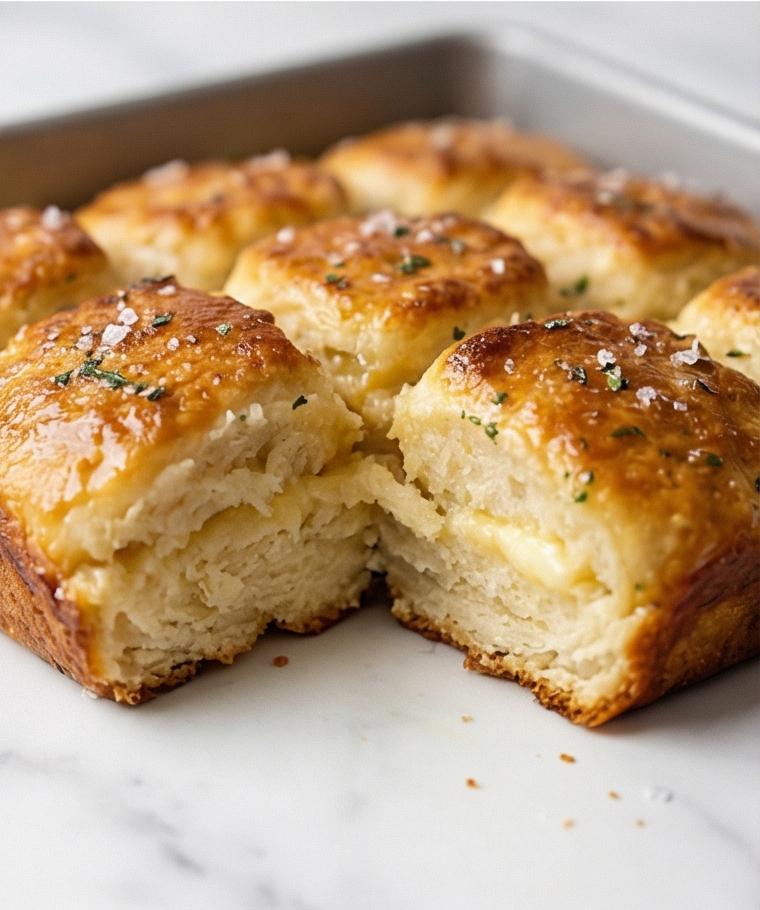
Shape the kneaded dough into a smooth ball and set it into a lightly greased bowl to bulk-ferment until doubled and slightly domed. Once risen, gently deflate, pat into a rough rectangle, and divide into twelve equal pieces. Pre-shape each piece into a disk, then fold and roll to create surface tension and a tight, smooth ball. Place each finished roll seam-side down in the prepared 9 × 13-inch greased pan lined with parchment, arranging them in an even 3 × 4 grid so they can expand and knit together as they proof.
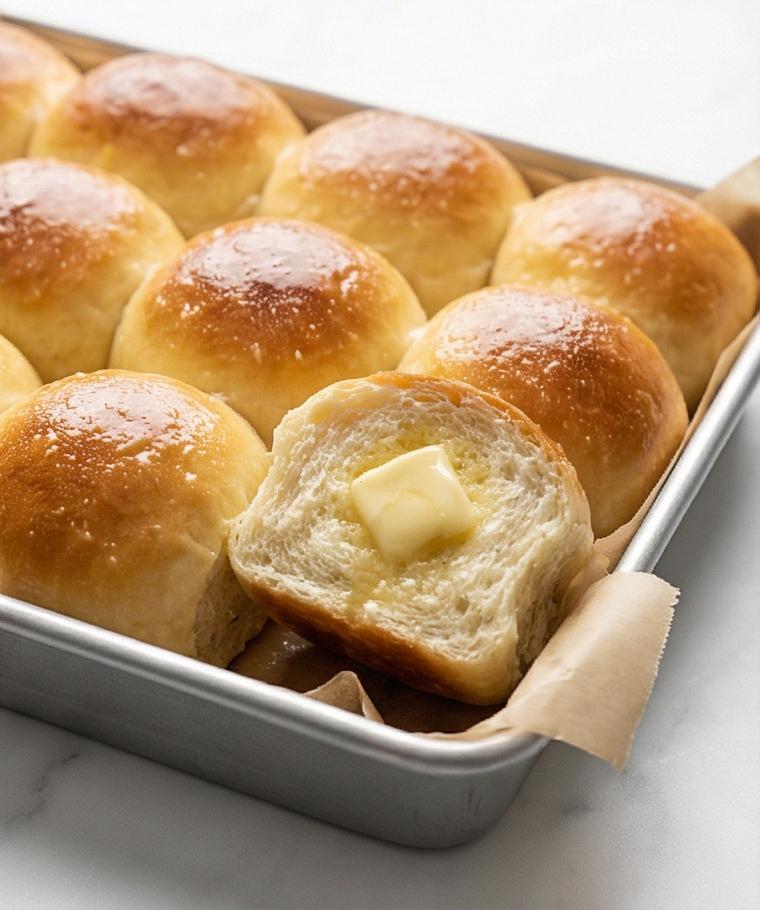
Step 5: Proof, egg-wash, bake, finish and serve
Cover the pan and let the rolls proof until puffy and nearly doubled, then gently brush the tops with an egg-and-milk wash and, if desired, scatter flaky sea salt or sesame seeds. Bake in a fully preheated oven until the tops are deep glossy golden brown and the interior temperature reaches the target, then immediately brush with a little melted butter for extra sheen and softness. Let the tray cool slightly so the crumb sets, then use the parchment overhang to lift the whole sheet out for cleaner separation. Serve warm or room temperature — the rolls should tear open to reveal an airy, moist interior and a pillowy crumb that validates every step you took.
Making It Your Own
I like to experiment with small changes to the Hokkaido Milk Bread Rolls Recipe. For a savory twist, fold in finely chopped herbs and a bit of grated cheese during the last minute of kneading. For a sweet version, add a teaspoon of vanilla extract and brush the finished rolls with a honey glaze while still warm. If you need a dairy-free option, try replacing milk and cream with oat milk and using a plant-based butter; the texture will be slightly different but still lovely. For seasonal flavor, swirl in a thin layer of pumpkin butter or a cinnamon sugar filling before rolling. Each variation has been a fun test that keeps the base recipe reliable while letting you play.
How to Serve
When I host, I arrange the Hokkaido Milk Bread Rolls Recipe on a long wooden board with small bowls of flavored butter, fruit preserves, and soft cheeses so guests can customize each roll. For a casual dinner, split the rolls and use them for mini pulled-pork sliders or small grilled cheese bites. If you need more servings, double the batch and bake on two sheets; cool slightly and store one batch wrapped to preserve freshness.
For a brunch spread, place the warm rolls in a linen-lined basket and tuck in small cards labeling the fillings you suggest. The soft texture makes them versatile, so plan one savory and one sweet option to satisfy different palates.
Storage and Reheating Tips
These rolls stay surprisingly fresh stored at room temperature for up to two days when wrapped in plastic or placed in an airtight container. For longer storage, freeze fully cooled rolls in a freezer bag for up to one month; thaw at room temperature and reheat gently.
To refresh day-old rolls, wrap them in foil and warm in a 300 F oven for 8 to 10 minutes, or microwave a roll wrapped in a damp paper towel for 12 to 18 seconds for a quick softening. Brush with a bit of melted butter after reheating for an extra-soft crust.
Common Mistakes and How to Avoid Them
Under-kneading often leaves a dense crumb. If your dough tears during the windowpane check, keep kneading for a few more minutes and test again. Patience is worth the payoff.
Overproofing can make rolls collapse or lose their glossy finish. Watch the dough for a gentle double and a soft spring back when poked. If it does not spring back at all, bake immediately or shape and chill briefly to regain structure.
Final Thoughts
I hope you give the Hokkaido Milk Bread Rolls Recipe a try and enjoy the small ritual of making them. The process rewards a bit of time and attention with warm, pillowy rolls that bring comfort to the table. Share them, savor them, and have fun making the recipe your own.
Frequently Asked Questions.
- What makes Hokkaido Milk Bread Rolls different from regular rolls?: Hokkaido rolls use a tangzhong water-roux and extra milk and fat for a uniquely soft, fluffy crumb that stays tender longer.
- Can I use all-purpose flour instead of bread flour?: Yes, but expect a slightly less elastic dough and softer chew. You may need a touch less extra flour when kneading.
- How do I know when the dough is kneaded enough?: Perform the windowpane test by stretching a small piece until it becomes translucent. If it tears quickly, knead a little longer.
- Can I make the dough ahead and refrigerate it?: Yes, after the first knead you can refrigerate the dough for up to 24 hours for a slow cold ferment. Bring it to room temperature before shaping.
- How should I store leftovers to keep them soft?: Cool completely, then store in an airtight container or wrap in plastic at room temperature for up to two days, or freeze for longer storage.
Hokkaido Milk Bread Rolls Recipe
Make Hokkaido Milk Bread Rolls Recipe for pillowy, golden milk-rich rolls perfect for brunch or sandwiches.
Ingredients
Instructions
Step 1: Make and cool the tangzhong
Begin by whisking the bread flour and milk together until perfectly lump-free, then cook gently until the mixture thickens to a pudding-like paste that leaves visible lines behind the whisk. Transfer the warm tangzhong into a small ceramic bowl, press plastic wrap directly onto its surface to prevent a skin, and let it cool to just-warm or room temperature — the texture should be glossy, dense, and spoonable, like a thick custard that still yields slightly when scooped. This stage sets the tender crumb foundation for the entire loaf, so take a calm breath and let it rest a short while before continuing.
Step 2: Mix the dough — dry, wet, and tangzhong together
While the tangzhong cools, whisk together the bread flour, sugar, yeast, and salt until evenly distributed. In another bowl whisk the room-temperature egg with the warm milk and heavy cream until smooth. Add the cooled tangzhong into the dry ingredients, pour in the egg–milk–cream, and mix on low just until a shaggy, cohesive dough forms; scrape the bowl as necessary. The result is a sticky, patchy mass with visible ribbons of wet and dry that will look irregular at first — exactly what you expect before the butter goes in.
Step 3: Incorporate butter and knead to a smooth, elastic dough
Add very soft butter in small pieces while mixing on low so each portion fully blends into the dough. As the fat is incorporated the dough will transition from streaky and sticky to smoother and silkier. Increase the mixer speed and knead until the dough becomes glossy, elastic, and pulls away from the bowl, still slightly tacky to the touch. Perform a windowpane check by pinching off a small piece and stretching it until translucent; if it tears, keep kneading briefly. The finished dough should look homogenous, supple, and slightly shiny — a soft, tactile promise of pillowy rolls.
Step 4: First rise, divide, pre-shape and shape into tight balls
Shape the kneaded dough into a smooth ball and set it into a lightly greased bowl to bulk-ferment until doubled and slightly domed. Once risen, gently deflate, pat into a rough rectangle, and divide into twelve equal pieces. Pre-shape each piece into a disk, then fold and roll to create surface tension and a tight, smooth ball. Place each finished roll seam-side down in the prepared 9 × 13-inch greased pan lined with parchment, arranging them in an even 3 × 4 grid so they can expand and knit together as they proof.
Step 5: Proof, egg-wash, bake, finish and serve
Cover the pan and let the rolls proof until puffy and nearly doubled, then gently brush the tops with an egg-and-milk wash and, if desired, scatter flaky sea salt or sesame seeds. Bake in a fully preheated oven until the tops are deep glossy golden brown and the interior temperature reaches the target, then immediately brush with a little melted butter for extra sheen and softness. Let the tray cool slightly so the crumb sets, then use the parchment overhang to lift the whole sheet out for cleaner separation. Serve warm or room temperature — the rolls should tear open to reveal an airy, moist interior and a pillowy crumb that validates every step you took.
Notes
- Use a digital thermometer to make sure the milk for the dough is about 95 F for best yeast performance.
- Press plastic wrap onto the tangzhong surface while it cools to prevent a skin.
- If kneading by hand, allow extra time and watch the dough texture rather than a strict time.
- For shiny tops, brush with the egg wash just before baking and a bit of melted butter immediately after baking.
- Freeze extra rolls in a single layer then transfer to a bag to avoid them sticking together.
