Garlic Butter Mushrooms Recipe has been a weeknight lifesaver in my kitchen. I still remember the first time I tossed cremini into sizzling butter and garlic and watched a simple pan transform into something rich and comforting. It’s one of those recipes I reach for when I want something fast, flavorful, and just a little bit fancy without the fuss. If you love umami and bright lemon lift, this Garlic Butter Mushrooms Recipe will quickly become a go-to.
There’s something undeniably cozy about a pan of browned mushrooms; they crisp at the edges, smell intoxicating, and pair with almost anything. That immediate, savory aroma is what makes the Garlic Butter Mushrooms Recipe special and worth trying — it’s simple technique, high reward. Whether you’re spooning them over toast, serving them next to steak, or tucking them into pasta, they bring bold, layered flavor in under 30 minutes.
How This Recipe Became My Weeknight Comfort
The first autumn I lived on my own, I had two sad potatoes and a box of mushrooms in the fridge. I’d been avoiding complicated cooking, but I wanted something that felt like a treat. I remember the pan heating, the butter melting and foaming, and the room filling with a warm, garlicky scent that made the evening feel intentional. I browned the mushrooms until they had those deep caramelized edges, stirred in lemon and parsley, and sat down with a slice of toasted bread. The contrast of silky butter, bright lemon, and earthy mushroom comforted me more than I expected. Since then, this Garlic Butter Mushrooms Recipe has carried me through rushed dinners, impromptu guests, and the occasional rainy-night craving. It’s a little ritual now: quick prep, patient sear, and a small, delicious reward at the end.
The Ingredients That Make It Sing
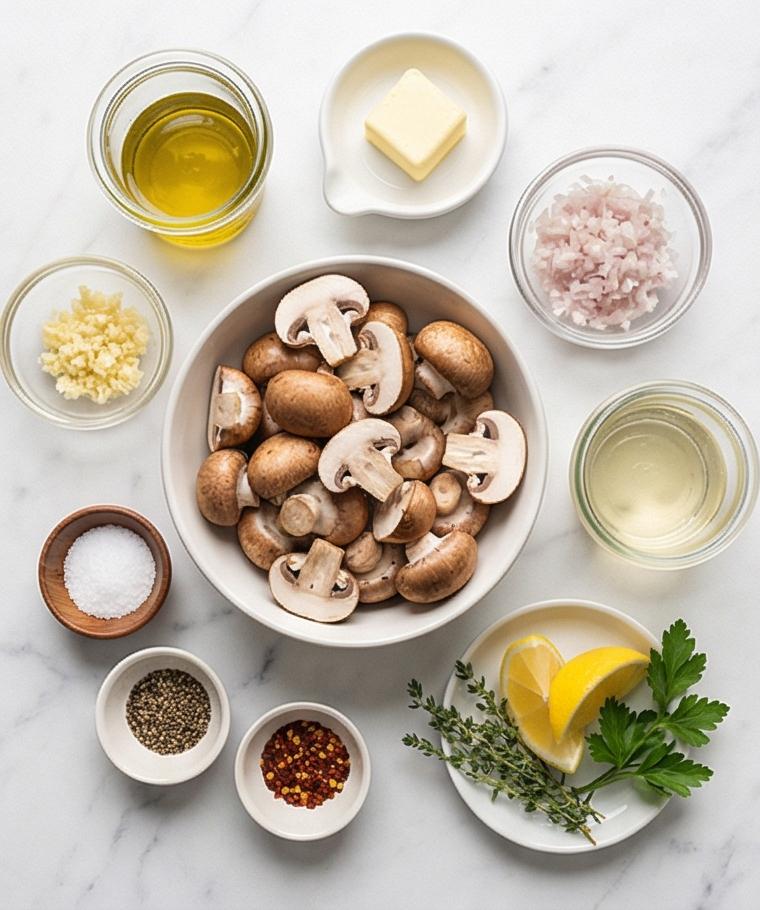
- Cremini or Button Mushrooms: The star ingredient; choose firm, dry mushrooms with closed caps. Substitute baby bella or shiitake for a deeper flavor. Avoid mushrooms that are slimy or heavily wet.
- Unsalted Butter: Provides silk and browning. Use ghee or vegan butter as a substitute for dairy-free versions.
- Extra-Virgin Olive Oil: Helps prevent burning and raises the smoke point. Can use avocado oil instead.
- Garlic and Shallot: Garlic adds punch; shallot brings sweetness and texture. Use onion if needed but reduce the quantity.
- White Wine or Broth: Deglazes and creates a glaze; use low-sodium broth if you prefer non-alcoholic.
- Lemon and Parsley: Brighten and freshen the dish; swap with a splash of sherry vinegar and cilantro for a different profile.
Essential Kitchen Tools and Why They Matter
A few good tools make this recipe effortless and give you predictable results. A wide, heavy skillet ensures even browning and enough surface area so the mushrooms sear rather than steam. A wooden spoon or heatproof spatula helps you toss and scrape without damaging nonstick surfaces. A sharp knife and a small cutting board speed prep, especially when mincing garlic and shallot.
- Large heavy skillet: Essential for even heat and proper searing; use stainless steel or cast-iron.
- Sharp chef’s knife: For clean, uniform mushroom pieces; dull knives bruise and slow you down.
- Tongs or spatula: For gentle tossing; use tongs for individual flips or a silicone spatula for scraping.
- Measuring spoons and cup: For accuracy with butter, oil, and liquids; eyeballing can change texture.
If you don’t have a heavy skillet, a wide nonstick pan will work; just watch heat to avoid sticking.
Step-by-Step Preparation Guide
Step 1: Prepare the mushrooms
Gently wipe each cremini/button mushroom with a damp paper towel or a soft brush to remove dirt; avoid rinsing so they won’t absorb water and steam. Trim any tough stem ends and quarter the mushrooms (or halve the smallest ones) so they’ll cook evenly. Arrange the cut mushrooms in a shallow bowl so they’re ready to go — plump, matte-finished caps and exposed pale interiors, ready to brown.
Step 2: Heat the pan and melt fat
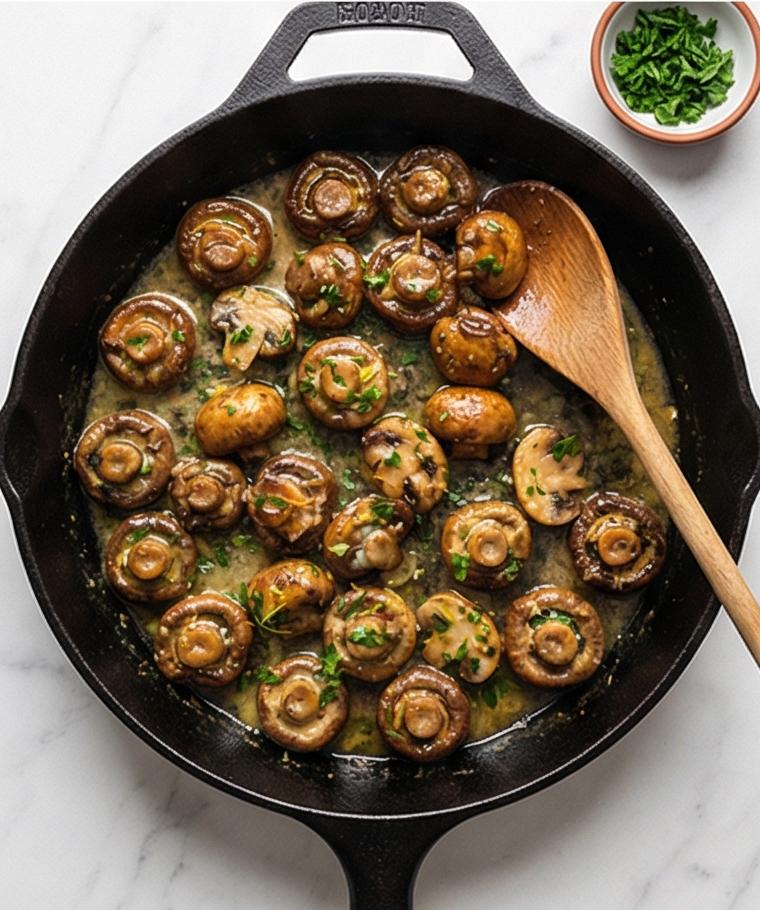
Place a large heavy skillet over medium-high heat and add the olive oil and most of the butter, letting the butter melt and begin to foam without burning. The fat should shimmer and thinly coat the pan surface — a glossy amber film with tiny pearls of foaming butter at the edges — the precise moment to add the mushrooms.
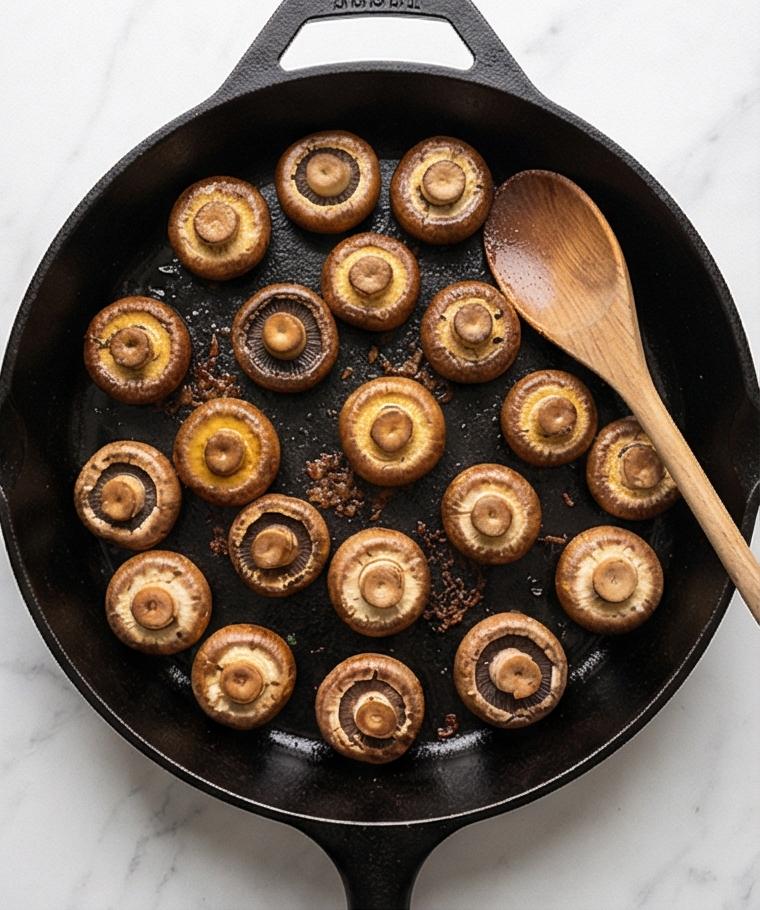
Step 3: Sear the mushrooms until deeply golden
Add the prepared mushrooms in a single even layer so each piece makes direct contact with the hot surface. Let them cook undisturbed so the undersides form a concentrated, caramelized brown — rich mahogany edges and tight, shrunken bodies. This is the first major visual milestone of the dish: concentrated browning and surface crispness juxtaposed with plump mushroom interiors.
Step 4: Continue browning and evaporate moisture
Once the first side is deeply colored, stir or toss and continue cooking, encouraging the mushrooms to release moisture and then re-brown as the liquid evaporates. The mushrooms should look shrunken and glossy where the juices reduced, with darkened rims and a satin sheen where the butter and oil have toasted into flavor.
Step 5: Season so flavor penetrates
Sprinkle kosher salt, freshly ground black pepper, and a touch of crushed red pepper flakes if you like gentle heat; toss to coat. The seasoning will draw out a little more moisture and begin to sit in the browned crevices, visibly deepening the surface color and amplifying the gloss from the fats.
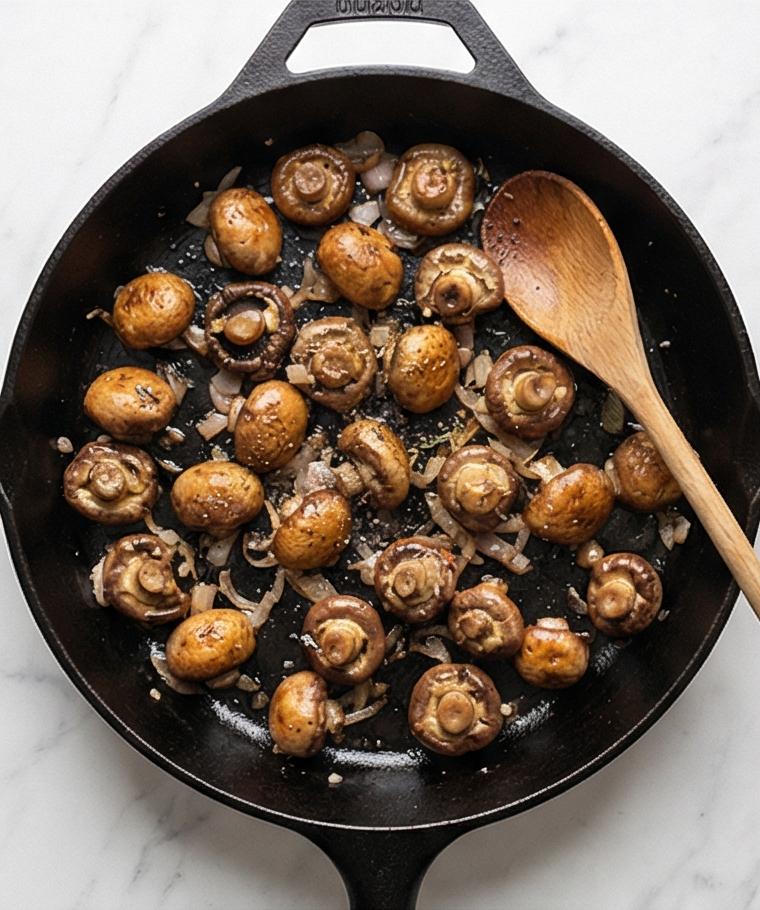
Step 6: Soften the shallot
Reduce the heat to medium and add the finely minced shallot. Cook, stirring frequently, until the shallot becomes translucent and soft — pale golden strands and tiny softened bits clinging to the mushrooms, adding a delicate, slightly sweet texture that sits lightly in the pan.
Step 7: Add garlic and thyme for aroma
Stir in the minced garlic and chopped fresh thyme and cook just until fragrant — very brief, 30–60 seconds. The garlic should be glossy and just softened, not browned; the tiny thyme leaves will sprinkle bright green flecks against the warm brown mushroom surfaces, an aromatic micro-contrast.
Step 8: Deglaze and glaze the mushrooms
Pour in the dry white wine or broth and use a spoon to scrape the browned fond from the pan bottom. The liquid will hit the hot surface, simmer briefly, and then reduce into a glossy, slightly saucy glaze that clings to the mushroom contours. Visually, this is where the bits loosen and the pan becomes a polished, flavor-laden pool.
Step 9: Finish with butter and lemon for silk and lift
Turn the heat to low and add the reserved tablespoon of butter and fresh lemon juice. Stir or toss continuously until the butter melts into a silky emulsion and the lemon brightens the color and scent. The result is a glossy, silky coating that highlights the mushrooms’ browned texture while leaving a gauzy, lemon-bright sheen.
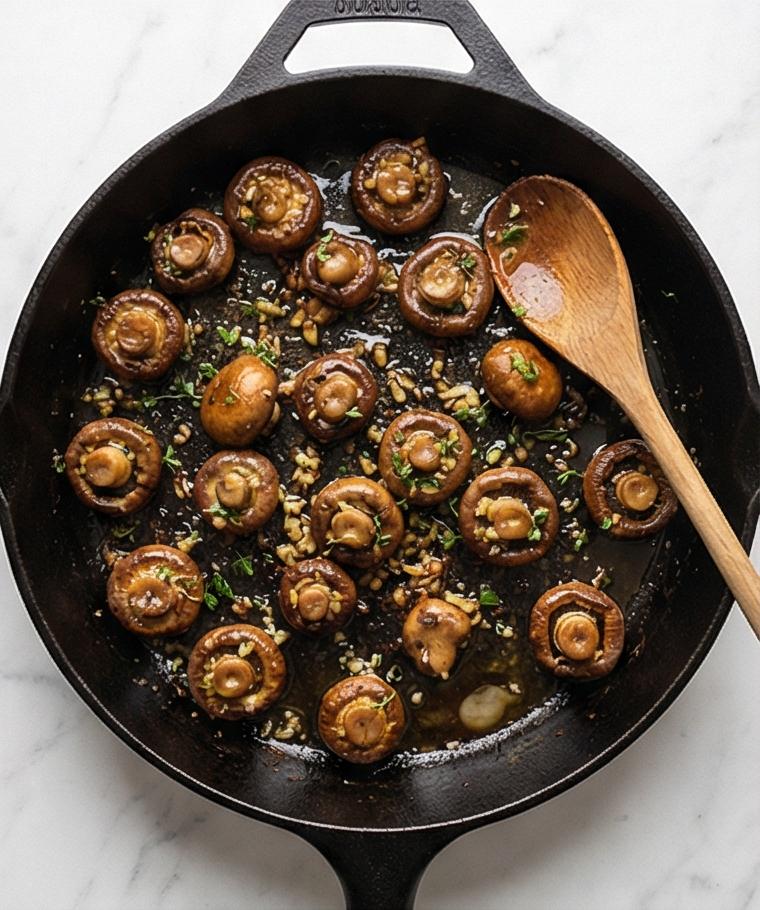
Step 10: Fold in fresh parsley
Turn off the heat and gently fold in the chopped flat-leaf parsley so the herb remains vividly green. The parsley adds a fresh speckled contrast — tiny emerald leaves scattered across the warm, tawny mushroom surfaces.
Step 11: Plate and finish with optional garnish
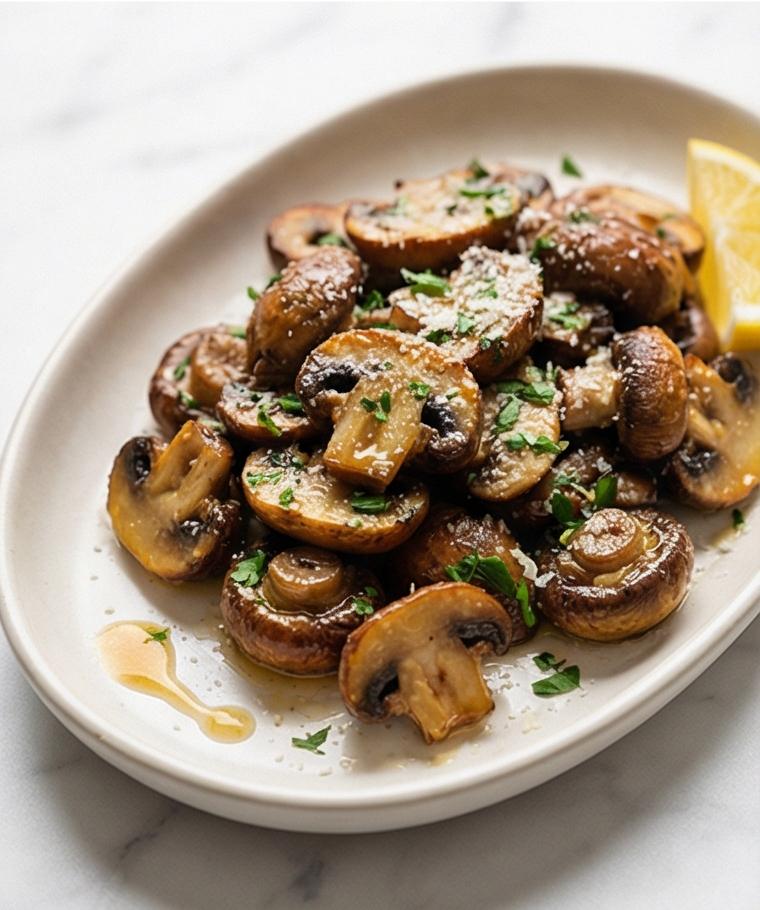
Transfer the garlic butter mushrooms to a warm shallow serving dish. Sprinkle with freshly grated Parmesan if desired and nestle a few lemon wedges at the side for squeezing. The plated mushrooms should glisten from the butter-lemon glaze, speckled with herb green and soft, translucent shallot pieces.
Step 12: Holding and serving suggestions
If you need to hold the dish briefly, keep it warm (low oven suggested in the recipe, but here simply note the serving state): the mushrooms should remain tender and glossy, not dry or overcooked. Serve immediately while hot as a side, spooned over toasted bread, or alongside proteins — each bite shows the same concentrated browning, silky glaze, and herb-fresh flecks.
Making It Your Own
I often tweak this Garlic Butter Mushrooms Recipe based on what’s in the fridge. Try swapping cremini for shiitake and add a splash of soy sauce for an umami-rich twist. For a dairy-free version, use vegan butter or olive oil and finish with a sprinkle of nutritional yeast for a cheesy vibe.
In winter I fold in a handful of kale or add chestnuts for texture. For a Spanish feel, sprinkle smoked paprika and finish with sherry instead of white wine. Small experiments like adding thyme sprigs or a hit of mustard can surprise you.
How to Serve
When I host, I serve these Garlic Butter Mushrooms Recipe-style family-style on a warm platter so guests can help themselves. For a starter, spoon the mushrooms over toasted sourdough and shave Parmesan on top. As a side, portion them next to roasted chicken or steak; their concentrated flavor stands up well to long-cooked proteins.
To scale the dish, multiply ingredients by the number of guests and use a very wide pan or cook in batches to maintain searing. For a buffet, keep mushrooms warm in a shallow dish with a lid and add lemon wedges for brightness.
Storage and Reheating Tips
Store leftovers in an airtight container in the refrigerator for up to 3 days. Let the mushrooms cool slightly before sealing to avoid sogginess.
To reheat, gently warm in a skillet over low heat with a splash of broth or a small knob of butter to revive the glossy coating. Avoid microwaving for long stretches; it can make mushrooms rubbery.
Common Mistakes and How to Avoid Them
The most common error is overcrowding the pan, which causes steaming instead of searing. Cook in a single layer and work in batches if needed to preserve those caramelized edges.
Another slip is adding garlic too early; it can burn and turn bitter. Add garlic near the end and keep heat moderate so it softens without browning.
Final Thoughts
I hope this Garlic Butter Mushrooms Recipe becomes one of your quick kitchen wins. It rewards a little patience at the pan with deeply satisfying flavor, and once you make it a few times you’ll find the small adjustments that suit your table.
Frequently Asked Questions.
- Q: Can I use frozen mushrooms for this Garlic Butter Mushrooms Recipe? A: It’s not ideal; frozen mushrooms release excess water and won’t brown the same. If you must, thaw and pat very dry and cook in smaller batches.
- Q: What can I use instead of white wine? A: Use low-sodium chicken or vegetable broth, or a splash of white wine vinegar diluted with water.
- Q: How do I keep mushrooms from getting soggy? A: Don’t overcrowd the pan and avoid rinsing. Wipe clean, give them space, and let the moisture evaporate while cooking.
- Q: Can I make this dairy-free? A: Yes, substitute vegan butter or extra olive oil and finish with a touch of nutritional yeast if you want a savory, cheesy suggestion.
- Q: Will these reheat well the next day? A: Yes, gently reheat in a skillet with a splash of broth or a little butter to restore gloss and texture.
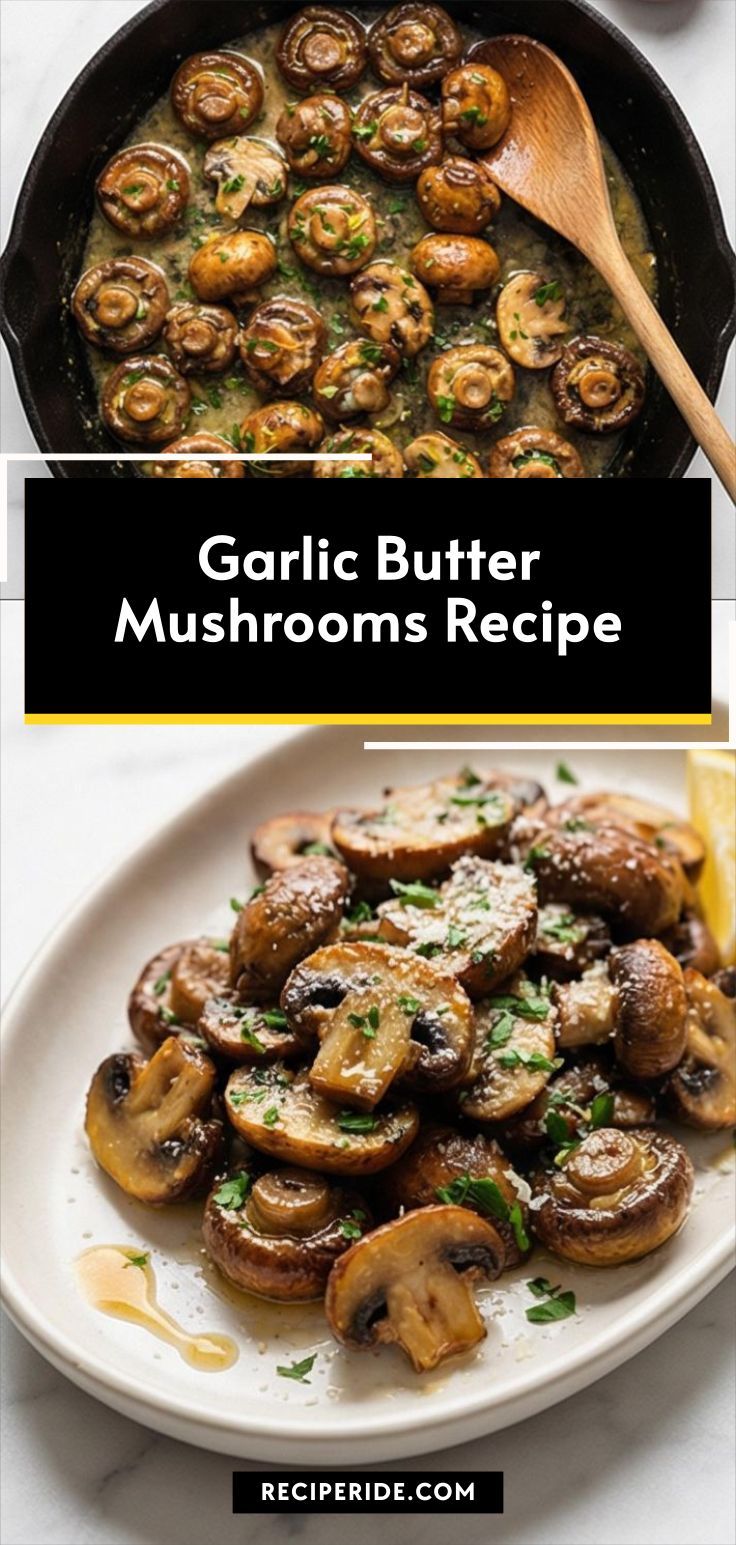
Garlic Butter Mushrooms Recipe
Make Garlic Butter Mushrooms Recipe: seared cremini with garlic, lemon, and parsley—ready in 25 minutes. Try it tonight!
Ingredients
Instructions
Step 1: Prepare the mushrooms
Gently wipe each cremini/button mushroom with a damp paper towel or a soft brush to remove dirt; avoid rinsing so they won’t absorb water and steam. Trim any tough stem ends and quarter the mushrooms (or halve the smallest ones) so they’ll cook evenly. Arrange the cut mushrooms in a shallow bowl so they’re ready to go — plump, matte-finished caps and exposed pale interiors, ready to brown.
Step 2: Heat the pan and melt fat
Place a large heavy skillet over medium-high heat and add the olive oil and most of the butter, letting the butter melt and begin to foam without burning. The fat should shimmer and thinly coat the pan surface — a glossy amber film with tiny pearls of foaming butter at the edges — the precise moment to add the mushrooms.
Step 3: Sear the mushrooms until deeply golden
Add the prepared mushrooms in a single even layer so each piece makes direct contact with the hot surface. Let them cook undisturbed so the undersides form a concentrated, caramelized brown — rich mahogany edges and tight, shrunken bodies. This is the first major visual milestone of the dish: concentrated browning and surface crispness juxtaposed with plump mushroom interiors.
Step 4: Continue browning and evaporate moisture
Once the first side is deeply colored, stir or toss and continue cooking, encouraging the mushrooms to release moisture and then re-brown as the liquid evaporates. The mushrooms should look shrunken and glossy where the juices reduced, with darkened rims and a satin sheen where the butter and oil have toasted into flavor.
Step 5: Season so flavor penetrates
Sprinkle kosher salt, freshly ground black pepper, and a touch of crushed red pepper flakes if you like gentle heat; toss to coat. The seasoning will draw out a little more moisture and begin to sit in the browned crevices, visibly deepening the surface color and amplifying the gloss from the fats.
Step 6: Soften the shallot
Reduce the heat to medium and add the finely minced shallot. Cook, stirring frequently, until the shallot becomes translucent and soft — pale golden strands and tiny softened bits clinging to the mushrooms, adding a delicate, slightly sweet texture that sits lightly in the pan.
Step 7: Add garlic and thyme for aroma
Stir in the minced garlic and chopped fresh thyme and cook just until fragrant — very brief, 30–60 seconds. The garlic should be glossy and just softened, not browned; the tiny thyme leaves will sprinkle bright green flecks against the warm brown mushroom surfaces, an aromatic micro-contrast.
Step 8: Deglaze and glaze the mushrooms
Pour in the dry white wine or broth and use a spoon to scrape the browned fond from the pan bottom. The liquid will hit the hot surface, simmer briefly, and then reduce into a glossy, slightly saucy glaze that clings to the mushroom contours. Visually, this is where the bits loosen and the pan becomes a polished, flavor-laden pool.
Step 9: Finish with butter and lemon for silk and lift
Turn the heat to low and add the reserved tablespoon of butter and fresh lemon juice. Stir or toss continuously until the butter melts into a silky emulsion and the lemon brightens the color and scent. The result is a glossy, silky coating that highlights the mushrooms’ browned texture while leaving a gauzy, lemon-bright sheen.
Step 10: Fold in fresh parsley
Turn off the heat and gently fold in the chopped flat-leaf parsley so the herb remains vividly green. The parsley adds a fresh speckled contrast — tiny emerald leaves scattered across the warm, tawny mushroom surfaces.
Step 11: Plate and finish with optional garnish
Transfer the garlic butter mushrooms to a warm shallow serving dish. Sprinkle with freshly grated Parmesan if desired and nestle a few lemon wedges at the side for squeezing. The plated mushrooms should glisten from the butter-lemon glaze, speckled with herb green and soft, translucent shallot pieces.
Step 12: Holding and serving suggestions
If you need to hold the dish briefly, keep it warm (low oven suggested in the recipe, but here simply note the serving state): the mushrooms should remain tender and glossy, not dry or overcooked. Serve immediately while hot as a side, spooned over toasted bread, or alongside proteins — each bite shows the same concentrated browning, silky glaze, and herb-fresh flecks.
Notes
- Use firm, dry mushrooms and avoid rinsing to prevent sogginess.
- Don’t overcrowd the pan; sear in batches for best browning.
- Add garlic late to avoid burning and bitterness.
- Substitute vegan butter and broth to make the dish dairy-free.
- Reheat gently in a skillet with a splash of broth to restore gloss.