Whipped Feta Dip Recipe is one of those simple, showy things I always bring to gatherings. I first started making this Whipped Feta Dip Recipe when I wanted a fast, flavorful appetizer that still felt special. It balances bright lemon, savory garlic, and creamy cheeses into something you can spread, scoop, or spoon over warm bread. If you like bold but approachable flavors, this version of the Whipped Feta Dip Recipe will become a favorite in your rotation.
How This Became My Go-To Party Dip
The first time I made this, it was a rainy Saturday and friends were dropping by unannounced. I remember the sound of rain on the windows and the sharp, clean smell of lemon filling the kitchen. I pulled a block of feta from the fridge, let it warm, and within minutes the food processor turned tangy crumb into a pillowy cloud. Watching everyone dip warm pita and smile made the whole evening feel cozy and easy. That night taught me that a few thoughtful ingredients and a tiny bit of technique can transform a simple snack into a memory. The textures, the little crunch of pistachio, and the honey ribbon on top still make me smile whenever I make it.
The Players in This Dip
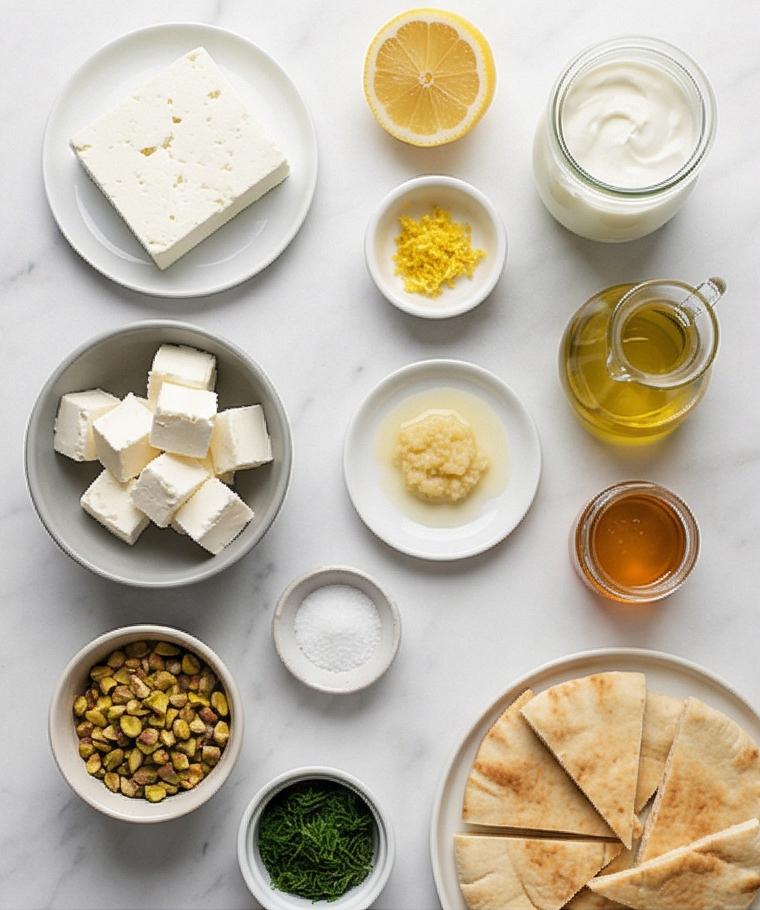
- Feta Cheese: The tangy backbone that gives the dip its signature bite; choose a sheep’s milk feta for a richer, creamier flavor, or a milder cow’s milk feta if you prefer less tang. Crumble and drain well.
- Cream Cheese: Adds silkiness and body; full-fat produces the best texture. Neufchatel is a lower-fat substitute.
- Greek Yogurt: Brightens and loosens the blend; whole-milk Greek yogurt is ideal, but plain strained yogurt works too.
- Lemon (juice and zest): Provides lift and freshness; use unwaxed lemons for best zest.
- Garlic: One small clove, mashed smooth to avoid raw chunks; roasted garlic is a gentler swap.
- Olive Oil, Salt, Pepper, Cold Water: For emulsifying, seasoning, and adjusting texture.
Essential Kitchen Tools
A few small tools make the Whipped Feta Dip Recipe effortless and consistent. A food processor does the heavy lifting and creates that silky texture you want; if you do not have one, a high-speed blender can work but may need a bit more scraping. An offset spatula or the back of a spoon helps you create pretty swoops for presentation. A microplane is ideal for zesting lemons finely. Lastly, small prep bowls keep ingredients organized so you can add them quickly while blending.
- Food processor: Best for texture and control; substitute a high-speed blender in a pinch.
- Microplane grater: For delicate lemon zest; use a fine grater as an alternative.
- Offset spatula or spoon: For smoothing and plating; a butter knife will do.
- Small bowls and measuring spoons: For mise en place and accurate seasoning.
Step-by-Step Preparation Guide
Step 1: Soften the dairy
About 20–30 minutes before you begin, let the block of feta, the cubed cream cheese, and the Greek yogurt come to room temperature so they lose their chill and whip into a silkier texture; leaving them out on the cool marble top for a short rest makes a surprisingly big difference in final creaminess and reduces graininess when blended.
Step 2: Prep the aromatics and brighteners
While the dairy relaxes, turn your attention to tiny, high-impact flavors: finely grate or mash one small garlic clove into a paste, zest half a lemon until you have about a teaspoon, and squeeze a tablespoon of fresh lemon juice into a small glass jar; place the olive oil in a little cruet, measure a pinch of kosher salt into a tiny ceramic dish, and have freshly ground black pepper at the ready – everything neat and ready to drop in when you blend.
Step 3: Crumble and pulse the cheeses into a coarse base
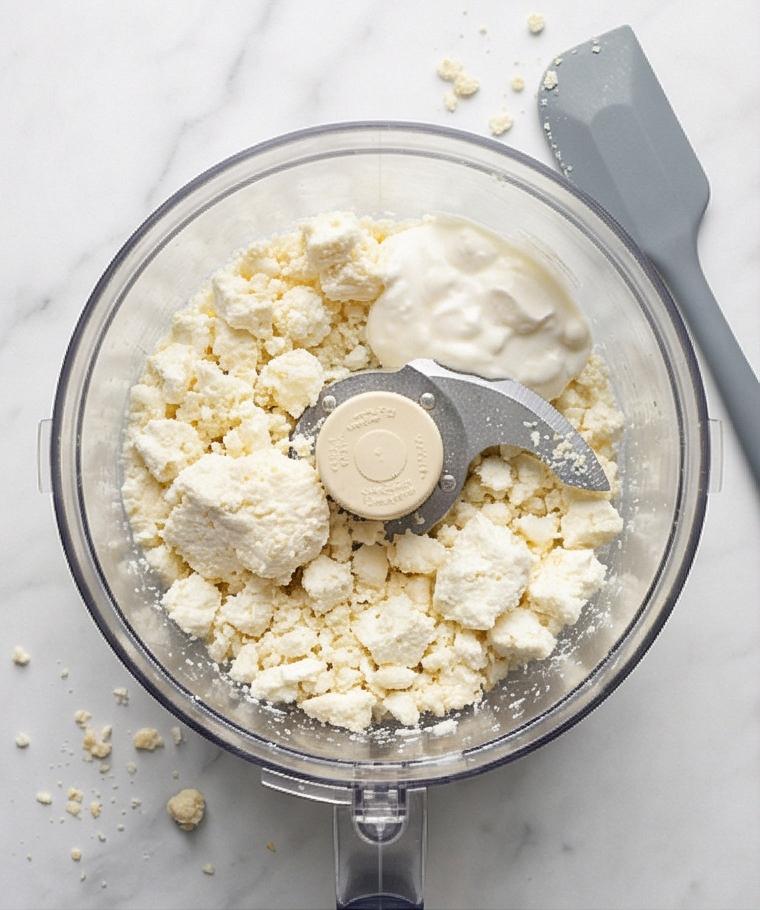
Crumble the block of feta into the bowl of a food processor, add the cubes of cream cheese and the Greek yogurt, and pulse on high briefly until the mixture looks mostly combined but still has tiny flecks of feta – a slightly textured, pale cream mass with visible granular specks that promise tang. Scrape the sides and bottom once so the cheese mass sits evenly in the bowl and the next blending will be consistent.
Step 4: Emulsify with oil, lemon, and garlic into a smooth cream
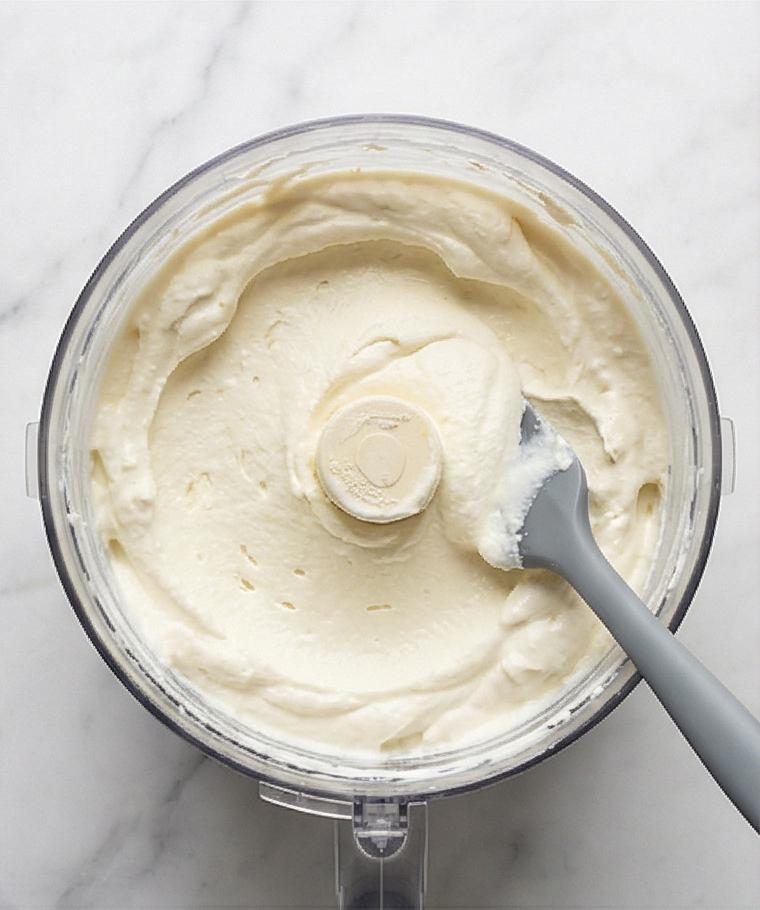
Add the olive oil, lemon juice, lemon zest, and the garlic paste plus salt and pepper to the processor, then blend on high until the mixture transforms into a very smooth, thick, satiny cream with no obvious graininess – a glossy, uniform whipped mass that holds its weight yet looks effortlessly spreadable. Pause once or twice to scrape down and keep the texture homogeneous.

Step 5: Adjust body with cold water until glossy peaks form
With the processor running on low, drizzle in a tablespoon of cold water and pulse until the whipped feta loosens into a fluffy, glossy consistency that holds soft peaks that barely slump; add extra teaspoons of cold water only if necessary, pulsing briefly each time, until the dip looks airy, silky, and scoopable without becoming watery.
Step 6: Taste and fine-tune seasoning
Spoon a little on a tasting plate and adjust – a tiny extra splash of olive oil softens sharpness, a drop more lemon juice lifts brightness, or a cautious pinch of black pepper for warmth; be conservative with salt because the feta already carries saltiness, and make small adjustments followed by a quick pulse so the texture remains consistent.
Step 7: Transfer, smooth, and chill for best texture
Spoon the whipped feta into a shallow serving bowl, using the back of a spoon or an offset spatula to create soft swoops, ridges, and valleys across the surface so the finishing oils and garnishes can collect attractively; cover and chill for 30–60 minutes to let the dip firm slightly and the flavors marry, or chill briefly if you prefer a softer, looser finish.
Step 8: Bring back to scoopable temperature if chilled long
If the dip has chilled longer than an hour, let it sit at room temperature for 5–10 minutes before serving and stir gently with a spoon until it returns to a smooth, creamy, easily scoopable consistency with restored sheen.
Step 9: Garnish with contrasting color and crunch
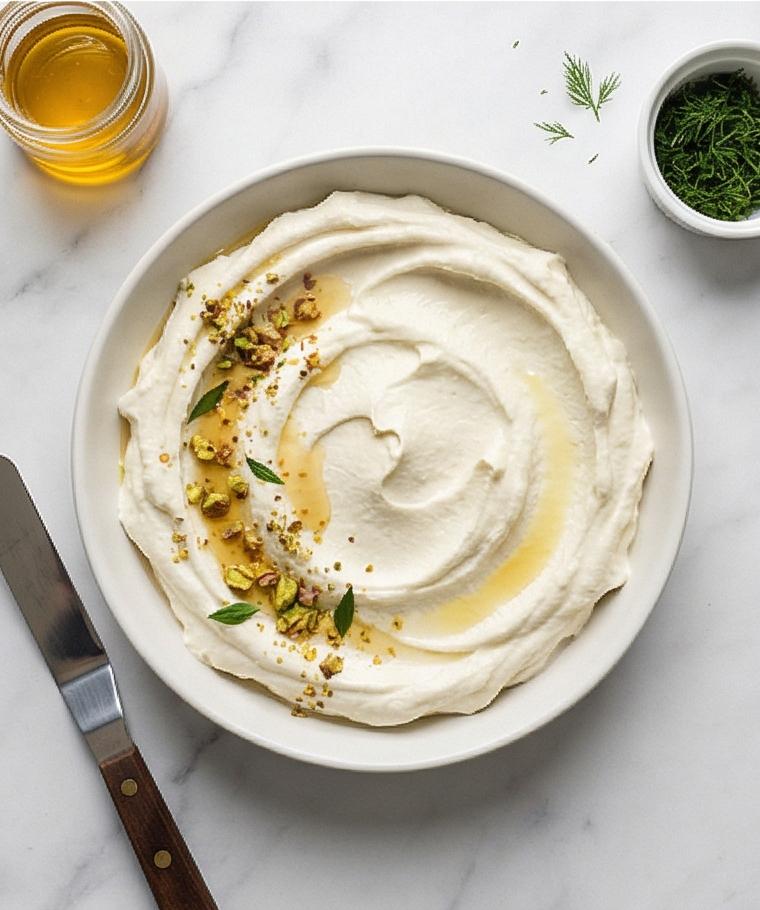
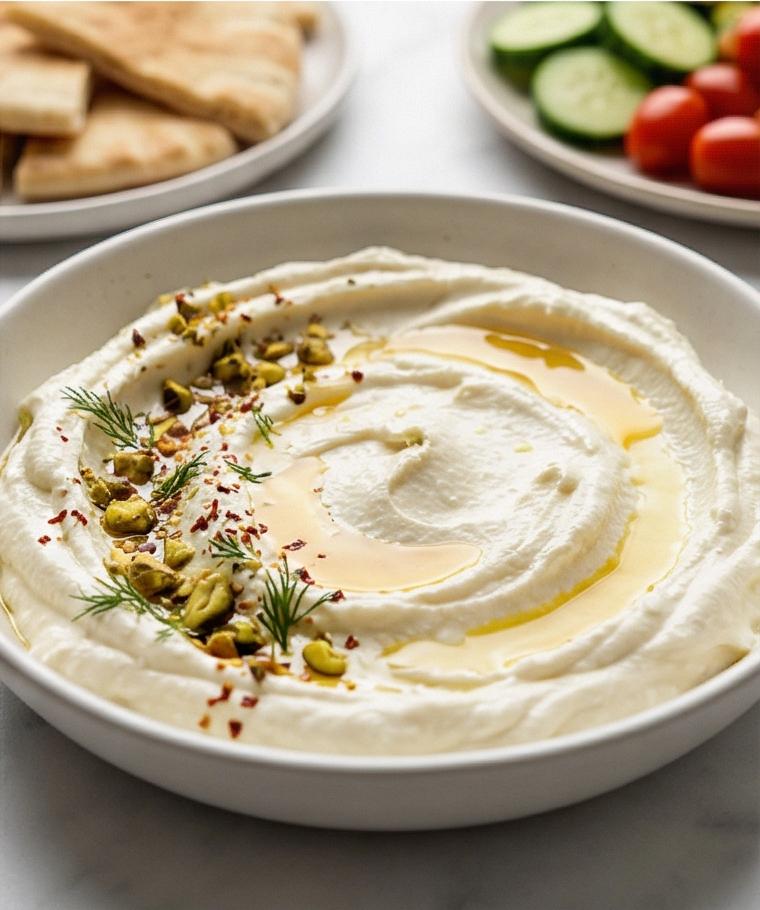
Just before serving, spread the dip into soft swoops, drizzle 1–2 teaspoons of extra-virgin olive oil and about a tablespoon of honey over the surface, then scatter Aleppo or mild red pepper flakes, chopped fresh dill (or parsley/chives), and toasted chopped pistachios or pine nuts evenly so you have bright green herb flecks, warm amber honey ribbons, and pale crunch against the creamy white base.
Step 10: Serve with warm bread and crisp vegetables
Place the bowl on the marble beside a small stack of warm pita, pita chips, crusty bread slices, and a small platter of cucumber rounds, bell pepper strips, and cherry tomatoes so guests can dip and enjoy the contrast of cool crunch and warm, pillowy bread against the velvety feta.
Step 11: Store leftovers correctly
For leftovers, press a piece of plastic directly onto the surface and refrigerate in an airtight container for up to three days; before serving again, let the dip come back to room temperature for 10–15 minutes and stir gently until smooth – do not freeze, as freezing will ruin the lush texture.
Making It Your Own
I like to think of the Whipped Feta Dip Recipe as a canvas. For a brighter, herb-led version I stir in a handful of chopped mint and dill and swap pistachios for toasted almonds. To make it smoky, roast the garlic first or add a drizzle of smoked paprika oil. For a vegan twist, try cultured tofu with a touch of miso for umami and use a creamy plant-based yogurt to keep the silkiness.
For warmer nights, fold in grilled charred peppers for color and a hint of sweetness. If you want spice, mix in Aleppo or chili crisp. Each small experiment changes the personality of the dip and keeps it endlessly interesting.
How to Serve
When I host, presentation matters more than fuss. Spoon the Whipped Feta Dip Recipe into a shallow bowl, create swoops, then drizzle olive oil and honey and scatter herbs and nuts for contrast. For a casual gathering, set a board with warm pita, toasted pita chips, and sliced vegetables arranged around the bowl so guests can graze.
Scale easily by doubling the ingredients for larger crowds. For small plates, serve tasting spoons with a little dip, a cucumber round, and a sliver of preserved lemon or anchovy for complexity. Cold salads or grilled fish also pair wonderfully with a dollop on the side.
Storage and Reheating Tips
Store the dip covered with plastic pressed directly onto the surface to prevent skinning and refrigerate for up to three days. I find the flavors marry and mellow after a day, so making it a few hours ahead is often ideal. Do not freeze; thawing ruins the texture and turns the silky mass grainy.
When serving leftovers, let the dish sit at room temperature for 10 to 15 minutes and stir gently to restore creaminess. If it seems too firm, a teaspoon of cold water and a quick pulse or whisk will loosen it without diluting flavor.
Common Slip-Ups and How to Fix Them
If the dip is grainy, it usually means the cheeses were too cold or over-processed. Let the dairy warm slightly and pulse in short bursts until smooth. If it is too salty, add a bit more cream cheese or a spoon of yogurt to balance the salt.
If the texture becomes runny from too much water, try chilling briefly to firm it up and then stir. For flat flavor, add a touch more lemon juice or a drizzle of good olive oil rather than salt.
Final Thoughts
Give this Whipped Feta Dip Recipe a try and you might find it becoming the quick fix for weeknight snacks and the effortless centerpiece at parties. It is forgiving, fast, and endlessly adaptable, and once you taste that creamy tang with a honey ribbon and crunchy pistachios, it is hard not to smile.
Frequently Asked Questions.
- What is the best feta to use and why? The best feta for this dip is a sheep’s milk feta because it tends to be creamier and more flavorful; if you have only cow’s milk feta, drain it well and adjust seasoning.
- Can I make the dip ahead of time? Yes, you can make it up to a day ahead and chill; bring it to room temperature for 10 to 15 minutes before serving for the best texture.
- Is there a vegan substitute that still tastes good? Try cultured silken tofu or a thick cashew cream with a touch of miso for savory depth; texture will be slightly different but still delightful.
- How long will leftovers keep? Stored airtight with plastic pressed on the surface, it will keep up to three days in the refrigerator and should not be frozen.
- Can I use a blender instead of a food processor? Yes, a high-speed blender can work but you may need to stop and scrape more often to get a consistent texture.
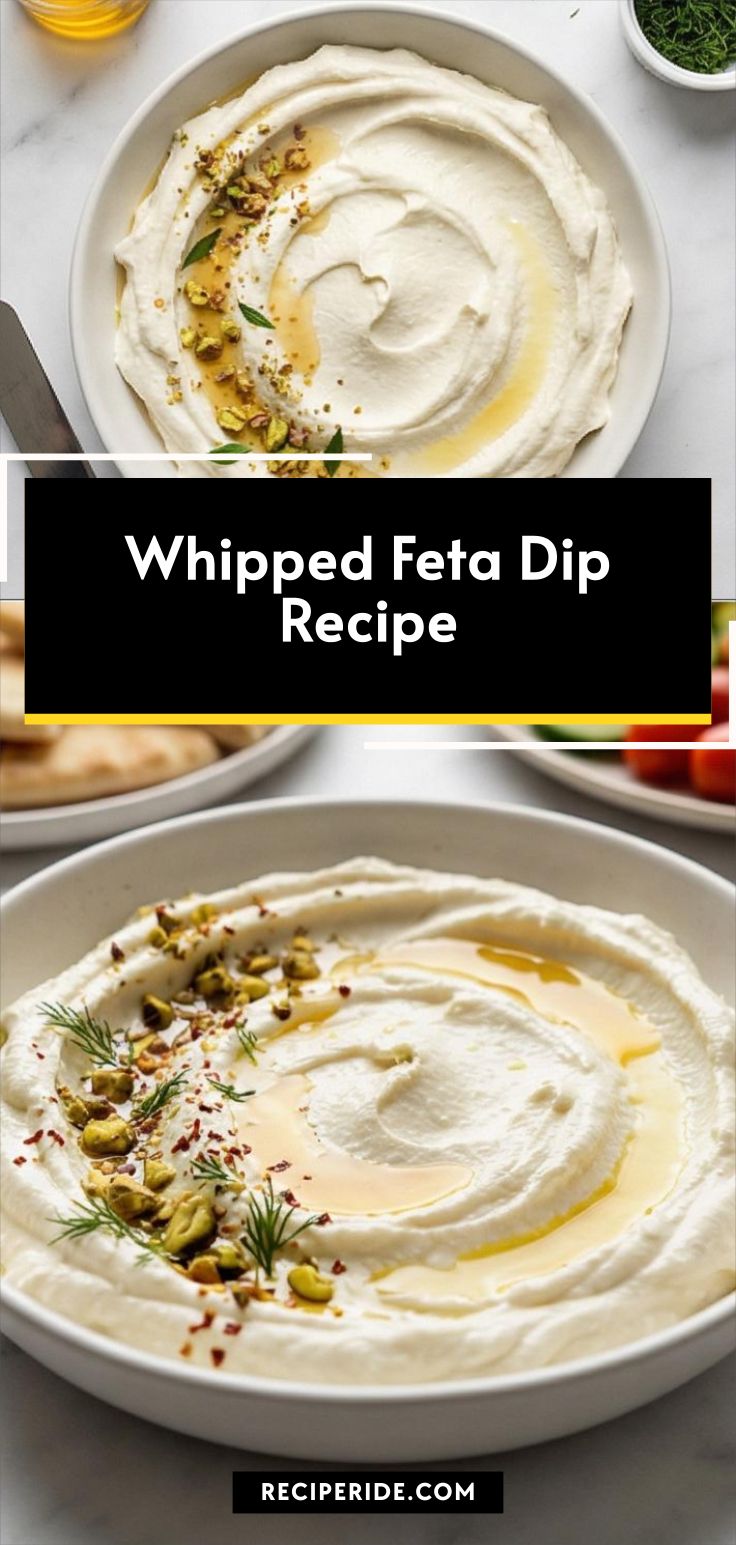
Whipped Feta Dip Recipe
Make Whipped Feta Dip Recipe: whip tangy feta with cream cheese, yogurt, lemon, and olive oil for a quick, crowd-pleasing spread.
Ingredients
Instructions
Step 1: Soften the dairy
About 20–30 minutes before you begin, let the block of feta, the cubed cream cheese, and the Greek yogurt come to room temperature so they lose their chill and whip into a silkier texture; leaving them out on the cool marble top for a short rest makes a surprisingly big difference in final creaminess and reduces graininess when blended.
Step 2: Prep the aromatics and brighteners
While the dairy relaxes, turn your attention to tiny, high-impact flavors: finely grate or mash one small garlic clove into a paste, zest half a lemon until you have about a teaspoon, and squeeze a tablespoon of fresh lemon juice into a small glass jar; place the olive oil in a little cruet, measure a pinch of kosher salt into a tiny ceramic dish, and have freshly ground black pepper at the ready — everything neat and ready to drop in when you blend.
Step 3: Crumble and pulse the cheeses into a coarse base
Crumble the block of feta into the bowl of a food processor, add the cubes of cream cheese and the Greek yogurt, and pulse on high briefly until the mixture looks mostly combined but still has tiny flecks of feta — a slightly textured, pale cream mass with visible granular specks that promise tang. Scrape the sides and bottom once so the cheese mass sits evenly in the bowl and the next blending will be consistent.
Step 4: Emulsify with oil, lemon, and garlic into a smooth cream
Add the olive oil, lemon juice, lemon zest, and the garlic paste plus salt and pepper to the processor, then blend on high until the mixture transforms into a very smooth, thick, satiny cream with no obvious graininess — a glossy, uniform whipped mass that holds its weight yet looks effortlessly spreadable. Pause once or twice to scrape down and keep the texture homogeneous.
Step 5: Adjust body with cold water until glossy peaks form
With the processor running on low, drizzle in a tablespoon of cold water and pulse until the whipped feta loosens into a fluffy, glossy consistency that holds soft peaks that barely slump; add extra teaspoons of cold water only if necessary, pulsing briefly each time, until the dip looks airy, silky, and scoopable without becoming watery.
Step 6: Taste and fine-tune seasoning
Spoon a little on a tasting plate and adjust — a tiny extra splash of olive oil softens sharpness, a drop more lemon juice lifts brightness, or a cautious pinch of black pepper for warmth; be conservative with salt because the feta already carries saltiness, and make small adjustments followed by a quick pulse so the texture remains consistent.
Step 7: Transfer, smooth, and chill for best texture
Spoon the whipped feta into a shallow serving bowl, using the back of a spoon or an offset spatula to create soft swoops, ridges, and valleys across the surface so the finishing oils and garnishes can collect attractively; cover and chill for 30–60 minutes to let the dip firm slightly and the flavors marry, or chill briefly if you prefer a softer, looser finish.
Step 8: Bring back to scoopable temperature if chilled long
If the dip has chilled longer than an hour, let it sit at room temperature for 5–10 minutes before serving and stir gently with a spoon until it returns to a smooth, creamy, easily scoopable consistency with restored sheen.
Step 9: Garnish with contrasting color and crunch
Just before serving, spread the dip into soft swoops, drizzle 1–2 teaspoons of extra-virgin olive oil and about a tablespoon of honey over the surface, then scatter Aleppo or mild red pepper flakes, chopped fresh dill (or parsley/chives), and toasted chopped pistachios or pine nuts evenly so you have bright green herb flecks, warm amber honey ribbons, and pale crunch against the creamy white base.
Step 10: Serve with warm bread and crisp vegetables
Place the bowl on the marble beside a small stack of warm pita, pita chips, crusty bread slices, and a small platter of cucumber rounds, bell pepper strips, and cherry tomatoes so guests can dip and enjoy the contrast of cool crunch and warm, pillowy bread against the velvety feta.
Step 11: Store leftovers correctly
For leftovers, press a piece of plastic directly onto the surface and refrigerate in an airtight container for up to three days; before serving again, let the dip come back to room temperature for 10–15 minutes and stir gently until smooth — do not freeze, as freezing will ruin the lush texture.
Notes
- Let the dairy come to room temperature to avoid grainy texture.
- Taste before adding salt because feta can be very salty.
- Chill for 30 to 60 minutes if you want a firmer dip and deeper flavor.
- Avoid freezing; freeze will alter texture negatively.
- Use a food processor for the smoothest result; a high-speed blender is an alternative.


